9 Best Browser Apps for Android to Enhance Web Browsing in 2023

Web browsers are probably one of the most important apps on our Smartphones. It lets us access all the World Wide Web.

Though a web browser comes bundled with Android device, there are a lot of third-party web browsers available in the Play Store which can enhance your browsing experience.

And that is the beauty of an Android system, giving you the ability to customize every aspect of it.

This is the list of some of the best web browsers you can find in the Play Store. In no particular order

1. Google Chrome

If you are a Google Chrome user on PC, having Google Chrome on your Android phone is a must if you want to continue working on the tabs that you left on your PC. If you are signed in using the same Google account you will have the same browsing history, autofill, remembered passwords that you used on your PC

Google Chrome usually comes bundled with Android, but you should update the Google Chrome browser to get the latest features available.

Tip: Movie Chrome browser from top to bottom to enhance the productivity

Install the Google Chrome app

2. Firefox browser

Similarly, if you are using Firefox on your PC, then having Firefox on your Android phone is quite helpful.

The Firefox sync feature will allow you to sync your browsing history and other data, the Android browser has also got add-on support

Firefox app also has a pretty clean Reading Mode for reading web articles clutter-free.

Install Firefox Browser 

3. Dolphin Browser

The 3rd browser that we recommend is the Dolphin Browser, it used to be my primary Browser before Google Chrome app was equipped with so many useful features.

And it is still one of the best browsers you can install on your Android device.

The unique features of the Dolphin Browser, such as the ability to add Add-ons, Dolphin Sonar, which lets you use your voice to search share and navigate, and Gestures, for opening websites faster by drawing on the screen.

Install Dolphin Browser

4. Opera Mini browser

The Opera Mini browser is recommended for everyone who uses their mobile data for browsing the internet.

The Opera Mini browser is free and very lightweight and probably the best browser when it comes to saving data while browsing.

Its features like data tracker, news updates, night mode, speed dial, private browsing are pretty useful to an average Android user.

Install Opera Mini

5. UC Browser

UC Browser made its entry to the play store a little late compared to all the browsers mentioned in this list but it gained popularity in less time.

Is only one of the few apps, which is truly a cross-platform app since it is available on multiple platforms like Blackberry OS, iOS, Symbian, Windows phone etc.

It is also at par with Opera Mini when it comes to data saving.

Apart from all this, the users prefer user browser for downloading bigger files sister download speeds are faster and the download manager is pretty intuitive to use.

Install UC Browser 

6. Maxthon browser

Here is another very lightweight Browser that you can install on your Android if you have got less storage on your smartphone.

The app offers a lot of useful features such as a built-in note-taking tool, a password manager, an email address manager, ad blocker, speed dial, night mode etc.

I have also found this browser to be faster, and responsive comparison to other browsers listed above.

Install Maxthon Browser 

7. CM Browser

Like the Maxthon browser, the CM Browser is also the choice of many Android users because of its responsiveness.

It is a lightweight browser that comes with an inbuilt antivirus engine that scans everything that you browse.

Despite being a lightweight browser it gives all the features that you would require on a daily basis such as, an ad blocker, speed dial, Incognito mode, gesture control, page translator etc.

The download manager in cm browser is pretty intuitive and painless to use

Another important feature worth mentioning is that the apt delete all your history automatically when you exit the app, which makes this app perfect for those who have privacy concerns.

Install CM Browser 

8. Puffin Browser

Puffin Browser is another excellent web browser for Android.

It also offers support for flash content, so if you browse websites that host flash content, this is the browser you should use.

Puffin speeds up the mobile browsing by shifting the workload from resources Limited devices to the cloud storage so that resource heavy web pages can run smoothly on your Android device.

Puffin Browser also sales bandwidth using their proprietary compression algorithm to translate web data two users’ Android devices.

Few of its features worth mentioning are virtual trackpad and gamepad, theatre mode for flash videos and games etc.

Install Puffin Browser

9. Flynx

Even if you pick the best browser from any of the listed apps above we would highly recommend you also install the Flynx Browser on your Android phone.

If you are someone who finds themselves clicking on links in various social media apps like Facebook Twitter or WhatsApp, You will realize one issue with Android is, you will have to leave that app to view that link.

But, the Flynx browser makes it possible for you to stay in the current app and open the link in a popup Browser, which is similar to Facebook Messenger Chat head, it really takes multitasking to a new level.

Check out how to be more productive with Flynx Browser

It has a built-in reading mode with clear the clutter of a web page and gives you just the content you want to read. It also saves a lot of data you would otherwise have to spend on loading all those useless elements of a website.

Install Flynx Browser 

Though, the reason it should be a secondary Browser on your Android because it does not offer an address for where you can actually type something, which is an important aspect of a web browser.

So these are the 9 best and free browser you can install on your Android and take your browsing experience to the next level.

10+ Amazing Android Apps for A Faster Workflow

You can read all tech related articles on techtippr.com

Camera error: Cannot Connect to Camera Error on Xiaomi Smartphones

I have owned a couple of Xiaomi phones in the last few years, and because they are not the most affordable smartphones you can buy, I have recommended that to everyone in my family and extended family.

Which makes me the unofficial tech support guy for Xiaomi phones, at least for my extended family. I try to solve almost all of their problems that are related to software.

One of the very common problems that have come my way is the camera error. Especially, the camera error in Redmi Note 4. Maybe because it is the most sold phone in the budget segment in India.

If you two are facing a similar issue with your Redmi phone, here are the possible solutions for the issue

Try restarting your phone

I know you are aware of it but this is the first step towards troubleshooting any error in your smartphone, I can guarantee that 90% of the software bugs can be solved just by restarting the smartphone.

Check the camera permissions

If this particular issue you are facing is inside a particular app, such as the WhatsApp camera or the Instagram camera, then it could be a Permissions issue. To use the hardware of your smartphone required permission to access the particular hardware, switch off the camera, mic, etc.

There are two ways to give the permissions back to this particular app, here is the easier one.

You need to go to the settings page of the particular app and clearing the cache and data then launching the app again, it will ask for permission to access the hardware of your smartphone, which you can allow.

If the above methods do not solve your problem, he is one more solution you can try which has been shared by a Xioami user

Solved this by doing the following:

1. Go to Settings -> About phone
2. Tap 5-6 times on “Kernel version”. This will enter to Engineering Mode (CIT)
3. From “QC test” menu, go to option “12.FrontCamera
4. Camera app will start with the front camera. Now change camera from front to back. You should have image from sensor.
5. Tap back to exit the camera app, and select “Fail”. This will reset the sensor and sensor lens.
6. Exit CIT mode and test your camera. If was a problem with the sensor (or lens), it should be solved now.

I hope that either of these methods would work for you and you are able to solve your Camera issue.

In case you are not able to do that, chances are, it might be a hardware related issue, and you need to visit the mobile phone repair shop. Your first priority should be to visit an authorized Service Cente for Xiaomi Smartphones.

Check out how to remove ‘Downloading English (India) Waiting for Wi-Fi’ from Notification Area.

How to take a screenshot on a Mac, an iPhone, or an iPad

0

If you want to share something that you are viewing on your screen, taking a screenshot and sharing it is the easiest thing you can do.

It’s much more visual and you don’t have to explain what is there on your screen.

Screenshot can also help if you are trying to troubleshoot someone’s Mac, an iPhone or, an iPad.

Here is how you can take a screenshot on either of these products from Apple.

How to take a screenshot on a Mac

In Mac, you can either take the screenshot of the entire screen or take a screenshot of a selected portion of your screen.

Take a screenshot of the entire screen

  1. Press Shift-Command (⌘)-3.
  2. Find the screenshot as a .png file on your desktop.

Take a screenshot of a selected portion

  1. Press Shift-Command-4. The pointer changes to a crosshair.
  2. Move the crosshair to where you want to start the screenshot, then drag to select an area.
  3. While dragging, you can hold Shift, Option, or Space bar to change the way the selection moves
  4. When you’ve selected the area you want, release your mouse or trackpad button. To cancel, press the Esc (Escape) key before you release the button.
  5. Find the screenshot as a .png file on your desktop.

Take a screenshot of a window

  1. Press Shift-Command-4. The pointer changes to a crosshair.
  2. Press the Space bar. The pointer changes to a camera.
  3. Move the camera over a window to highlight it.
  4. Click your mouse or trackpad. To cancel, press the Esc (Escape) key before you click.
  5. Find the screenshot as a .png file on your desktop.

How to take a screenshot on an iPhone?

Press the home and lock buttons on your phone at the same time to capture the screenshot

How to take a screenshot on iPad

Taking a screenshot on an iPad is similar to taking a screenshot on an iPhone.

To take the screenshot on iPad, you need to press and hold the two physical buttons on the iPad at the same time, these two buttons are the home button and the Sleep /Wake up button.

Check out to take a screenshot on a PC or How to take screenshots on an Android Mobile 

7 Best Android Apps for Opening Office Files and Boost Your productivity

Our smartphones have become powerful enough to be used as a full-fledged computer.

Android apps have also allowed the professionals to be productive and do their work while they are on the go. Android has got so many awesome Office apps one can install and get their stuff done from their smartphones itself.

In this article, we are going to list out some of the best apps for opening office files on Android. The apps we have picked up for this left are free and can be installed from the Play Store.
Though, all the free apps have got some premium version for extra features that are available as in-app purchases.

Here are the top recommended Android Office App

1. WPS office

WPS stands for writer presentation and spreadsheets it was previously known as Kingsoft Office and is one of the best Android Office App Suite available in Play Store, which has features like the Microsoft Office you can be called a great alternative to MS Office.

If you work requires you to open MS Word documents PDF in excel sheet then this single apps makes the life easy.

This Microsoft Office alternative for mobile supports over 40 languages and integrates with apps like Evernote, and also supports wireless printing.

This app is ad -supported and there is no premium version to remove ads by paying some amount of money, so if you are okay with seeing ads, then this is one of the best Office App you can install from Play Store.

Install from Play Store

2. Office Suite

Like Microsoft Office Suite, this app is also more than just one app.

Office Suite can open all major file types from local and network location including cloud services it also has a sign-in feature which keeps the documents synced across all the devices where OfficeSuite is installed.

It supports all basic formats from Microsoft along with some additional document in Office formats like RTF, TXT, ZIP and much more.

The app is free to download from the Play Store, the free version is ad-supported, so you can also upgrade to remove ads as well as unlock other features which include, the ability to convert any file into PDF and easily scan documents and images with your camera.

Install from Play Store

3. Polaris Office

It is an excellent app which offers too many features, such as, to view, edit, share, and archive all types of document anytime and anywhere.

Polaris office also supports major formats from Microsoft Office, and can also be used for viewing PDF files.

You can also cast your documents presentations to a Chromecast from this app.

The interface of Polaris office is neat and easy to use. The app also allows you to sync files using the storage providers of your choice, such as Google Drive, Dropbox, and Amazon cloud Drive etc.

Install from Play Store

4. Docs to go

If you are looking for a simple Android office, you can use the Docs to go. It is perhaps one of the oldest office app available for Android.

If you are someone who has to open document files on their Android phones every now and then, then the docs to go app is for you.

The app requires no sign up to get started and is pretty straightforward without any gimmicky features.

The app is free to use, but it also offers some premium features, like, desktop sync, connecting to multiple cloud storage accounts, and opening password protected files, the features can be unlocked via in-app purchases.

Install from Play Store

5. Microsoft Word, Excel, PowerPoint

The Microsoft Office Suite is the best Office software for Windows from last many years, though, it’s been only a few years it has been released for Android, Microsoft made them available on Android for free, which has enabled them to gain millions of users on Android as well.

If you are in a Windows ecosystem, you can make use of this offering by using the same Microsoft Office Suite on your Android phone as well by installing their apps from the Play Store.

You can download and use Microsoft Word, Excel and Powerpoint for free.

Install MS Word from Play Store

Install MS Excel from Play Store

Install MS PowerPoint from Play Store

6. Google Drive

Google’s Office Suite, the Google Docs, Google Sheets, Google Slides, and much more, it now comes under Google Drive.

Note: The Google drive App comes bundled paid the Android Smartphones but that does not mean that this app is not good, is probably one of the best Office apps for Android if you use multiple devices.

You can install the respective apps from the Play Store and use the features of Google Drive, along with these apps you also get 15GB of cloud storage in Google Drive, plus anything you do inside Google Docs is synced across multiple devices.

Google Drive app for pretty straightforward to use, you can install them from Play Store and then use it to open any document file on your Android phone.

It can also open Microsoft documents using the Office Compatibility Mode (OCM) which is included in Google Docs, Sheets, and Slides apps.

Install from Play Store (The link will update the app if already installed)

7. Smart Office

The smart office is a full-featured and easy to operate Android Office App.

You can create, edit, view, and share Microsoft Office documents right from your Android device.

Smart Office is also a no-brainer app that requires no particular setup to use. You simply have to install it, and whenever you will have to open a Microsoft Office file you will get the option of opening the file with the Smart Office

The app offers some features for free that are paid on other apps such as creating PDF files or securing private files with password protection, another great thing about this app is that it’s totally free with no ads or in-app purchases.

Install from Play Store

So these were some of the best Android Office apps that you can use for productivity purpose or opening office files on your Android phone.

How to install in older version of An App in Android

If you own an Android phone, and you don’t live in China, then chances are, you can access Google Play Store to install any app you want.

You may have heard about the fact that there is an app for everything.

Google Play Store makes it easy for you to install any app you want, but, what if you want to install an older version of an app on your Android device?

Now, there may be many reasons why you would want to install an older version of an app on your Android.

Such as the latest version does not work the way it used to, before the update.

This is a possibility because sometimes, the app developers push an update for a particular device and the app starts having issues on other devices

Or maybe you do not like the new user interface

Sometimes, apps push new design and then there is a lot of backlash on it, while there are some services that require you to run the latest version of app, you can still use an older version of app for many services.

If you have updated the app from Play Store, there is no way you can roll back.

Fortunately, Android allows you to sideload apps by downloading the APK files.

You can download the apk file of an app from sources like APKMirror.com, without having to worry about viruses and trojans.

To download the old version of An App, you are required to know the version of the current version of app that you are using, which you can find from the about section of the app.

Once you know the version of the app Go to APK mirror.com and find the older version and download it on your device.

You can simply install it without removing or uninstalling the app.

Just make sure you have ‘install from unknown source’ option enabled in the settings.

Note: In some cases, you will lose the app data, which means you will have to setup the app as per your liking again, but I think it’s a small trade off in return of installing an older version which works for you.

So this is how you install an older version of an app on your Android phone. I hope you find this article used for you can leave because on the blog.

Microphone not working on Xiaomi Redmi 4, Redmi Note 4 or any other Xiaomi my device

Hindi Sadiq I am going to tell you how you can fix the microphone on that is not working on your xiaomi redmi 4 redmi note 4 or any other xiaomi device that you own.

I faced the situation myself several times, where the microphone does not work, for example when I have to use voice command in Google assistant is does not respond at all, or maybe I am recording something but it says something wrong with the camera.

Surprising thing is that the everything on the smartphone works and I am sure that I have not dropped my phone.

Which makes it clear that there is something wrong from the software side.

Here is you can fix your microphone

The first thing would be to restart the smartphone, I cannot count the number of times I have fixed problems just by restarting the phone.

Xiaomi makes nice devices, but, to be honest there software is not that great. Not just the microphone I have found sometimes the camera does not work and the simplest solution to fix it is to restart the phone.

Is restarting does not fix the microphone error. Try using external microphone, if you have got here phones which have got inbuilt microphones as well you can plug them in the 3.5 mm jack Android checking whether the microphone works or not

You can launch the recorder app to record something to know whether the microphone works or not.

If it works then there’s something wrong with the hardware, that is, the inbuilt microphone of your Xiaomi smartphone.

This is it in this article, I hope you find this article useful.

Also read, how to fix the ‘missing fingerprint sensor’ on redmi 4 issue.

If you are having problem removing the ‘downloading language’ notification from the notification panel read how to fix it.

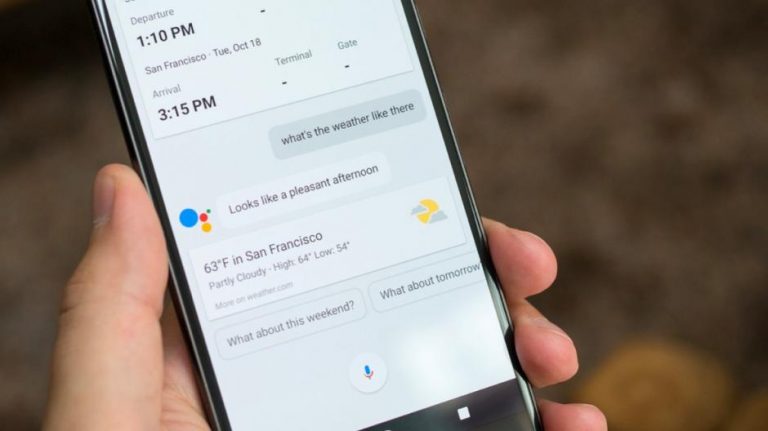
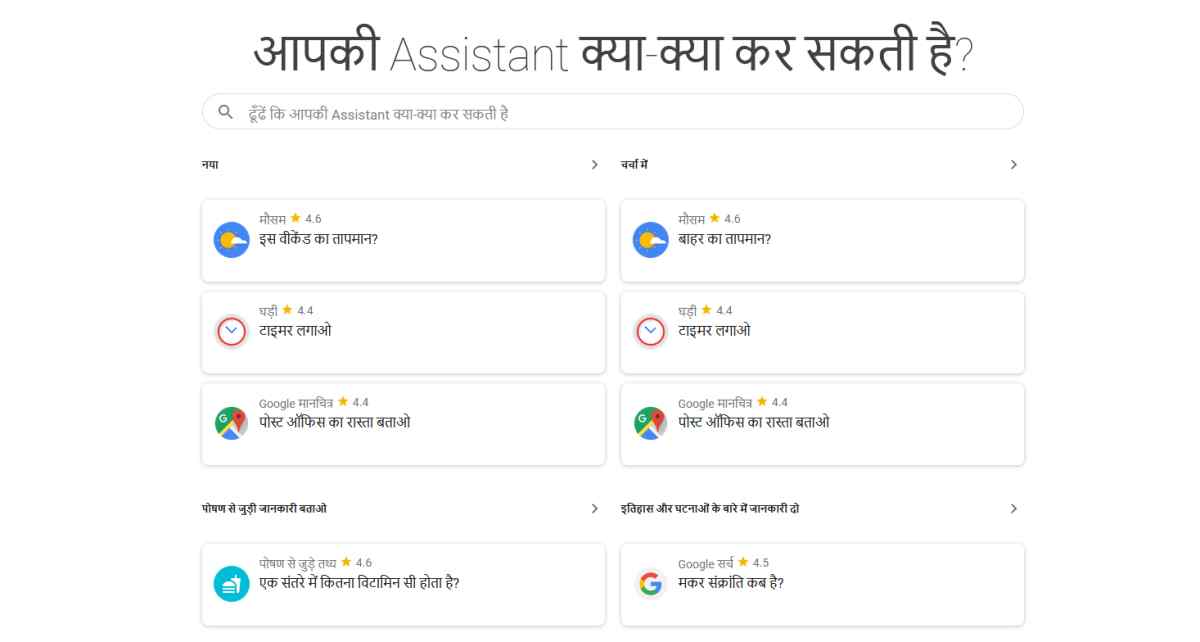
Google Assistant Now Responds to Hindi Commands, Here’s how to setup on Android

Google has finally rolled out Hindi support to its virtual Google assistant, you can now give commands to Google Assistant in Hindi and it will respond.

Here is a brief guide for you to set up Google Assistant in Hindi.

This new roll out from Google is gradual, which means it will take time for Google to roll this new feature to every Android smartphone running on Android 6.0 (Marshmallow) or above.

The Google Assistant in the Hindi language was already available in Google’s messaging app Allo, just like the Google Assistant which was first available on Allo, outside of the Pixel Phones.

But if it is rolled out to your Android, there are two things that you would require to do.

1. Change your device language to Hindi,
2. Update your Google app to the latest version

Once you have done these two things, long press the home button to get started with Google Assistant in Hindi. There are only a handful of commands you can use at the time of writing this article, but with time more functionalities will be introduced in Google assistant for Hindi.

How to take Better Videos with Your Smartphone (Detailed Guide)

In this article, we talked about some tips and tricks to record better videos with your smartphone. By applying these tricks, you can shoot better videos on your smartphone. Read the article now to learn how to do it

It is a popular saying that best camera is the camera you own, and foremost offers it is the smartphone camera that is always there in our pockets.

And most of us underestimate its capabilities.

Today, in this article we are going to talk about how you can use your smartphone camera to take better videos.

There are hundreds of videos that were shot on mobile phones and they have gained millions of views on YouTube. While it is said that the camera gear can only improve the production quality, not the story.

You can still work on some tips and tricks to get the best production quality even with your smartphone camera, and this is what we are going to talk about in this article.

Always record in a landscape mode

Just because it is easier to hold a lot of people record videos in vertical form without realizing that if they ever have to play the video on, TV or anything that is not a smartphone, then you will have to bear those thick bars on both sides of the video.

So, always try to capture videos in landscape mode, all you need to do is hold your camera horizontally, this way you will able to cover a wider area, which is Pleasure to watch when you play on a big screen.

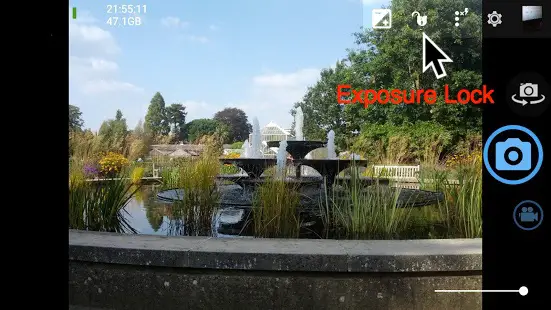
Lock the exposure

When you recording in auto mode, the exposure will also be selected auto, which means it will try to lighten or dim the video depending on how old it the scene you are recording is.

If you are recording a video where a lot of camera movement is involved then you will end up having a video that will sometimes be too dark, or too light.

To overcome this, you can lock the exposure, the option to lock exposure depends on the smartphone you use and the UI of the camera app, but it’s quite easy to find.

You can also use a third party app called Open Camera which gives you a bit of manual control for recording videos, it is available for free from Playstore you can install on your phone and play with it to know how it works.

Try not using the Zoom feature

Smartphones have digital zones, at least the ones which have single camera setup if this is the case with your smartphone, try capturing the video without using the digital zone because it will result in loss of quality of the video.

You can try capturing the video close to the subject, this way you will be able to retain the quality.

Shooting in proper light conditions

Even though smartphones have come a long way in providing good photography low light conditions, the same cannot be said for videos.
If you are shooting indoors make sure you have proper lighting, in the lighting should always fall on the subject rather than falling on the camera.

And it is better to shoot videos in natural light, which will help you get the best quality video.

Proper framing of the video

This one is a bit tricky but you will get a hold of it by practice, proper framing means, making the subject up here within the frame throughout the video. Small things like proper alignment of the scene, placing the subject in the camera can improve the quality of video drastically.

Give your videos a bit of motion

You may have noticed how the camera moves in the movies if you haven’t, you will now after reading this article. Notice how the scene becomes interesting when the camera keeps moving.

You can do a similar thing while shooting videos from your mobile if there is no particular action going on anywhere recording seems like market mountains etc, you can Pan your camera from bottom to, top, or from right to left, just give it a simple smooth pan.

Shoot stabilized videos from your smartphone

If you want a flagship smartphone, chances are that your smartphone has got optical image stabilization (OIS) which means there are tiny Motors installed in the camera that helps it take smoother videos by eliminating small jerks and shocks.

Even if the optical image stabilization is not available on your phone, few Smartphone manufacturers have something called electronic image stabilization (EIS) which can also be useful in taking stable shots.

The way IAS works is, it evaluates the entire frame and then cuts the corners of the frame to give a video that is a little bit stabilized, though you get a bit of zoomed video because of the corners getting cropped out.

If OIS or EIS is available in the or smartphone, and you know how to hold your smartphone sturdy, you can take some amazing shots from your mobile phone.

There are few smartphone gimbals also available in the market which or also helpful in recording stabilized videos.

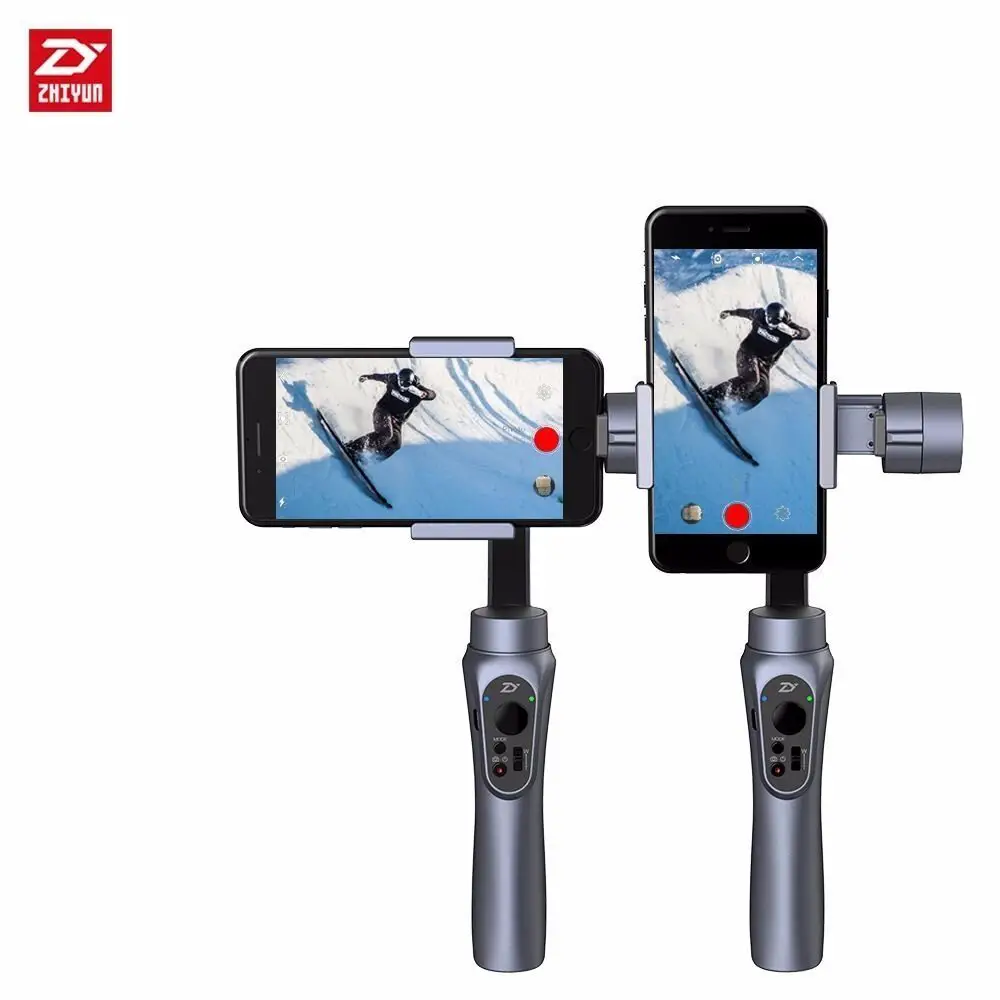
One of such Gimble is, Smooth Q from Zhiyun, which is available for just about $100, but totally worth the investment.

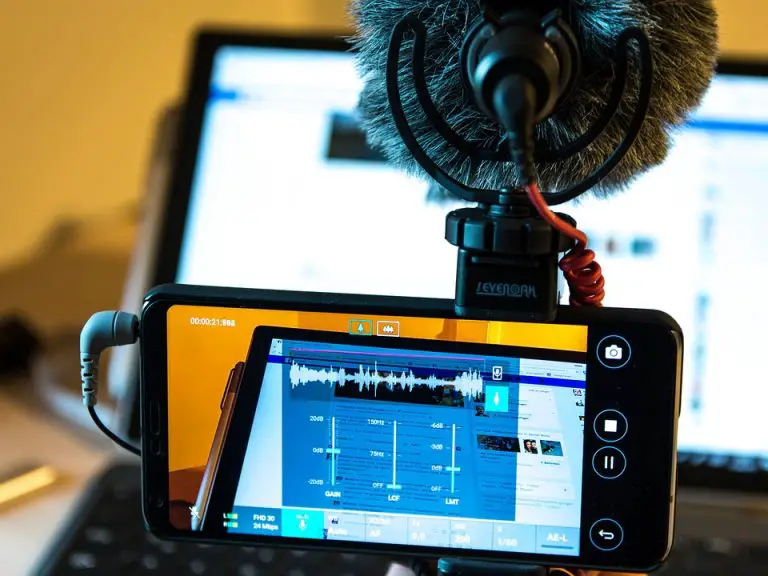
Use an external microphone for high-quality audio

If you are shooting a video which also involves dialogues are subject to talk, make sure you use an external microphone to get Chrisp audio.

The funda is to make the microphone available as near as possible to the subject, the selection of a microphone will depend on the type of video you are trying to shoot.

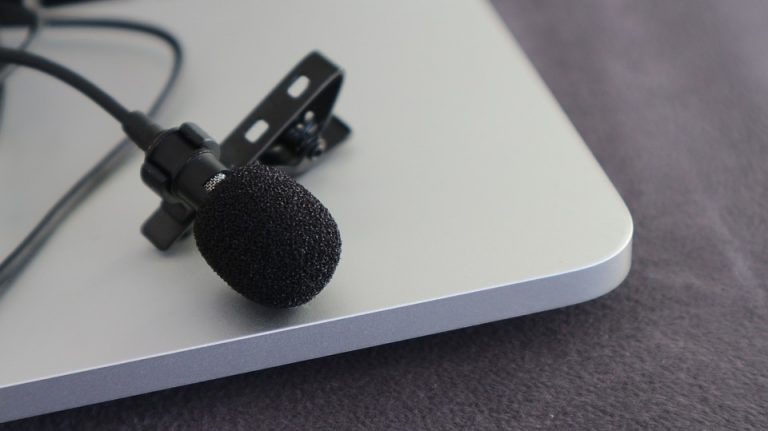
The best microphone that might work in several conditions would be a Lapel Mic or collar mic.

The Boya M1 microphone is the one I use all the time, it’s cable is 20ft long which is quite enough if you want to record far away from the subject and still want his/her voice to be recorded in the video.

I’ve done a separate article talking about this Boya M1 Mic you can check it out here.

Lastly, keep a lot of patience

If you want to get out the best quality video then you should keep a lot of patience as well, if you want to record something in hurry you will always end up making mistakes.

So, in the end, my advice would be to plan everything ahead of shooting the video if you can. Your first video is definitely not going to be a Masterpiece, but I can assure that it will improve over time as you make more videos more often.

My YouTube channel plug in the end

I do have been making videos from last few years, and we have a tech YouTube channel, I tried to keep it alive by posting videos every now and then. I would recommend that you subscribe my channel. I shared quite a lot of useful stuff about the technology.

How to install PUBG Game Android in any country

PUBG (Playerunknown’s Battlegrounds) has been in demand after record-breaking sales on PC and Xbox One last year.

The popular game has made its way to smartphones but is currently restricted to China.

If you are someone who lives outside of China but would still love to experience again on their smartphone here is a quick guide to show you how to download and install PUBG on your Android Device.

You need to create QQ account to play it on your smartphone, click here to create an account.

Install the PUBG mobile in any country (Chinese Version)

Below is the method to download the PUBG Mobile game available in China.

1. Download and install the TapTap App Store on your Android device, click here to install

2. Open the TapTap app store and search for PUBG, find and download the game.

3. But you have downloaded the game simply login with your QQ ID, and you are good to go.

Download PUBG mobile for Android in any country (English Version)

The game was recently released in Play Store Canada, so you can get the APK and download it and then install it on your smartphone until it is available in the Play Store for your country.

PUBG file APK via APKMirror

Note: Please note that the game available on smartphones is in early access, so it might not be as fluid as it is on the PC. Although the lake is pretty minimal it depends on how far you are from games servers.

The game is slowly being made available in other countries as well, so you can also search for the game in the Play Store and see if it is available in your country or not then only go ahead and use the above method, or maybe wait until it is made available in your country.

5 Reasons you should buy Xiaomi Redmi 5

0

Xiaomi has now launched the next version of their Redmi Series in India the Redmi 5 will go on sale from 20th March.

Xiaomi has also announced that it increased the stocks to 4 lac units for the Redmi 5 for the  first flash sale.

If you are the market for a new budget phone and In case you are still curious whether you should buy the phone or not, I am pointing out 5 reasons why you should buy redmi 5.

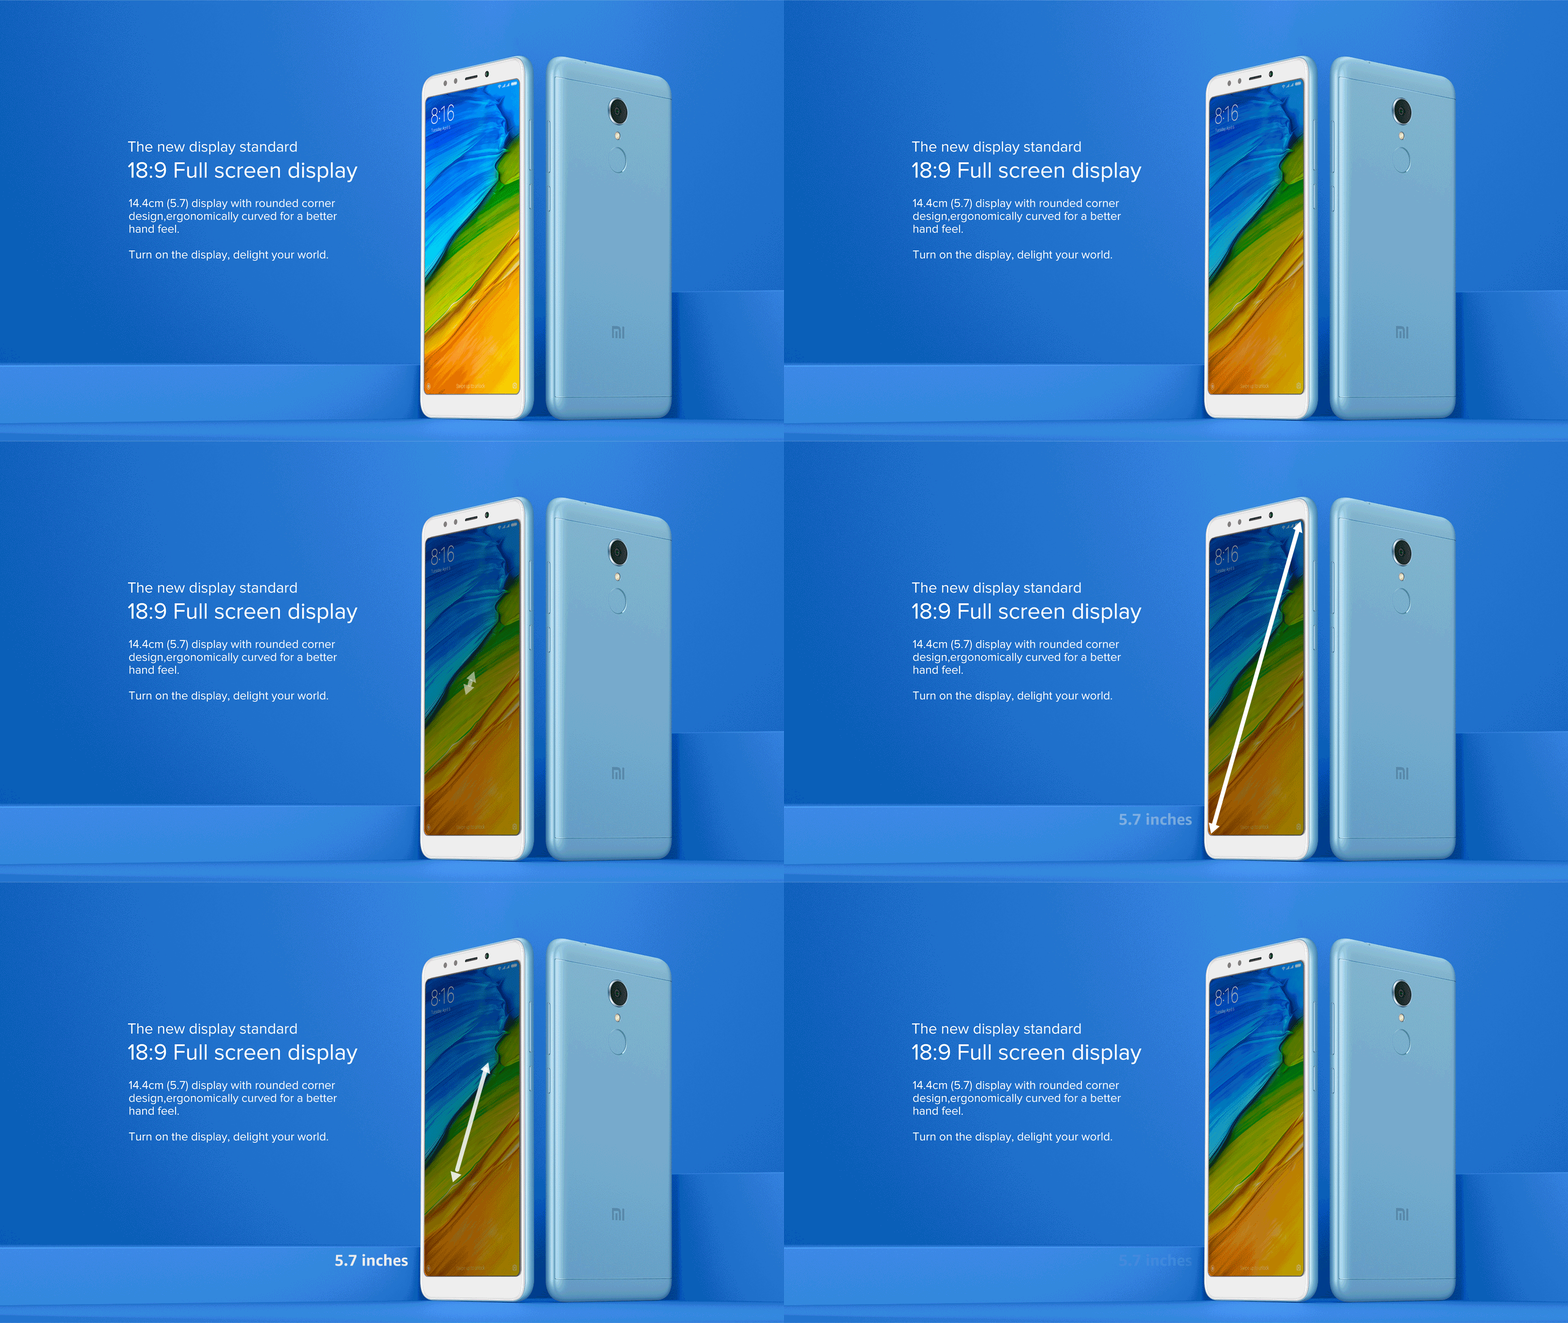
18:9 Display

18:9 aspect ratio display is the hottest trend of 2018, this new display is available in almost all the new phones from different manufacturers

Xiaomi brought the trend to this Ultra-affordable smartphone that is a price at just Rs 7999.

Though, the Redmi 5  offers so much more, this display in such an affordable phone is the reason alone you should buy this phone over any other phone in similar price range.

This new display has enabled show me to make a bigger font with 5.7 inch display with the same sized phone the Redmi 4 which had a 5 inch display.

Snapdragon 450

The Snapdragon 450 is the latest chipset in the 400 series, the Snapdragon 450 is said to be closer to Snapdragon 625 in terms of benchmark scores and overall performance levels.

Snapdragon 625 used to be in all the mid-range phones of Shammi last year that priced above Rs 10,000.

So, having the similar performance in a Rs 7,999 smartphone is something unbelievable.

Improved cameras

The camera in redmi 5 has been improved in comparison to the last years redmi 4.

The Camera of the Redmi 5 has a large 1.25m pixel sensor which helps in bringing more light to the sensor, giving better image quality even in low light conditions.

And, also the front camera now has a Flash for taking selfies in low light conditions.

3300mAh Battery

Even though the battery is lesser in comparison to redmi 4 which had 4100mAh battery, but the new Snapdragon 450 chipset, which has improvements on power efficiency, makes the phone similar kind of battery life in comparison to Redmi 4.

Having small battery enabled Xiaomi to create a slimmer phone, in fact, it is 11% slimmer than Redmi 4.

Availability of different variants in the different price range

Despite having improved almost all the departments for this new Redmi 5, the pricing is quite attractive.

The base model is priced Rs 7,999, the 32GB variant with 3 GB RAM is priced at Rs 8999, and the 64GB variant with 4 GB RAM is priced at Rs 10,999.

The Xiaomi Redmi 5 is Amazon exclusive, you can buy it from Amazon.in, MI Store and MI home.

5 Best Smartphones with Face Unlock Feature under Rs 15000

After iPhone X was launched last year with a fingerprint scanner and a face unlock, suddenly every phone manufacturers started introducing this Face unlock feature on their phones.

Oneplus was one of the first Android Smartphones that introduced the face unlock in an Android phone, though the implementation of Face Unlock was software based, unlike the hardware based in iPhone X.

But reviews from different Tech blogs made sure that it really doesn’t make much of a difference and the face unlock on Oneplus 6 was also working similar to iPhone X.

After that we have seen the Face Unlock feature in a number of Android smartphones, and since it is software based it made its entry to the budget segment as well.

In this article, I am going to mention 5 best smartphones with the face unlock feature that is under Rs 15000

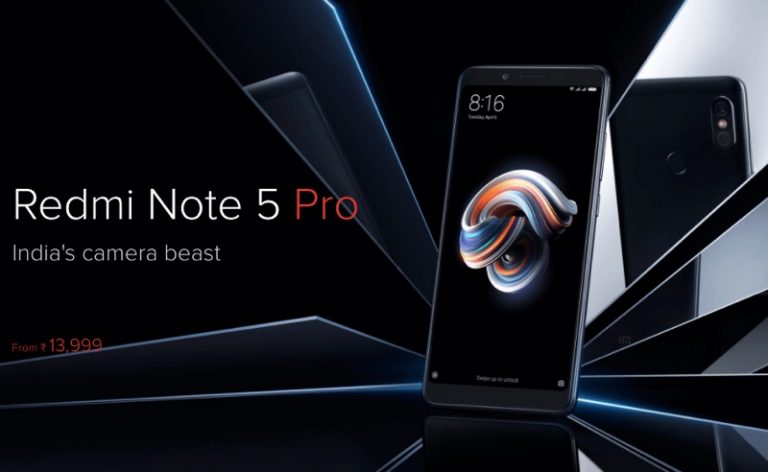
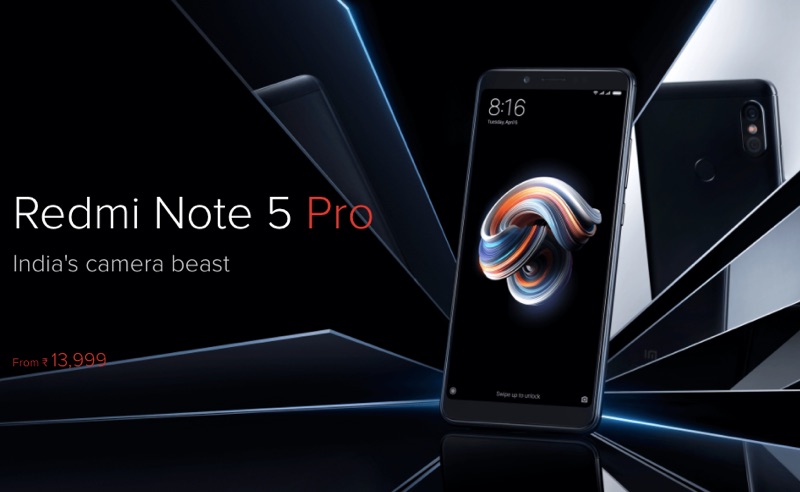
Xiaomi Redmi Note 5 Pro

Now this one has to be the number one smartphone in this list, it was launched just a month ago. But you voice packs of 5.99-inch full HD display that is powered by Snapdragon 636 Octa-Core processor with 4 GB RAM.

The device has a 20 Megapixel selfie camera with flash.

The device is priced at Rs 13999

You can buy redmi K5 Note Pro from Flipkart

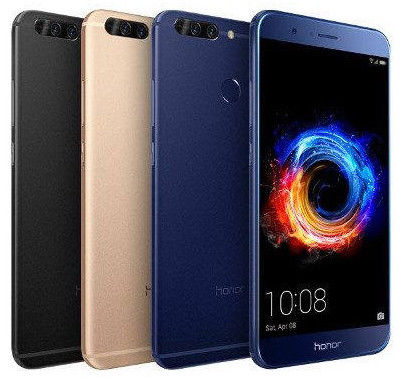
Honor 7x

Honor 7x was announced at the end of the last year, the phone also comes with 18:9 display and features a 5.99 inch full HD display. The phone is powered by Kirin 659 Octa Core and has got a 4 GB of RAM,

The phone comes in two variants 32GB and 64GB, the price of 32 GB variant is rupees 12999 which makes this eligible for this list.

The face unlock feature will be rolled out in a new software update to the Honor 7x

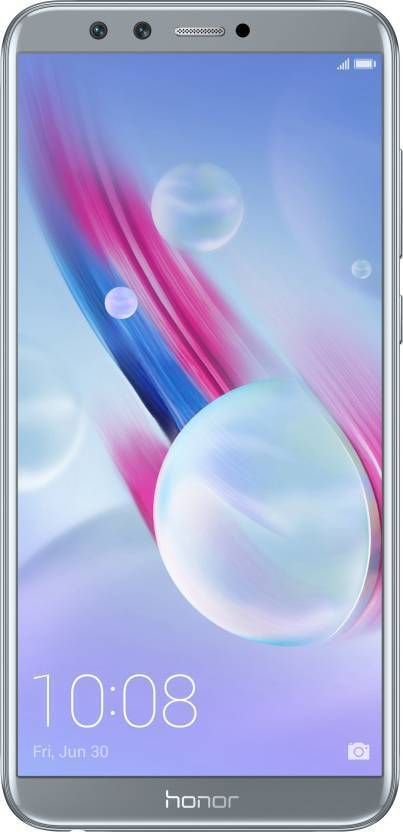
Honor 9 Lite

Honor 9 Lite has a 5.65 inch full HD display and is powered by Kirin 659 Octa-Core processor in the phone comes into different variants 3GB Ram and 4 GB RAM the 3GB Ram variant is priced at Rs 10999.

The face unlock feature has been released in an update to the device.

Also, this device is perhaps the first smartphone with Quad camera set up.

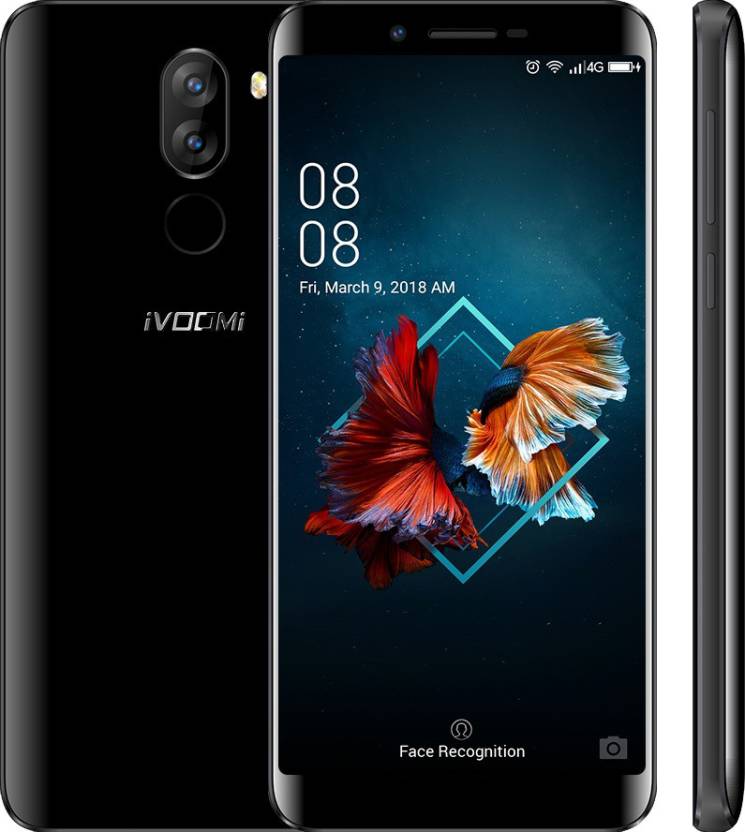
iVoomi i1S

iVoomi i1S is a 5.45-inch smartphone with HD+ Infinity edge display which has got 18:9 screen ratio the phone has got a Dual camera setup of 13-megapixels + 2-megapixel, a fingerprint sensor at the back.

The 3GB plus 32GB variant is priced at rupees 7499

Infinix Hot S3

The Infinix Hot S3 has a 5.65-inch HD+ resolution with 18:9 aspect ratio display. The phone is powered by Snapdragon 430 Octa-Core processor with 3GB Ram and 32GB storage.
The front camera is a selfie camera with 20 Megapixel.

The device is priced at rupees 8999 and the face unlock feature has been announced for the phone in the upcoming software update.

How to enable voice typing in WordPress

0

I have been using speech to text / voice typing to write articles on techtippr. I have also written an article where I mentioned how to write faster. Voice typing has enabled me to write articles 3x faster.

Because,

We can talk faster then we can type.

My Previous Writing Process

Though, my process of writing article was something like this,

  • I had Google Docs opened on my computer, and enable voice typing by pressing Shift+ Command +S.
  • After I am done with the article,
  • I copy the entire article into WordPress and make corrections to it.

Though there are no issues with this kind of workflow, I wanted to know if it is possible to directly voice type in WordPress, so that I won’t have to write everything in Google Docs and then copy it back to WordPress.

I found a couple of plugins that enabled voice search in WordPress, but it’s not something that I was looking for.

One particular plugin that I was able to find in the WordPress repository which offered voice typing had a very confusing layout, and the plugin required Google Chrome to work. So it’s better to install a Chrome extension since adding plugins to the blog will only increase the load time of the website.

My Current Writing Pro ess

So here is an even better solution, to use a Chrome extension named VoiceIn Voice Typing, and the reason it is better than having a plugin in WordPress for voice typing is that it can be used anywhere and not just in WordPress editor.

Also, if you have got multiple blogs when you don’t need to install the voice typing plugin on every blog, just install the Chrome Extension and you are good to go.

I have been using the voice typing feature on Facebook and other social media networks where I have to write longer.

Again, like I mentioned in my earlier article that the voice typing feature does not work everywhere.

If you are in a crowded place then it may not work if you are using the inbuilt microphone of your laptop, but since most of my writing process is done in my home office it works perfectly. You anyway would not be using voice typing in public, or are you?

The limitations of voice typing Chrome extension

The only limitation I was able to find in my brief usage is that it does not work in WYSIWYG interface of WordPress editor, to use the voice in voice typing extension you need to switch to plain text format, and then switch back to the visual format once you are done writing the article.

Also, if you have to have to add a line when you are making corrections in the visual format, then you will either have to type using the keyboard or switch to the text mode, which is quite confusing since you have to find where to place the cursor to type the extra line you want to type.

Over the years, this chrome extension has fixed the limitations, I posted about it in this article. Updated in 2023.

In 2023, a lot of productivity tools are powered by ai, I think voice typing has got the maximum benefit of AI, with LLM models like Whisper from OpenAI, we have a lot of tools that will give you accurate transcriptions.

Tools like AudioPen, has greatly reduced the creation process by automating fixing the first draft into something usable. Even I have created an iPhone shortcut called Dictation Pro, which use is ai to fix grammar and errors and gives out perfect transcriptions.

Best party is it works on iPhone and automatically save the text in the Notes app, which is available on all the apple devices.

How is the accuracy in comparison to Google Docs?

I found the accuracy of this voice typing extension to be pretty good since VoiceIn uses Google’s speech recognition engine, it is almost similar to what you type in Google Docs but a convenient way to type anywhere you want.

Install VoiceIn Voice Typing Chrome Extension

Amazing YouTube Tricks You Should Know to Enhance Your Video Watching Experience

YouTube is most popular video sharing websites on the internet, more than a billion people watch millions of videos. 

Assuming you to spend a good amount of time watching videos on YouTube, I think you should know some tricks about YouTube so that you can enhance your YouTube video watching experience

Watch age restricted videos without logging in

If you did not already know, you are required to log in to YouTube before you can watch a video that is age restricted.

Remove ‘watch?‘ from the URL and replace the ‘v=‘ to with ‘v/‘ and press enter.

Start the video at a specific time

Maybe the video is too long, maybe it’s a part in the middle of the video you want to share with a friend, you can easily make the video start at the particular time. 

Just add “#t=” followed by the time you want your video to start from. For example, “#t=1m2s” or “#t=62s”.

Sing along the music videos

MusiXmatch is a Chrome Extension that will overlay lyrics on top of music videos on YouTube so that you can sing along. 

Full screen the YouTube video just inside the browser

There is a Chrome extension called Magic Actions for YouTube, which enhances YouTube experience and will add a couple of features to YouTube.

It will let you run YouTube videos in the full-screen mode, just inside the browser so that you can still switch between tabs if you have to.

Watch your videos 1.5x Faster

There are videos on YouTube that are quite long and are also slow, fortunately, YouTube gives the option to speed up or slow down the video playback,  the options are, 0.25x, 0.5x, 1.25x, 1.5x, 2x.

I have found that speeding up the videos to 1.5x, it still makes you understand what for videos about and you can actually finish a 9-minute video in just 6 minutes.

Similarly, you can slow the speed of a YouTube video if you have to learn something, like, a dance step, perhaps.

Add videos to Watch Later Playlist to watch them later

When you discover a video on YouTube, you really don’t have to watch it at the same time.

But, you feel that it will be lost if you do not watch it right now, and you will not be able to see it again, this is why many people stop their work and get done with the video.

You can actually add it to a playlist, Watch Later (this playlist is already created in every YouTube account) and then go back to watch the video, no hurry, work is more important.

Know what it is in the videos, even before playing it?

It’s 2018 and clickbait on YouTube has not stopped, sometimes there is a serious mismatch between the title and what is India’s inside the video.

If you click on such videos using your mobile data, you will end up losing it, the best way is to install YouTube Go app, which is a specially designed app for countries your mobile data is expensive. 

The app actually lets users Scrub through the video without playing it so that you know what is inside. It is actually not just helpful for saving data but for saving time as well.


How to free up space in Android without deleting important apps

There was a time when even 16GB on smartphones was quite sufficient, but these days we have smartphones with even 128 GB of internal storage, and some phones’ base variants starting from 32GB onwards.

Though 32GB may be quite enough for a lot of people, it can still be filled up pretty quickly, considering there are so many amazing apps that make our life easy and constant media sharing on messaging apps like WhatsApp.

How To make space on your Android phone Without deleting the important apps

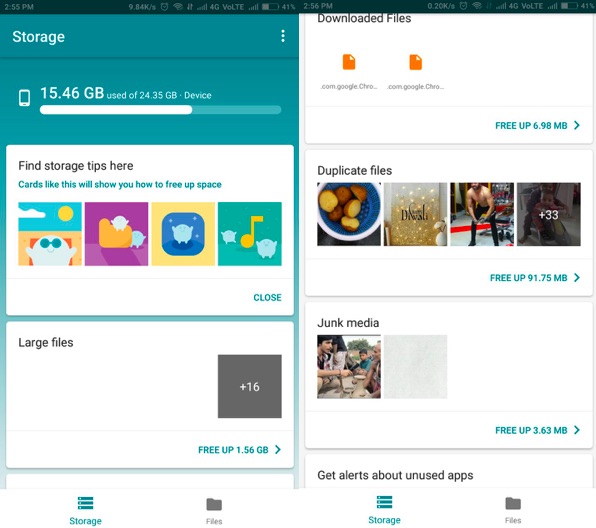
The best thing you can do is use the built-in storage tool that is provided on every Android OS, the storage tool lets you see which files are taking up space so that you can clear them off from your mobile phone.

But, sometimes using the built-in tool is not quite sufficient, there are several third-party apps available in this Play Store that are specifically designed for managing storage on your smartphone.

The one app that I have been using for a long time, is the ES Explorer, which is actually a file management system that lets you access files on your Android phone just like a PC User Interface. and it also has an inbuilt feature, for clearing out temporary files from your Android device.

You can also use Files Go by Google which is a newly launched cleaner app from Google itself, the app is specially created for Smartphones with Limited storage and the beauty of app is that it gives you recommendations on which are the apps that you can uninstall from your phone and what files can be deleted to make space on your smartphone

Usually, the apps that I mentioned above we clear the cache on your Android device. But, you can still check it out manually, apps such as YouTube, Google Play Music Facebook store a lot of data on your phone.

Suppose, if you are saving a music file on Google Play music or you have saved a bunch of videos on YouTube app,  You can remove the data by going to the storage option particular app (in the app section from settings area)

Disable the System apps

Android devices come with bundled apps most of which we don’t really at all since these are systems as they cannot be deleted or uninstalled from Android unless your phone is Rooted.

You can still disable these apps and it will save some of the data that might be taking when it is enabled.

To disable the app,  

  • Long press on the icon,  
  • and drag it on the top at the right side where it says ‘info’,  
  • this will open the settings page for the particular app where you can disable the app (sometimes you may need to uninstall the update before the disable button can appear)

Remove media files from WhatsApp

In one of its recent updates, WhatsApp has introduced an option where it lets you manage storage space by allowing you to see how much data WhatsApp media files are occupying, and you can delete them specifically from particular Groups for individual chats.

You also get the option to delete only a particular file type, mostly the videos are the one that occupies the largest space so you can use remove just the video and keep text images and GIFs

Use Google Photos and free up space on your phone

Google photos is kind of Magical and apart from giving you the ability to Organise your photos, it also lets you free up space on your phone.

You can enable ‘backup & sync’, so that every photo you take from your phone is backed up online.

Google photos also gives you the option to select other folders on your Android device from where the photos and videos can be  backed up.

Once you have backed up the desired photos and videos,  you will have to simply click on ‘free up space’ and Google will automatically remove the photos  from the device it has backed up. this simple trick can free up GBs of storage space.

Also, note that Google photos provide unlimited Storage for photos and videos it’s quite awesome

Move apps to the MicroSD card

And this option would only work if your smartphone has a MicroSD card slot, you can simply move the apps to MicroSD card.

Not all the apps can be moved to MicroSD card, but you can check what apps allow you to do so by going to the settings of the particular app, which you can do by long pressing and dragging the app to the info option on the top right side.

So these are the things that you can do to make some space on your Android device without having to delete or uninstall important apps.

How to backup your contacts in Android so that you never lose them

It’s 2018 and our phones are smart enough to do these small things and not require our attention, but I still hear stories where people say they have lost all the contacts on the Android phone.

Despite Android offering such a seamless way to sync contacts, people lose thousands of their phone contacts either when they format their phone or it is stolen.

So, I, once and for all, thought of writing a detailed guide.

Learn how to backup contacts in Android and never lose them

Add your best Google account to your Android Smartphone

This is the number one mistake people do who complain about losing phone contacts

To enjoy the full features Android smartphone has to offer, you and need to add your Google account to it,  it is the first thing that Google asks when you set up your Android smartphone. But a lot are people skip this part and do not add a Google account at all.

When you add your Google account,  it keeps all the contacts, app data, browsing data, and probably everything you do in a Google product is synced, so that it is also available on another device when you use your same Google account to login.

Since in this guide we’re talking about contacts,  I will talk about just that feature, the ‘sync’ is enabled by default for every Google product, so you don’t need to do anything extra from your side apart from adding the Google account.

If you have done just that,  all the contacts in your phonebook will be synced to Google, and the contact you keep adding to your phonebook over the period of time will also be synced so that you can get them back whenever you sign in with your Google account on a new device.

This will also make formatting of your phone easy because you will not lose your contacts.

Take a backup of your  contacts and save it to Dropbox or SD Card

Though, 90% of the problems related to losing the contacts, can be solved by just adding the Google account to Android device, there still can be issues where you can lose them, such as, you lose access to your Google account, and in that case you also lose access to your contacts that  are synced to the account. 

I would advise you to take a backup of your contacts on a monthly or quarterly basis and keep them in Dropbox or your SD card.

There are several Backup and Restore apps available in the Play Store, which can easily get your backup not just contacts but the Calendars logs, Call logs, SMS, and your Apps as well.

But, for this guide,  you can use it for backing up contacts and saving them somewhere safe.

The same app can be used for importing back the contact file that was created during the backup.

Install super backup & restore from Play Store

What can you do when you have already lost the Contacts in your Android phone

The above methods would only work when you have got your contacts already in the phonebook, but if you have already lost them, there is nothing much you can do, because we can only Sync it if it is available in the phonebook or take a backup of it when it is there.

So, if you have lost them, there are only a few things you can do which of the following.

Put a status update on your WhatsApp asking everyone to message you so that you can save their number.

This, kind of works, because your number would still be stored in other people’s phones and they can see your contact in their WhatsApp, and if they see your status update, they can message you back and you can add the contacts in your phone book.

This process requires patience and you might be able to get your important contacts with whom you communicate on a daily basis. Because WhatsApp is one of the popular messaging apps worldwide.

Install Truecaller app,  

We have written quite a lot of articles about this great app, it is a Universal phone directory, which will show you the name of the person who is calling even if it is not saved in your phonebook.

So, this can save you from some embarrassment, when someone is calling you and you don’t have their contact saved in your phone book. Truecaller will tell you who is calling so that you can save that person’s number in your phone book.

I hope you find this article useful and it will save you from losing your contacts.

Also, you can share this page with anyone who is looking for a way to get the contact back and keep it Synced so they never lose it again.

The number one reason I started loving Gboard over Swiftkey

I am sure you may have read our article where we compared both the keyboard apps, Gboard vs Swiftkey

If not you can click the link to read the article. In the end, I Praised the SwiftKey and preferred it over Gboard.

But, one thing, I did not mention is that the reason why Gboard is still installed on my smartphone and why I use it on a daily basis is because of one particular reason.

And the reason is,

Gboard’s placement of the mic button for speech to text aka voice typing.

Both Gboard and SwiftKey offer speech to text feature, which has become my current favorite way to type faster.

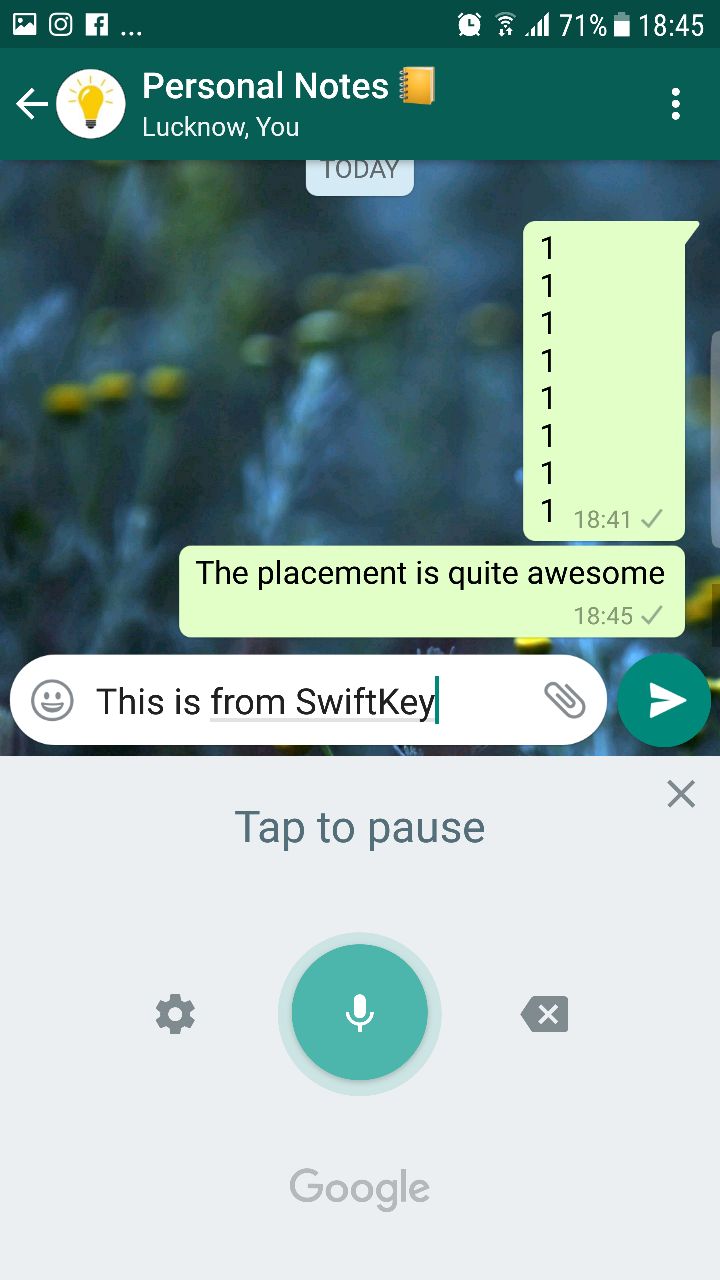
I was using the text to speech feature on Swiftkey, prior to using Gboard app, it was quite a tiring experience because of the way it behaves on Swiftkey.

When you switch to speech to text in SwiftKey, the entire text keyboard is replaced by a simple big mic button, which can be tapped to activate and deactivate the mic.

When you talk to it, it converts your voice into text flawlessly, but and if you have to insert a comma or a full stop or go to next line, you have to switch back to the keyboard form, since commands do not work in the speech to text.

And, a comma is typed as a (‘) full stop is typed in place of (.) and it types ‘new line’ when you try to say the command to go it to the next line.

Either you have to go back to the keyboard form to do these little from things on the way, or you have to spend some extra time in formatting at the end of the text to speech session.

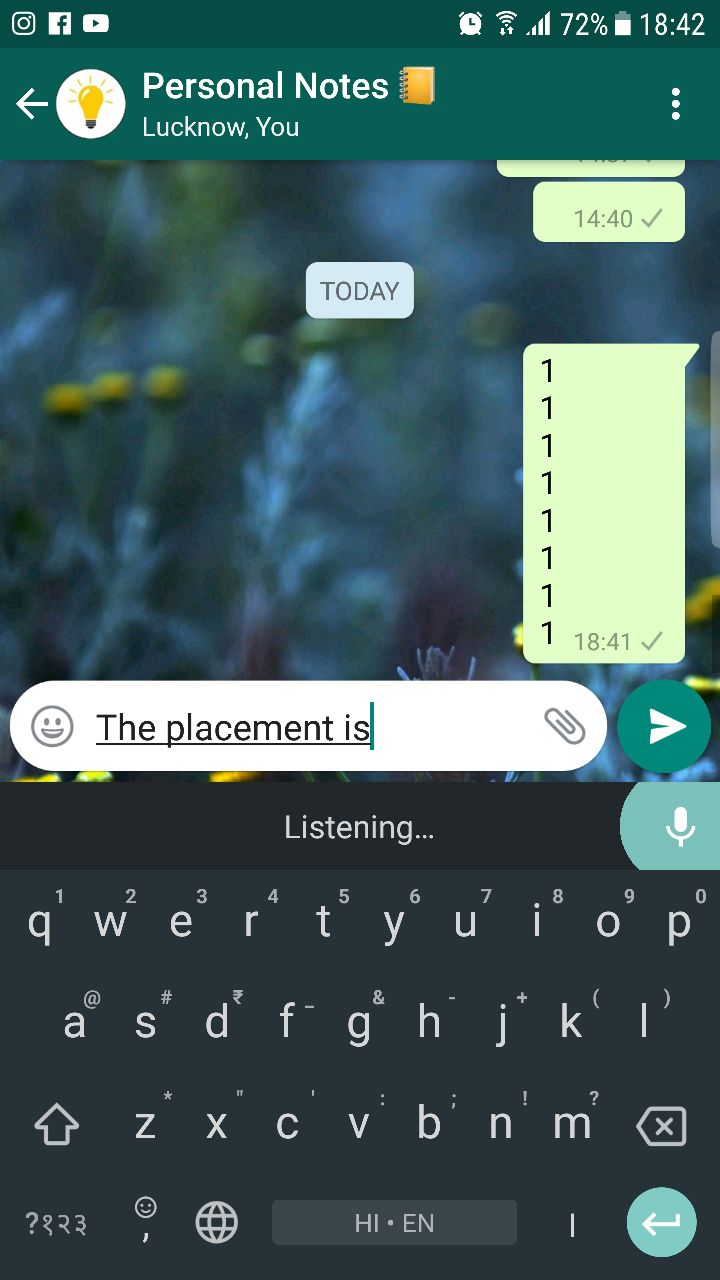
And I was fine with the entire thing after the speech to text session until I started using Gboard, which has a better placement of the mic, on the right-hand side of the prediction bar, so that it can be used without, replacing the entire keyboard with a mic button.

So, simple formatting, such as, inserting a comma, full stop, or going to the next line, is easier than it is in SwiftKey. Which means you have to spend less time in formatting after you are done with the speech to text.

This may be a small thing but it has allowed me to write long-form content even on my smartphone, such as this one, which has entirely been written on my smartphone using the Gboard keyboard app.

And the first draft of this post had 500-words, which was done in less than 5 minutes, which is kind of awesome.

If you are not using Gboard, I think you should give it a try, because it not only offers this unique feature that is awesome for me and for everyone who uses text to speech, but it also has got an amazing feature of integrated Google search which makes life easier if you are looking for something on Google and want to share it in messenger.

Again, since I have praised that so much, I would like to put a disclaimer that I have not been paid to say that and this is not a sponsored post at least until now.:-)