
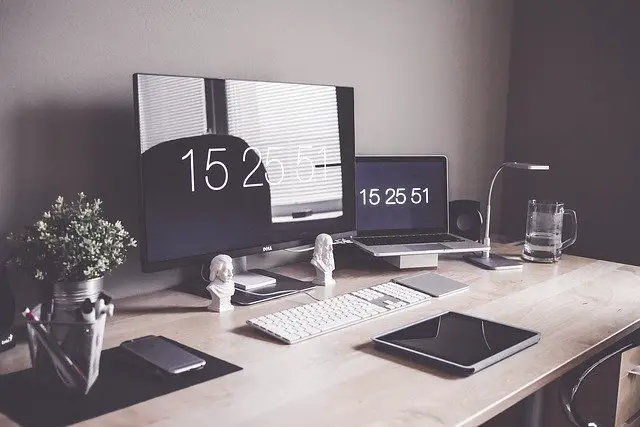
How to Use MacBook in Clamshell / Closed Display Mode
Get the best of both worlds — use your MacBook like a desktop by closing the lid and connecting to a big external monitor. Less heat, less noise, more screen real estate.
To use your MacBook in Clamshell (Closed Display) Mode, connect it to an external monitor + power source, then close the lid. macOS will automatically use the external monitor as the primary display — no extra settings needed on modern Macs. You will also need a Bluetooth keyboard and mouse/trackpad to control it.
📅 Dual Display Mode 🔴 MacBook screen + external monitor both active 🔴 GPU drives two displays simultaneously 🔴 More heat generated — fans spin louder 🔴 Higher battery drain even when plugged in 🟢 More total screen real estate 🟢 No external peripherals required | ✅ Clamshell / Closed Display Mode 🟢 Only one display — far less GPU load 🟢 MacBook runs much cooler 🟢 Fans stay quiet during casual use 🟢 Cleaner, desktop-like desk setup 🔴 Requires Bluetooth keyboard & mouse 🔴 Must be connected to power source |
Understanding what happens when you close the lid helps you troubleshoot issues and get the most out of this setup.
| 🔌 Connect External Monitor | → | 🔋 Connect Power Charger | → | 🖥️ Close MacBook Lid | → | ▶️ macOS Wakes on Ext. Display | → | ✅ Ready to Use! |
On modern MacBooks (M1/M2/M3 chips and newer Intel models), macOS automatically detects the external monitor and power source. You no longer need to open the lid and press the power button — simply plug in power and the MacBook wakes up on its own in Closed Display Mode.
Here is everything you need to assemble a comfortable closed-display setup. You may already own some of these items.
If you are shopping for a monitor, a 32-inch 4K display is the sweet spot. Here is why resolution and size go hand-in-hand:
📹 Monitor Size Guide 🔴 27-inch 4K — text can feel small 🟢 28-inch 4K — works for some users ⭐ 32-inch 4K — ideal sweet spot 🟢 32-inch+ 4K TV — great for productivity | 💡 LG USB-C Monitor Tip LG makes a 27-inch monitor with a USB-C port that also delivers power. One cable handles both video output and MacBook charging — a clean, minimal setup. A 32-inch version also exists but is pricier. |
📌 Already using the author’s setup? He uses a large 4K Smart TV for maximum screen real estate at a lower price point — a totally valid choice if you don’t need high refresh rates.
To enjoy true 4K at 60Hz, all three of these must support it:
💻 Your MacBook Must support 4K@60Hz output | 🔌 Your Cable / Dongle Must support 4K@60Hz bandwidth | 📺 Your Monitor / TV Must accept 4K@60Hz signal |
⚠️ Warning: Most generic USB-C dongles on the market only support 4K @ 30Hz — this causes noticeable mouse lag and choppy animations. Always check the spec sheet before buying. The author’s own MacBook Pro dongle only does 4K@30Hz. For Full HD or QHD (1440p), most cables and dongles work fine at 60Hz.
With the lid closed, you need an external keyboard. Here are the top options:
⭐ Apple Magic Keyboard Most similar typing feel to built-in MacBook keyboard. Expensive but premium. Best macOS integration. | 🟢 Logitech K380 Affordable Bluetooth keyboard. Connects to multiple devices. Compact form factor. Author’s personal pick. | 📋 Logitech MK470 Combo Keyboard + mouse combo. Great value bundle for those setting up from scratch on a budget. |
🖰 Apple Magic Mouse Touch-sensitive surface with no physical scroll wheel. Supports swipe gestures for page scrolling — closest to the MacBook trackpad experience. All other mice with scroll wheels will feel less smooth by comparison. | ▶️ Apple Magic Trackpad Author’s Pick Preserves the full MacBook gesture experience — swipe between spaces, pinch to zoom, and more. The author uses this on the left, paired with Logitech K380 keyboard and a Logitech Bluetooth mouse on the right. He rarely uses the mouse since the trackpad covers almost everything. |
A MacBook stand keeps your desk tidy when the laptop is in Closed Display Mode. It holds the MacBook vertically or at an angle, reduces desk clutter, and can improve airflow. Generic stands are available for around $20 on Amazon — the author uses one himself. There are also premium options from brands like Twelve South if aesthetics matter to you.
Across five key performance metrics, Clamshell Mode consistently wins for everyday productivity use:
| Dual Display | 85% — Very Hot | |
| Clamshell | 38% — Cool |
| Dual Display | 80% — Frequent | |
| Clamshell | 20% — Rare |
| Dual Display | 90% — High | |
| Clamshell | 45% — Moderate |
| Dual Display | 70% — Easy | |
| Clamshell | 55% — Needs peripherals |
| Dual Display | 95% — Maximum | |
| Clamshell | 60% — Large single display |
This is the part that confuses most users. The physical power button is on the MacBook — which is now closed. Here is everything you need to know:
Even in Clamshell Mode, shutting down is straightforward. Click the Apple menu in the top-left corner of your external display and select Shut Down. No need to open the lid.
Older MacBooks required you to open the lid and press the physical power button each time. Many users worked around this by never fully shutting down — putting the Mac to sleep instead, and waking it the next morning. Some used macOS’s built-in scheduling feature (System Preferences → Energy Saver → Schedule) to set automatic startup times, e.g., 9 AM every weekday.
Modern MacBooks with Apple Silicon (M1/M2/M3) and newer Intel models automatically detect when they are connected to both a power source and an external monitor. Simply plug in the charger — macOS wakes up on the external display on its own. No lid opening required. This makes Closed Display Mode genuinely seamless.
1 | Connect Your External Monitor Use an HDMI-to-USB-C cable (or a USB-C to USB-C cable if your monitor supports it). Make sure the cable supports 4K@60Hz if you plan to use 4K resolution. |
2 | Plug In Your MacBook Charger Clamshell mode requires the MacBook to be connected to power. Without the charger plugged in, closing the lid will simply put the Mac to sleep. |
3 | Pair Your Bluetooth Keyboard & Mouse / Trackpad Do this before closing the lid for the first time. Go to System Settings → Bluetooth and pair your devices while the MacBook screen is still visible. |
4 | Close the MacBook Lid Gently close the lid. The internal display turns off and macOS switches everything to the external monitor within a second or two. |
5 | Adjust Display Resolution (Optional) Go to System Settings → Displays to set the resolution and scaling. For a 32-inch 4K display, choosing “More Space” gives you a QHD-equivalent workspace. Use a tool like SwitchResX for custom resolutions. |
✅ Clamshell Mode Is Right For You If… ✓ Your MacBook gets hot during normal use ✓ Fan noise bothers you while working ✓ You want a clean, minimal desk setup ✓ You primarily use one large external monitor ✓ You do web browsing, writing, and video editing ✓ You are comfortable with Bluetooth peripherals | 📺 Dual Display Mode Is Worth It If… ✓ You need maximum total screen real estate ✓ You run a cool-running MacBook (M2/M3) ✓ You multitask across many apps simultaneously ✓ You want to avoid buying extra peripherals ✓ You use the MacBook keyboard and trackpad a lot ✓ Heat and noise are not major issues for you |
The author’s current daily driver setup is: Apple Magic Trackpad on the left → Logitech K380 Bluetooth Keyboard in the center → Logitech Bluetooth Mouse on the right. He rarely touches the mouse because the trackpad handles almost everything efficiently. This combination gives you the best of macOS gestures without the premium price of going all-Apple.
💻 Best Overall Setup MacBook in Clamshell Mode + 32-inch 4K Monitor + Apple Magic Trackpad + Logitech K380 Keyboard. Quiet, cool, productive. | 🔄 Best Budget Setup MacBook in Clamshell + 4K Smart TV + Logitech MK470 Keyboard & Mouse Combo + Generic MacBook Stand. Full experience at lower cost. | ⭐ Premium One-Cable Setup LG USB-C Monitor (27/32-inch with Power Delivery) + Apple Magic Trackpad + Apple Magic Keyboard. One cable for video + charging. |
Using your MacBook in Clamshell / Closed Display Mode is one of the smartest productivity upgrades you can make. It lets you enjoy the portability of a MacBook while getting a desktop-class experience at your desk — with significantly lower heat, quieter fans, and a cleaner setup. The key requirements are simple: an external monitor, a power source, and a Bluetooth keyboard plus mouse or trackpad. Once you try it, you will wonder how you ever worked any other way.