
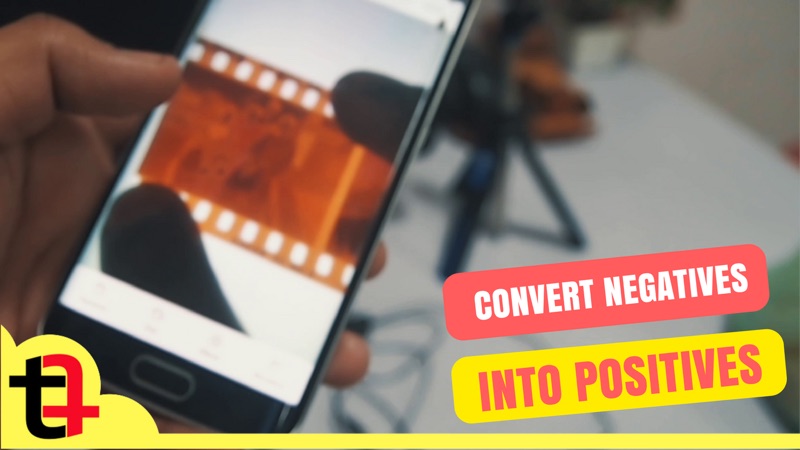
Boxes of old photo negatives are sitting in millions of homes, slowly degrading. Converting them to digital photos used to require expensive lab equipment. Now, your smartphone camera is good enough to do a surprisingly decent job — and there are apps that make the process straightforward.
Short Answer: The fastest method is using a dedicated negative scanning app like FilmLab or Negative Lab Pro alongside a light source (a tablet screen or lightbox). For the best quality, hold the negative flat against an evenly lit white surface and photograph it, then use an app to reverse the colors and correct the image.
What You’ll Need
- Your smartphone (any modern camera phone works)
- A light source: a tablet or monitor displaying a white screen, or a $15–$30 LED lightbox
- A film scanning app (free options available)
- Clean, dry negatives
- A steady hand or small tripod
Quick tip:
A free lightbox substitute: open a blank white document on your tablet or laptop, set brightness to maximum, and lay the negative flat on the screen. This gives you an even, bright light source at no cost.
Method 1: Using a Film Scanning App (Recommended)
Step 1: Set Up Your Light Source
Place your tablet, laptop, or LED lightbox on a flat surface. Display a pure white screen at maximum brightness.
📸 SCREENSHOT NEEDED: Tablet displaying white screen being used as a lightbox for negative scanning
Step 2: Position the Negative
Lay the negative flat on the light source. Hold it in place — you can use small pieces of tape at the corners if needed. Make sure the negative is clean (no dust or fingerprints — handle by the edges).
📸 SCREENSHOT NEEDED: Photo negative laid flat on a glowing tablet screen, ready to photograph
Step 3: Photograph the Negative
Hold your phone directly above the negative. Tap to focus on the negative’s details (not the light source). Use your phone’s native camera in Pro/Manual mode if available to avoid auto-exposure issues. Get as close as possible while keeping the entire negative in frame.
📸 SCREENSHOT NEEDED: Smartphone held directly above a film negative, camera pointing down for scanning
Step 4: Process with a Scanning App
These apps invert and color-correct the negative automatically:
- FilmLab (iOS/Android, free with paid scans) — The easiest option. Point at a negative and it shows a live positive preview.
- Negafix (Android, free) — Simple color inversion with manual adjustments.
- Snapseed (free) — Not a dedicated scanner, but use Curves to manually invert and correct a photo you’ve already taken.
📸 SCREENSHOT NEEDED: FilmLab app showing real-time positive preview of a film negative being scanned
Method 2: Manual Inversion in Google Photos or Snapseed
If you don’t want a dedicated app, photograph the negative as above, then:
- Open the photo in Snapseed
- Go to Tools → Curves
- Drag the top-left point to the bottom and the bottom-right point to the top (creates an S-curve inverted)
- Adjust the color channels separately (Red, Green, Blue) to correct the orange mask that most color negatives have
Warning: Color negatives have an orange base (the mask) that makes manual inversion tricky. You’ll need to reduce orange/yellow tones significantly in the red and green channels. Dedicated apps handle this automatically — manual inversion works best for black and white negatives.
Tips for Better Results
Quick checklist:
- ✅ Clean the negative with a soft lens cloth before scanning — dust is very visible when lit from behind
- ✅ Use the highest resolution setting on your camera
- ✅ Keep the phone parallel to the negative — any angle creates keystone distortion
- ✅ Turn off auto HDR in your camera for more accurate exposure
- ✅ Photograph in a dark room to reduce reflections on the light source
FAQ
How good is smartphone negative scanning compared to a proper scanner?
A dedicated film scanner (like the Plustek 8200i, ~$200) will always give better results, especially for large prints. But a modern smartphone with a good camera app can produce very usable 10–20 megapixel digital versions that are excellent for sharing online or printing at standard sizes.
Can I scan slide film (positives) the same way?
Yes — the same setup works. You don’t need to invert slides since they’re already positive. Just photograph them on the light source and color-correct as needed.
What about 35mm vs 120mm film?
35mm negatives are the most common. 120mm (medium format) film is larger and easier to photograph with a phone since you have more detail to work with. The process is identical — just make sure your light source is big enough.
Best Photo Scanner Apps ↗Organize Your Photos on Android
Old photo negatives are fragile and won’t last forever. Even an imperfect smartphone scan is infinitely better than losing those memories completely. Start with FilmLab for the simplest experience — the results will surprise you.