

Turn Ugly Screenshots Into Gradient-Wrapped, Social-Ready Graphics — Mocksy for Mac
You take a screenshot of your app, paste it into your blog post, and it looks flat and lifeless. The solution shouldn’t take 20 minutes in Photoshop. Mocksy is a Mac app that turns any screenshot into a polished, gradient-wrapped graphic in under 30 seconds.
Short Answer: Mocksy is a free Mac app that wraps screenshots in gradient backgrounds with drop shadows and padding. It runs locally (no uploads), exports at any size, and produces results that look like they came from a design team.
What Is Mocksy?
Mocksy is a lightweight Mac app built for one specific job: making screenshots look great. You drop in a screenshot, choose a gradient background from a preset library, adjust the padding and corner radius, and export. There’s no subscription, no cloud upload, and no design experience required.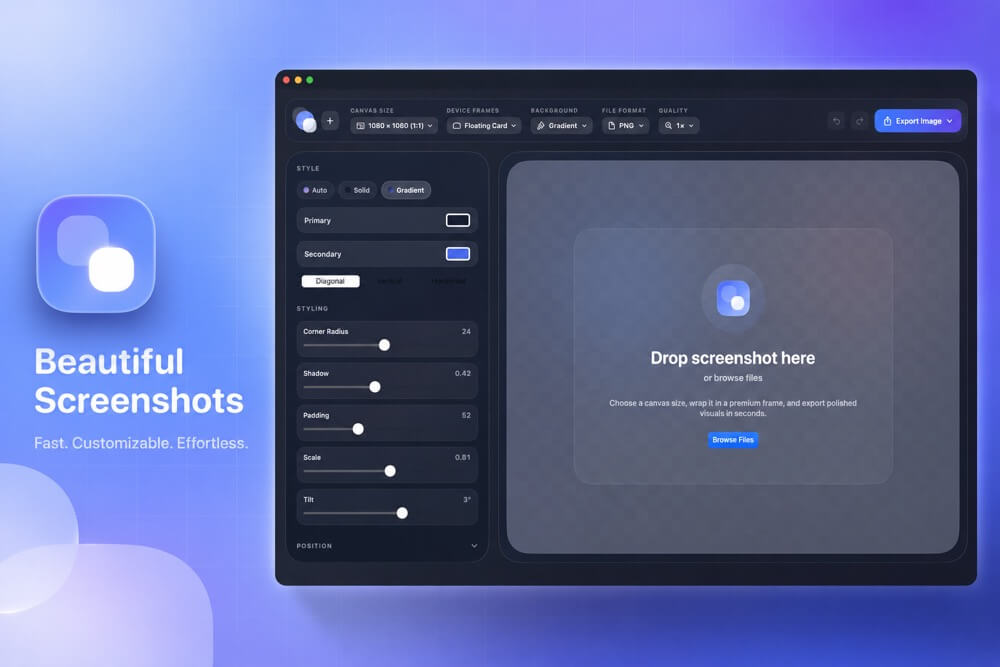
It fills a gap between “paste your raw screenshot into WordPress” (looks bad) and “spend 30 minutes recreating this in Figma” (takes too long). For bloggers, technical writers, and indie developers publishing tutorials and product pages, it’s the right tool at the right complexity level.
How to Use Mocksy
Quick Steps:
Open Mocksy → Drag screenshot onto canvas → Choose gradient preset → Adjust padding → Export as PNG or JPEG
Step 1: Import Your Screenshot
Drag any PNG or JPEG screenshot directly onto the Mocksy canvas. You can also use Cmd+V to paste from clipboard — which is faster when you’ve just taken a screenshot with Cmd+Shift+4.
Step 2: Pick a Background
Mocksy includes a library of gradient presets — purple-to-blue, green-to-teal, warm sunset, dark obsidian, and more. Pick one that complements the tone of your app. Dark-mode screenshots look great on dark gradients. Light apps suit pastels or off-white backgrounds.
Step 3: Adjust Padding and Shadow
The default padding is usually fine for blog posts. If you’re exporting for a Twitter card or LinkedIn graphic, increase the padding slightly to give the screenshot more room to breathe. The drop shadow is enabled by default — leave it on. It’s subtle enough to not overwhelm the image but adds the depth that makes screenshots look lifted off the background.
Step 4: Export
Click Export. Mocksy lets you set custom dimensions. For blog featured images, use 1200×630px. For in-post screenshots, export at the same width as your content area (typically 800–1000px). Output is PNG by default — if file size matters, re-export as JPEG at 85% quality using a photo compressor.
Mocksy vs Other Screenshot Beautifier Tools
- Mocksy vs Ray.so — Ray.so runs in the browser and is great for code snippets. Mocksy runs locally, handles any app screenshot, and is faster for bulk processing.
- Mocksy vs Shots.so — Shots.so adds device frames (MacBook, iPhone). Mocksy focuses on gradient wrapping without frames. Use Shots.so when you need the device context, Mocksy when you want clean and minimal.
- Mocksy vs Screely — Similar positioning. Screely adds a browser chrome frame. Mocksy is more flexible with background options.
- Mocksy vs Figma — Figma can do everything Mocksy does, but it takes 10× longer. Mocksy wins on speed for simple screenshot enhancement.
For a full breakdown of all the gradient background tools for screenshots, including browser-based options, see the comparison guide.
Who Should Use Mocksy
Mocksy is the right choice if you’re a Mac user who:- Publishes tutorials with app screenshots regularly
- Creates social media graphics from screen captures
- Needs polished product screenshots for a landing page
- Values privacy — your screenshots never leave your machine
If you’re on Windows or Linux, you’ll need a browser-based alternative. Ray.so and Screely both work without installation.
Use Cases Across the Cluster
Mocksy is the foundation tool, but your workflow changes depending on the platform you’re publishing to:- Blog posts — Full guide to making blog screenshots professional
- Twitter/X — Twitter screenshot hacks for creators
- YouTube thumbnails — How to show app interfaces in YouTube thumbnails
- SaaS landing pages — Why your SaaS screenshots are losing you conversions
- iPhone workflows — iPhone shortcuts vs Mac apps for screenshot beautification
- Device frames — How to add device frames to screenshots on Mac
- Gradient tools deep-dive — Best gradient background tools for screenshots
Warning: Mocksy exports PNG by default. PNG files from Retina displays can be very large (2–5MB). Always compress your exports before uploading to WordPress — target under 200KB for standard blog images.
Checklist:
- ✅ Screenshot taken (Cmd+Shift+4 on Mac)
- ✅ Dropped into Mocksy canvas
- ✅ Gradient preset selected to match app tone
- ✅ Padding adjusted for target platform
- ✅ Shadow enabled
- ✅ Exported at correct dimensions (1200×630 for featured, 1000px max for in-post)
- ✅ Compressed before WordPress upload
Frequently Asked Questions
Is Mocksy free?
Yes, Mocksy is free to use. Check the Mac App Store or the developer’s website for the latest version.
Does Mocksy upload my screenshots to a server?
No. Mocksy runs entirely locally on your Mac. Your screenshots are never uploaded anywhere.
Can I use Mocksy for Windows?
Mocksy is Mac-only. For Windows, use Ray.so or Screely in your browser — both are free and require no installation.
What’s the best export size for blog screenshots?
1200×630px for featured images. 800–1000px wide for in-post screenshots. Always compress the output before uploading.
Get the Full Screenshot Guide ↗Compare Gradient Tools