
Making videos has never been easier thanks to the available tools for everyone. However, with the increased accessibility, the competition has also risen.
How can you stand out on YouTube in 2023?
By enhancing the visuals in your videos. While the information you provide may be similar to others, focusing on visual appeal can make a difference.
One way to elevate your videos is by creating multi-cam content. You might have seen many YouTube videos using multiple cameras, and editing such content used to be more challenging in the past.
However, with the new updates in Final Cut Pro, it has become easier. In this video, I’ll show you how I create multi-cam videos for my channel.
My videos are typically five to six minutes long, but the actual recording takes about 10 to 15 minutes. Editing these multi-cam videos usually takes me around 45 minutes to an hour. So, it doesn’t require a lot of time.
Here’s the Video Tutorial
How to Record Multi-Cam Videos?
Multi-cam videos involve using multiple camera angles.
For simplicity, I’ll be using only two angles in this tutorial: a screencast of my computer and a talking head angle. Before recording, make sure to start all the cameras or recordings at the same time.
Also, try recording audio on all camera sources. This will make it easier to sync the videos within Final Cut Pro. You can even do a clap once all the cameras are turned on to have an audio waveform for matching purposes.
How to Edit Multi-Cam Videos in Final Cut Pro
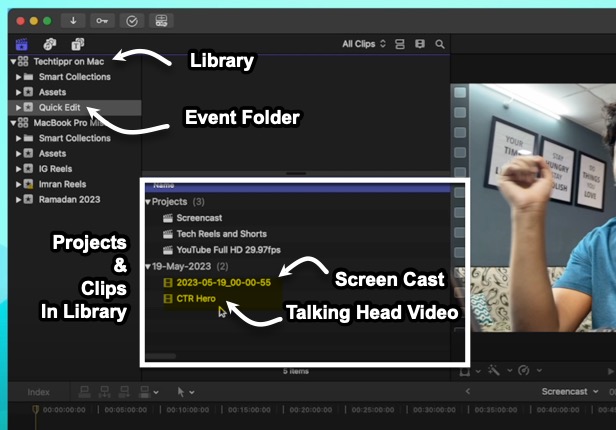
To demonstrate, I have a pre-recorded screencast and a talking head video. I imported both into Final Cut Pro and organized my files within the Library.
In this case, I’ll create a compound clip that combines both clips, with my talking head appearing on the right side of the screen while the screencast plays. I’ll drag the screencast video to the timeline and place the talking head video on top of it. Then, I’ll sync the two videos by aligning the audio waveforms.
With the videos synced, I can add a picture-in-picture effect. By adjusting the size, position, and colors, I can create a visually appealing layout. Additionally, I can enhance the background by applying effects, such as a gradient, to replace the black background.
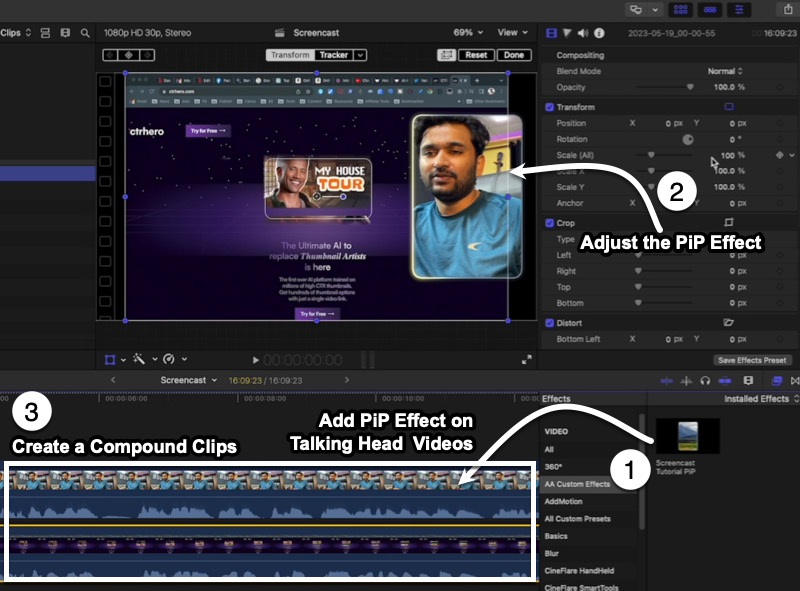
Once everything looks good, I’ll select all the layers and create a compound clip. This simplifies the timeline and keeps things organized. Now, I have a compound clip that represents the screencast portion.
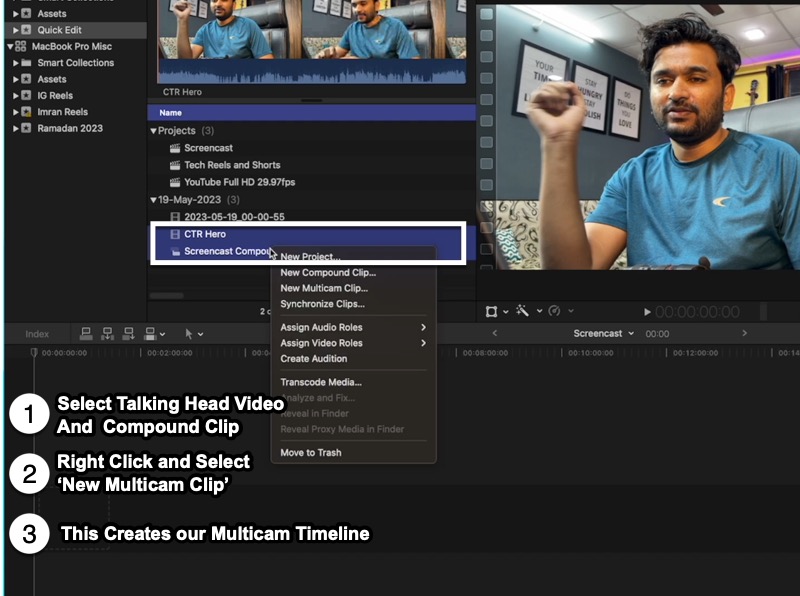
Next, I’ll select both the talking head clip and the compound clip, right-click, and choose “New Multi-cam Clip.” This creates a multi-cam clip that combines both angles.
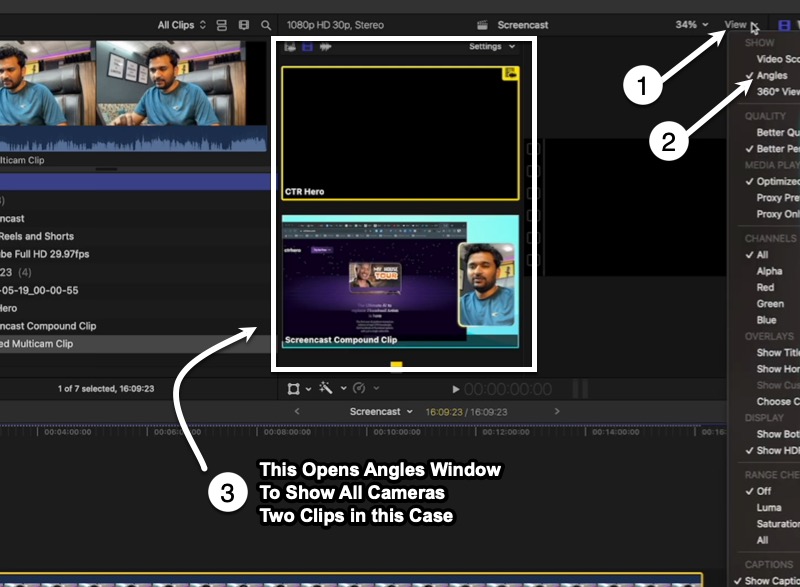
In the “Angles” view, I can see both angles appearing. If there were more angles, they would be visible here as well.
I’ll select the audio source from the camera where I used a professional microphone for better sound quality. I’ll also apply color corrections if needed, using preset effects to enhance the audio and color grading.
At this point, I can easily switch between camera angles by manually clicking on the desired angle or using the number keys on the keyboard.
To add more information to the video, I can include text, create chapters, or incorporate graphics. I can either create graphics within Final Cut Pro or use tools like Canva, which offers animated graphics. After downloading the graphics, I can import them into Final Cut Pro and place them where needed.
Once I’m satisfied with the editing, I can export the video and upload it to my channel. While this process may seem more involved than creating single-camera angle videos, with practice, it becomes easier and more efficient.
I hope you found this tutorial useful. For more details and additional resources, check the video description.
If you have any suggestions or comments, feel free to use the comment section. Don’t forget to like the video and subscribe for future content. Thank you, and take care!