Snagit is a useful application that allows you easily capture screenshots on your computer and also record screen casting. And the inbuilt editor makes it easy to make adjustments to images.
It also allows users to record system audio, which brings up many use cases for this single application.
For instance, you can capture a segment of a YouTube video without downloading it by simply taking a screencast and enabling the system audio recording feature.
This capability is also helpful when creating tutorials involving websites or web apps where you also happy record the internal audio.
Enable ‘Record System Audio’ in Snagit on Mac
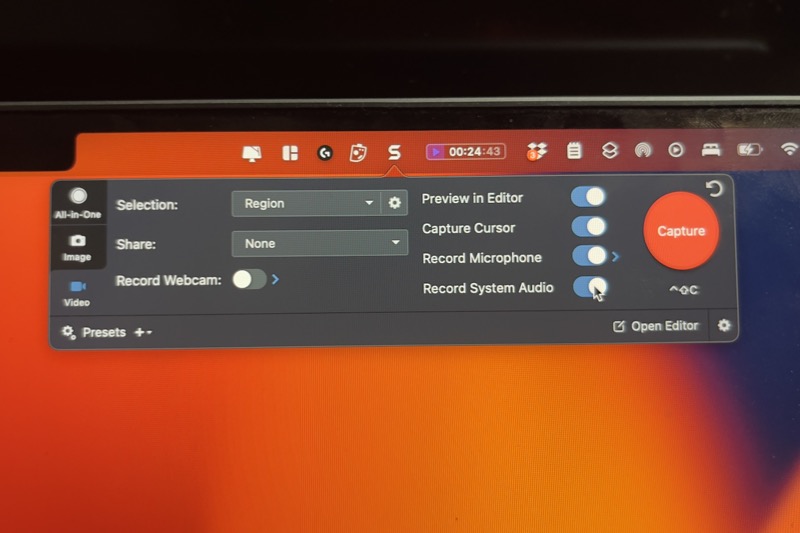
When you click on capture, to start recording your screen, you can make the selection of the area you want to record, a long with many other options such as enable the webcam or enable audio recording.
Another feature you can enable is, ‘Record Internal Audio’. This easily gets enabled for pc users. But make users are facing an issue where it ask to authorise a plugin.
Mac users (especially M1 powered and other Apple Silicon Chipset powered Macs) may encounter an issue when enabling the system audio feature in Snagit.
Upon installation on your Mac computer, Snagit requires certain permissions for smooth operation, such as access to your microphone and folders.
When attempting to grant access to system audio, conflicts within the Mac system may cause Snagit to perceive this as a security threat and deny plugin access.
This tutorial will guide you on how to enable the system audio feature on your Mac computer effectively.
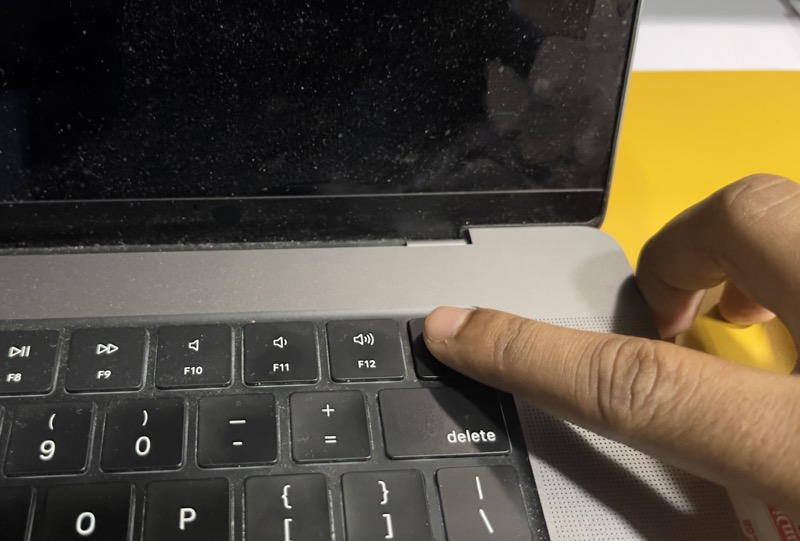
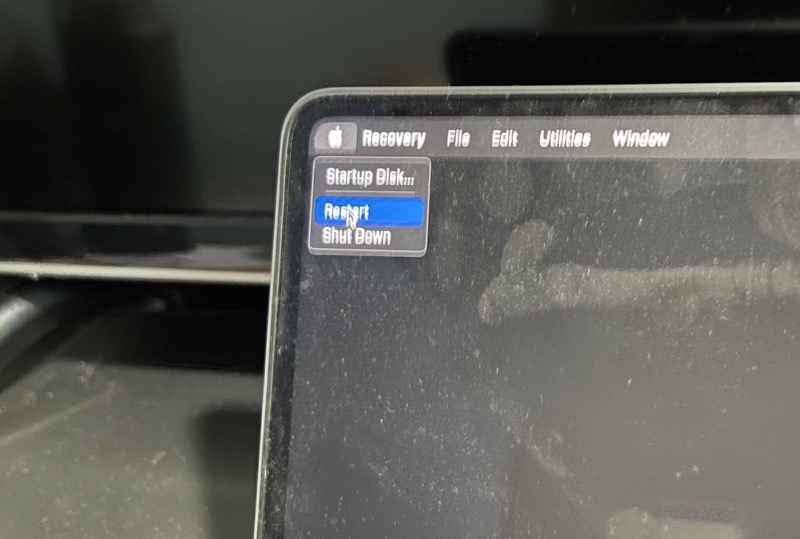
Shut down your computer by clicking the Apple logo at the top left and selecting “shut down.” After it’s off, press and hold the power button until you see startup options loading.
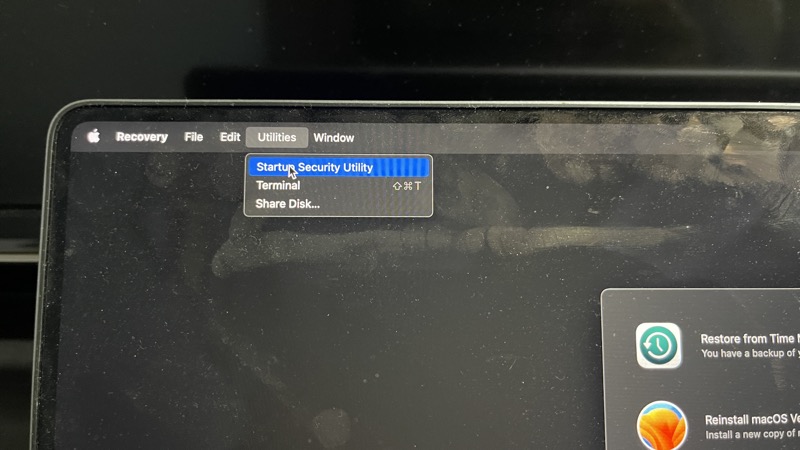
Once recovery options appear, select “options” and click “continue.”
Wait for MacOS recovery mode to load. Then choose “Startup security utility” from the ‘Utilities’ Dropdown menu in the top left corner.
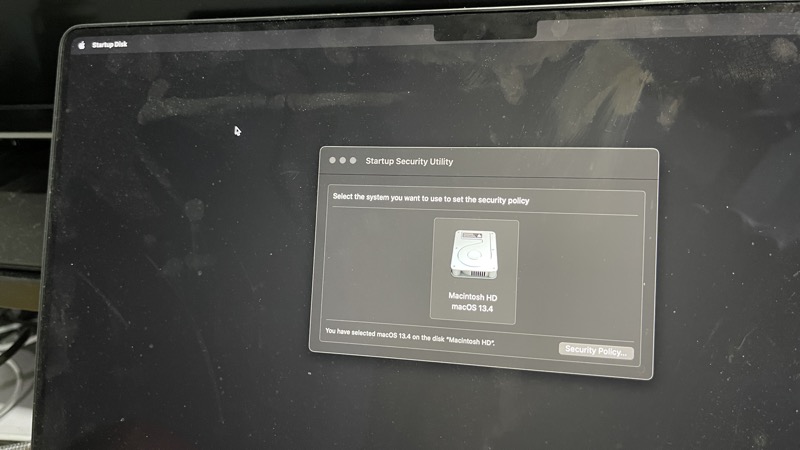
In this window, select your system drive and click “Security Policy.”
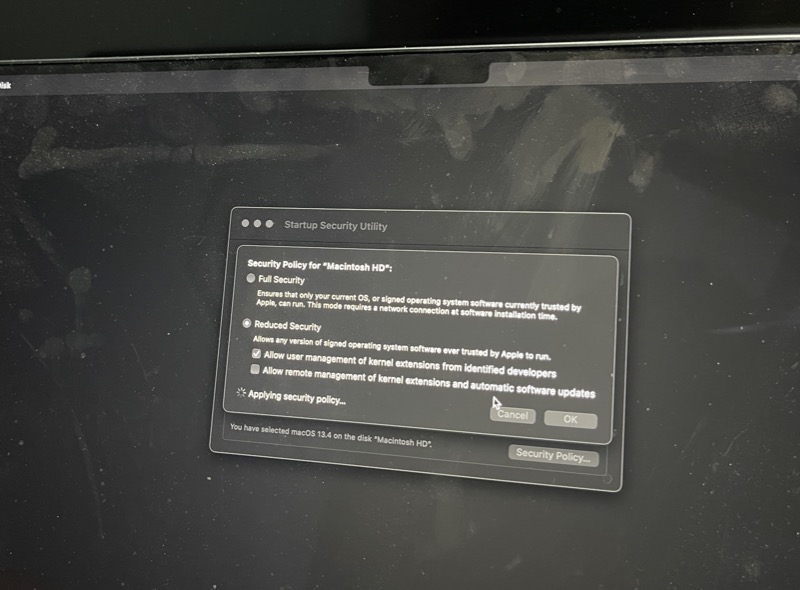
Switch from full to reduced security and enable the first checkbox. Enter your password when prompted to apply these changes.
Afterward, restart your Mac by clicking on Apple logo > restart.
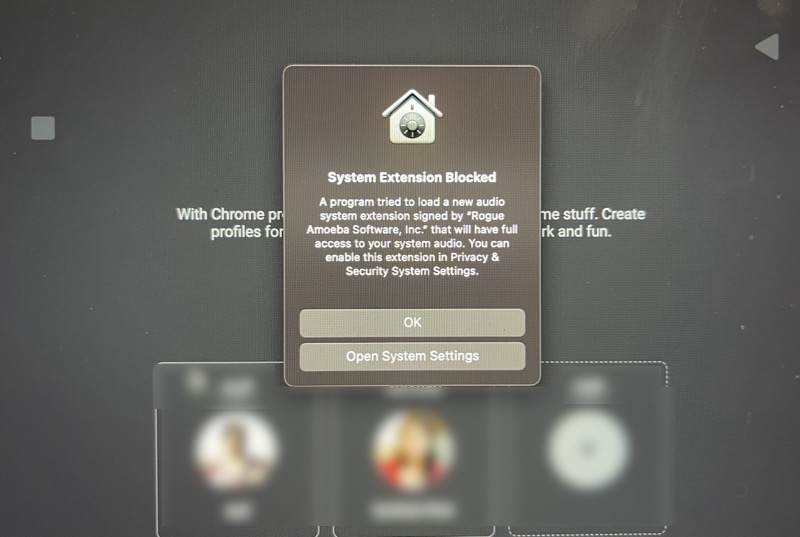
When you log in again, a message stating that a system extension is blocked should pop up; if not go manually to System Preferences > Security & Privacy settings.
Unlock settings using padlock icon (bottom left) with your password.
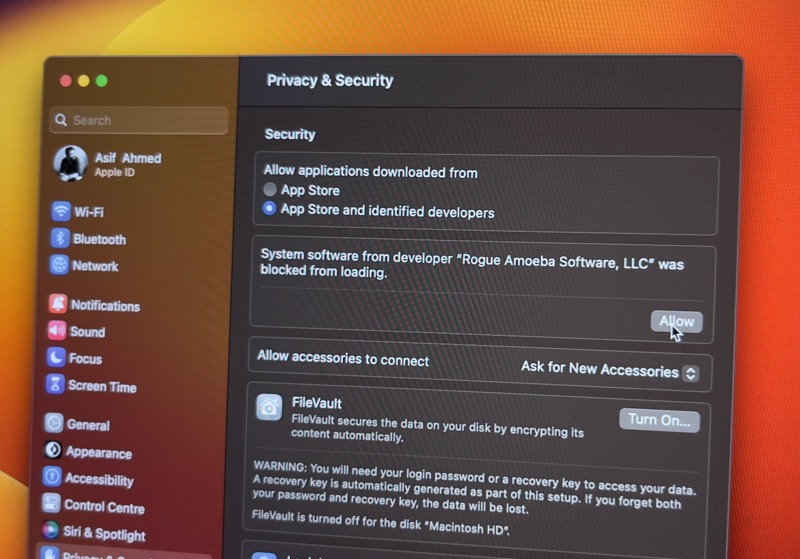
Allow Rogue Amoeba Software LLC as prompted at bottom of window. Then, restart once more.

Now you’ve successfully set up! Now when you enable record system audio, you will be able to record internal audio and use it for many other use cases other than taking screenshots and recording screencast.
