
You may have watched a lot of videos on YouTube where the camera is exactly on the top of the subject, these are mostly unboxing videos or the videos that show you how a specific thing is done, for example, Food recipes. There are a lot of food channels on YouTube that create overhead videos.
The overhead videos are easy to understand as they are recorded from the creator’s point of view, which gives you an easy understanding of how the things are going on.
Now, to create videos like that, a simple tripod is not enough. You will have to either buy an extension leg to mount of the tripod to get that vertical angle or a completely different Rig altogether which will cost a couple of hundred dollars.
And if you are just starting out it is difficult to put that kind of money into something that is kind of experimental.
For those of you who don’t know we also have got a food channel where we put food recipes, and we wanted to make short, crisp overhead videos for the channel, and since it was experimental, we did not want to invest t lot of money into it.
I wanted to create a DIY solution that would not cause a lot of money but at the same time get the job done, and we came up with this,
We actually created it using CPVC Pipes, which are easily available at the local Hardware Store. I’ve already created a video about how to create a selfie stick using CPVC pipe, but this one is pretty awesome, we have shot over 200 recipe videos using just this which is made of CPVC pipes and cost less than $5.
Let me show you how you can do it too if we are looking to create overhead videos for YouTube channel or any other platform.
You can buy CPVC pipes from your local Hardware Store, the standard size of 1 CPVC pipe is around 12 feet, and the Overhead Camera Rig that I created requires 16 feet of CPVC, so we bought two.
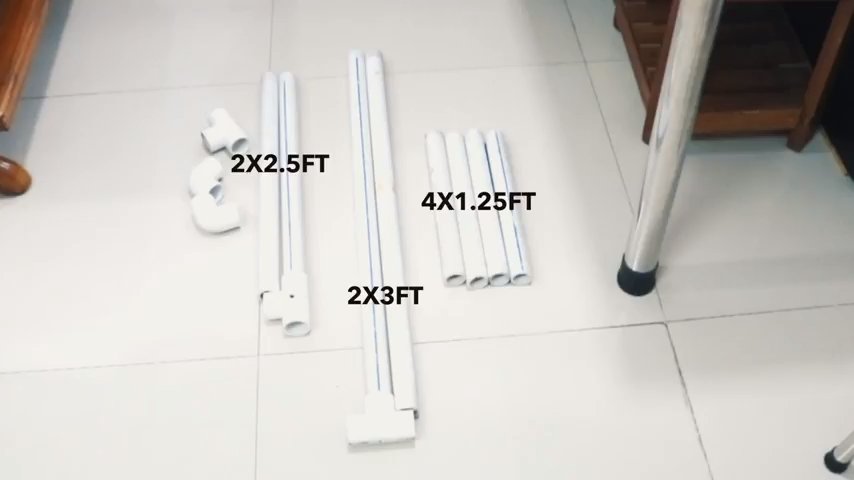
You need to get 8 pieces out of these CVPC pipes, 4 of which would be of the same size which will work as support, 2 will work as legs, and the other two will be joined where the camera will be mounted.
Here are the following measurements for my Overhead Camera Rig.
4 x 1.25ft
2 x 2.50ft
2 x 3.00ft
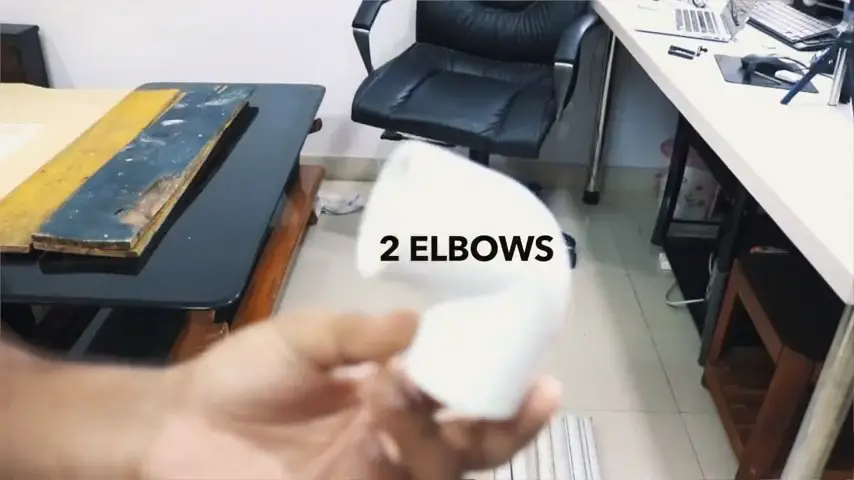
You will also require 2 elbows which look like this,
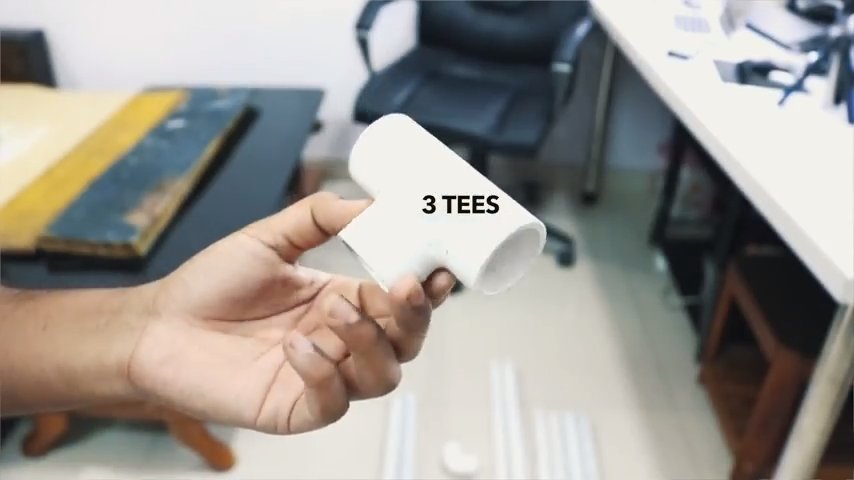
And, 3 Tees, which look like this,
And this is how all can be put together to make sure inexpensive overhead video Rig.
https://www.youtube.com/watch?v=RhSP2L20nbI
You can also go one step further and close the holes of the pipes with End caps, that can also be bought from the hardware store, and you also may paint it with the colour of your choice using Spray paint. I am also planning to paint it black as soon as I overcome my laziness.
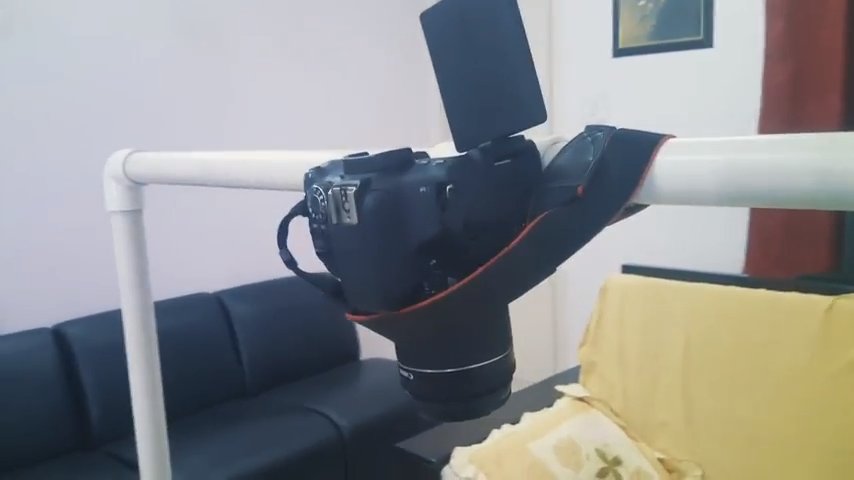
How to mount the Camera to this Rig?
To do that you need to drill a hole into the third Tee if you do not have got a drill machine you can also try it with a screwdriver, but it is going to take a little bit of time.
After you are done with making a whole you can use a quarter inch screw to pass it through this tee and tighten the camera on the other side.
If you can spend some more money you can also buy a cold show mount that can be screwed to the ring and it will make mounting and un-mounting the camera a little easier.
Buy 1/4 Hot Show Camera Mount Adapter from Amazon
So this is how you get your work done without spending a lot of money, one more thing I would like to add as I have not fixed these pieces permanently, which means I can dismantle it anytime and take it with me anywhere I want but I usually don’t take it anywhere.
The choice is yours whether you want to conceal it using some kind of glue or just use it the way I am using.
I hope you like my DIY tutorial to create an Overhead Camera Mount Rig, an inexpensive solution for shooting overhead videos at home.
