
There is a never-ending debate about what kind of setup is the most productive. Is it the laptop that has the option for mobility or is it the desktop that forces you to sit down on your chair and work?
If you opt for laptops, you can definitely get the best of both worlds by using your laptop as a desktop by connecting to an external monitor. This means you don’t always have to use the small screen of your laptop.
I have been using external monitors with my MacBook since 2015 when I had MacBook Air. That was particularly an amazing experience because a 24-inch monitor with full HD resolution gave more screen real estate than what you get on a non-retina MacBook Air.
In 2019, when I switch to MacBook Pro I continued to use it with my 24-inch full HD monitor, and when I needed more screen real estate, I used SwitchRes X to use 1440p (qHD resolution) on it.
I later moved to use I used SwitchRes X to use 1440p (qHD resolution) on it as an external monitor to my MacBook Pro. Which was a nice experience but it used to give me issues.
My MacBook Pro used to get too hot, later found the solution for it. Turns out the Macbook Pro has to do a lot of work running, two monitors, at high resolution.
So, my current solution is to MacBook Pro in Clamshell mode. Apple has now simplified its name and it is now called Closed Display Mode which is self-explanatory.
So, when you close the lid of your MacBook Pro while it is connected to a power source and to an external monitor, it becomes the primary monitor of the Macbook Pro.
Normally, when you are not connected to a power source and are using an external monitor, closing the lid of the laptop would result in making the MacBook go to sleep.
When you use your MacBook Pro in Closed Display Mode it only has to run one big monitor instead of two monitors, which does not put too much load on the computer.
This means the fans on your MacBook Pro will not start making noise even when you are doing casual web browsing by opening multiple Windows on your big monitor to utilize the extra screen real estate.
Things you would require
32-Inch 4K Monitor
If you want to use your MacBook Pro in Clamshell mode or Closed Display Mode, chances are you already have a monitor but if for some reason you do not have I would recommend you go for a 32 inch 4K monitor.
You can only take advantage of the UHD resolution on a monitor if it is 32-inch or is bigger in size because the smaller monitors will make the text on the screen too small to read.
For some people, 28-inch 4K monitor would also get the job done, but as per my experience, a 32-inch monitor is a sweet spot.
If your sole purpose of using a monitor is productivity and you just want to open a bunch of Windows or maybe do video editing, you can use 4k TV like I am using with my setup.
Using smart TVs as a monitor is nothing new, but there are a lot of things you should know before going further. You can check out this article to know more about using smart TV as a monitor.
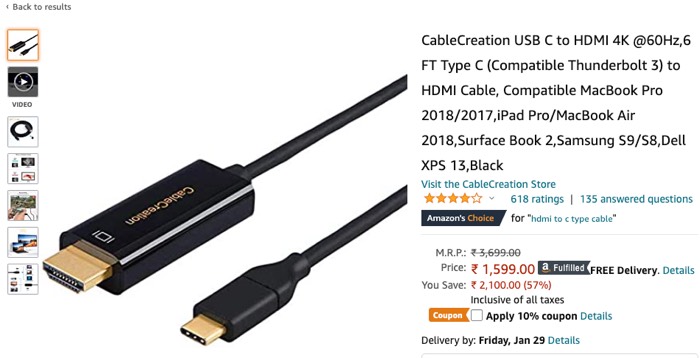
HDMI to Type C cable that supports 4K at 60Hz
You will only enjoy a 4K resolution on a monitor if you are able to output it at 60Hz.
- Your laptop needs to have the support for it
- Your monitor / Smart TV needs to have the support for it and,
- the cable you want to use should also have support for it.
The new generation MacBooks have only type C slots, so if your monitor only has HDMI, you should get an HDMI to Type C cable, where the HDMI and connects to the monitor and the type-C and connects to the MacBook.
Most of the USB type-C dongle is available in the market do not support 4K at 60hz. I have a type C dongle for my MacBook Pro which has got an HDMI, but it only supports 4K@ 30Hz.
If you want to use a full HD or even Quad HD monitor with your MacBook Pro, mostly all the HDMI cables, dongles would support full Hd at 60Hz.
There are only a handful of monitors available that offer a USB type C slot that also delivers power meaning you can use a single cable to output the display of your MacBook Pro along with charging your MacBook Pro at the same time.
For example, this model from LG is a 27-inch monitor (Amazon India link) that is available at a reasonable price and supports power delivery so that you can leave that one cable does it all life.
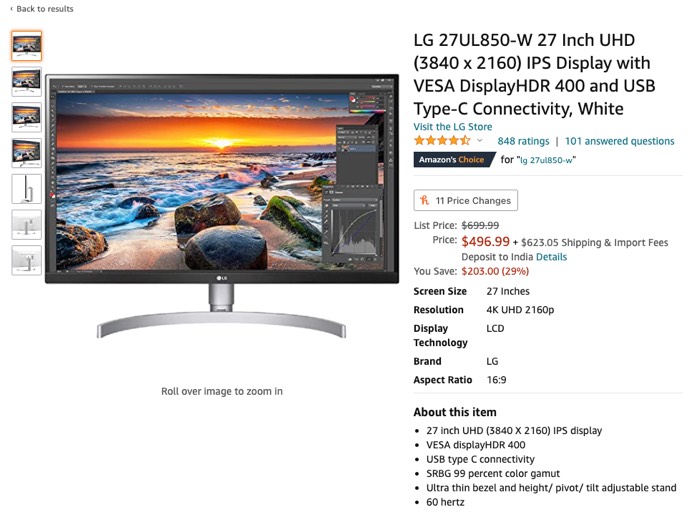
There is also a 32-inch version of the same monitor available but it is a little expensive so I would recommend you go for a smart TV if only your workflow does not require you to have a high refresh rate monitor, you can refer to the smart TV article.
Bluetooth Keyboard and Mouse
Using the Macbook Pro in closed-display means you won’t be able to use the keyboard on it and you will have to buy a separate keyboard.
The best keyboard for MacBook Pro would be the keyboard from Apple because it will give you similar kinds of typing experience.
Apple keyboards are expensive, you can go for alternatives like the Logitech K380 or the LogitechMK470 Keyboard Mouse Combo
The Apple Magic Mouse is the best Mouse available for Mac. 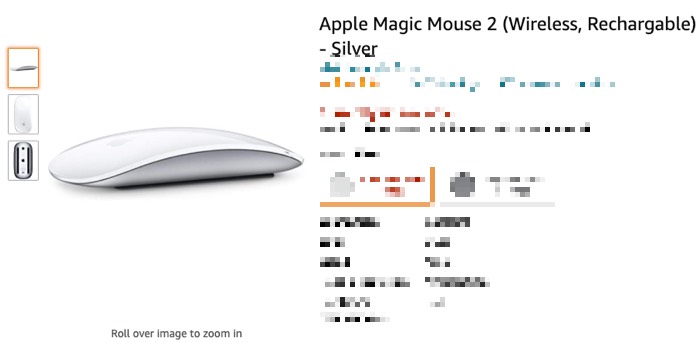
The reason is, it does not have any buttons on it, and you can use the swipe gesture to scroll through pages if you want to have a similar trackpad experience to your MacBook Pro.
All the other Mouse with the scrolling wheel, will not give you the smooth scrolling experience.
Apple Magic Trackpad
The best part about using the Macbook Pro is using the trackpad on it and using different kinds of gestures. It is something that can make you really productive depending on your workflow.
It is a little expensive but if you are looking to opt for the Magic Mouse, you can buy this instead, and club it with any Bluetooth mouse from Logitech.
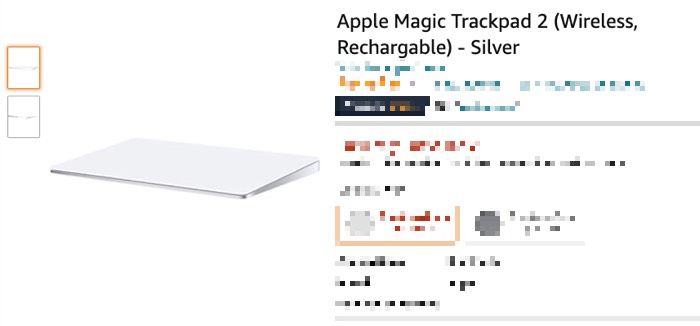
My current setup is the Magic trackpad is on the left side and then I have the Logitech K380 keyboard and then I have the Bluetooth mouse on the Logitech. To be honest I rarely use the mouse because I am pretty efficient in using the trackpad.
Buy from Amazon US | Buy from Amazon India
MacBook Pro Stand
If you want to make your desk a little cleaner and theatre free you can opt for a MacBook Pro stand while it is in closed-display mode.
I am using a generic MacBook Pro stand which costs $20 dollars but there are a bunch of options available on Amazon.
How to turn on and turn off MacBook Pro in clamshell mode
To turn off the Macbook Pro while it is in the Closed Display mode, you can do it normally like you always do. Click on the Apple icon on the top left-hand side and then select shutdown.
A lot of people are confused about how to turn it on since the Macbook Pro has a physical button that you need to press in order to turn it on.
The Old method
A lot of people had this issue, where they had to open the laptop to press the power button.
Some even used to make their MacBook Pro go to sleep and then wake it up the next day when they want to use it.
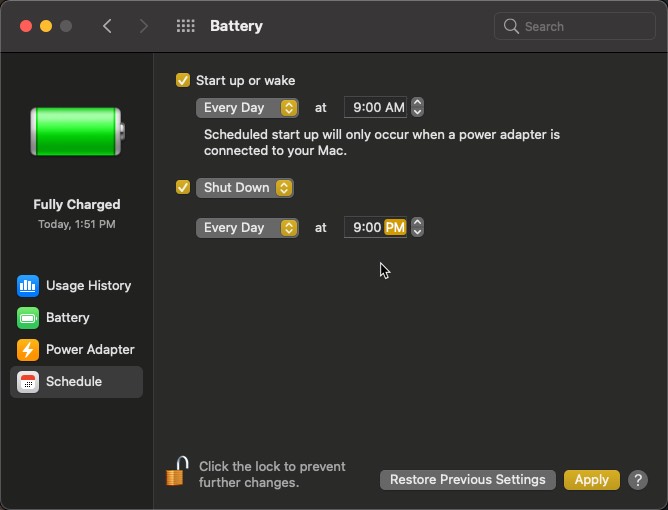
Some used the scheduling feature in Macbook Pro where you can set a time for the Macbook Pro to turn off and turn on. Like, ok if you usually start your day at work at 9 a.m. you can schedule MacBook Pro to turn on at 9 a.m.
The New Method
But, the new closed-display mode identifies when it is connected to the monitor and turns on when you connected to a power source.
So, now you can simply switch on power to the charger connected to the Macbook Pro and it turns on when it detects the power source.
I hope you find this article useful, you can read more Macbook, Productivity, and Office Tips related articles on the blog to make your tech life easy.