
If you didn’t already know how to take screenshots in Windows 10, it’s by pressing the print screen button.
Taking a screenshot using a PrtScr button on Windows has been around for quite some time.
But, the method only works when your PC has booted completely. If you want to take the screenshot of your login screen for the lock screen, the print screen option will not work.
Same is the case with third-party applications like the Snagit app, which will not work when you are on the login screen.
So how do you take the screenshot of Windows 10 login screen?
When you are on the login screen in Windows 10 you might have noticed that your Windows lock screen has an Ease of Access button at the bottom right-hand side
In this is how it looks,
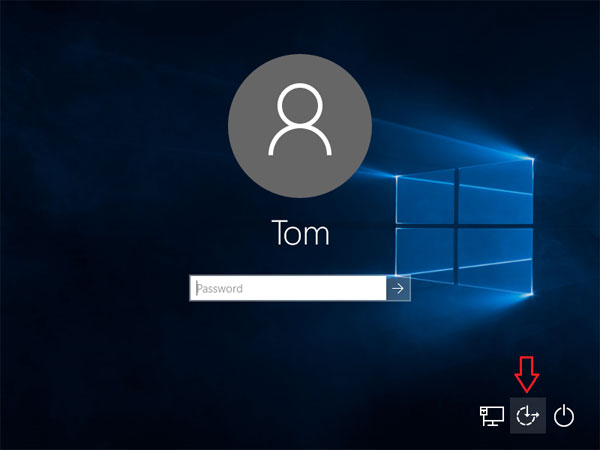
Clicking on the Ease of Access button will open a program called Utilman.exe which gives you access to some programs right on the login screen.
With the help of some simple Registry Editor trick, you can add the snipping tool.
Here is how you can do it,
Open registry editor on your computer by typing ‘rededit‘ in the windows search bar.
Now click on the ‘regedit‘ Run command open the registry editor.
Follow this path to navigate to the specified location
HKEY_LOCAL_MACHINE\SOFTWARE\Microsoft\Windows NT\CurrentVersion\Image File Execution Options
When you click on Image File Execution options it will show a single entry in the right pane. You will need to add a new key.
You can do that from the top menu bar, click on Edit > New > Key
When you click on the key you need to create a new key with the name utilman.exe
When the new key is created, you need to add a new string value and value data by going to the following path: Edit > New > String Value
After creating the new value, rename it to ‘Debugger‘ by right-clicking.
This step will add an option to take the screenshot on the Windows 10 login screen.
Here is what you will need to do
- Click on the Ease of Access button on the lock screen, it will launch the Snipping Tool Utility.
- You won’t be able to directly save the screenshot, but, it will be copied to the Clipboard. So, after login in, you can open Paint app and paste the screenshot using Ctrl + V.
How to take Screenshots in Windows 10 after Logging In
There are various ways to take screenshots in Windows PC. One of the easiest ways is to use the Snipping Tool Utility.
You can simply type snipping tool in the search bar and click on the application. When the application is launched you get several options to take the screenshot of the screen.
You can precisely select the area you want to capture.
Another method is used in the print screen button. Simply pressing the PrtScr button would make the screenshot copy in the clipboard, and then you can open Paint app and paste the screenshot.
Apart from these two native solutions, you can use third-party apps. The best and most advanced one is Snagit app. It is a paid utility but is quite useful in creating screenshots for tutorials or eBooks.