
When I searched for how to take a screenshot on Windows 10, Google returned About 91,70,00,000 results in 0.68 seconds. Ours is one of them.
I read a couple of them, but none of them showed the easiest way to take screenshots on Windows 10 or any other Windows version.
So in this article, we will be talking about the easiest way to take a screenshot on Windows 10 for any other Windows version.
The easiest way to take a screenshot
Some people believe that the native method of pressing the PrtScr Is the easiest way to take a screenshot. But I think there is an even better way.
The native method might be the fastest way to take a screenshot, but you also have to process it.
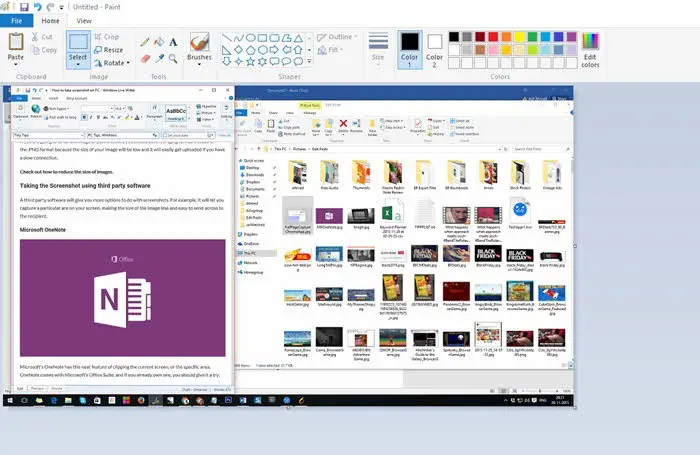
When you press the PrtScr , the screenshot is saved in the clipboard, and you have to open another program to take the screenshot, which is mostly the paint app.
But even if you paste the screenshot in the paint, you have limited to make edits to the screenshot. So the overall process is a little time consuming.
At least in comparison to the method final to share with you.
I’ll be honest here, you will have to take some effort before you can take screenshots effortlessly. But I guarantee you this will be the best way to take screenshots on your computer.
You need to install an app called Snagit
The app is pretty amazing and I have already written about it a few times on the blog. It is the tool I have been using for the last decade. It has been improved over time, and a lot of features have been added to it.
The best part is, it is not just an app to take screenshots but also to make edits to it. So it’s the best app if you want to create a tutorial where you need screenshots for easy visual.
But the primary function of SnagIt is to take screenshots.
You will have an icon appearing in the Quick Launch area of Windows. You can click on it using your mouse and then click to take the screenshot.
The app also offers you the option of having a shortcut button floating across your screen, making it a one-click affair. And if you are into keyboard shortcuts, you can use that for taking screenshots.
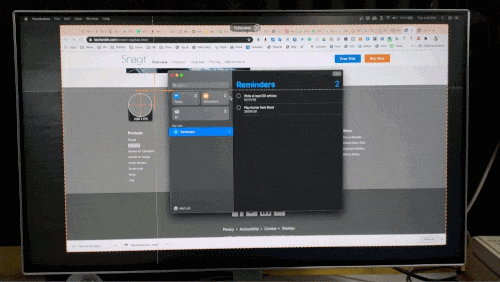
The Snagit app’s best part is that it allows you to take a screenshot of precisely any part of the screen. It automatically highlights an active window appearing on your screen, and you can choose either the whole screen or a part of it.
Making edits to the screenshot
Snagit has a built-in image editor as well, along with some fantastic features that can enhance your screenshots. When you take a screenshot, it automatically opens with it in the Snagit editor.
You can then quickly make changes to the screenshot to make it look even more appealing or highlight the information you want to share.
For example, you can draw different figures, arrows, put numbers, and even blur out areas containing sensitive or unwanted information.
So if we consider the entire process of grabbing a screenshot and then processing it to make it ready to be shared, using a third-party app like Snagit is the easiest way.
And since this app is so fantastic and makes your job so easy, you can buy a premium app for $60. If you are not sure whether this one is for you or not, it also offers 30 days free trial. So, you can check it for yourself.
