
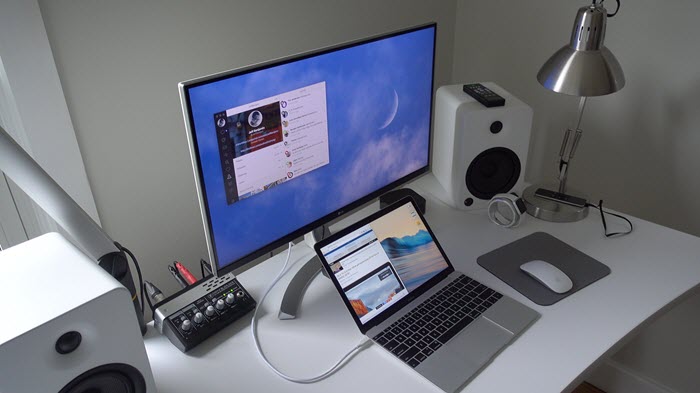
If you own a MacBook but work at a desk, you’re probably leaving a lot of productivity on the table by not using it in desktop mode. A monitor, keyboard, and mouse turn your laptop into a full dual-display or clamshell workstation — and the setup takes less than 10 minutes. Here’s exactly how to do it.
Short Answer: Connect a USB-C or HDMI monitor, plug in an external keyboard and mouse via USB or Bluetooth, and your MacBook automatically extends your desktop. For clamshell mode (lid closed), you’ll need a powered USB-C hub and an external power source.
What You’ll Need
- An external monitor with HDMI, DisplayPort, or USB-C input
- The right cable/adapter for your MacBook (most modern Macs use USB-C/Thunderbolt)
- An external keyboard and mouse (Bluetooth or USB)
- Your MacBook’s power adapter (required for clamshell mode)
USB-C Hub Recommendation:
If you need HDMI out and USB-A ports simultaneously, a USB-C hub or dock handles it all in one cable. Anker’s 7-in-1 and CalDigit TS4 are top picks depending on your budget.
Step 1: Connect the External Monitor
Plug your monitor into the MacBook using the appropriate cable. USB-C to HDMI adapters are the most common for modern Macs. When connected, your Mac automatically detects the display and mirrors or extends the desktop.
📸 SCREENSHOT NEEDED: MacBook connected to external monitor showing the Thunderbolt/USB-C port connection and monitor turning on
Step 2: Configure Your Display Arrangement
Go to System Settings → Displays. You’ll see both displays represented as rectangles. Drag them to match their physical arrangement on your desk (monitor to the left or right of the MacBook). This determines how your cursor moves between screens.
To make the external monitor your primary display (the one with the menu bar and Dock), click and drag the white bar — the menu bar indicator — from the MacBook display to the external monitor in the arrangement view.
📸 SCREENSHOT NEEDED: macOS System Settings → Displays showing two display rectangles with the white menu bar indicator being dragged to the external monitor
Step 3: Set Up Clamshell Mode (Lid Closed)
To use only the external monitor with the MacBook lid closed:
- Connect the external monitor, keyboard, and mouse
- Plug in the MacBook’s power adapter (clamshell mode requires power to prevent overheating)
- Close the MacBook lid — the external monitor becomes the sole display
Your Mac won’t sleep when the lid is closed if it’s connected to power and an external display is active.
Warning: Running in clamshell mode without power connected causes the Mac to sleep when you close the lid. Always connect the power adapter first.
Step 4: Connect External Keyboard and Mouse
Bluetooth: Go to System Settings → Bluetooth and pair your keyboard and mouse. Apple’s Magic Keyboard and Magic Mouse connect automatically if they’re on the same Apple ID.
USB: Plug in via USB-A (needs adapter on modern Macs) or directly via USB-C. No setup required — they work immediately.
Step 5: Adjust Display Resolution and Scaling
In System Settings → Displays, select the external monitor and click More Space under the resolution options to fit more content on screen, or choose a specific resolution. For retina-quality text on a 4K external monitor, enable HiDPI mode by selecting a scaled resolution that’s half the native resolution (e.g., 1920×1080 on a 4K display).
Quick checklist:
- ✅ Use USB-C to HDMI cable or adapter to connect the monitor
- ✅ Drag the menu bar indicator in Display settings to set primary display
- ✅ Always plug in power before closing lid for clamshell mode
- ✅ Set display arrangement to match physical desk layout
- ✅ Enable HiDPI for sharp text on 4K monitors
- ✅ Consider a USB-C hub/dock if you need multiple connections
Frequently Asked Questions
Can I use two external monitors with a MacBook?
MacBook Pro models from 2023+ (M3 Pro/Max) support two external displays even with lid open. Older M1 and M2 MacBook Pros only officially support one external display. There are workarounds using DisplayLink adapters but they require additional software.
Does clamshell mode damage the MacBook?
No — Apple designs MacBooks to run in clamshell mode. The fans are in the body and exhaust through the hinge area. Temperatures stay normal. Just don’t block the keyboard area vents when the lid is closed.
Why won’t my MacBook wake from sleep in clamshell mode?
Press a key on the external keyboard or click the external mouse — not the MacBook’s keyboard — to wake it. The built-in keyboard and trackpad are disabled in clamshell mode.
Can I use a Windows keyboard with a Mac?
Yes. Windows keyboards work on Mac via USB or Bluetooth. The Windows key functions as Command, and Alt functions as Option. You can remap modifier keys in System Settings → Keyboard → Keyboard Shortcuts → Modifier Keys.
More Mac Guides ↗Back to Techtippr
Using your MacBook as a desktop is one of the best investments in productivity you can make — a larger screen and a proper keyboard/mouse setup reduces fatigue significantly on long work days. The setup is straightforward and reversible. If you travel frequently, an ultrawide or 4K monitor at your desk combined with clamshell mode gives you the best of both worlds.