How to Save Mobile Data While Browsing on Your Mobile

Smartphones have improved our mobile web experience so much over the years. We can consume high-quality content on the go, but that requires a lot of data to load these fully loaded web pages, even on mobile phones.

Though Internet access has increased a lot in last few years, we still have expensive data plans, and they cost a bomb in few countries.

Here are few ways you can minimize the data usage on your phone without sacrificing much on the quality.

Use Opera Max

Opera Max

Opera has always been about offering innovative features, and it’s data compression feature has been there since ages. That is one of the reasons Opera Mobile is the second most popular browser in Countries like India¹.

Opera has now launched a new data management app called Opera Max, which can cut your data usage to half.

How does it work

When Opera Max is installed and enabled on your Android Phone, you can then consume content from any app, the data will be compressed in the background without you having to worry about the data.

OperaMax_Usage

Opera Max helps you watch videos without buffering by compressing it without loss in the quality.

Not just the YouTube, but any type of media (Audio, Video or Image) gets compressed almost by 50%. So, if you browse Instagram or Facebook, or may even have the Auto Play videos enabled in Facebook, you won’t get shocked after looking at your data usage.

➤  Install Opera Max from Play Store

Turn off Auto Updates & Auto Downloads

Disable_Download_on_MobileData

There are several services in Android that are just looking an active Internet connection and start their operations as soon as they get one. Better would be to turn it off.

[easy-tweet tweet=”You can save 50% of your mobile data using this simple tip” user=”Techtippr”]

For example, You can disable the auto download of images in WhatsApp when you are on a mobile connection. This will save a lot of data if you are in a lot of groups who solve business it to forward funny MEMES

These MEMES might be very less in size (less than 50kb) but few dozen of them will add up to a healthy number. So you might want to avoid.

Look for similar options in different apps and turn them off.

If you are enabling Hotspot for others

DisbleDownload_on_Wifi

Make sure you (ask others who use your Hotspot) turn off Auto Updates of Apps in the Play Store and Auto download Media files (Video, Audio & Images) in WhatsApp because other devices will treat your Data Connection as Wi-Fi and can suck all your data quickly.

How to Stop the Videos from Playing Automatically in Facebook

0

facebook auto play

Facebook has always been making changes to their website to keep its users engaged and say inside. And the recent attempt of doing this is to make Native videos play automatically when you scroll through yours newsfeed. (Native videos means the videos that are being directly uploaded to the Facebook), These videos play automatically without any sound (you can watch it with audio when you click on it).

Though the videos do not load completely but the fact that they auto play, will surely increase your data usage, and that’s pretty costly in some countries.

So you might want to turn the ‘Auto Play’ off so that you can save some bandwidth, to pay the other utility bills.

Turn Off the Video Auto Play

Facebook Auto PlayYou need to go to the Video tab found under the settings of your account. Click here if you are logged in), Change it to ‘Off’ from ‘Default’ in the second option.

If you want to turn off the  Video ‘Auto Play’ on the mobile apps. Info is below ➜

To adjust the auto-play settings on your Android phone or tablet:

  • Open the Facebook app
  • Tap ☰
  • Scroll down and tap App Settings
  • Tap Video Auto-play
  • Choose an option

To adjust the auto-play settings on your iPhone or iPad:

  • Open the Facebook app
  • Tap ☰
  • Scroll down and tap Settings
  • Tap Videos > Autoplay
  • Choose an option

7 Apps to Learn a Foreign Language Faster

One of the best investments is a foreign language, particularly if you live in a multicultural setup, travel often, learning foreign language grammar or just for the sake of challenging yourself. Sometimes your career might require foreign language proficiency.

Rather than use online translation sources all the time, including apps on your Smartphone that might not work wherever you are, there are a number of apps you can use to learn a foreign language and faster while at it.

Duolingo

DuoLingo

You might not have all the time to learn a foreign language and progressing at your own time is important. This app lets you use its wonderful user interface that is easy to use and bright. After a few simple phrases at the beginning, move towards a little complex grammar. The important thing is the help you receive along the way on every step you make; efforts are praised and mistakes pointed out in an app available for Android, iOS and online users.

App Store | Play Store

Babbel

Babbel

This app lets you learn a foreign language through the completion of phrases and repeating them. You also have lots of diverse languages applications to choose from, such as Spanish, German, Portuguese, Italian, Dutch and French, among others. The app allows you to benchmark and monitor your progress through a unique custom goal arrangement.

App Store | Play Store

Memrise

Memrise

Memrise takes a unique approach that begins rather slowly to learn a foreign language. You’re guided across the language’s alphabet until you get it through straightforward visual aids. Remembering every lesson will be so easy. The app, available both for Android and iOS users, also comes with a quality support network that even sends follow-up emails to make it easy to learn and remember the lessons.

App Store | Play Store

Busuu

Busuu

A unique language learning app with a busy user community behind it, you also get a chance to learn and even write a dozen languages. You are also provided access to a native speaker community to not only speak with but also listen to them to comprehend and internalise the foreign language better. After a lesson you will engage in recorded conversations, listen and give a response.

App Store | Play Store

[easy-tweet tweet=”Learn Foreign Languages with the help of these awesome apps http://tippr.in/1MFU8qg ” user=”Techtippr” hashtags=”Learning”]

HelloTalk_LearnLanguageFast

This app is available for Android and iOS users. You only need the entry level of the language you want to learn and find a person to speak with. As you type in the language you are fluent in or your native tongue, the stranger also types his/hers. You can then hold and tap to either pronounce or translate a phrase or sentence.

App Store | App Store

MindSnacks

MindStacks]

What about learning a foreign language while being entertained in the easiest games to play? That’s what this app does. The over 10 different lessons are made in the form of easy to play exciting and fun games. Colourful puzzles are arranged as per your proficiency level and you have to solve them.

App Store

How To Pronounce (Web Only)

HTP

This web app helps you pronounce better. All you need is a sentence and word and after typing it, you can know the pronunciation in the language of your choice. While the app doesn’t go beyond pronunciation into learning about phrases, you can use it to complement other foreign language learning apps.

How to Charge Your Smartphone Faster? A Guide to Fast Charging

0

Updated in August 2021

6 years after writing this, adding update information to this article.

Which charging Technology has come a long way in the last few years. We now have quick charge 4.0, charges that can charge smartphone batteries in less than 1 hour.

It could have been less than 1 hour but, the batteries of the smartphone have also increased.

We have reached to a point where we literally have to carry just one charger for all our devices. Check out this article that lists a few chargers you can purchase that will charge everything.


Smartphones are becoming an important part of our lives, and they will continue to interrupt be more important. With us building more dependence on our phones, we simply cannot afford our smartphones to go off or die out of battery.

Thanks for the phones that provide bigger batteries, that can fill enough juice to power our devices for a longer period of time. But, these big batteries take forever to charge, okay, not forever, but they still take a lot of time.

Before we dig deeper into the topic, let’s point out some basic tips you should remember that can affect the time taken to charge your phone.

Some Basic Tips on Charging Your Phone Faster

Do not use your phone while it is charging, when you are using your phone while it is charging you are consuming more power and he slows down the charging process.
Your phone gets heated up a lot when you do some resource-intensive tasks while it is charging, and this affects badly on the life of the battery.

Phones, when turned off, charge faster. in case if you haven’t noticed, the phones charge faster when they are switched off because they do not consume any power at all. If you can’t do that, putting your phone on Airplane mode also helps a bit.

Always use the original USB cable, these cables carry charge from a charger to your phone, the quality ones have less leakage of the charge in the way. And a cheaper one can waste a lot of it, the longer the cable, the more leakage it has.

If you lose your original USB cable, do not buy those cheaper ones just because they look the same. For a price like $4-5, you can get the original ones so there is really no need of the cheaper ones here.

There is more to it, which we will talk about in little detail, each getting a sub-heading of their own.

Dependency on the Power Outlet

Now that we’ve talked about the basic stuff, like, not using the phone and always using the original USB cable. it doesn’t mean that an Original USB cable will give your phone the best charge possible.

For example, if you plug it into a USB port of your PC or Laptop, you are not going to get the optimal charge, because the USB port deliver less power than Wall chargers.

Even in USB, there are variations of the power supply, for example, USB 1.0 and USB 2.0 is capable of delivering up to 0.5A. The USB 3.0 gives just the double, up to 1A.

Wall chargers, on the other hand, offer far more power than the USB ports on Computers. There are fast chargers which can give a charge of as much as 2.4A.

Usually, the mobile phone manufacturers have set a limit as to how much of power the phone can take, this is actually meant to protect your phones from getting damaged from high power.

Thanks to the fast charging technologies like Quick Charge by Qualcomm, we can charge our smarthpones faster in a controlled manner.

Introduction to Quick Charge

Quick Charge is a technology created by Qualcomm for devices that are powered by the Qualcomm Snapdragon Processors.

The technology lets a mobile phone’s battery fill more charge in less time when it’s empty, making it charge faster.

In laboratory tests using a 3300mAh battery1, a Quick Charge 2.0 enabled device went from 0% to 60% charge in 30 minutes, while a device without Quick Charge 2.0 using a conventional (5 volt, 1 amp) charger achieved just a 12% gain in the same 30 minutes. A device with Quick Charge 1.0 managed a 30% charge in that time period.

Qualcomm has introduced Quick Charge 3.0, which provides even more fast charging, it claims that Quick Charge 3.0 can charge a phone (with 3300mAh battery) from 0 to 80% in 35 Minutes.

Recommended Third-Party Chargers

Usually, you will get a fast charger with your phone if it supports fast charging, but there are many third-party chargers you can buy to get faster charging done or merely as a replacement for the original charger you get with your phone. You might be able to get more charge pushed to your phone.

UltraPro Link charger I bought delivers 2.4A of power which is far more than what most mobile phones can take. Which brings us to another point that the phone also has to support fast charging.

Qualcomm recommends few chargers that support Quick Charge and has been tested also. These are, Motorola Turbo Charger,  Tronsmart Quick Charge 2.0

[su_youtube_advanced url=”https://www.youtube.com/watch?v=rk9f_wfFeNE” width=”640″ height=”360″ autohide=”yes” showinfo=”no” rel=”no”]

Fast Charging Differs from Phone to Phone

As of now, there are only the Flagship phones from Mobile manufacturing companies support the ‘Quick Charge’. But more and more phones are getting this very important feature.

To charge your phone faster, you don’t necessarily need to have this Quick Charge feature (though it will be helpful). it all depends on the limit your phone manufacturer has set on the phone, and it may take more charge than the shipped charger supplies to it.

Your phone, without the ‘Quick Charge’ support, might be able to get more charge than its charger supplies to it. So, you might want to try out chargers that deliver 2A or more charges.

Potential Downsides of Fast Charging

While everyone would love to charge their phones faster, there are few things you should know that come as a side-effect of changing your phones faster, then make an educated decision whether you want fast charging or not.

One of the things is, it affects the battery, fast charging produces a lot of heat and heat is not good for the battery.

*Quick Charge, minimizes the chances of decreasing the lifespan of the battery.

Another thing is that most of us have this habit of putting our phones on charge at night time and find them fully charged by the morning. With fast charger charging your phones much faster, you will be keeping your phone on charge for long even after it is fully charged.

*Though the smartphones are smart enough to understand it has been charged fully and cut the power source to keep the battery from overcharging, but it still doesn’t feel right to leave your phone on charge.

In any case, when the batteries are given more charge they can handle, the batteries get swollen, or may even explode.

So, it is recommended to use only the chargers that have been tested, use original USB cables and see if your phone really supports fast charging.

You May Consider Keeping a Power Bank

There are other ways to keep your phones filled with juice they require to run your life.

Buy Power Banks, they are quite helpful when you are always on the move, you can charge your phone even when you don’t get a power outlet available.

Some Power banks are designed as phone cases, which makes it extremely convenient to carry and look nice as well.

If you are looking for more reasonable power bank, you can buy power banks from Xiaomi or OnePlus.

WhatsApp Web has a Security Flaw which Lets A Hacker Hijack Any Computer

0

If you are a WhatsApp Web user then you should be aware of this security flaw in the WhatsApp web that will make your PC venerable to attacks by Hackers. Let us talk about it in detail.

WhatsApp has recently crossed over 900 Million monthly active users, our of which, over 200 Million use WhatsApp Web to send and receive messages from friends and family.  But is has a flaw that can let users install viruses and malware using a few line of codes that can be sent inside the vCard (A feature that is used to exchange contact details).

WhatsApp web users can currently send and receive text, image, audio, location and contact (vCard).

WhatsApp Web Security FlawHackers can hide the codes inside the vCard and when it is opened on a PC, it can get activated letting Hackers install anything to a PC remotely.

Opening the vCard on Mobile won’t affect as the architecture doesn’t support installation from a .BAT file.

Here is how it works

ALSO READ: How the Hackers Can Hack Gmail’s Two Factor Authentication

In order to attack a person, the Hackers only need the phone number that is associated with WhatsApp, and the user needs to be using WhatsApp Web.

The Hackers sends a vCard which looks just like any other vCard, containing a phone number,  one would share.

When the user opens the vCard, the .BAT file gets activated and runs in the background, making the PC available to the Hacker for exploitation. Once the Hacker gets access to the PC, he can do following things.

The Hacker takes control of the Computer system and asks for a Ransom to leave the system.

[easy-tweet tweet=”Do you use WhatsApp for Web? Your PC might be at Risk http://tippr.in/1hZPc1K” user=”Techtippr”]

Monitor the user’s activity on the Computer that leaves to many more hacks like Passwords of Email and Back accounts.

This vulnerability was found by Oded Vanunu from Check Point Security Research who explained in a blog post how it works.

WhatsApp has been notified of the issue and they have rolled out an update to fix the issue, so if you are a WhatsApp Web user who uses a version before V0.1.4481, we strongly advice you do update your app.

ALSO READ: How to Remove Adware and Spyware that Hijack Your Browser

How to Remove Adware and Spyware that Hijack Your Browser

When you turn to the Internet, looking for something, the last thing you want to see is, Ads popping up in your Facebook.

It’s true that Advertisement makes it possible for webmasters and blogger to publish the information for free. But then there are publishers use shady Ad Networks that run ads for spyware and third party browser Add-Ons that will make your browsing life hell.

Most of these publishers are banned by Legit Ad Networks like AdSense because they all host content that are pirated/stolen from official websites, it could be songs, movies or software for which you will have to pay if you decide to download from the official websites.

Most of the people don’t want to pay and these websites make it easy for them to download, little do the users know that they would end up paying more than what the actual content would have cost. By ‘cost’ I do not mean money.

This is how any download page looks on a website that offers downloads. Pretty misleading isn’t it?

misleading downloads

There are many download buttons on the page, but only one will lead you to the link with the file you want to download, all others will download other things. The above page is from a website that offers downloads of Free software or the trial versions of them.

So, image how the pages with pirate content would look, if a person is not too familiar with this Internet and Computer thing, he will end up download something else that will inject more aggressive ads on the pages you would visit.

[easy-tweet tweet=”Is Your Browser Hijacked by Third Party Adware? Here is how to fix it” user=”Techtippr”]

The ads would look as if the Publishers has put them on the website, but in reality, it’s the  Adware you download the other day which is not putting ads all over your browser.

There are different types of Adware you need to be aware of, these are.

➜ Third Party Browser Toolbars

➜ Third Party Browser Extensions/Add-ons

➜ Spyware install as a normal software in your PC

So, when you see pages like these, where even a normal website would look like this, these are the potential places you should look for the culprit. We will discuss each of them below in detail.

Ads-by-Max-AdBlock
Image Credit

How to remove Third Party Toolbars or Add-ons from Browser

Different browser ac differently, like in Google Chrome, it is extensions where Add-ons are placed when you add them (deliberately or otherwise).

You can go to More tools- Extensions and  where you can view all the extensions added, find the unusual ones that seem the culprit, if you are not sure then remove all one by one (you can always add them from the Chrome Website)

Chrome ExtensionsYou can also look for the any suspicious addition to the Search engine in Google Chrome. (Open Settings in Google Chrome) Most of the spyware hijack the search engine making you use another search engine when you use the address bar to make a search (by default its Google.com)

Internet Explorer Add-ons

Same goes for the Internet Explorer though we highly recommend you to switch to Google Chrome or Mozilla Firefox as Microsoft itself has been moving their focus and attention to a newer Browser called Microsoft Edge.

How to Remove Spyware from your PC

If you still find those ads after removing all the suspicions elements from your browser then your next step should be to inspect all the apps/software installed on your PC. You can do so by going to the Programs and Features section in Control Panel where you can see all the programs installed on your PC.

Copy paste this in File Explorer Control Panel\All Control Panel Items\Programs and Features

RemoveAdd Programs Microsoft

Look for the suspicious one, the one that was not there last time you check, or it has no icon or maybe very less in size (few MBs).

If you are still not unsure, just pick the names of the ones you do not recognize and Google them (you may use your Mobile phone for search) Google will let you about that, if it’s the culprit, will find pages that talk about their experience. Remove it.

Reset your browsers and restart your PC, try browsing few pages. The problem should get solved by now.

Use the comment form below to discuss your issues, regarding PCs hijacked by spyware and Add-ons

Not Just Windows 10, Windows 7 and 8 are Also Tracking You Now, Here is How to Stop Them

In’s been just over a month since Windows 10 has been launched and it’s already been installl on millions of PCs around the world.

But few people noticed (and were not happy with it too) that Microsoft has tools inside the Windows 10 that is trackign the activity of users in the name of making their computing experience better, however in reality, it will benefit Microsoft in targetting users to promote their (and their partner’s products) to the users.

And that is the point that is stopping them from installing Windows 10 to their devices.

But now, it turns out that Windows 10 is not the only OS that is tracking the user’s activities. Other OS like Windows 7 and 8 have got updates that track the users activities.

Updates in question are →

3068708 → Update for customer experience and diagnostic telemetry

3022345 → Update for customer experience and diagnostic telemetry (This update has been replaced by the 3068708 update)

3075249 → Update that adds telemetry points to consent.exe in Windows 8.1 and Windows 7

3080149 → Update for customer experience and diagnostic telemetry.

Sounds scary? it isn’t actually, everyone from Google to Facebook to Yahoo tracks you to understand you better and show you the ads you might actually be interested in, but then again, it’s totally your choice whether or not they should be allowed to target you and you should definitely be given a choice no matter what.

How to stop Windows 7 and 8 from Tracking you

The best thing would be to avoice these updates and not install them at all, as you already know the updates in question, you can choose not to install them.

Uninstall Updates

If you have already installed them, you can still uninstall them manually by going to the Windows Update section from Control Panel and choose these updates to remove by right clicking on each of them one by one.

Control Panel ➤ Programs ➤ Programs and Featurs ➤ Installed Updates 

If is possible that the update may get downloaded and installed again if you have chosen Automatic Updates to the Update settings, so you need to block these updates from appearing again.

You can block the updates after unstalling them, loacte the updates in the list of available updates and hide the updates by rightcliking on it and selecting ‘hide update’

How to Set Different Scroll Preference for Mouse and Trackpad in Mac

Working on the Mac OS has been a refreshing experience for me after using only Windows for years, Chromebooks helped a lot to rely less on the native apps.

I recently bought a Macbook Air that I used as my travel work machine, it’s very lightweight to carry around and gives me enough battery power that I can forget about carrying the charger when I am taking my Macbook to the cafe for longer writing sessions.

We all know how productive we become when we use a Mouse instead of the touchpad, I mean, writing is okay, but when you have to work in different windows and have to do a lit of editing or formatting then a mouse really helps.

But using a Mouse on Mac seems a bit odd, why? I mean it is because of the way apple wants us to use it. the Mouse works just the opposite of what we are used to on Windows or on any other OS.

Scroll Preference

Apple calls it ‘Natural scroll’ which works just like a touchscreen, where, when you slide your fingers upwards, the screen also goes up, swipe down and the screen goes down, but when you connect a Mouse to your Mac, this behaviour is just odd.

And when you uncheck the ‘natural scroll’ the mouse start working the way we want but then the touchpad is working odd. And there is no way to set different preferences for mouse and touchpad.

Scroll Preferences

Even though Apple has given separate check boxes for enabling ‘natural scroll’ in both Touchpad and Mouse preferences, but they both are linked to each others, which means if you uncheck it for the Mouse, it also gets unchecked for the Touchpad as well.

I use different machines for different purpose, and even when I forced myself for using the ‘natural scroll’ for the mouse, it creates problems when I was using my Windows Desktop for work.

I searched for a solution and found that there are many others who face the same issue as mine. I was surprised to find forum posts dated 2011, which means Apple still hasn’t fixed this, maybe they do not think of it as a problem which should be addressed, and if they haven’t addressed it in 5 years, I don’t hope they will come up with it in near future.

Here is a comment on one of the forum posts that I like so much that I am quoting it in this article –

I don’t want to change a decades-old habit with the mouse, just because Apple changed their idea of how a trackpad should work. I embrace the trackpad change because it makes sense to anyone who uses an iPhone or iPad (and I use both) but I’m not willing to rewire my brain’s way of using the mouse.)

The ‘natural scroll’ feels natural on the touchpad, but the Mouse scroll has to be reverse it is how it has worked. Users should be given a choice, especially in a world of multiple platforms

Thankfully, there is an app to fix this issue.

srshot

Scroll Reverser is the app that will let you set an independent scrolling preference for the Mouse.

Download and Install Scroll Reverser and check the ‘Reserve Scrolling’, ‘Reverse Vertical’, and ‘Reverse Mouse’ options and you are good to go. Also make sure you set it to run as the system starts to let it run in the background.

Let’s hope that Apple will release this and will put an option to select your preference for the mouse independently if not reverse scroll it by default.

How to Post GIF Animations to Facebook That Play in the Newsfeed

0

GIF Animations are getting popular day by day, we are talking about the 3-5 second soundless videos playing in the loop, mostly showing a reaction which many of us can relate to. They are perfect to express yourself online. They are Emoticons 2.0. And finally they are on Facebook.

I don’t know why it took so long Facebook to embrace the power of GIFs, but at least they are here, you can now post GIFs on Facebook so that they start playing inside the Newsfeed of your Friends, just like it does on Google Plus or Twitter.

But it is still tricky to get them to work. You cannot simply upload a GIF like you post other Images, and they start playing in the newsfeed. They will not.

Posting GIF on Facebook

To make them play inside the newsfeed, you need to host them on any other websites, it could be your own blog or other social networking sites like Google Plus or Tumblr where the GIF Animations work.

All you have to do is, take the direct URL of the GIF and post it on your Facebook. You can remove the link after it loads and then post it.

PostingGIF to FB

Try it out

You can try it yourself to see it in action, right-click on the GIF animation below and copy the image URL, then post on your Facebook timeline.

ShareGIFonFB
Copy this link

You can create your own GIFs as well, don’t worry we have a complete guide for you. Check it out.

Useful PC & Internet Tips that will make you more productive

0

The tech is touh to understant, and at the same time, it makes life easy. You only need to know how to use it to ease your work. Make it work in favoure of you and save time to do things you love doing. Here are few uncommon PC and Internet Tips that will make you a better person [at tech].

1. CTRL + Y

Undo an Undo

Let’s start with the easiest one, but something that will save you huge time. We all know and use CTRL+Z, but sometimes we mistakenly undo things we don’t indent to, CTRL+Y come handy.

2. See Saved Passwords in Google Chrome

Show Saved Psssword

The ‘Save Password’ option in Google Chrome is pretty awesome, but the most we use it the most have have stopped remembering our passwords. In my case, I remember only a few. This methods comes handy if you need a password that is saved in Google Chrome.

Right click on the password area and click on the ‘Inspect element’ (last on the list)and find

<input type=”password” class=”inputtext” name=”pass” id=”pass” tabindex=”2″>

Type ‘text’ in place of the ‘password’ and hit Enter key. You will be able to see th saved password in the password field.

3. Use Chrome Tabs as a Notepad

Browser Notepad

All you have to do is, type data:text/html, <html contenteditable> in the address bar and hit Enter. You will be able to write anything, comes in handy to write something down. You can bookmark it on the bookmark bar so that it’s just one click away.

*Do remember that your notes won’t get saved. 

4. Use Google as a Timer 
Google Timer

Type Timer in the Address bar of Google Chrome and you will be able to set a timer right on the search page of Google. Very useful for things like taking a break after 15 minutes or call someone.

5. Learn about your nearby Locations using WikipediaWikipedia_nearby

Read articles on Wikipedia about nearby your locations by typing https://en.wikipedia.org/wiki/Special:Nearby on your phone.

6. Activate God Mode in Windows

GodMode

[easy-tweet tweet=”Learn How to Active God Mode in Windows 10 and More other time saving PC tips” user=”techtippr” hashtags=”#PCTips”]

Nothing religious but it’s a way to access to the hidden and useful features of Windows OS. as Windows 10 is finally released, this should be helpful.

Righ click and create a new folder at the place where you want the Icon to appear (I would recommend to place it on the desktop). Rename it to this ⤦

GodMode.{ED7BA470-8E54-465E-825C-99712043E01C}

The folder icon will turn into a different looking icon and you can click on it to get over 260+ functions to perform. Many of them are not available otherwise. It’s super useful and time efficient as everything can be done from one place.


We will keep adding more unique tips on this page so make sure you either [su_tooltip style=”dark” position=”north” content=”To bookmark this page, press the Ctrl (PCs) or Command (Macs) and ‘D’ keys on your keyboard”]Bookmark this page [/su_tooltip] or like us on Facebook to keep yourself updated. Also, please share with others as well. 

7 Things You Should Do After Installing Windows 10 on Your PC

0

So the Windows 10 is finally here, and we’ve discussed how you can get a free upgrade. If you decided to go with it and Install Windows 10, here are few things you should consider doing just after the installation so that you can get a smoother experience running the OS.

1. Perform a Disk Cleanup After the Upgrade

Disk Cleanup

If you chose to Upgrade from Windows 8 or 8.1, perform a disk cleanup for removing files your system may no longer need. These files include temporary files, log files, installation files from previous version etc. You can free up quite a lot of space using this step.

Right Click on the Drive Where your OS is installed (Mostly C:), Click on ‘Disk Cleanup’, wait for the system to analyze files, then select the files you do not entend to keep and click ok.

2. Turn off the option in ‘Choose How Updates are Delivered’

Choose Updates

Windows 10 brings a new way of throwing updates over to users, by making a Peer to Peer connection (P2P) between computers to share updates. Turn that off if you do not want to spend a lot of data or if you are using an Internet connection with limited data.

Go to ‘Settings’ from ‘Start Menu’ then Click on ‘Updates & Security’ then Find ‘Choose How Updates are Dilivered’ in the ‘Advanced Options’ section. Turn it off.

3. Hide the Search bar from the Taskbar

Windows 10 Search Bar

Windows 10 has put a universal search bar inside the Taskbar, that will search your entire PC as well as the Web for answers. But if you want a clean taskbar just for the things you want to use, you can hide it by right-clicking on the taskbar and then select hide from ‘search’ section.

4. Change Default Programs for Opening Files

Default Programs

One thing that gets a lot of users confused when they open a file and it opens in a program they are unfamiliar to use. Thankfully every Windows OS offers this option to change the default program. Do that from settings under the ‘default apps’ section.

5. Resize the Start Menu

Resize Start Menu

Windows 10 brings back the classic start menu in the real sense, not like the Windows 8.1 where the button took you to the other ‘Modern UI’ of Microsoft. But the start Menu in Windows 10 can be resized as per your liking. Just hold the edges and drag using the mouse/touchpad to get the size you want

6. Pin Your Favourite Apps in the Start Menu

Pin Fav Apps Windows 10

Find the most used apps and pin them to the start menu for faster access. Just right click on the app and select ‘Pin to Star’

7. Update the Drivers

display Drivers

I encountered this problem in both my Desktop (1920×1080) and older Laptop (1366×768) that the display started acting weirdly, The problem got fixed after I updated the display driver. So, If something doesn’t work which was working pretty fine before the installation. Updating Drivers can solve the problem.

You can got the ‘Device Manager’ by right clicking on ‘My Computer/ThisPC’ in the Files Explorer and select ‘Manage’ Find the driver for that particular thing not working and update it by right clicking on it.

Using iPad Mini as a Primary Computer and How Effecient it is

So after reading a bunch of articles where Bloggers claimed to use iPad as their primary computer machine, I was intrigued by the fact that you can carry your work with you literally anywhere, even when you are travelling light.
Whenever I go out I take a bag with me that can’t fit a laptop but would fit an iPad.

By making the iPad my primary machine, I can literally take my work anywhere though that sounds cool, I still wasn’t sure if I can really get my work done using a Mobile OS.

So I am using iPad mini as my main computing device from last one month and the results are pretty good. The iPad Mini is not the fastest iPad out there but I chose it for it’s form factor and compactness, because if I could manage a full sized iPad, I can definitely manage to carry a small netbook like the Acer Aspire V5 I used to carry on short trips.

Choosing iPad mini over a full sized iPad was a tough decision to made as I had to compromise on a few things which I’ll be talking about below.

When I am out, I may not work on things that require a lot of computing power such is editing videos and images or tweaking my website design by player with the codes, these are the tasks I like to do on my desktop computer and when I have plenty of time.

Most of my times goes in writing and I am able to write full articles on my iPad mini. That too without using a physical keyboard.

Whenever I am out I get only a few minutes (say 15 to 20 Minutes) between other tasks, I use that time to either write or do a research for a post and I love doing it on the iPad mini, I have used mobile phone for this and have even blogged about it, but I find a tablet PC much more useful because of the bigger screen size as you can do more in less time.

The iPad opens the web pages that look pretty much the way they look on a Desktop, so it’s easy to understand the content, take notes and save links for your future posts.

Same goes for writing, you basically can see the entire A4 sized page on the screen when helps you write more.

The tool I am using for managing my writing is a simple app called Writebox, which is the only app I found that supports saving files to Google Drive, where all my work is saved.

I use Trello as a to-do list, capturing ideas, long and short term goals. It is available for multiple platforms so I have it with me every time.

Canva is a nice tool for creating the images I use for my posts. It is not very pleasing to use it on the iPad Mini but I rarely do it when there is something important to be published.

Because not only editing or developing images is tough, even formatting the posts is a challenge, perhaps due to the slow processing speed of the iPad Mini and perhaps the newer iPad Mini would be more efficient. But then the WordPress app is not rich enough to offer tools for rich publishing directly from the app.

Though the WordPress dashboard of my blog can be opened in the Chrome browser, it reloads itself automatically when I move to another app or open another tab in the Google Chrome itself. Reloading messes everything up taking me back ot where I started. So, formatting posts is not the best thing I love doing on the iPad.

So, I guess for now, the iPad is useful for writing posts which you can save to either Dropbox or Google Drive and published them from a PC or Mac after the required formatting.

Having said that, I still love writing on the iPad and making use of the time I wouldn’t do anything at all.

It is indeed a useful tool which is not just for Watching Movies and Reading Magazines as mentioned by many people who love to call the iPad a bigger iPod touch.

I am thinking of buying a Bluetooth keyboard for my iPad mini and see if it increases my writing.

We will see that in coming weeks, but till then, I am enjoying the comfort of writing articles whenever I can.

This post was written and edited on iPad mini itself.

How to Upgrade to Windows 10 for Free Without Any Issues

0

So, Windows 10 has finally seen light of the day on 29th July when Microsoft released the stable build of the latest OS in 190 Countries.

We have used the technical preview of the OS a few months ago and liked everything Microsoft has done with it, at that time, it had some flaw, which is obvious to find in a technical preview but those issues have been fixed and we are excited to try it out again.

1.Get the Windows 10 Upgrade Notification

Windows 10 Upgrade Notification
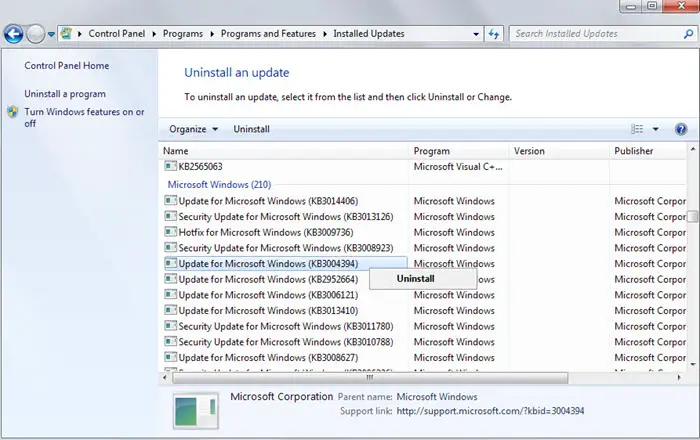
Microsoft provides free upgrades to the genuine Windows 7, 8 and 8.1 users and they will be notified of the upgrade if they have enabled ‘Automatic Updates’ in their Windows Update settings.

2. Force the PC to Upgrade to Windows 10

Windows 10 Upgrade toolMicrosoft also provides easy tools for those who don’t want to wait for the Upgrade notification. What they can do is,  go to the official Windows 10 download page and download these tools for the forced upgrade.

Download this tool if your OS is 32-bit

Download this tool if your OS is 64-bit

*You can find your system type bit by right-clicking on the ‘Computer’  and then clicking on properties in the file explorer. (check image)

When you run the tool, a window will appear, Select the first option that says

Upgrade this PC now’ and follow the instructions to upgrade.

3. Do a clean Install of Windows 10 on your PC

You may also start afresh by doing a clean install of Windows 10 on your PC. You may want to keep a backup of your important files. Here is what you can do.

➜ Store Documents and other files in Dropbox

➜ Move all the files you need that are saved in the Hard Disk Partition where the OS is installed (C: drive in most cases)

➜ Go to the official Windows 10 download page and download these tools for the force upgrade.

Download this tool if your OS is 32-bit

Download this tool if your OS is 64-bit

Download ISO files for Windows 10➜ After downloading either of the tools, launch them, then Select the second option ‘Create installation media for another PC’ and click on next.

➜ Select the language, the Windows 10 Editon you want and the OS bit structure (32-bit or 64-bit).

➜ At this point, you have the option to either create a bootable flash drive to install Windows 10 on a different computer or you can simply download the .ISO file and Create a Bootable DVD or a Flash Drive using the Windows USB/DVD Download tool

The thing to keep in mind here is that Microsoft offers the free upgrade only to the genuine Windows 7, 8 and 8.1 users. Microsoft might not recognise you as a genuine user if you do a clean installation of Windows 10. That’s why Microsoft advises users to first upgrade to Windows 10 by either 1st of 2nd methods mentioned in this article and then follow the 3rd option to get a sure Free upgrade even with a clean install.

Who won’t get the Free Windows 10 Upgrade?

  • Windows 7 Enterprise users (even those running Service Pack 1)
  • Windows 8 Enterprise users (even those running the Windows 8.1 update)
  • Windows RT
  • Windows Vista
  • Windows XP
  • Users running pirated copies of Windows

If you fall in any of the above situations, there is still a way to use Windows 10 for Free which is approved by Microsoft.

Microsoft has introduced a program called ‘Windows Insider‘ and users can opt for it to get the Free Windows 10. In the Windows Insider program, you will provide your computers as text machines where Microsoft will throw the beta version of the updates and collect data to fix them for the final release

This is a WIN WIN situation for both Microsoft and the users as users get to use Windows 10 for free and Microsoft gets to test their upcoming updates before the release.

But, then it is going to suck a lot of monthly bandwidth of your internet connection, so, if your internet provider has a limit for the number of GBs you can consume in a month, Windows 10 on the insider program is going to be a bit costly in the long run.

Think of 5 years from now, if any Windows Insider user stops the updates, their Windows 10 will be invalidated.

5 iOS 9 Features that Already Exist in Android

Apple finally announced and showcased the next version of their Mobile OS, the iOS9 at WWDC 15 on 10th June.

iS9_features

Everyone seems to be singing all the praises they have for the tech Giant. iOS9 is revolutionary, actually, every next upgrade from Apple portrayed as revolutionary, that is company’s style. Let’s save that debate for another post and focus on the new features of iOS9 Apple borrowed from existing companies.

The Proactive Assistant – Siri

iOS9_Siri

Siri gets an upgrade in iOS9, it is now smarter than before, 40% more accurate than the last upgrade and gets over a billion requests in a week. And now you can ask Siri to do things that were only possible in Google Now. I mean, Siri can now look into other Apple apps and notify what’s relevant to you.

For example, Apple’s disastrous Maps are finally graduating, with more features coming to them, now it can tell you things like when you should leave for your meeting, depending on the traffic conditions of the route it suggests you, so that you don’t get late.

It’s quite an interesting feature, I know it because I have been using it from last two years and its called Google Now. There is an article on Forbs with all the praise to Apple and they have predicted this to be the fall of Google Now.

Muti Tasking with Split screens and Slide Screen

In iOS9, users can finally run two apps at one, by sliding another app users can actually view two apps at one, users can also split the screen into a ratio of 50:50 or 70:30 to work on two all at once. It is a new step in the way of multi-tasking and more power to the group of people who use their iPad as their primary computers.

It is a new step in the way of multi-tasking and more power to the group of people who use their iPad as their primary computers. You will be able to drag things between to apps.

Samsung came up with this split screen feature when they launched their Galaxy Note 10.1 in 2013. So, Apple is just catching up with Samsung on this.

Picture in Picture

iOS9_PiP

Picture in picture is a feature where you can keep watching a Video while working on your document or email while, quite an innovations you see.

But that was available on Android Powered Tablet PCs, especially the ones Samsung brings every fortnight, and there are plenty of them, since, I think, 2013.

Battery Saving Mode 

Apple now adds a feature to iOS9 which can be enabled to get few extra hours of battery life. Apple decides to call it revolutionary and makes you feel no one really thought about that, ever.

But it is pretty much the same as it is on Android OS since a long tine, every other Android Smartphone has a feature where the phone goes on a light mode to save battery. So, let’s not call it innovative Apple.

A news App that looks and feels like Flipboard 

AppleNews App

Apple’s newsstand is a place where no one goes to read the news. and yet it is a part of iOS8, Apple is giving another shot at making users read more Apple and non-Apple related news by introducing an app where you can add news sources and read them in a beautiful layout.

The app will learn your reading pattern and offer you more content based on what you usually read on the app. This is a good part it if actually works, but the look and feel of the App is just like another popular app called Flipboard.

Publishers will be partnering with Apple to work on making their content look good on this new layout. Something Facebook is doing currently, plus the Facebook will also share Advertising revenue.

Whereas nothing of that sort is known about Apple’s news app.

The iOS9 beta has been made available for the curious ones, the public beta will be available in July and the final version will be available after Summers. So are you excited about iOS 9.

How to Check if Your Email Has Been Leaked in a Breach

Check_Hacked_or_Not

The hacks are pretty common these days, we get to read them every once in a week, but then there are some major hacks that put the details of millions of users in public.

It’s the scariest thing to happen, I can tell you because of my first-hand experience with it.

We all use several services, small or big, where we have accounts and often to transactions. It is a wise idea to keep ourselves informed about these hacks and whether these hacks have affected us.

You can find that out using this website called Have I Been Pwned. Just put the email you use for your accounts and it will search whether or not your account has been compromised in a data breach.

Mine did, when Adobe was hacked in 2013 that compromised the data of over 152,445,165 Adobe accounts.

You also can get notifications when it happens in future. So that you can take the required measures in time and save yourself from any misfortune.

This website only tells you of the hacks where the data has been released publicly by the hacker, meaning they have posted the data somewhere to be accessed publicly.

If you use Google Chrome browser’s built-in Password Manager, it also notifies you if your email and password has ever been compromised in a data breach.

You can check it out by going to the ‘Passwords’ section from the ‘Settings’ area of Google Chrome browser

Steps to take when there is a data breach.

Change your password as soon as possible, or, deactivate your account if you can. This is especially very important if the account has your credit card details.

Make sure you change the passwords for all the other accounts as well, if you are using same password for other accounts, there is a possibility that someone can access your other accounts as well.

➤ Have I Been Pwned

Introduction to Google Photos and Why You Should Move all Your Photos to It

0

For most of the people, who own smartphones and computers, photos are one of the most important things on their devices. In fact, we have seen great improvements in the mobile cameras in last few years, because it is what the consumer demands.

We all take photos using our phones day and night, and we easily build a mountain (well, not literally) of photos on our phones. So much so that it becomes a Big task in organising the photos or when we have to change your phone.

This is where Cloud storage comes in, you know the services like Google Drive and Dropbox (and many others), they all offer options to backup your photos so that you can easily get them on any device you want.

But that’s not the complete solutions to our problems of photo management. And this is what Google is trying to achieve with Google Photos, the solutions to our photos management problems.  I mean an automated way to organise photos so that you can find the right one when you look at your 1345 photos from last year.

Google Photos has been a part of Google Plus, the Social networking website where people create an account and forget, (okay, maybe a few are using it, but I have non one there). It offered the options to back up your phone photos, but you had to have Google Plus installed on your phone.

I personally preferred not to use that feature as I was never comfortable uploading my photo collection to a Social network, I mean even though all the photos are set to private, I feared about the photos getting public somehow, so it was better not to use the service. And maybe this is why many other people didn’t use it.

You Get unilimited Free Storage 

Unlimited Storage
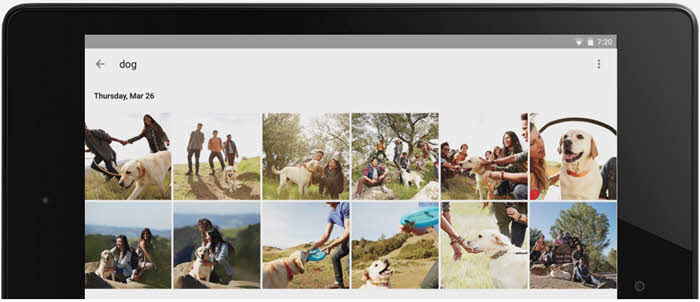
So Google separated the Google Photos from Google Plus and now it is a standalone product, just like Google Plus itself, meaning it now has its own url to access, it’s own app on all the popular platforms and gives unlimited storage for every user.

Find specific photos in Google Photos

Now, about solving the photo organisation problem, it has built a smart system that magically organises your photos and gives you the ability to search them using different tags.

Search Google Photos

Google was already near perfect in recognizing who is there in the photos, but it just got better, it can seperate photos depending on the things in the photos, like photos which has a dog in it, can be searched by typing dog. Same goes with everything else. It’s pretty cool if you think about it for a second.

Save selected photos with others even with non Google users

Share Google Photos

Sharing photos is another part of our photos management, we are often in a situation where we have to share few photos with others, like a trip you took with friends, or a number of photos you clicked with someone who just messages you to send them the photos.

Just select the photos and share them by creating a shareable link that can be accessed without a Google account. Cool.

Save files in Original size and format

Not only that, users can save their photos in the original form up to 16mb, which means no loss of photo quality for the people who use their smartphones to take photos, as the maximum size of a photo taken from the smartphones varies between 2mb to 5mb.

So, you don’t have to worry about organising your photos, even when you know you are never going to look at them again, it will remain there for you, because, dude, unlimited storage.

➤ Google Photos