So the wait for businesses to integrate WhatsApp into their business is finally over, after months of trial and constant feedback from a bunch of beta users, WhatsApp has finally rolled out WhatsApp Business.
Just like the WhatsApp app, WhatsApp Business is a simple app that will help businesses use WhatsApp for their business phone numbers, including the landline.
Business users can select ‘call to verify‘ option to verify the landline numbers so that they can use WhatsApp Business app for the purpose of messaging their customers.
Here are some key features WhatsApp will offer to WhatsApp Business app users
Business Profiles: Help customers with useful information such as a business description, email or store addresses, and website.
Messaging Tools: Save time with smart messaging tools — quick replies that provide fast answers to frequently asked questions, greeting messages that introduce customers to your business, and away messages that let them know you’re busy.
Messaging Statistics: Review simple metrics like the number of messages read to see what’s working.
WhatsApp Web: Send and receive messages with WhatsApp Business on your desktop.
Account Type: People will know that they’re talking to a business because you will be listed as a Business Account. Over time, some businesses will have Confirmed Accounts once it’s been confirmed that the account phone number matches the business phone number.
Now, cosmetically the WhatsApp Business app doesn’t look much different from the WhatsApp app, it is because of the fact that it is built on the WhatsApp app itself.
Apart from giving the ability to businesses to use their landline for WhatsApp, there are several other features, like, auto predefined messages and bunch of other features.
Android app is already available in the Play Store and people from few countries can even install it, but it will take some time for the app to be rolled out to further countries.
Run two WhatsApp on a single phone,
This also will let users use two WhatsApp in a single phone, the WhatsApp for personal purpose, and WhatsApp Business for business purpose.
The WhatsApp business app is free to use as of now maybe they will come up with a price model to offer services such as bulk messaging, and even letting businesses take payments within the app itself.
We will just have to wait and watch how the WhatsApp Business app evolves over time, we will be posting more updates related to WhatsApp Business you can like our Facebook page get instant updates about technology.
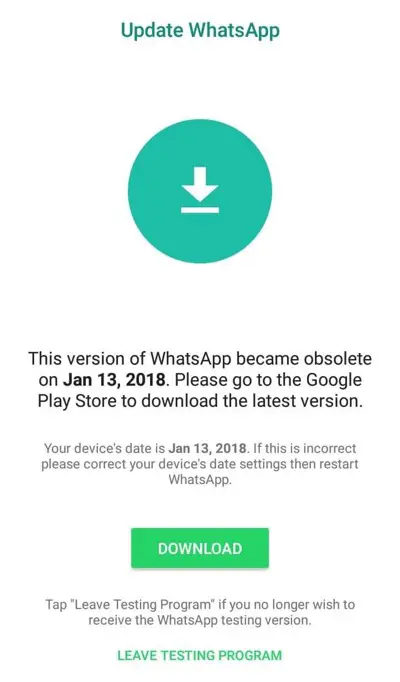
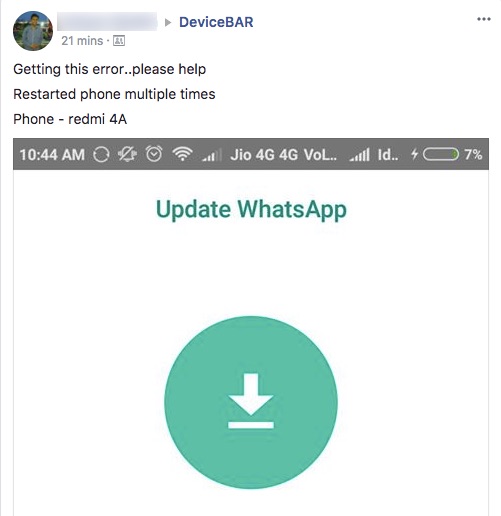
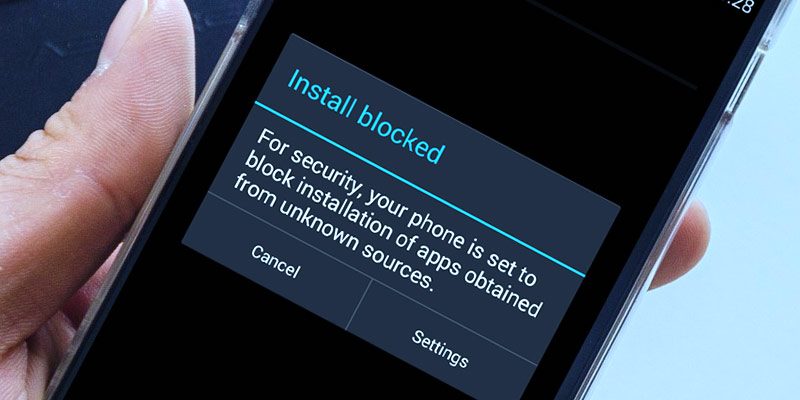
A lot of people have started facing an issue where their WhatsApp has stopped working, and they are not able to even update it.
This is the message they get,
Annoying this is, there is no option to update WhatsApp from the Play Store and shows that the user has the updated version already installed.
The majority of people reporting this issue are Xiaomi phone users.
Here is how to fix it,
Even though it’s a bug that needs to be fixed from the OEM’s end, here are easy fixes.
Method 1. Simply uninstall your WhatsApp and install it again from the Play Store. This shall work for the majority of people.
If the above method doesn’t work,
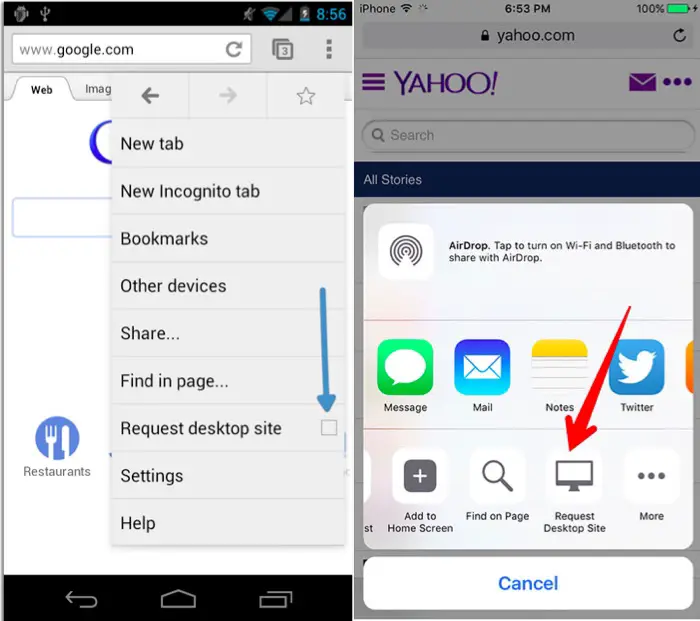
Method 2. Go to whatsapp.com and download the latest .apk file on your Mobile.
If you open whatsapp.com on your Android mobile, it will redirect you to the Play Store, so that you can do is, tap on ‘Request Desktop Site’ in Google Chrome, which opens the desktop version of the website and it won’t redirect you to the Play Store.
Once you have downloaded the .apk file, install it on your phone, which will update the WhatsApp.
Note: Make sure the ‘install from unknown source’ is checked to install the .apk, you can uncheck it later.
So I recently installed an App on my Mac from Adobe, I know Adobe software are cool but this one was a freeware that lets you create videos easily, but it also adds a watermark to the video which I did not like.
So, I thought of uninstalling it but I couldn’t find a way to do that. It used to start up on its own whenever I started my computer and it was pretty annoying to see the icon on the top right corner of my MacBook. it shouldn’t be there when it has no purpose.
So I tried figuring out how to uninstall it and finally did it.
Here is how you can do it too if you are annoyed by an app that you installed from Adobe and you are not able to figure out how to uninstall it.
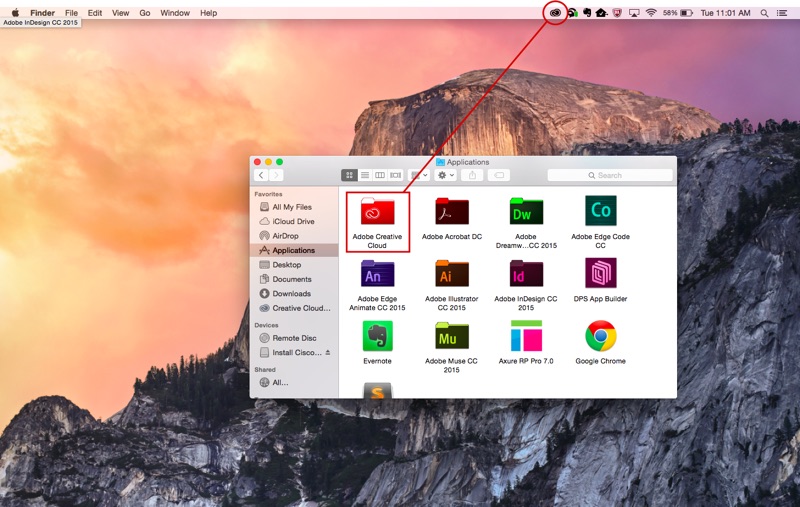
Usually, to uninstall an app in Mac you simply can delete it from the Applications folder, but deleting any application from Adobe will not remove it completely.
So what you can do is, Open the Application folder, you will find the Utilities folder, and inside the Utilities folder, you will find Adobe folder where you can find the uninstall folder as well.
You just have to click on the uninstaller of the application you want to uninstall and you are done.
Here is a video how you can do it easily on your Mac
The year 2017 ended well for a lot of people, but for cryptocurrencies, it was amazing. Where Bitcoin reached a maximum of $18000 in December and then settling to $13000-$14000, another cryptocurrency Ripple saw 28000 percent increase in its value.
Here is one more Cryptocurrency, which is fairly new, that came up from nowhere and currently it is standing at 6th position in the cryptocurrency market.
The cryptocurrency we are talking about is, TRON.
TRON has jumped 12755% of its value in just one month. This is a growth that which makes the growth of other cryptocurrencies look like peanuts
On December 5 (2017), the share price of TRX, as TRON token is called, was $0.00215. As of January 06 (2018), it is trading at $0.276378.
TRON is actually founded by Justin Sun, a 26-year-old tech entrepreneur based in Beijing, China. TRON’s market capitalization has grown six-fold from $2.8 billion on January 1 to $18.7 billion on 6th January.
Barely 4 months old cryptocurrency is now the 6 most valuable cryptocurrency in the world. The internet is basically filled with reports about this new thing and I spent my coffee time reading a bunch of them so that you don’t have to. :-/
What is TRON?
TRON is essentially a blockchain-based decentralized protocol that aims to construct a worldwide free content entertainment system.
The protocol allows each user to freely publish, store and own data, and in the decentralized autonomous form, decides the distribution, subscription and push of contents.
It also enables content creators by releasing, circulating and dealing with digital assets, thus forming a decentralized content entertainment ecosystem.
Content providers will, therefore, no longer need to pay high channel fees to centralized platforms like Google Play and Apple’s AppA Store.
Bitcoin currently holds the market cap of 41.5% followed by Ripple, which holds 12.4% and Ethereum which is in the third spot contributes to the 12.3%
It seems the world is taking a keen interest in the cryptocurrency, even the Facebook founder, Mark Zuckerberg is keen to learn more about the cryptocurrency and looking forward to studying it’s positive and negative aspects and to bring to his own company to make their services better for people.
Our patterns for using computers has changed a lot in the last one decade, previously we used to do all the things on the desktops and laptops and now we have a computer in our pocket all the time, we can simply take it out and start using it. Life has become so much is easier.
But on one hand, where the life has become so easy for us, it has also become easy for hackers to hack into our mobiles phones to steal our sensitive information.
In this article, I am going to list out few measures you can take to safeguard yourself from getting your android phone hacked.
Do not install apps from other sources other than Play Store
One amazing thing about Android is that you can install apps like you can do on your PC, you can download APK file of any app from anywhere on the web and then install it on your Android smartphone. But, there is a reason Google has created an App Store for all the apps for Android
Google tests and checks all the apps before approving them to list it in the Play Store. You can trust the apps that they will not do the things they are not supposed to do.
There have been some cases where the app installed from Playstore have been accused of stealing data of users like location information, contact details there have been no severe threats of getting someone’s mobile hacked from the apps installed from the Play Store.
Do not download pirated software on your mobile phone.
All the things in that apply for a computer also applies for mobile phones, the websites where you download the pirated software from, they can modify the software and inject them with spyware and viruses that can harm your Android smartphone.
Don’t hand over your smartphone to someone you don’t know
Just like when you install an untrusted app on your phone yourself you should also not give your phone to someone because they might install something that can steal your data and send them the information.
It is possible to install apps that will not be visible anywhere on the phone and only could be uninstalled if you area bit of tech savvy, which 80% of the Android users are not.
There are so many videos available on YouTube showing how a person can hack into your smartphone if he gets his hands on your smartphone even for a minute. so do not give your smartphone to anyone you don’t know.
Do not download cracked APK files of paid apps.
If you try to download a cracked APK for a paid app the chances are high that you will end up downloading an infected APK that well sneak into your smartphone and will damage it.
Most of these apps might look like the cracked version of the paid apps but in reality, they are trojans that are designed to get installed on your smartphone and secretly send data from your smartphone.
If you want to download a paid app, you can install an app called Google rewards, that lets you earn Google Play credits that can be used for purchasing any paid app in the Play Store.
I have written an article about it you can check it out here and I have already received more than 500 Rupees as credits and have purchased apps like Power Director, Filmora app and many others.
So these were some of the tips that you should follow if you want to keep your mobile phones safe from any hacks.
Like our Facebook page to stay updated with the new technology.
Facebook is reportedly working on a feature to let Instagram users post their Instagram stories directly on WhatsApp.
You may already be aware of Facebook’s existing feature of letting users post to Instagram stories directly to Facebook stories. The feature gives Instagram users a broader audience on Facebook.
Now the similar feature is going to be available for WhatsApp users as well. If you are an Instagram user and also use WhatsApp, then you will be able to save some time by automating the process of posting stories on WhatsApp.
I had mentioned in my earlier articles about Facebook testing a dozen things at once, so this feature is also being tested on a limited number of users.
TechCrunch has already confirmed this from Facebook’s spokesperson that the feature will be rolled out soon.
Instagram and WhatsApp stories have already been getting 300 million daily users, and the number is rising. With this feature being available, the three hundred million people will get a wider audience on Facebook
How to enable this feature of sharing Instagram stories on WhatsApp?
For auto-sharing Instagram stories to Facebook, you can find the option to enable it in the story settings that can be found in the Instagram stories.
Before this option is available in the instagram story setting, you need to add the same mobile number to instagram as well. You can find this option in the settings area, bye going to ‘Account’, scroll down to find ‘Share to other Apps’ one of the option would be whatsapp, where you will have to enter the same whatsapp number.
If your instagram is professional account or business account you need to enter your business whatsapp number.
But since WhatsApp has a different authentification system, that is, using your mobile phone number, I guess the process for posting Instagram stories to WhatsApp would be different than Facebook.
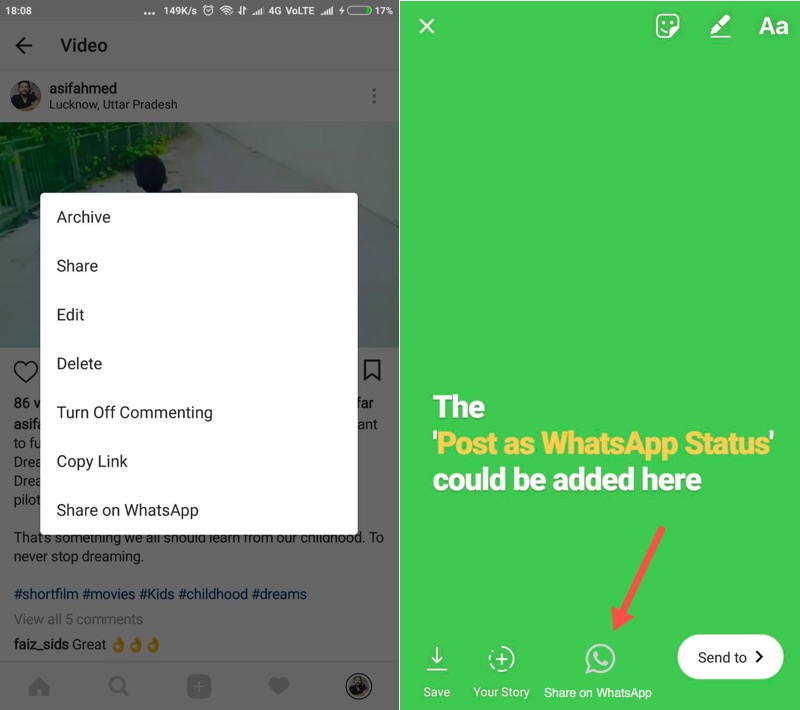
A button could be added on the Stories screen that needs to be tapped if the user wants to post the stories to WhatsApp, just like you can share Instagram posts to WhatsApp by tapping on the ‘Share on WhatsApp’ button.
I’ll update this article whenever this feature is available for me or it gets rolled out to a larger number of users.
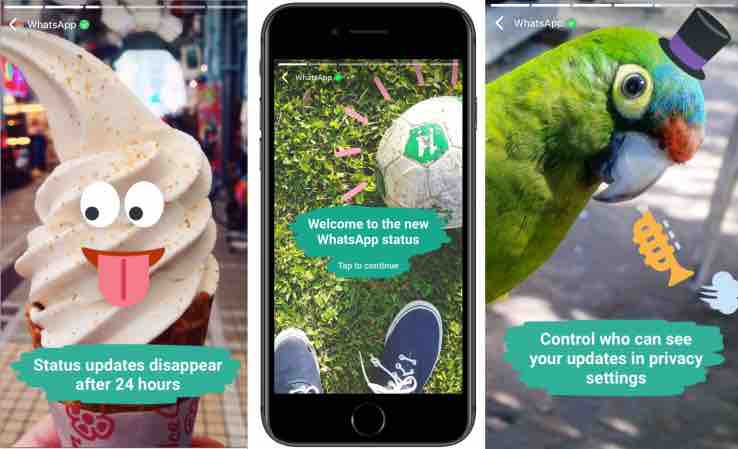
There are different formats to tell a story and the current favourite of the millennials right now is Stories, the videos and photos that expire 24 hours after posting them.
The Stories were originally stated by Snapchat, but was later introduced to Instagram, and then to Facebook and WhatsApp.
If you didn’t know already, Instagram, WhatsApp both are owned by Facebook, which means one feature you find on any of them will eventually be available on other two.
Facebook has now also started letting users cross-posting their Instagram Stories to Facebook. Currently, the feature is limited to a handful of testers but will eventually be rolled out to others as well.
The Feature currently lets users cross-post their Instagram Stories to Facebook and not another way around, because, Stories are more popular on Instagram than on WhatsApp and Facebook.
How to post Instagram Stories to Facebook Stories automatically.
Launch the Instagram app, then tap on your Profile icon to go to the profile page (it can be done by tapping on your display picture visible at the bottom).
Tap on the three dots on the top right to go to the settings area.
(If you have already linked your Instagram with Facebook, skip this step) tap on Linked Accounts, and tap on Facebook (if you are using the Facebook on your smartphone, you will be linked instantly).
Go to Story settings, the option to post Instagram Stories on Facebook would be at the bottom. Enable it and you are done.
Note: This feature in closed beta so you might not be able to find the option, it would eventually be rolled out so have patience.
What’s the benefit of posting Instagram Stories to Facebook Stories
If you are already posting stories on different platforms, this can save a bit of your time by automating the process.
And Facebook, being used by the majority of people, can give you a wider audience. And Facebook stories are also visible for desktop users.
There are also some reports coming that Instagram Stories can also be posted to WhatsApp automatically.
Would you be interested in posting the same story on different platforms automatically? Let us know in the comments below.
I would roughly tell you about that post, what we covered was, how to use any video and put them on stories so that they fit perfectly into the Instagram Stories.
In this article, I am going to show you how you can post longer videos on Instagram.
Videos on Instagram stories have a limit of 15 seconds, even if you go ahead and post a video clip that is longer than 15 seconds, only the first 15-second portion of the clip would be posted and rest will be sliced out.
To post longer videos what you will have to do is slice that long a video into a series of small 15 second clips.
If you are using an iPhone you will have the video editor on your computer to slide the videos into smaller 15-second clips because I don’t know how it is done on the iPhone.
But if you are an Android user you can do this right on your mobile phone, the only app you would require is the Power Director app. It is an amazing app that can be installed for free from Play Store.
How to slice longer videos into small 15 second clips on your Android
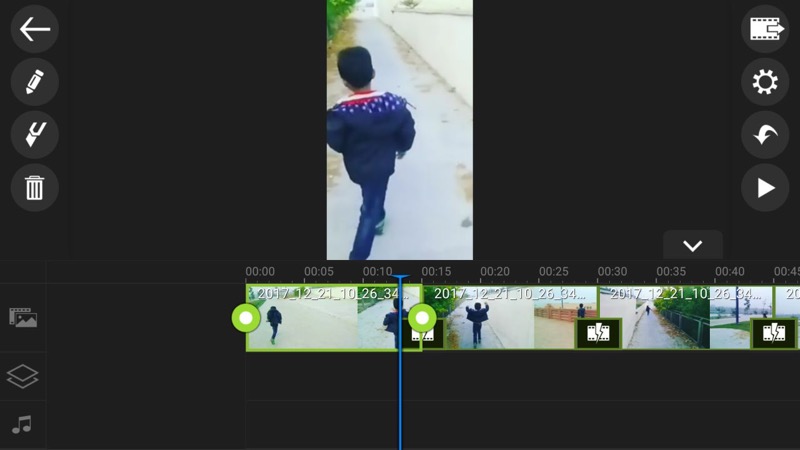
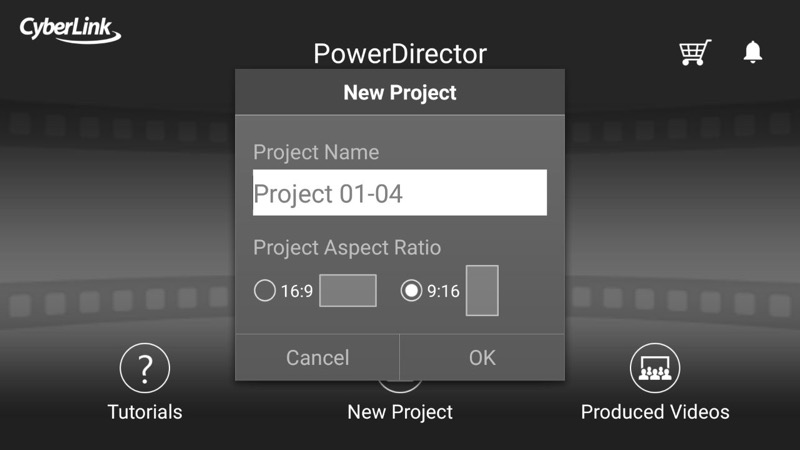
Open the clip in the Power Director, you can do this by opening the App, selecting the 9:16 aspect ratio for the project, and then add the video by tapping on Media.
Take the first 15 seconds of the video and slice the video, then tap on the rest of the video clip and tap on delete.
You will be left with the only 15-second keep that you can export. Rename it something like Instagram Story 01.
Go back to the project in the app, then tap on undo (icon will be on the right-hand side) which will bring back the entire clip, then tap on the first clip to delete it.
Tap on the second clip, select next 15 seconds of the clip and slice it and then tap on the rest of clip to delete it and export the second clip also and the name is something like Instagram Story 02.
You can come back to the project again keep doing this until you have sliced the entire video into smaller 15-second clips.
Once you have all your clips, you can start posting the clips to your Instagram story. Start with Instagram Story 01 and finish with the last one.
Many people do this on their Instagram stories and the use multiple 15-second clips to tell a story. Just think of one 15-second clip as one scene of your story. Use Multiple scenes to tell a story.
I hope you like this article to post longer videos on the Instagram story. You can do the similar thing for WhatsApp also, the only difference is, WhatsApp status has a limit of 30 seconds, so instead of slicing the videos into small 15 second videos you can slice them into 30-second clips and post them in your WhatsApp status.
Of all the things social media, I’m hooked on using Instagram stories from the last few months and have also written quite a lot of articles to up your Instagram game, I’ve written tips and tricks about Instagram. You can find all the articles about Instagram published on techtippr.com
Watch the Video Instead
In this article, I am going to list out how you can post any normal video, that is in the aspect ratio of 16:9 (mostly all the videos that you find on the Internet or of that aspect ratio only.
But when it comes to the Instagram stories, these videos are in an aspect ratio of 9:16, which means you can rotate the normal video to turn them to fit into the Instagram Stories.
Rotating the videos would also change the orientation of videos and they are not truly vertical so what you can do it, crop the videos into a 9:16 aspect ratio so that they can fit perfectly in the Instagram stories.
For doing that you will be needing video editing software. You may already have a video editor installed is on your computer.
I use Final Cut Pro but you can also do this in iMovie, which is free software for Mac. Or, you can also do it in any kind of software available for Windows PC.
You can check out the best video editors available for windows as well as the best video editors available for Mac
I want to show you how to do it in Final Cut Pro but the process will be pretty much the same in any software.
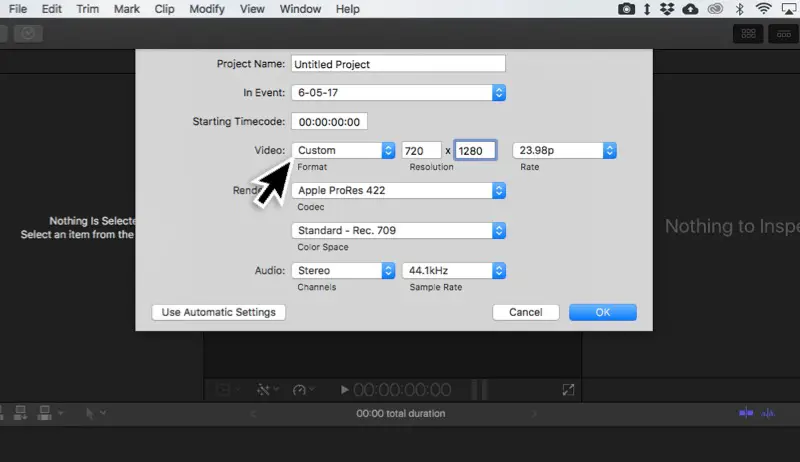
Create a new project in Final Cut Pro and select the custom resolution of the new project as 720×1280 (HD) or 1080×1920 (Full HD), these resolutions would be having an aspect ratio of 9:16 that is perfect for vertical videos on Instagram.
Note: Creating an HD or Full HD Project will only matter when it comes to video quality, you can select Full HD (1080×1920) but Instagram currently only supports HD (720×1280)
So when the project is created, you can add the video you desire to post on Instagram stories to the timeline you, will notice thick borders on the top and bottom of the video because it will only attack the width of the resolution.
Now, what you can do here is select the video clip and click on ‘Transform’ then expand it to the level where the tick borders from both top and bottom disappear and the video fills up the entire canvas.
Move the video clip left or right to find the perfect spot where the Subject is visible in the video. Don’t worry about keeping the subject exactly at the center because if the video is moving it won’t be at the center all the time. So, for the 15-second clip find the spot where the subject is visible throughout the duration of the clip.
Once you have found that spot what you can do is export this video.
Note: If the video is longer than 15 seconds keep in mind that if you want to post it on Instagram Stories, you can either slice your clip into smaller 15-second videos or get the 15-second portion of the video you want to post on Instagram stories.
After the export is done you can transfer the video to your mobile phone either by saving it t Dropbox or Google Drive if you want to do it via the Cloud or you can also use a Pendrive flash drive.
After transferring you can easily post it to your Instagram story.
How to do it on your mobile phone?
In this article, I will be talking about the Android smartphone. Smartphones have come a long way in the last few years and you can now do things that were only possible on a desktop just a decade ago.
You can install the Power Director app, which is an amazing app that will let you edit videos in a 9:16 aspect ratio as well.
It is available in the Play Store, the free version would have a watermark on the bottom right-hand side of the exported video and if you want to remove it, you can u the pro version, which is somewhere around $5 to $6.
You can skip coffee for a day at Starbucks buy this app, buy this if you are planning to post videos like this on a regular basis. It’s worth it and you can do more with it as well (that we will cover in the future, here on Techtippr)
Install and launch the PowerDirector app and create a new project. The project should be vertical (in the 9:16 aspect ratio) and then add the desired video by tapping on Media.
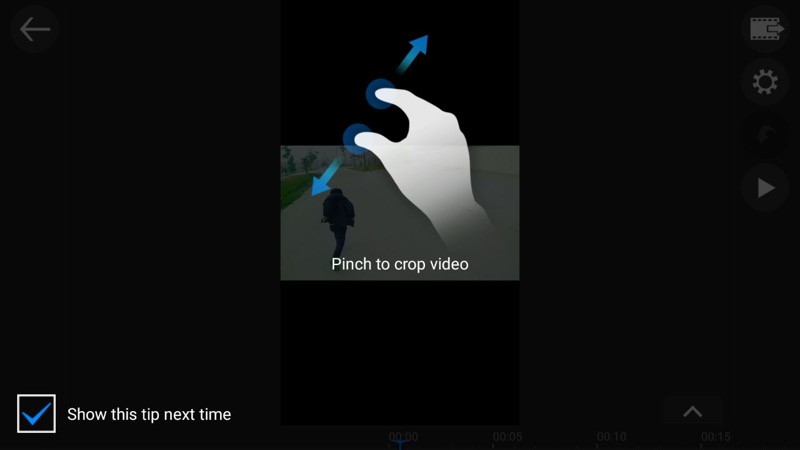
Once the video appears on the timeline you can type on it and then tap on edit where you will find the ‘Crop’ option, tap on Crop and then Pinch Zoom the video so that it fills up the entire video area.
The rest of the things are pretty much similar to what you would do in a video editor on your PC, you have to align the video in such a way that the subject is visible throughout the 15 seconds clip.
The video editor app would also let you slice the video so take the best 15 seconds and remove the rest of the video and export the video.
So this is it how you create Instagram stories from existing videos that are not vertical. The more fascinating videos you can upload the more visibility it will get. Even if you do not get the desired view on the stories or feed, there is nothing to worry about as choosing an Instagram growth service may help to solve all your difficulties.
Now that we have entered in the new year of 2018, let’s make this year even more productive than the previous one.
In this article, I am going to list out few amazing apps that are going to help you save some time by doing things faster or automate them so that you have time for doing things you love and care.
Watch the Video
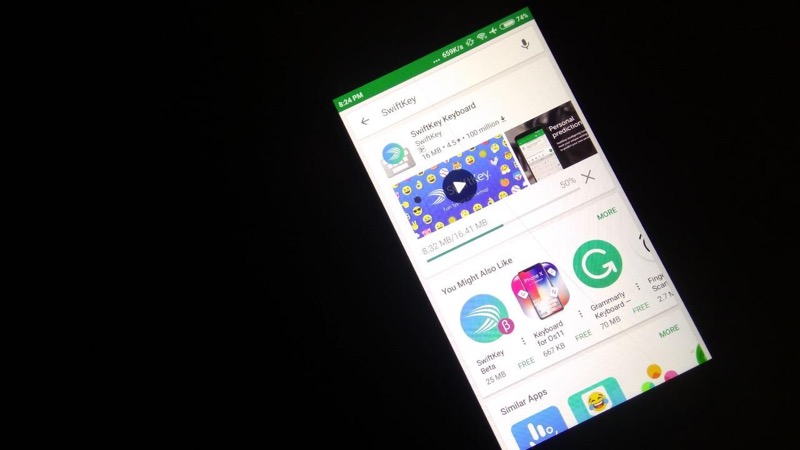
1. SwiftKey Keyboard
Majority of us spend most of our time on mobile phones writing emails, sending messages, posting updates on Facebook, Twitter and other social networks, replying to comments and chatting on WhatsApp and other instant messengers.
The more app we use the more typing we do, and making a change on our keyboard, we can make a bit of difference and perhaps save some time.
I would suggest you use the SwiftKey keyboard, it is an awesome keyboard that lets you type faster by giving you predictions that it has learnt from your previous chats. I have found the predictions to be 99% accurate.
I have one more tip for setting up your own acronyms for a faster typing on SwiftKey. This feature has been available on the iOS keyboard for a very long time, but for Android, you can use SwiftKey and it’s quite handy for typing long phrases that you use more often.
For example, assuming you use, a phrase like, In Case You Missed It, more often. You can set up a shortcut for it as ‘incy’. So that, the next time you have to type that phrase, just type ‘incy’ and you can type the phrase in just one tap.
2. Evernote App
I have been a fan of Evernote app for a very long time, and I use it on a daily basis for different things.
I simply dump all the tiny pieces of information that are important to me so that I can keep my mind clean for doing other things, this app lets you create different notebooks and in the notebooks, you can write as many notes as you want then you can tag these notes with the keywords there are related.
Another great thing is you can add any type of Note be it a text or an image or a voice note, you can do it all in Evernote, and it also lets you set reminders.
So what I usually do is, I take a picture of the bike insurance documents and then save it in my notebook, add a tag to it (e.g documents) and put a reminder for the next year when the renewal is due.
This way I don’t have to remember the renewal date and I don’t even have to remember where the document has been kept, because the Evernote is going to notify me whenever it is due and I can simply tap on the notification, view the document and even print it directly from the app, and the tags let me search all the notes tagged under the same tag, such as my Passport, the PAN Card and other important documents that I would need, they all would be under the ‘documents’ tag.
The app has many different uses, you can note down the ideas you have, you can also use it like it To-Do, but I use a different app for the purpose and that is
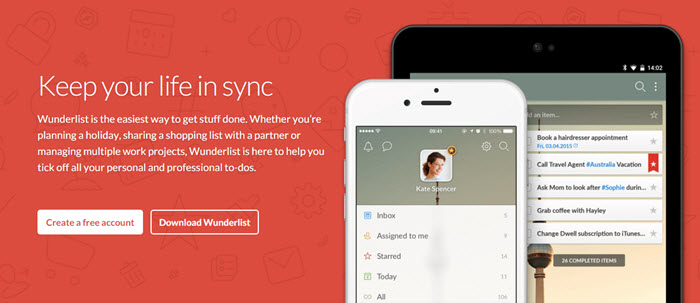
3. Wunderlist
This is my favourite app for noting down the things that I would be doing in next few days or weeks. The best use of this is to remind me for the recurring tasks such as paying the electricity bill, paying the hosting fees of my websites, sending the invoices the clients, or when I have to go for cycling at a particular time on the weekends.
This app is there to remind me all the things that I would be doing so I don’t have to remember it.
This app literally saves a lot of resources of my brain that could be used for different creative purposes like creating awesome videos for you guys. So make sure to hit the like button and also Subscribe to the channel if you haven’t already.
I would really appreciate that. moving on to the next
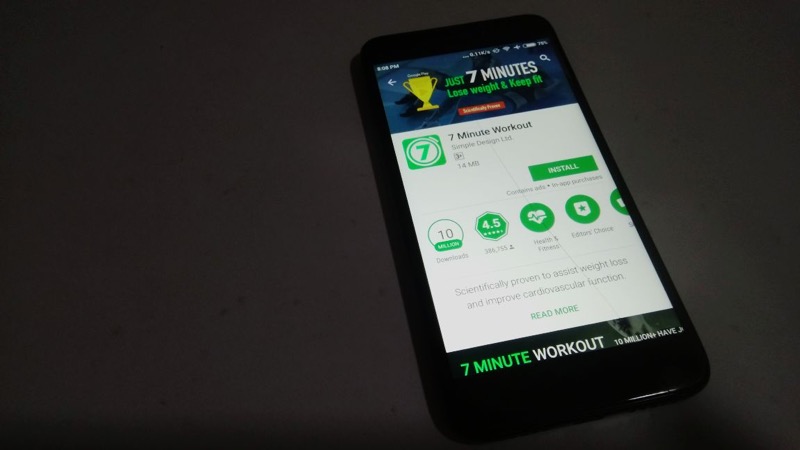
4. 7 Minute Exercise
Last year I spent 1.5 hours per day or around 9 hours every week in the gym and in the end I had to stop because I was behind the schedule for doing so many things that are important, but I know that health is important too.
This is why I started using this amazing app called 7 Minute Exercise, it literally saves a good amount of time and the exercises mentioned in the app does not require any kind of equipment that means you can do the exercise anywhere you want, any time of the day.
7 minute is basically a single circuit, if you’re not satisfied with a single circuit you can do multiple circuits, even but doing multiple circuits it still better than spending 1.5 hours per day in the gym and then finally leaving it because you are not able to make time for the workout
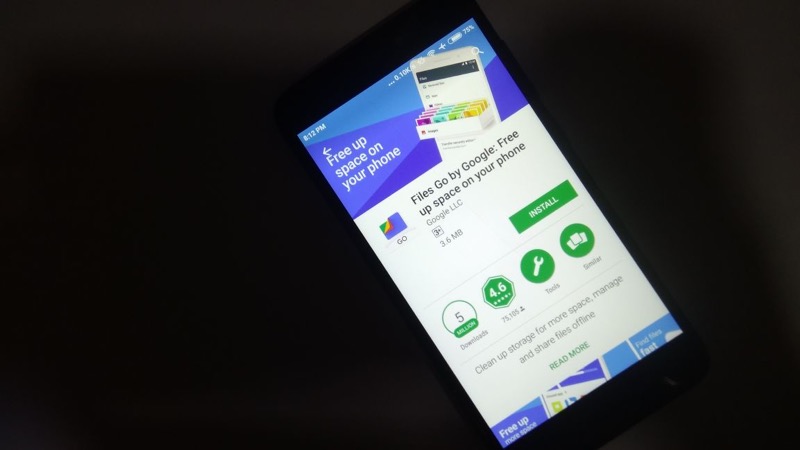
5. Google Files Go
Google has launched this app a few months ago and it is an app that easily lets you browse the contents on your mobile phone in an easy folder type interface.
There are already so many apps available for this purpose and ES Explorer is one of them that I have been using from last few years, and I still use it every now and then.
But just a while back I thought of trying Google Files Go to see how it works and I found out it is really helpful. The purpose of this app is to let the users manage space on the Android devices smartly.
Google’s machine learning works behind the app to figure out what apps and files are not important on the mobile and the app notifies users suggesting they can remove the particular app or file to clear out some space.
Other than that, it also lets you send files locally to other devices. You might already be familiar with apps like AirDroid, ShareIt, Xender etc. that lets users send and received files offline.
Since I already mentioned that I am a fan of apps that let you do more than one thing, this is the reason why I have added this app to this list.
So these were some of the best apps that you can install on your mobile phone and get stuff done faster so that you can save some time to spend with your friends, family, and do things that you love to do.
So this is it in this video, I hope you liked it, and if you did, hit the like button and also subscribe to the channel if you want to see more videos like this. I would really appreciate if you subscribe to the channel because I really need your support to make awesome content.
So this is it, I’ll see you in the next video till then take care.
Long time reader of Techtippr.com knows we also have a YouTube channel since the very beginning. But we didn’t really do anything with it.
SO in 2017, I wanted that to change, and I invested some money in some gears for creating a good quality video.
One of the gears is the Blue Yeti Mic.
The Blue Yeti Mic is the choice of many YouTubers, though it’s a bit expensive, I had the budget for it so I went ahead and purchased it.
Check out the video where I unbox the box
Initially, the kind of videos I wanted to make were animations or slideshows with a voiceover or maybe tutorials where I record my screen and tell people how to do a particular thing.
For such things, the Blue Yeti is quite nice, the quality is simply amazing. I’ve used it for videos other than the one I upload on YouTube channel of Techtippr.
Here is Video where the Audio is recorded using Blue Yeti Microphone
The Audio has not been enhanced in any way, I just recorded it in a very quiet environment.
Why I bought the Blue Yet
I literally spent days on deciding which Microphone to buy, I asked it, several groups, other experienced Youtubers and the answers were always mixed.
Most of them told me I should get it If I have the budget, I mean it’s fairly on the higher side retailing at $120.
But here are few reasons I bought this,
I love its design, and I especially love the Black Model, it looks good on my white table.
It’s heavy, meaning it’s sturdy and does not move from its place.
It has a 3.5 mm slow for Audio Monitoring with 0 latency, makes it easy to monitor the audio that is being recorded.
There is a Gain Nob, which controls its sensitivity. You can pump it to the max to Record even the Pin drops (quite literally) and keep it to extremely low when you are very close ot the mic (this will keep the background noise ot minimum).
And it has got a bunch of modes that can be helpful in recording audio in different scenarios.
So, if you are a Gamer who does game plays or if you want to Record Podcasts, or maybe you want to record Interviews, this is perfectly suited for such things.
The best buy links are below
Buy from Amazon.com http://tippr.in/BlueYeti_Blackout
Connect the Mic to the dSLR Camera directly, so that you don’t have to do an extra step of synching the audio with video, though it’s not that difficult.
And in some cases, where you won’t be able to connect the Mic Directly to the dSLR, you can connect the Lavaliere mic to the Smartphone and record the audio.
I recommend the Lav mic because you can get clear of audio because the mic is closer to you.
Now, if you are going to create videos in a closed environment, like in an Office or you want to record podcasts or any kind video where a bunch of people discuss something, then Lav mics are not a good option because it can close to only one person.
So, in that cases, you need a Mic that can be put on a table, so that it’s evenly distant from all the people.
You might have seen a Boom mic, or a Mic mounted on a stick that stays on the top but outside the video frame, that kind of setup requires people to help you record good videos.
Watch the Video
But if you are a one-man army, then a mic like Blue Yeti might be helpful for you. I mean, it has different types of modes for different types of situations. So it can give you a really great quality of audio.
So the best Mic to get great Audio Quality in Most Scenarios
The best one that works in almost every scenario is the lav mic. And after that, the Blue Yeti mic.
Casey Neistat and his vlogging setup
But, if you are Vlogger, then both the Blue Yeti Mic or the Lava Mic is not a good option.
If it’s just the Smartphone that you are using for vlogger, you already have a great mic on a smartphone, the only thing is, noise cancellation, that’s not good.
And for that, many vloggers use an external microphone and some pro vloggers use dSLRs for vlogging, so you might have seen their set up as well.
Something like a Rhode Mic mounted on a dSLR camera. And that works really well, so go for it if you have the budget.
But if no, the smartphone Camera as well as the Mic does a great job capturing good quality audio and video.
I feel immense joy and happiness in typing this article from my HP Chromebook I thought will never be usable again.
I am actually using it after months, It’s still fast, just like what Google Promised. But the hardware gave up on me a few months earlier when it used to get freezed up in the middle of an important work only to restart automatically making me lose all my work.
So I had kept it on my shelf where the gadgets go only when they die.
I had no hopes until tonight when I randomly thought of finding what’s causing the Chromebook to fail.
I Did the search (and believe me, this was not my first search related to this issue), but this time, I didn’t Google, I YouTubed. And what happened next will blow your mind!
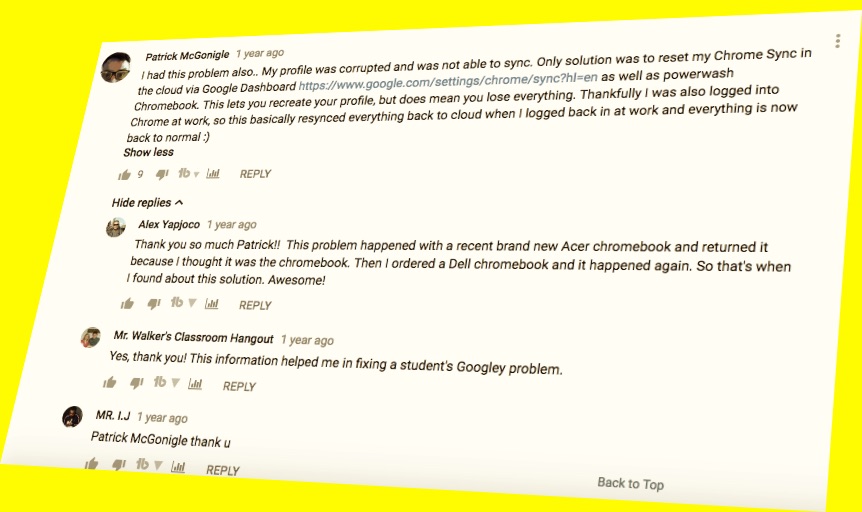
After several videos, I landed on this
https://www.youtube.com/watch?v=gJdfHw4u-Ec
This person seems to have exactly the same issue I was having. Interestingly this was not a solution video but more of a Problem / Help or maybe she just uploaded it to show it to someone at a Service Centre.
And there was the solution in one of the comments.
At the start of 2017, I decided to co-start a new YouTube Channel along with Wife, it was about Food, youtube.com/foodtippr.
So we initially started creating videos using the Yi Action Camera since all the great things have humble beginnings,
After almost 6 months, we deiced to update and bought a new Camera, a dSLR, a huge upgrade to my Olympus EP1, the Macro Four Third Mirrorless Camera that I bought in 2011.
Here is the Unboxing of the Canon 750D Recorded using the Yi Action Camera
Canon 750D for Video Recording
Smartphones these days have got really awesome apps for photo editing, so this WIFI connectivity saves time.
The one that I bought came with an 18-55 STM Lens, and the STM (Stepper Motor technology) lenses are meant to be quieter and smoother at focussing while recording. So there is no sound while the camera tries to shift focus when you are filming something.
Buying it with an STM Lens is a good decision.
The Camera can Record Full HD Videos and the output turns out to be pretty good. But there is one downside of the Camera which I think needs to be addressed.
This Camera comes at a price of $600 that you will buy in 2018, but it still does not have the capability to record Full HD Videos at 60 Frames per second.
Not having a 4K Recording capability can be understood as it’s a requirement of a very few people which machines worthy of handling 4K footages to edit them and I believe they can go for more expensive cameras.
But most people who will settle for this Camera, will do it because it’s from Canon and lets you shoot at Full HD.
While most Cameras from other manufacturers offer this function of shooting Full HD at 60 frames per second, I don’t understand why Canon has not upgraded this model with this feature.
Shooting Full HD at 60 frames per second means you can take smooth slow motions, something I have been experimenting with lately and I have to use HD (720p) at 60FPS and then upscale to 1080, and it kind of sucks to lose the quality.
Other than that, there have been no issues with the Camera when it comes to Video Recording.
Cancon 750D for Photography
Frankly, I have not done enough of photography, apart from taking pics of the Final Presentation of the Food at Foodtippr.com
I actually like the output of the photos that I clicked.
One of the big reasons to buy Canon 750D when we had the budget of Canon 700D was the WIFI Connectivity.
You can directly connect your Camera to your Smartphone to use it as a remote Viewfinder or taking photos and transferring them to your Phone to sharing it instantly on Social Media.
So, apart from that Full HD Video recording at 60FPS, there is nothing I am not happy with. And if you too can live with recording Full HD videos at 30FPS, you can go for it.
So I had bought the basic Action Camera from Yi, the sister company of Xiaomi. It’s the normal non 4K Camera without the screen.
I bought this one because I was not shooting and editing in 4K neither I had the budget to buy the 4K variant as it was 3x the price of this one (and it still is).
Check out the Unboxing I did on my YouTube Channel
This action camera is available on Amazon.com for around $49 (half the price of what I paid last year) and the 4K variant is now selling for $169.
Note: They’ve launched another 4K Action camera which is actually a Budget Camera priced at $99. While the Yi Action Camera (non 4k) is still a pretty great action camera, you might consider buying this lite version of 4K. Read the review to know why.
Though these Yi Action Cameras are popularly known for being a GoPro Alternative, because it’s cheaper and all the accessories there are for GoPro can be used with Yi Action Cameras as well, it’s still the best quality action camera after GoPro.
How Good an Action Camera is, that costs $49?
The Market for Actions Cameras was not really populated last year, but in just one year, a lot of new and small players have come into the scene.
And they can go as cheap as $30, but I am really not sure what type of quality they will provide.
Anyway, talking about this Action Camera, I haven’t really used it in any kind of sports activity, which is the reason it has been created, but since it’s a Camera in a very small body (and also no very expensive) you can experiment with for creating Interesting POV videos.
And because of that, I was able to create some really nice videos in last one year. I’ve also used it for creating Food Recipe Videos for our Food Channel (Now we use Canon 750D)
We initially were using a Microphone Arm and wanted to hang a camera that would be light enough and could be charged while being used. It worked.
And if your question is, is it really worth $49 (I bought it for $100) Indeed it is.
The Downside of this Action Camera
While there is no doubt it is worth $49 you’ll spend on an Action Camera, you really should buy the Yi Action Camera 4K Lite if you can spend $99.
Because the the touch screen will so much of your time in changing into different modes on this Camera.
For the Yi Action Camera, I had to connect it wirelessly with my Phone for changing the modes. It gets connected easily, it’s an extra step for a simple task as changing the frame rate or capturing a time lapse.
Because the true potential of Action Cameras is the ability to capture videos in higher frame rates.
Specs of Xiaomi Yi Action Camera
This Action Camera can record Full HD Videos at 60 Frames/sec, HD at 120 Frames/sec and 848*480 at 240 frames/second.
It has 16MP CMOS image sensor from Sony.
Bluetooth (4.0BLE low power consumption) and Built-in (802.11 bgn) Single band 2.4G Wi-Fi
1010mAh Battery that can give video recording of 2 hours (drains drastically when connected to the phone)
Final Verdict
Not going too harsh on this, but one year ago, this was the only choice if you cared about quality on budget. But this year you can Yi Action Camera 4K Lite, which has a touch screen.
If you are looking for a microphone that can be used in different scenarios then buying Lavalier microphone would be a wise decision. Here is why,
So Techtippr had a Youtube channel from the very beginning but it wasn’t really that active. In 2017 I decided to change that and post some videos. Though I’ve been able to post some videos, it isn’t much, and part of the reason is, not having proper gears to produce the kind of quality I wanted.
I already had a Blue Yeti Microphone, but when I recording myself on a dSLR, the Blue Yeti just sat on the table, I did try putting it to some use but it was a bit of effort and sync the audio and video in the post-production, especially where are a lot of clips to work on.
Watch the Unboxing Video of Boya M1 Microphone (More Videos Below)
This is where the Boya M1 Microphone comes in really handy, It’s actually a collar mic which can be clipped onto the collar of your shirt so that you can record clear audio of yourself talking about something.
It can be connected directly to the camera as well as the smartphone, which is great, I’ve already been using my Mobile phone for making some videos.
It’s not just a collar mic, It’s a Multi-Purpose Microphone.
The good thing about this collar mic is, it had got a really nice noise cancellation feature which makes it better than the microphone on your smartphone because you can get rid of the extra background noise without any effort.
I’ve used the Mic of my smartphone for doing some voiceovers for my Videos, a good voiceover can only be done in a closed environment where you can control the background noise and make sure there isn’t much of it.
Use it for Voiceovers
So, this mic can also be used for recording voiceovers. In fact the voiceover in my recent few videos, the voiceover has been entirely done using the Boya M1 Lavalier Microphone.
I am going to give you an example by putting a voiceover while I show you the unboxing of it. You can check out the video embedded below.
The Voiceover in this video is done using the Boya M1 Lavalier Mic
It can Replace your Desk Mic
I bought the blue yeti last year and I’ve used it a lot, but I still find myself using My Smartphone for doing voiceovers because I am not in my office at times, and the only good mic I have with me all the time is, my Mobile phone, the Xiaomi Mi Max which has an amazing microphone
But, like I said, you really need to be in a quiet environment or using it. Since this Microphone has got the noise cancellation feature and is also very handy, maybe this new mic will help me do it well as it has got a good noise cancellation ability.
Use it with your dSLR Camera Directly
The default microphone on the dSLR camera records a lot of noise, so if you are in a closed environment or you closer to the camera, it is good, but if you are even a couple of feets away from it, the voice is going to be terrible.
In that case, you can use a desk mic, but it also bounds you to a desk and you have to sync the audio on the post-production, which is time consuming.
So this is how 90% of the poeple are going to use this Lavalier Mic, by connecting directly to their dSLR or Smartphone and recording the video.
The wire of this microphone is very long, approximately 20ft, which will let you move 20 ft away from the camera source.
Use it with your Smartphone Directly.
Same goes with the smartphone as well, the Mic is good, but lacks the noise cancellation abilities, also if you move farther from it, voice will not come out good.
You can Use it as a Field Mic
Record audio on Mobile or a Portable Audio Recorder such as Zoom H1, and sync audio in the post production.When you do a video outdoors, there is not much you can do about the background noise.
But keeping the microphone closer can help, so this Lavalier mic can help since it’s wire is quite long. You will be able to record great audio no matter how far you are from the Camera.
So I got it for Rs 2000 that’s roughly $30, and the in the box you get some paper work along with a black fake leather pouch which has got the Microphone,
A long with the microphone, you get The coushion or the windshield , and a clipper to clip on the mic on your shirt collar, a small batter and a quater inch audio jack if you want to plug this mic into an implifier.
The LR44 type battery can last for an year with moderate use. but it may vary depending on how much you use it.
There is not much function on the mic to learn but there is an on and off button, since the mic requires power for the noise cancellation feature to work, you need to turn it on when you are using it with your camera, and for Smartphones, you can turn it off since it can derive some power from the smartphone itself.
Watch the Video Review of Boya M1 Lavalier Microphone


 So I recently installed an App on my Mac from Adobe, I know Adobe software are cool but this one was a freeware that lets you create videos easily, but it also adds a watermark to the video which I did not like.


")