Text Based Video Editing Can Save You Hours of Editing Work – 6 Best Apps You Can Use

0

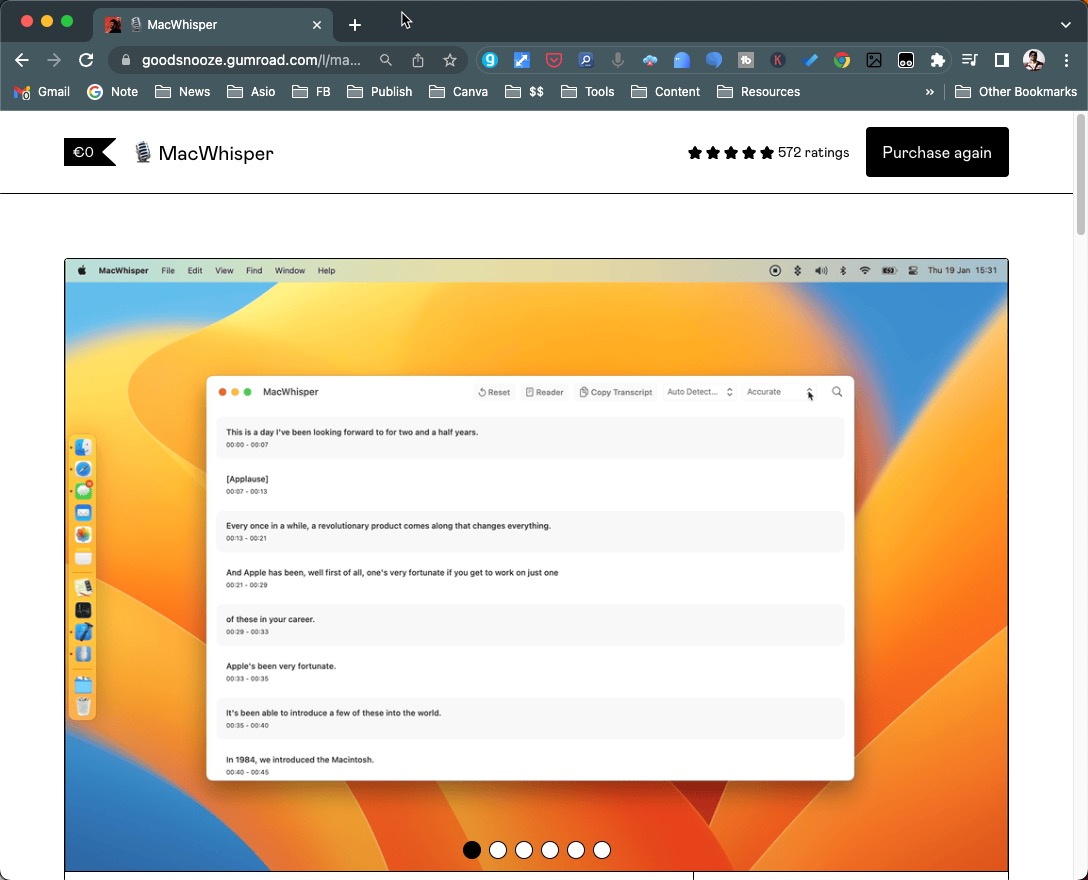
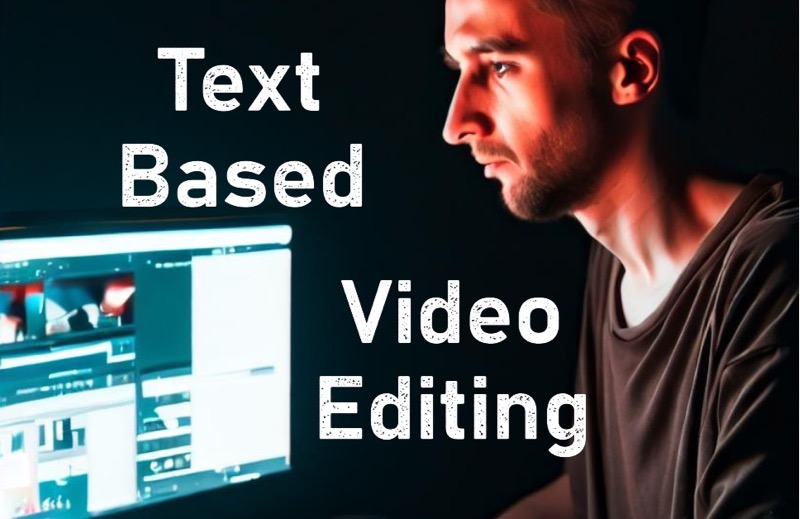
Text-based video editing software is gaining popularity due to its unique and efficient approach. This innovative method involves uploading your footage into a web or desktop app, which then transcribes the video and displays both the text with timestamps and the video itself in separate windows.

Here’s how the Text Based Video Editing Works

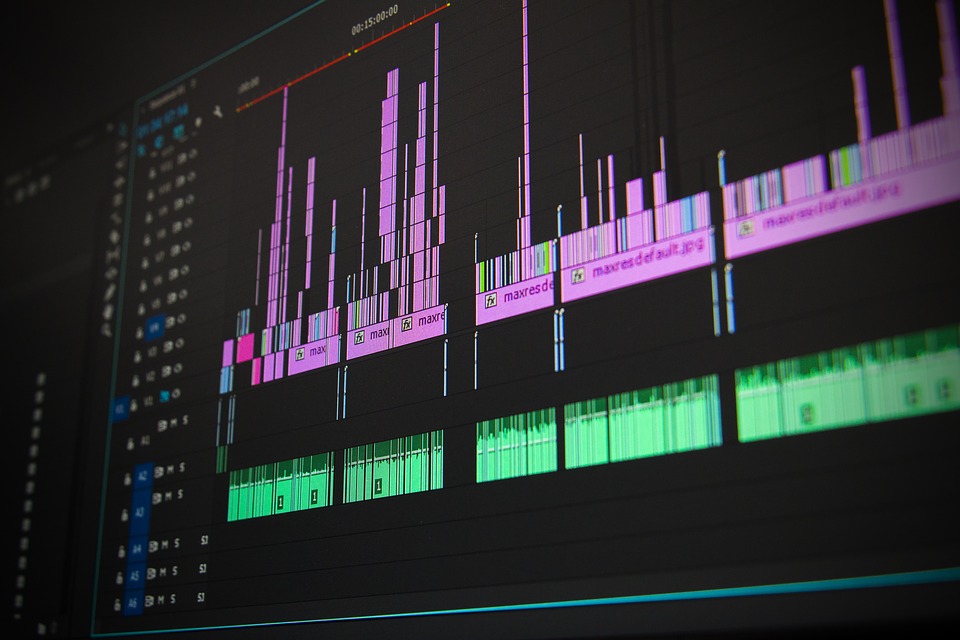
You can navigate through your video using either the panel or by searching specific sections in the text. Editing becomes much simpler as you can remove sentences or large portions by highlighting and deleting the corresponding text. The software even allows for automatic removal of pauses and filler words.

Traditional editing requires scanning an entire timeline to identify unnecessary elements, such as pauses, filler words, or repetitions. While this may be manageable for shorter videos, it becomes time-consuming when working on longer files like podcasts or hour-long recordings.

Text-based editors are especially useful for editing lengthy talking videos. Several great options offer free trials so you can experience their benefits firsthand.

Here’s a list of some text-based video editors you can try yourself. 

Gling.AI

Gling.AI is a text-based video editing app that revolutionizes the editing process by allowing users to make precise edits and enhancements using simple text commands.

Wisecut.video

Wisecut.video is a powerful text-based video editing app that streamlines the editing workflow by enabling users to edit videos using intuitive text-based commands, making it effortless to create professional-looking videos.

Typestudio.co

Typestudio.co is an innovative text-based video editing app that offers a unique approach to editing videos. By utilizing text-based commands, users can easily manipulate and enhance their videos, saving time and effort in the editing process.

Adobe Premiere Pro

Adobe Premiere Pro is a great video editing software that provides a comprehensive set of tools and features for professionals. The new version has this feature where you can transcribe the entire video and then make edits to your video timeline by editing the text. 

Descript

Descript is a versatile text-based video editing app that combines a text editor and audio/video editing capabilities. With its unique transcription-based approach, users can edit videos by editing the corresponding text, making it a powerful tool for content creators and editors.

TechSmith Camtasia

Camtasia is mainly used for creating tutorial videos by editing screencasts of desktop computers. But it has recently introduced this feature where you can transcribe your video and then edit your video using the text. The edit in the text will also reflect in the video content.

Conclusion

Now, obviously the text-based video editor is not going to work for videos where there are a lot of visuals and not a lot of dialogues or information.

For example, a trailer, a travel vlog, or a wedding video. For these type of videos, you will still require the traditional video editing software. 

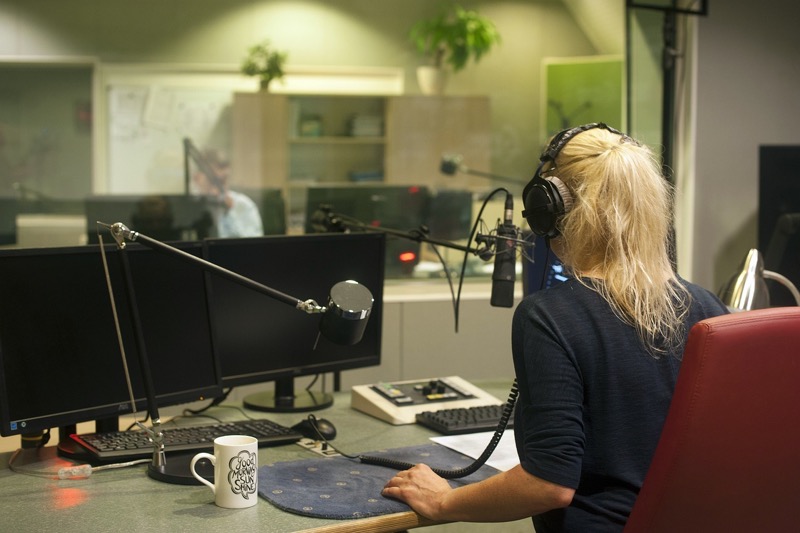
But for videos like, Podcasts or Interview videos, where there is just dialogues, these tools can speed up the editing process. 

Adobe Premiere Pro, which is a great traditional video editing software has added this text-based video editing, followed by TechSmith Camtasia, which is also a video editor but added this feature.

Hopefully many more traditional video editing software will also offer this as a feature, which would be really great to speed up the editing workflow.

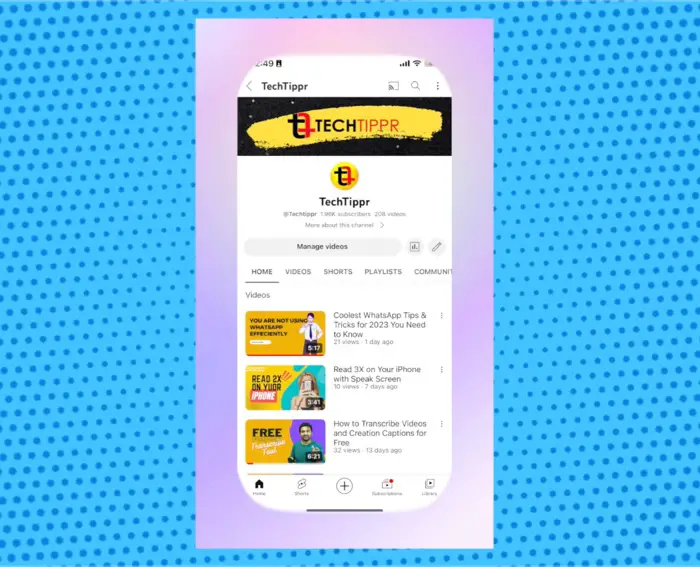
Talking about speeding up your workflow you can check out how you can write five times faster using the AI tools.

How I Use Notion to Organize My Life Digitally

I consider myself someone who keeps things organized be it online or offline. So ever since I started using internet and computers, I kept my things organized. Way before becoming a content creator.

When I was a student, I used to have all my notes organized in folders, based on subjects, I had my movie collections organized in folders. Same goes for photos, funny videos etc.

When I started working, I started utilizing tools like Google Keep and Evernote, and they have been great tools.

But the limiting features of these apps made me use multiple apps, each for different, but likely similar type of tasks.

Like,

  • Google Keep for jotting down random ideas, personal things to remember for long.
  • Evernote for Storing Digital copy of documents, receipts, certificates, warranty cards.
  • Google Calendar for tracking Due Dates.
  • Trello for tracking progress of different projects.
  • Google Docs for writing longer versions that could potentially become blog posts.

Fast forward to 2023, I use Notion for all of the above. Heck I even use to to track Milk, download my free template.

Why Notion?

Surprisingly, it does much better job. Much better than all of these apps combined.

It is such a great app that lets you build your own systems. It could be called a super app where you can create as many mini apps as you like.

The kind of functionality and flexibility Notion offers is amazing. It is an empty notebook where you can start from a blank page or import a template from its template library which has more than 5000 templates.

The Templates let you organize and record your data any way you want, for any type of use case. When you visit the template repository of Notion, you can search for templates category wise.

You can select a simple Notion template to get started or buy a premium template that has more complex functionality, and handles your data any way you want it to.

Notion is so good that people purchase premium templates for it. There are Notion template creators who make tens of thousands of dollars per month selling just Notion templates. That is the power of Notion.

It is available for all the platforms, be it Mac, PC, Android or iPhone, you have access to your data all the time.

How I use Notion for Productivity

The fact you can create a page, inside a page, and a page inside of that page, and then again a page inside of that page, It gives you the flexibility of organizing your data the way you want it.

For example, you can create workspaces under which you can create different pages. And then under those pages, you can create another pages.

But to keep it simple, I have created just one Workspace, under which I have two main pages.

One is Work Space and the other is Personal Space.

In Work Space,

I have different pages for different web properties. And under those web properties, I have pages for different projects related to that property.

I also have pages like login credentials, a page named Learnings, where I have important links that I want to reference.

I have an idea file, where I can note down ideas and so on.

How I use Notion for Personal Goals

And inside the Personal Space,

I have got a page where I have saved all the important documents. A page has all the receipts, A page has information about all the subscriptions I have, what subscription is expiring. Monthly subscription, Yearly subscription and so on.

I have created some pages from scratch and inside those pages for specific projects, I use templates.

Notion also offers the reminders features, you can set a due date or a reminder date for a particular use case.

For example, I use it to remind me of repairing dates or servicing dates of home appliances or renewing my car insurance, etc.

How I Use Notion for Travel Planning

In the personal workspace, I have a travel page as well. I have yearly travel goals and each destination is a separate page.

And the page has got details about that destination, things like places to eat, places to visit. And I keep filling more details as the time goes by.

I also have checklists, a pre-written checklist for backpacking, like what clothes I should pack if I am visiting a destination which has beaches or a checklist for packing my bag for a destination which has mountains.

It lifts so much of stress from your brain and frees it up for creative thinking. You don’t have to put a lot of mental energy into thinking packing you bag and what things you should not be taking, because you have already got that sorted.

I have created a travel template for my own self, although there are a lot of great traveling templates available, both free and paid. You can get started with free travel planning templates.

The benefits of digital organization with Notion

Notion is available on all the platforms and its flexibility to use it any way you want is the best reason to use it.

The availability of templates makes it super easy to keep a track of things or just store things for reference purpose.

The free version gives you so much of resources and features for free that you that you might never need to upgrade.

There’s no reason not to try Notion because it’s free.

Transcribe Your Audio Perfectly with ChatGPT iOS App

The Chat GPT app for iOS is finally available and has got some really nice improvements. For example, you can now input the prompt using your voice.

It uses speech to text product from OpenAI called Whisper. The transcription is pretty accurate and is also pretty fast in comparison to the other services.

It is a cool way you can use this feature for doing transcriptions on your iPhone. After installing it on your iPhone, whether you have to note an idea or write an email, you can open the chat GPT iOS app and tap on the waveform icon appearing in the input area and then speak into the microphone.

If you have to format your transcription and get a clean transcription, you can start your speaking into the microphone by saying a prompt that will ask chat GPT to clean your text.

For example, before saying something into your microphone, you can say ‘clean this text, fix typos and grammar’ and then start speaking whatever you want.

Once the transcription is done, you can tap on send to send it to ChatGPT and it will give you a much cleaner formatted version of your transcription, which you can copy paste into your email or wherever you want to use. This is a clever usage of the chat GPT app and it’s totally free to use.

In comparison to the native Dictation feature on iPhone, it is far superior. However, Apple is also adding AI into their Dictation feature in iOS 17. iOS 17 will be available in September 2023, till then, you can use this workaround by using chat GPT to transcribe your audio.

Or you can also use my Chrome custom shortcut for iPhone. I’ve named it Dictation Pro. It does several steps automatically. All you have to do is activate it and speak into the microphone. It will transcribe it, use chat GPT to clean and format it, and then it will save it in your Notes app.

ChatGPt for iOS

Dictation Pro Shortcut

Whispering: A Chrome Extension that uses Whisper AI for Speech to Text

Speech to text can be a great productivity booster. I have been using speech to text for writing 3x for several years. Voice in Chrome extension is my secret weapon. But I was amazed with the quality of output whisper AI is able to give.

In fact, I’m using a desktop app for Mac computer called MacWhisper and the transcription is amazing. But but it adds several steps to my workflow.

If I have to use MacWhisper to write something, I have to speak into the microphone, then get the transcription, copy it and then paste it wherever it is required.

While the VoiceIn Chrome extension lets me activate it using a keyboard shortcut. Speak into the microphone and it automatically inputs the text into the text field, which makes it convenient to write articles, emails or reply to social media posts.

Whispering Chrome Extension

Finally, I found a Chrome extension that uses Whisper AI by letting you use your own OpenAI API key. It is pretty much similar to the VoiceIn Chrome extension with a bit of a difference.

Unlike the VoiceIn Chrome extension, which works on Google’s speech to text API, the Whisper AI requires the entire audio clip to process, so that it can give a better output.

I feel  the VoiceIn Chrome extension is still great for replying to tweets or social media comments or even quick one liner emails. While this new Chrome extension that uses Whisper, can be used for writing long form text, be it a formal email or blog posts.

Download Whispering from Github.

Currently it is not available in the Chrome Web Store, but you can download it from GitHub. The updates to the Chrome extension is quite frequent and hopefully it will be available in the Chrome Web Store soon.

The author of the Chrome extension also has a desktop app to offer, which works quite similar to the MacWhisper app. But I would still prefer Mac Whisper.

How to Install and Use Whispering Chrome Extension

To install the Chrome extension not available in the web store, first download it from GitHub using the link provided at the end of this article. Extract the zip file and open your browser’s extensions page, accessible either through settings or by typing “chrome://extensions” in the address bar.

Enable developer mode by clicking on its toggle button located at the top right corner. Next, click “Load unpacked” and navigate to where you extracted the extension folder. Select it and press OK to add it to your Google Chrome browser. If needed, pin its icon for easy access.

Upon installation, a settings page will open where you can paste your OpenAI API key obtained by creating an account on their website—new users receive free credits lasting several weeks. Once added, you’re all set.

If desired, create a keyboard shortcut for toggling recording: go back to extensions page > click hamburger icon (top left) > select Keyboard Shortcuts > set custom shortcut for Toggle Recording option.

Download my Shortcut, Dictation Pro for iPhone

Also, if you are looking for a similar kind of tool for your iPhone, I have created an iPhone shortcut that uses Whisper AI to transcribe text perfectly.

In fact, my custom shortcut, which I have named Dictation Pro, will automatically fix grammars and typos to your transcriptions using Chat GPT and then save it in Notes app, which is remarkable, as you will be able to use your iPhone as a productivity tool and note down your ideas whenever you are away from your computer.

And about the Chrome extension, you can use both the voice in Chrome extension for quick voice typing as well as this Chrome extension called Whispering, which will let you transcribe longer audio files. You can download them from the links below.

Part of the article was written using the Whispering Chrome Extension, and part of the article was written using the VoiceIn Chrome extension. I’m still getting a hang of it because the Whispering does not show you your transcription and it also does not automatically enter the text in the text field, but it is more accurate than VoiceIn chrome extension.

Download Whispering Chrome Extension

Download VoiceIn Chrome Extension

Download Dictation Pro Shortcut

Create Animated Videos with AI: A Step-by-Step Guide Using Kaiber.ai

0

So, how do you create the animated effect in your videos? You might have seen it on Instagram or YouTube. Several videos have a unique effect where everything gets converted into an animation.

This effect is actually created by AI websites, thanks to evolving technology. It is possible to create an animated version of your videos in just a few minutes. There are several websites available for this., but we will be working with Kaiber.ai because it is an excellent website. You can upload a photo, a video, or even music.

Then, describe what you are looking for using a prompt, and Kaiber.ai will work its magic to give you an output. However, it works best when you give it a video that is just a few seconds of clip because it takes a lot of processing time.

Here’s a tip to save time and money

You don’t necessary have to use your entire clip to convert into ai. The best use would be to use the animated version in key moments.

If you have a video that is 1 minute long and you specifically want to use the animated section, say 10 seconds you can export the exact 10 seconds of your clip and then use Kaiber.ai to convert that into an animated video. When you get the output, you can put it into your editing software accordingly to use it.

The free version of kaiber.ai gives you a few credits in the trial version that are sufficient for converting 10 to 15 seconds of video. If you want to use the monthly land 15 per month will give you 1000 credits which is good enough for creating 8 minutes birth of videos.

So if you use the if I mentioned above, and create only a few seconds of your videos into animated versions, 8 minute sufficient. For example 8 minute is around 400 and 80 seconds. Which means if you create 10 seconds clip for each video you can get 48 clips for $15 is quite sufficient.

How to use Kaiber.AI: Step by Step Guide

Once you have signed up on Kaiber.AI, you can login using your creations. Get the part of your clip, preferably less than 10 seconds, and upload it to Kaiber.AI.

On the next page you will have to give up prompt for how you you want your video to look like. You can use a reference from to, from the examples given on the page on the right hand side.

For example I selected Cyber Punk. And the art style was Lost. Hit enter and wait for Kaiber.AI to do its magic.

This is how it turned out.

Like I said, if you use Kaiber.AI smartly, you can get more clips to render animation, and utilize their free credits to create your videos. And then decide whether you want to pay for it or not.

However, if you want to keep using the free version, there are a lot of options available.

Runway ML

With Runway ML, you can produce videos from either text or images using a freemium AI video generator. Its features are diverse and include the capacity to incorporate music, voiceovers, and text overlays.

Apart from letting you create the animated version of your regular videos, it has a lot of features to offer. It can create videos for you even if you don’t have an original video. You can use a text prompt.

People are doing amazing things with these ai websites, one such example is this trailer that was created entirely using Runway ML.

The free version gives users 125 credits, which can be used for creating 25 seconds worth of video. But like I said you can use a combination of things websites to use the free version on them to get the output you want at least for first few videos of yours.

I am certain the prices are going to go down incoming ears and it will be more affordable. But right now you have got the exclusivity if you are doing client work this can enhance you work and can get you more clients.

Write 5x Faster with AudioPen: Advanced Speech-to-Text Tool

0

Lately, I’ve been using the AudioPen web app on my iPhone to record my thoughts with my voice. Recently, they released a Google Chrome extension that expands its functionality beyond just noting down ideas. Now it can be used for writing long-form content, emails, or social media posts

I previously used VoiceIn, another speech-to-text Chrome extension; however, it only uses Google’s speech-to-text API and lacks AI capabilities. In contrast, AudioPen is far superior as it incorporates AI and provides formatted notes of your thoughts.

The free version of AudioPen limits users to 3-minute recordings but offers an annual premium subscription at $60 or a one-time payment of $120 which extends recording time up to 30 minutes. Premium features include Zapier integration for automating tasks like sending emails without copying and pasting text.

Additionally, AudioPen is useful for composing research-based articles by speaking into the microphone while browsing individual tabs and clicking on relevant links after enabling the extension.

This new tool combines multiple steps that I used to perform individually. Initially, I would use the Voice in Google Chrome extension to write first drafts. Afterward, I would manually proofread the entire article and then utilize Grammarly to fix any grammatical errors and format the text.

Finally, I would add photos where necessary. However, with the Audio Pen tool, these three steps are taken care of directly. It transcribes the text, formats it, and also fixes grammatical errors. The only remaining step is adding images where needed, and you’re done.

Compared to the previous method, which allowed me to write articles 3x faster, this new tool makes the process five times faster. For instance, I wrote this entire article using the Audio Pen.

Even though I am using the free version, I had to repeat the process three times to achieve this output. However, it took me less than 15 minutes to obtain the text and an additional 5 minutes to ensure everything looked good and ready for publishing.

The tool is available for free as a web app and also as a Google Chrome extension. Additionally, if you want to use something similar on your iPhone, I have created an iPhone shortcut named “Dictation Pro.” think at the end of this article.

It operates similarly to the web app and can potentially provide even more output since you can use your own OpenAI API key. You can obtain the API key for free from the website, and it includes $18 worth of free credits, which should last for at least two months. Afterward, you can pay according to your usage, which is not too expensive.

Here is the link to my shortcut, which works on both iPhone and Mac.

Install AudioPen Chrome Extension

Dictation Pro Shortcut for iPhone

How to Transcribe Audio and Video to Text for Free

0

Here is a free tool that allows you to effortlessly transcribe your videos into audio, and it’s quite accurate.

I have been using it for the past few days, and I wanted to tell you about this free tool called Mac’s Whisper.

What is Transcribing?

Transcribing is the process of converting audio into text. You may have seen many videos on YouTube and other social media platforms that have subtitles or captions.

Those subtitles are a transcription of the audio in the video because surprisingly, many people watch videos without sound. When they have subtitles, they watch a few seconds and then decide whether to continue watching the video or not.

Captions or Subtitles are quite important, which is why YouTube has a feature for auto-generating subtitles and closed captions for all videos. It helps users understand the context of the video.

Watch the Video How to Transcribe Audio and Video to Text

You Need Captions on Videos for More People to Watch

Even Instagram offers a feature to create captions from videos. While these auto-generating features of social media apps are good, they give you little to no control over how the transcription is done, and sometimes the quality is poor.

That’s why I recommend everyone to use a standalone application for transcribing videos and creating subtitles. Doing it manually takes a lot of time, and when you need to create videos quickly, it becomes a challenge.

I always emphasize creating a faster workflow, and that’s why I suggest using AI tools that can speed up your workflow by 5x or even 10x.

There are already many apps for creating subtitles, which we have discussed in a separate. post, sure to check it out.

MacWhisper – Free App Mac App to Transcribe Audio and Video to Text

While browsing the OpenAI website, which is the parent company of ChatGPT, a company that has made a significant impact in just six months, I found out that they have a range of other AI products.

Whisper is a transcribing tool that converts speech into text, and it does a fairly good job. It’s a pure AI product from OpenAI, and other companies and startups can create products around it using their API. There is a lot of documentation available, and you can even create your own web app using it.

I was going through the documentation to create a web app for myself because it’s absolutely free. There are a few apps that charge around $9 to $10 per transcription of a video. So this one is really good and promising.

However, during my search, I came across an app called MacWhisper, available on Gumroad. It was created by Jordy Bruin.

This application has both a free version and a pro version. The difference between the two is that the free version offers slightly downgraded transcription capabilities, while the pro version provides more advanced features.

The pro version is available for a one-time payment of 18 euros and includes features like batch transcriptions and the ability to manually add speakers to your transcripts.

If you just want to transcribe a video or audio file, the free version works really well.

When I downloaded and installed Mac Whisper, it prompted me to upgrade, but I used the free version and it works quite well.

The interface of Mac Whisper is quite user-friendly. You can drag and drop any audio or video file to transcribe or start the recording inside the app as well.

The transcription it also pretty fast and you get to export the text in different formats.

If I export the SRT file, I can import it into Final Cut Pro or any other video editing application to add captions. The process is similar across different applications. In Final Cut Pro, I use a plugin called Caption Burner to import the SRT file and add captions to the video.

MacWhisper, available on Gumroad

Apple is Finally Fixing the Dictation Feature on iPhone in iOS 17

At WWDC23, Apple announced iOS 17, which will be released later this year. It has a few interesting updates for the iPhone, such as the Live Voice, Contact Poster, NameDrop, Improved Airdrop. But the thing that got my attention, was Intelligent Input.

Apple is finally fixing Autocorrect and Dictation feature on their iPhone. More on that later, let’s first see what other new things are coming to iPhone in iOS 17.

Watch the Video

Contact Poster

It is inspired by the lock screen from iOS 16. You will now be able to customize your screen and the way your contact looks when you call someone on their iPhone.

There is another nice feature which allows you to create stickers out of live photos or photos by removing the background. This feature was introduced in iOS 16, but now you can take it one step further by converting them into stickers which can be used in supported applications.

Intelligent Input

There have been improvements in Dictation and the Keyboard. As we all know, dictation is not that accurate, especially for non-native American people. However, it has improved a lot. I am currently using the beta version, so it’s not working perfectly. Sometimes it works, sometimes it doesn’t. But when it does work, it is better.

Hopefully, when the public release of iOS 17 happens, the dictation will be error-free. Additionally, there are some improvements in Airdrop as well.

Apple in its demo mentioned that they are using AI to predict words,  so the autocorrect works much better and accurately. The keyboard also gives what predictions in line while you are typing, which is a feature similar to google smart compose which has been there for a couple of years. But I appreciate that apple has finally incorporated this into their own keyboard.

Name Drop

If two people using iPhones want to share contact details, they can bring their iPhones closer, and they will be able to share the contact numbers.

Similarly, you can also share files and media files via Airdrop. If you are out of range, you can use the internet to continue the transfer in high quality.

Check out Dictation Pro

If you currently want to use dictation, which works far better than the dictation feature on the iPhone, you can use my shortcut, Dictation Pro.

It is an iPhone Shortcut that uses Whisper and ChatGPT to give your perfect transcriptions and auto saves them in Notes app, so that it is available on your computer. There are many uses cases of this shortcut. For noting down ideas you come across while taking a walk, or when you are in the bed staring at your ceiling, trying to sleep, you can capture all these thoughts perfectly using dictation pro custom shortcut

All you need is an Open AI API key, check out this article for a full tutorial about how you can get the OpenAI API Key, and how you can save this custom shortcut on your iPhone.

Dictation Pro: Transcribing Audio Into Perfect Notes on iPhone with this Shortcut

If you are using an iPhone, there is an easy solution to get perfect transcriptions of your audio.

Typing long text on a small keyboard as the iPhone’s keyboard takes time. Using the dictation feature of the iPhone can help you type much faster.

However, the problem with the native dictation feature on iPhone is that it is not accurate for non-Native American speakers.

Watch the Video

But artificial intelligence can help solve this issue. AI is smart enough to figure out what’s being talked about and can predict the words accordingly so that it can make sense.

The ChatGPT app for iOS provides a solution to this. It has an input for voice, allowing you to use your voice to input the prompts. ChatGPT uses its own product for speech-to-text known as Whisper, which is quite good at transcribing. The app is free to download and use, and currently, there are no restrictions.

Here’s the Easier Solution

How to convert your voice into text with ChatGPT App

To use ChatGPT app to transcribe audio on your iPhone, open the app, then tap on the waveform icon, and start speaking into the microphone. Once you’re done, stop the recording and it will immediately convert it into text and highlight it in the input field.

You can either copy the entire text and paste it, or you can utilize ChatGPT to format it and give you a cleaner version.

How to get perfect transcription with ChatGPT App

Use voice command to make formatting even easier. Add a prompt such as “fix grammar and typos and clean this text” and then start recording your audio. Once finished, it will transcribe the entire audio and put it in the input field.

You can tap send, which will send it to ChatGPT. The app will clean it up, fix any typos and grammatical errors, and give you a cleaner version that can be copied by long pressing and pasted anywhere.

There are several use cases for ChatGPT app. For instance, you can use it when writing an email or capturing ideas when you don’t want to type long text. The app will provide you with a piece of text that makes sense, which you can copy and paste into your notes app or any other application.

Here’s the perfect solution

So I created this shortcut for iphone I have named it dictation pro because it is pro in all the sense.

It uses Whisper to transcribe the text, and then use his charge gpt to fix grammar and typo. The shortcut also saves the output to Notes. So it’s all done automatically. You just have to tap on the icon and speak into the microphone.

Here’s how it works

I have added this iPhone shortcut to my home screen, and the fact that you can change icon colour of the Shortcut it feels like its an app.

When you tap on the icon the Shortcut gets triggered, first action of the shortcut is to ask for your audio, so it pops up a the recorder app.

Tap to start the recorder and start talking whatever you want to know down, don’t worry about being perfect you can speak like you normally do, take pauses between sentences, even repeat a word twice, it will be perfectly transcribed when Whisper sends the transcription to ChatGT in next action.

ChatGPT fixes typos and grammar and saves it to the Notes app.

The good thing about shortcuts is you can make it do anything you can even make it copy the output to clipboard so that you can directly paste it anywhere. But since my use case is to have my thoughts saved in notes app which is also available on my macbook.

I have been using it a lot lately to note down ideas when I am away from my computer. Dictation pro make it easy to note it down no matter how long i speak into the microphone.

The solution requires you to grab your own OpenAI API Key, which is free to try. You get $18 worth of credits which can last for two months. After you finish you credits, it still too cheap to use it. More details at the end of this article.

Check the demo of this shortcut in the video embedded above. It’s truly magical that you get perfect transcription every time and you don’t have to do a lot of steps to save it.

You can download this Shortcut and get your OpenAI API key to configure it.

Create a new shortcut, name it OpenApiKey or something descriptive. Then add Text action and save your API key in it. Then in the Dictation Pro shortcut, configure the second action, Run Shortcut.

And you are done. Dictation Pro is ready to use.

Use This iPhone Shortcut & Never Forget Anything Ever Again

How many times has it happened to you that there is no sauce, or milk in the fridge, or maybe that bulb is not working, and you say to yourself. Okay, I will get it when I head out. But you always forget, and you remember only when you get back home and you have to use that thing again.

Count me in.

I have been in that situation and I have finally found the solution. If you have got an iphone you can use that solution. Is an iphone shortcut that reminds me whenever I am out, to check out my shopping list to see if I need something for home.

The Shortcut app is quite amazing for iPhones. it’s a super app where you can create a lot of automations, and speed up your workflow. You can create a lot of automations based on certain actions.

One of those actions is location. So you can create automation on the basis of location, whether you are reaching some location, or you are getting out of location, you can set rules that get triggered if that happens.

So I have created an automation that works like this,

Whenever I leave out of my home (I given 100m circle), so when I am out of that circle, my phone will vibrate, and then will give me a pop up, with the message telling me to check my shopping list with that I need something or not.

So I can check my shopping list, which is inside the reminders app, and I can now finally get the sauce back home.

Even if you don’t have the habit of noting down the things you want for home, or you don’t create any type of shopping list.

It’s still is useful when your phone vibrates and it asks you whether you want anything for home. Because that’s what we forget, we forget we have to get anything if someone reminders that we have to get something for home we will know what those things are.

How to create this automation

Open the shortcuts app and then go to the automation tab, tap on the plus I can on the top right hand side, select ‘Leave’, then on the next page, tap on choose location. If you are currently at home tap on current location.

You can then select the radius, the smallest it can get is 100m which is sufficient for this automation to work. Tap on Done.

So you have set up the trigger, you are on the next page, here you can do what action you want.

Tap on new blank automation, this opens a new page where you can Add an action.

Search for vibrate device, Add this action

Search for show alert, Add this action. Tap on do you want to continue, write any anything that reminds you to get something, for example,

Heading out? Might want to check your Shopping List, Incase you have to get something.

You can add next action to open reminders app, or any app you use for shopping list. Automations are pretty amazing. Especially this automation that has worked for me many times.

Now I almost never forget to get anything when I head outside and have my iPhone with me, which is pretty much all the time.

Speechify Alternative Text to Speech Extension that Lets You Use Premium Voices for Free.

0

One thing you would wish to get your work done would be if you get the superpower to do things at 3x or 4x or maybe even 5x.

Well, if you work on a computer then this is quite possible. In a normal workday, I have to read tons of emails, dozens of blog posts and n number of social media posts, on Twitter, Instagram, and Facebook.

If I spend three hours on just reading these things, I would be only spending one hour, if I could do it 3x faster.

This is actually possible, thanks to speed reading tools like Speechify, a great Chrome extension I came across a few months ago.

Watch the Video

You just have to install it in your Google Chrome browser and whenever you are on a page or on your inside your gmail account you get up play button simply play that button and it will speak back the entire thing to you.

You can select the speakers, the speed, and a bunch of other features that are well designed.

But the problem with Speechify is, it’s based on a SaaS (software as a service) model, where you have to pay a monthly fee. I’m already having a lot of monthly subscriptions I don’t want one more service.

Speechify Chrome Extension does offer free tear where you have limited usage everyday, it’s like able to read one email for you and after that you are back to the robotic voices.

But the very essence of Speechify chrome extension is that it let’s you choose a premium voice. (they even have Snoop Dog’s voice).

If you had to use a robotic voice you can use the inbuilt voices of your computers or other chrome extensions that after robotic voices.

But here’s a Free Alternative

After getting frustrated about finishing my daily limit on specify by just after one email I was searching for an alternative I found a few but all of them were either premium or offered standard voices.

Wavenet for Chrome

This Chrome Extension let you use the voices from google. And it’s free to use the voices all you have to do is get the api key from Google Cloud for a particular service.

You can follow their documentation which is pretty easy to follow to get your API key. The good thing about using google cloud API key for text to the speech, you can use their recently added neural voices which are natural human like voices, for free.  You can check the amount here

You get 1 million character per month for free, if you use neural to voices which are pretty amazing. If you are using beyond that, it is $16 per 1 million characters which is still cheap.

Here is a rough calculation how much 1 million characters would be in pages. 

1,000,000 characters / 5 characters per word = 200,000 words

200,000 words / 300 words per page = approximately 666 pages

So you can read that many articles for free and after that it cost $16 for another 600 articles.

And these are credits that you get every month, and you will only be charged when you exhaust them, and continue using it.

Google is offering their text to speech services for to developers to create applications, but this chrome extensions let’s users like you and me to use this service via API without having to pay heavy for apps, that might be using these API keys in the backend.

However there is one downside of using Wavenet for Chrome, its two simple, there isn’t even a Start Speaking/Stop Speaking button. You have to highlight the text, right click, go to Wavenet for Chrome, and then click on Start speaking.

If you have to stop speaking you have to follow the same process and then click on Stop speaking. So here is another chrome extension that actually has got a button to start and stop playing whenever you want.

Read Aloud: A Text to Speech Voice Reader

You can use this right after installing this chrome extension, and you have a lot of voice is to choose from. It even gives a thousand characters free if you use the premium voices from Amazon.

But then if you select voices from the dropdown menu, and go way down it has an option to enable custom voices.

This chrome extension gives you the option to use your own API for custom voices for example you can use API from Google Cloud Platform, which will add neural voices to the list and you can choose any voice.

You still have that one million character limit, so you are basically using a premium voice, with an option to start and stop speaking by clicking on a button, without having to pay a monthly subscription fee.

Surely this chromic sanction is nothing like Speechify, but if you don’t want to add another monthly subscription to your card, any still want to be productive by doing things 3x or even 5x faster, this is the best alternative you have got.

MIUI Launcher vs Poco Launcher: A Fair Comparision

In the Android world, every smartphone maker has got their own custom UI over the top of Android. This is done to differentiate themselves from others.

Xiaomi has MIUI for its phone, apart from the ones that come with stock Android, such as the Mi A series.

But, when Xiaomi launched the Poco F1 under their new sub-brand, Pocophone, they decided to go with a customized MIUI and called it Poco Launcher.

Even though it is built on the same MIUI ROM, it is slightly different an brings some key changes to the MIUI Launcher.

We have talked about the interesting features of the Poco Launcher in a separate post, so in this post, we will be doing a fair comparison of both the launchers coming from the Xiaomi.

Now, you should keep one thing in mind that app launcher or custom skins should not be buying a factor for an Android smartphone because you can always use a third party launcher to get a unified look across your devices.

Moreover, these custom Android skins offer extra functionality over the top of Android.

Now let’s talk about the key differences between both the launchers.

App Drawer Support

One of the biggest changes Xiaomi did in the Poco launcher is introducing the app drawer which was absent.

Xiaomi has been taking a lot of inspiration from Apple being the hardware or the software this is why it decided to mimic the iOS even while using the Android.

And the reason to include app drawer in the Poco Launcher is to give users a stock Android experience, and the smartphone is mainly competing with the OnePlus, which also uses a custom skin, which is very much near to the stock Android experience.

So, while you have to be a little creative to organise your apps in the MIUI, you don’t really have to work that hard on the Poco Launcher.

All the apps can stay in the app drawer so that you can pick only the ones you want on the home screen.

For the majority of Android users, it’s the app drawer that is preferred and using MIUI with no app drawer support is kind of a compromise the MI users have to make in order to use Xioami smartphones.

So, the Poco Launcher is definitely better than MIUI Launcher.

Theme Support

MIUI has a standalone app for Themes and Wallpaper and the community keeps coming up with new and refreshing themes that any Mi user can download and apply to their Mi smartphones with MIUI.

This one aspect of MIUI makes it more appealing. Since the Poco Launcher is built on MIUI, it also supports all the themes in the Theme Store.

App Organisation

Talking about keeping the apps organized on smartphones, it’s also a crucial part of opting for a launcher.

With more than 100 apps installed on an Android smartphone on an average, one really needs to keep stuff organized if they want to use it in a better way.

With the limitation of no app drawer support on the MIUI, it has enabled the MI users to use Folders to keep their apps organized on the Home screen, which is a better way to keep apps organized on iOS as well.

Talking about the Poco Launcher, apart from letting users organize their apps in Folders, the launcher automatically organizes the apps in the app drawer by categorizing them according to their type.

It isn’t as accurate but it’s still better to have such type of organization in the app drawer.

Apart from the, you can also groups apps on the basis of the colour of the app icons.

Tap on blue dot and it will show you Facebook, Trello, Truecaller etc apps so that you can launch the app in the next tap.

Search bar Support

Again, in MIUI, the apps are placed on the home screen, and there is no option to look for the particular app when you need it.

You either have to look for it by swiping left or right on different home screens or use the Google search widget.

To add Google search widget, long press on the home screen and tap on the ‘Widgets’ option that appears at the bottom. 

Poco Launcher has got the search bar at the bottom of the app drawer, which makes it easy to search for the app if all the given organizational features do not work.

The search bar is placed at the bottom, which is great for bigger phones where reaching your fingers on the top is a little troublesome.

And the winner is….

The Poco Launcher is a clear winner, and it isn’t surprising by any bit since it has been well thought to bring out features people missed the most in MIUI.

Since the Poco Launcher is a part of the broader MIUI, we can see the Poco launcher as an option to use on upcoming smartphones from Xiaomi, especially in the Midrange segment.

Either way, you can still install it from the Play Store for free, and it on any Android smartphone since both are available on Play Store.

Install Poco Launcher from Play Store

Install MIUI Launcher from Play Store

How to Take a Screenshot on iPhone Like a Pro

So if you have got an iPhone, stop taking boring screenshots. Instead take screenshots like these.

Let me show you how.

Suppose you have taken a screenshot. Now, instead of sharing it directly, tap on it, tap on the share button. Do you see this option?

This will add an iPhone frame to your screenshots and then again give you pop up and now you can share it anywhere you want.

For example, if I share it in one of my groups on WhatsApp, this is how it is going to look. Then once it is sent, I can delete this screenshot.

Here’s the Video Tutorial

How to enable this ‘Add iPhone Mockup’ feature.

It is actually a shortcut that I have created for myself, you. can download it at the end of this article.

This iPhone shortcut app can be either added to your Home Screen or to the Share Sheet so that it is easily accessible.

How does this shortcut actually work?

It takes the screenshot and then it adds a mask on the screenshot it has taken, makes it rounded rectangle and then it will add it as an overlay on an image which I have saved on my phone.

So it grabs that image which is the background image and then it adds the screenshot on top of it.

On this overlayed image, another image is added which is a PNG file of an iPhone frame with a transparent background.

So it only appears on top of the screenshot and then the final image is ready and then this shortcut will pop up the share option which will let you share the final image anywhere you want.

Download this Shortcut.

Here is the link to download this shortcut. Add it to your Shortcuts app and then, download to image files used in this shortcut. If it’s a bit confusing to you you can follow the tutorial below.

Here is the tutorial.

Once you have downloaded this Shortcut from the link and have added it to your Shortcuts app on your iPhone, you can edit this shortcut by tapping the three dots and you will be able to see what actions I have added into this shortcut.

The first section is,

  • Get the screenshot and then
  • add a mask to it, which makes it rounded rectangle because if I was not adding the mask, the screenshot was visible on the sides even after adding the frame to it.

In the text, you can see the URL of the image, copy and open it in browser to download and save it on your phone.

The next action is, ‘Gets the file from the folder’. My Folder is called Assets, where the BG1.jpg (background image) is saved. This action grabs this image.

It overlays the screenshot on top the the BG1.jpg.

And then you can look for the second text box, which contains the second image, which is a PNG file of an iPhone frame. Copy the URL from the text field, open in browser of your choice and then download it to your iPhone.

Save it in the same folder, make sure the next action ‘Get files from Folder’ has the correct path to find the image.

The Shortcut is Ready. Now, Add to Home Screen or Share Sheet

To Add this Shortcut to your Home screen, you can tap on the arrow on the top after the name and then you can tap on add to home screen from the options and this will be added to your home screen.

If you want to add it to the Share Sheet you can tap on the I button at the bottom which will give you the option.

You just have to toggle that button to make it appear on the Share Sheet.

The next time you take a screenshot and tap on the share button, you will see this shortcut somewhere at the bottom. You can tap on edit actions.

Then you can tap on the plus button to make it appear under favorites. Long press the hamburger icon and drag it to the top.

The next time when you have to add a mockup to a screenshot, when you tap on share button, your ‘Phone Mockup’ will appear on top.

When you tap on it, it will work its magic and will add an iPhone mockup to your screenshot and you will be able to easily share the new screenshot anywhere you want.

Here’s the Download link

Add iPhone Mockup Shortcut

iPhone not charging? Here is how to fix it

From everything that has been advancing in our phones, one thing that still needs to be taken care of is the battery.

No matter what phone you have, it will barely last for a day, which forces us to charge it every night to ensure it’s ready for the next day. However, one of the most distressing problems iPhone users can encounter is when their device stops charging altogether.

This issue, though seemingly trivial, can leave your iPhone completely dead, causing a mini heart attack for anyone heavily reliant on their device.

Fortunately, there are several potential solutions you can try to fix the iPhone not charging problem. Let’s explore some of the steps you can take

Is Your iPhone Too Hot?

If your iPhone is too hot, apple will deliberately disable charging in order to prevent the battery inside the iphone from exploding.

But that doesn’t mean you can put your iphone in refrigerator to cool down so that you can charge it, that’s going to create another problem of condensation inside the iPhone. Which is bad, we don’t want that.

Instead let it cool, keep it in a cool environment, or better shut it down. If that’s not the problem continue reading,

Is your iPhone Wet?

Iphone or waterproof, you can take it with you in swimming pool, on may be in a shower. But that doesn’t mean water will not enter the open ports of your iphone like the charging port.

If your iphone is wet and if you put it on charge there is a fear of short circuit that’s why iphone disable charging when it detects there is water in the charging port. In fact it will notify you on the screen itself. This is for your interest, so that you don’t fry your iPhone.

Let it dry on its own or if you are in a hurry you can use a hair dryer to blow hot air, but again, keeping mind not to heat your iphone too much, because battery can explode, remember?

Make sure you have updated iOS

One of the first things you should do is check for any available software updates. Often, charging issues can be attributed to software bugs that may have been addressed in the latest iOS update.

It is worth noting that Apple has a history of releasing updates that unintentionally introduce unusual bugs to iPhones, so keeping your device up to date is crucial.

Change the charging cable

Charging cables, with their constant plugging and unplugging, are prone to wear and tear. If you are a careless user or have been using the same charging cable for an extended period, there is a possibility that it has been damaged.

Try using a different charging cable to see if the issue lies with the cable itself. You can also experiment with using another wall adapter, which you can borrow from a friend, to determine if the problem is with the charger.

Clean the charging port

Over time, the charging port on iPhones can accumulate dirt, lint, or debris, preventing the charging cable from making a secure connection. In such cases, cleaning the charging port can often resolve the charging issue.

Use a toothpick, toothbrush, or an earbud to carefully remove any dirt or debris from the port. You can moisten the cotton wrapped around the earbud slightly to assist in dislodging stubborn dirt.

These steps should help you troubleshoot and potentially resolve the charging issue with your iPhone.

If you encounter similar charging problems with an Android smartphone, you can also attempt these solutions. However, it’s important to note that Android devices may have different charging mechanisms and issues, so it’s advisable to refer to specific troubleshooting guides for Android charging problems.

Conclusion

While our smartphones continue to evolve with cutting-edge technology, battery performance remains a challenge. Dealing with an iPhone that refuses to charge can be a frustrating experience. By following the aforementioned steps and exploring possible solutions, you can tackle the charging issue and ensure your iPhone remains functional when you need it most.

Download High Quality Photos from Instagram on Mobile & Desktop

In this post, I am going to show you how you can download high-quality photos from Instagram.

There can be various reasons where you want to download the photos from Instagram, like for one of your projects, for a blog post if you are a blogger or maybe you just want to use it as a wallpaper.

Now if you are on on mobile, there isn’t really a straightforward way to download the Instagram photos to your phone.

Some of you might already be doing this, taking a screenshot of the photo and then cropping just the area of the photo. While it is good for a quick reference, it’s not the highest quality of photo if you are planning to use it as a wallpaper or something.

So what you can do is, install an app for that, there are various apps for this purpose, like Fast Save, QuickSave or Easy Downloader. And your job will be done.

Now if you are on Desktop, you might have seen there is no direct way to save the photos in the desktop mode as well.

While you can get the direct link to the picture from the inspect elements by right-clicking on the mouse, it’s little too confusing for a lot of people.

So a quick way is to use a website like dInsta, where you can paste the Instagram post link and get the download button. It’s by far the easiest way to download a single photo from Instagram,

However, if you want to download a bunch of them, and you do this quite often, then you might install a Chrome Extension called Downloader for Instagram.

It will let you download Instagram photos directly from the Instagram website with just a click. The extension sits on the top right of your browser where it can be used easily.

Bonus Tip: This is also good for bringing your memories real touchable form, by using these picture to print and put on your living room walls, you can use https://www.wallpics.com get them printed for wall art. Spon

Watch the video to know how to do it

Creating Compelling Multi-Cam Videos: Your Guide to Visual Excellence

Making videos has never been easier thanks to the available tools for everyone. However, with the increased accessibility, the competition has also risen.

How can you stand out on YouTube in 2023?

By enhancing the visuals in your videos. While the information you provide may be similar to others, focusing on visual appeal can make a difference.

One way to elevate your videos is by creating multi-cam content. You might have seen many YouTube videos using multiple cameras, and editing such content used to be more challenging in the past.

However, with the new updates in Final Cut Pro, it has become easier. In this video, I’ll show you how I create multi-cam videos for my channel.

My videos are typically five to six minutes long, but the actual recording takes about 10 to 15 minutes. Editing these multi-cam videos usually takes me around 45 minutes to an hour. So, it doesn’t require a lot of time.

Here’s the Video Tutorial

How to Record Multi-Cam Videos?

Multi-cam videos involve using multiple camera angles.

For simplicity, I’ll be using only two angles in this tutorial: a screencast of my computer and a talking head angle. Before recording, make sure to start all the cameras or recordings at the same time.

Also, try recording audio on all camera sources. This will make it easier to sync the videos within Final Cut Pro. You can even do a clap once all the cameras are turned on to have an audio waveform for matching purposes.

How to Edit Multi-Cam Videos in Final Cut Pro

To demonstrate, I have a pre-recorded screencast and a talking head video. I imported both into Final Cut Pro and organized my files within the Library.

In this case, I’ll create a compound clip that combines both clips, with my talking head appearing on the right side of the screen while the screencast plays. I’ll drag the screencast video to the timeline and place the talking head video on top of it. Then, I’ll sync the two videos by aligning the audio waveforms.

With the videos synced, I can add a picture-in-picture effect. By adjusting the size, position, and colors, I can create a visually appealing layout. Additionally, I can enhance the background by applying effects, such as a gradient, to replace the black background.

Once everything looks good, I’ll select all the layers and create a compound clip. This simplifies the timeline and keeps things organized. Now, I have a compound clip that represents the screencast portion.

Next, I’ll select both the talking head clip and the compound clip, right-click, and choose “New Multi-cam Clip.” This creates a multi-cam clip that combines both angles.

In the “Angles” view, I can see both angles appearing. If there were more angles, they would be visible here as well.

I’ll select the audio source from the camera where I used a professional microphone for better sound quality. I’ll also apply color corrections if needed, using preset effects to enhance the audio and color grading.

At this point, I can easily switch between camera angles by manually clicking on the desired angle or using the number keys on the keyboard.

To add more information to the video, I can include text, create chapters, or incorporate graphics. I can either create graphics within Final Cut Pro or use tools like Canva, which offers animated graphics. After downloading the graphics, I can import them into Final Cut Pro and place them where needed.

Once I’m satisfied with the editing, I can export the video and upload it to my channel. While this process may seem more involved than creating single-camera angle videos, with practice, it becomes easier and more efficient.

I hope you found this tutorial useful. For more details and additional resources, check the video description.

If you have any suggestions or comments, feel free to use the comment section. Don’t forget to like the video and subscribe for future content. Thank you, and take care!