What is WannaCry Ransomware? How Severe it is and What to do to safeguard yourself

Over the last few days, you might have come across this term Ransomware’ more than once.

So what exactly is a Ransomware?

Imagine someone kidnapping your loved one and asking you for money in order to spare their lives, the money is the Ransom.

And when someone hacks into your computer, takes all your important files and encrypts them and demands a certain amount of money, the software that hacks your system is called Ransomware.

A single line definition of Ransomware is the following

Currently, you are are reading this, more than 200,000 computers from over than 150 countries have been affected by a ransomware called WannaCry.

A report by Mint.com says that over 48000 such attacks were attempted in India in a few days, these attacks were just the ones that were detected and cleaned by Quick Heal Antivirus. The attack has been much broader and much worse.

In fact, the attack is so severe that it resulted in many companies shutting down completely.
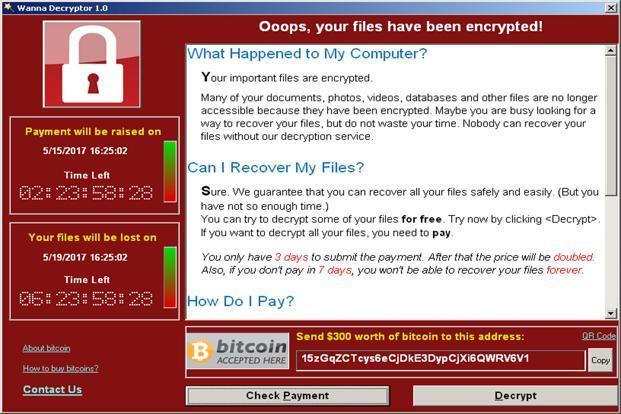
The computers affected by the WannaCry virus have been locked and the hackers are demanding $300 via Bitcoin, a digital currency and near impossible to track down.

If the victim does not pay the ransom in three days, it gets double to $600. And if the victim still does not pay, the files on the computer get destroyed after a week.

The photos of your family in your computer might be the only important files for you, image millions worth of data on big corporate computer networks gets locked down behind a ransom attack, you can only imagine how severe it is.

How did WannaCry Spread so widely?

The WannaCry virus exploits a security hole in Windows OS that was found in March and Microsoft released a security patch.

For the hackers to attack a computer, a file has to be downloaded to a computer, which then gets’s installed and is spread across other computers if the victim computer is connected to a network.

Which means, a computer connected to a network can still be affected by this virus even if no file it downloaded on the computer.

Fortunately, this attack has currently been witnessed on Windows-based Computers, but the users who updated their OS (or keep it on Auto Update) will be safe from this attack.

How to keep yourself safe from such attacks?

The most important thing is to keep your Computer updated, better turn on the automatic updates.

If you are still using a Windows OS which is not a Windows 10, make sure you upgrade to Windows 10, Microsoft prefers their latest OS and brings security patches more frequently.

Do not download files from untrusted sources, this means no cracked software, pirated movies and songs.

If you are using an older OS, and can’t upgrade right now, the least you can do is download an Anti-Virus, as I mentioned above, Quick Heal managed to detect and clean 48000 attempts of Wanna cry Virus attack.

Despite how much educational content you consume, there is no guarantee your computer can’t be attacked, so the best way is to keep a backup of your important files.

We have Google Photos, which has an incredible technology behind it, use it to back up your family photos. Learn more about Google Photos

Services like Dropbox and Google Drive offer up to 5GB of free storage, use it to back up important files.

If your data files are in huge sizes, External Hard Drives are now so affordable, you can pick 1TB External HD under $60.

Just keep a copy of your files off your computer so that you can simply format your computer and not worry about the files. Because even if you pay the Ransom, there is no guarantee they will spare you and give you the encryption code to decrypt your files.

For corporates and computer on private networks, we just hope they use updated systems instead of keeping running old Operating Systems to save the costs.

Wanna read more? The Hacker News has put together an informative article you should read if you care.

Best Headphones Under Rs 1000 You Can Buy Right Now

I was looking for a new pair of Headphones for myself since my last Sony Bluetooth Stereo headphones got washed out (quite literally).

They were in-ear headphones or ear headphones with some really nice sound quality and noise cancelling features.

So, this time I was looking for On-Ear or Over-Ear headphones. I’ve never really used them in the past so I wanted to pick an affordable one, preferably under Rs 1000. But when I started looking for the one I should buy, I was surprised by the number of options in the market.

I had to spend some time to filter out the best headphones under Rs 1000, I thought why not share this list with you guys. So here it goes.

All these headphones have similar specifications, like 32mm dynamic drivers that are good enough for great sound experience, they all work well with every device, like PC, Laptop, Mobile Phones or MP3 Players with a 3.5mm Audio slot.

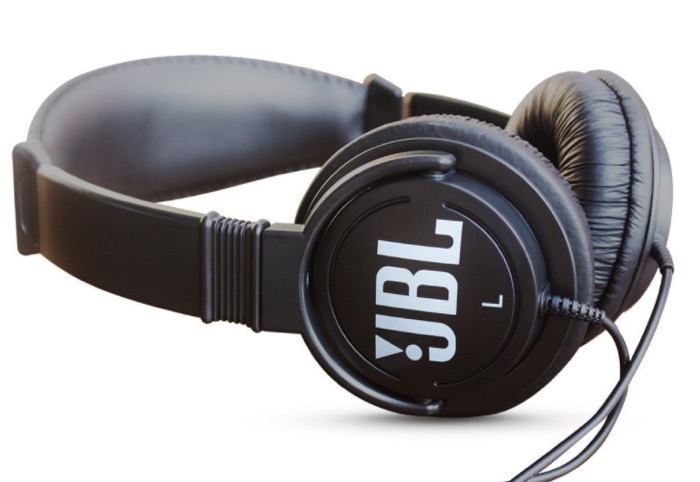
JBL C300SI

JBL is quite a popular Brand among the Youth, I’ve seen JBL branded stuff own by people around me. These specific headphones cost Rs 899 and were on a deal at Rs 799/- which is quite a steal deal for a headphone like this one.

Buy from Amazon

Sony MDR-XB250

Thankfully Sony has something under Rs 1000 that is also good in performance as well as the design. The XB in Sony MDR XB250 stands for the Extra Bass and the reviews suggest it worked out well for the people who owned it.

These headphones are plastic build and are quite delicate, which means if you are a rough user, take it out of your list but you are paying Rs 899 for this headphones getting better sounding headphones. So I think I’ll keep it on the list.

Buy from Amazon.in

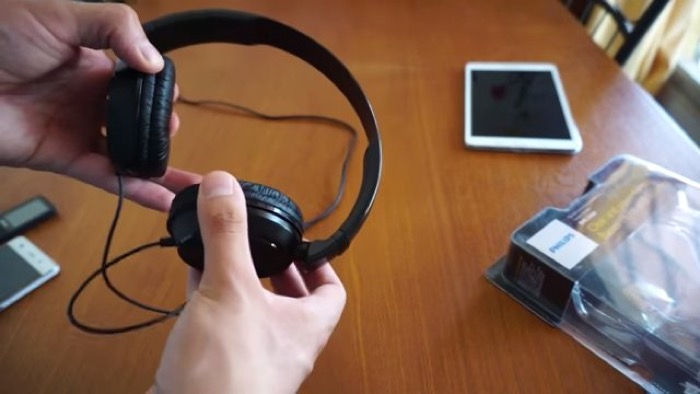
Philips SHL3060BK

youtube.com | trolldays

I’ve used a lot of Phillips products in the past, and a bunch of them have been either speakers or earphones. I find the value for money and since I’ve put the price limit of Rs 1000 I was sure there will be something on the offer for this list as well.

The build quality is nice, the headphones are foldable so you can carry them easily if you have to or just keep them on the desk. You will be paying Rs 800 for this.

Buy from Amazon

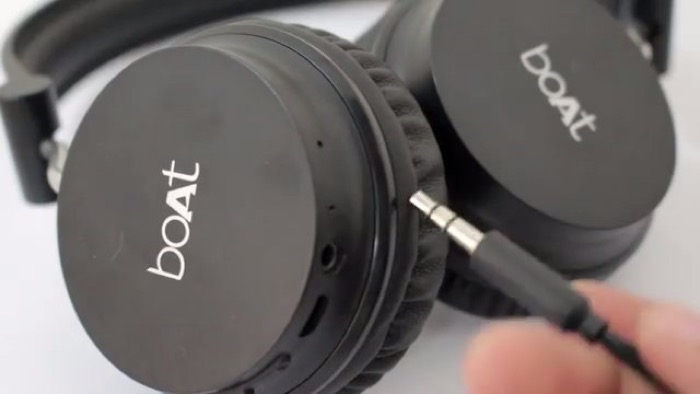
Boat Rockerz 40

Youtube.com | Snehal Wagh

One big feature of these earphones is, It’s WIRELESS. I was a bit sceptical about putting these headphones on this list, because of several reasons, a) it’s actually sold for Rs 1200 something, but is mostly available at Rs 999 on deals, b) it’s a Bluetooth headphone so it’s unjust to put these in the company of wired headphones.

Talking about the Bluetooth features, it offers a standby time of 100 hours with playing time of 8 hours (let’s consider it 6 based on our past experiences with claims) and charges the full battery in 2 hours.

These headphones can also be used regular wired headphones by using the AUX cable (plug one end to the headphones and another end to the music source, Smartphone/PC)

Buy from Amazon.in

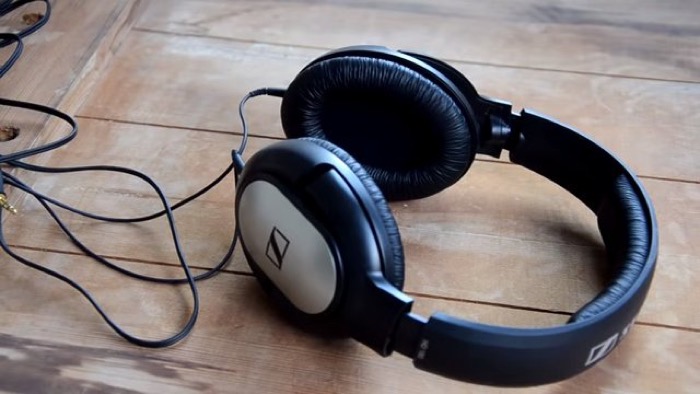
Sennheiser HD 180

Youtube.com | Techstreamy Good

Just like a Sony, there’s a Sennheiser on this list as well. But we are not talking about the expensive models. It’s just the plain Sennheiser HD 180, which is at around Rs 850 (keeps varying).

Unsurprisingly a lot of folks have picked this one up for themselves, perhaps, the brand power, the reviews on Amazon suggest they all are happy with the purchase, except a few.

One thing I saw a lot of people complaining about, is the 3-meter long wire. But what’s one man’s trash is another man’s treasure, I love long wires.

I’ve also tried other from the brand such as Sennheiser CX180 and Sennheiser CX213 and while the Sennheiser CX180 falls under Rs 1000 category for you to buy, the Sennheiser CX213 is a little over the budget.

Buy from Amazon.in

AmazonBasics On-Ear Headphone

Products under the tag of Amazon Basics are always valued to the money products, these headphones are not an exception, I’ve owned several Amazon basics myself and quite happy with them.

Usually, these headphones sell for Rs 1300 on Amazon.in, but you can get them for lower prices since Amazon keeps coming with deal offers every now and then. But at Rs 1300, there is nothing near it if you are not a fan of flashy designs or looking for something you can show off at the Airport lounge.

Buy from Amazon.in

Audio Technica ATH-S100 BGR

The Audio Technica is said to be one of the best brands out then when it comes to Music related products, thankfully they have something to offer that’s under Rs 1000.

The Audio Technica ATH-S100 BGR keeps the music output balanced meaning no Extra Bass, there’s a Sony MDR or a Phillips SHL for that (which is on this list).

Audio Technica has so many great products to offer that come at a higher price, but if you are paying Rs 1000 for this headphones, you are definitely getting the worth of every rupee you spend.

Buy from Amazon.in

Notable Mentions

The idea of this guide is to be simple and help you find the best headphone with great sound quality and features like noise cancelling, so it is worth mentioning a few more products that were recommended by friends and our visitors after reading this guide.

The 1More Piston Fit also qualifies to be on this list since it’s priced at Rs 999 on Amazon.in. The wired earphones look pretty much like the Mi basic inear with powerful bass.

So, this is a list of some budget friendly headphones in India or the earphones for music players, Android smartphones and iPhone (well, not the iPhone 7 or above :p)
Most of them come with a builtin microphone, and volume control, You can buy these headphones in India from Amazon, and with Amazon prime, you can get them delivered in a day or two without any shipping charges.

9 Smart Uses of Your Camera Phone You Didn’t Know

All you wanted in life was to own a camera phone, and what you do with it now? Take selfies, do Dubsmash and Instagram your food. Do you really think these are the only reason there is a camera on your phone?

We are listing few things you can do with your Camera phone

Photo Credit: The Fair Kitchen

1 Take a photo of your fridge to know what do you need to buy when you are in a grocery store next time. This is helpful if you really hate using To-Do apps for such tasks.

2. Take a photo of the parking area to know where you parked your car. Why put a strain on your brain to memorize where did you park your car? It’s helpful.

Dismantling_a_Phone
Photo Credit: Popular Mechanics

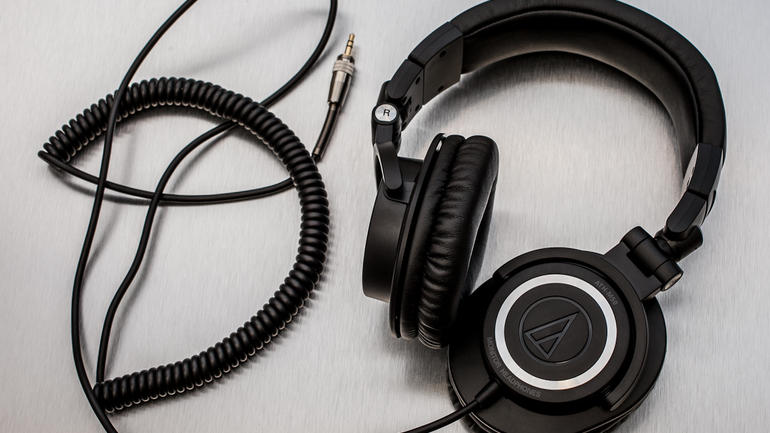
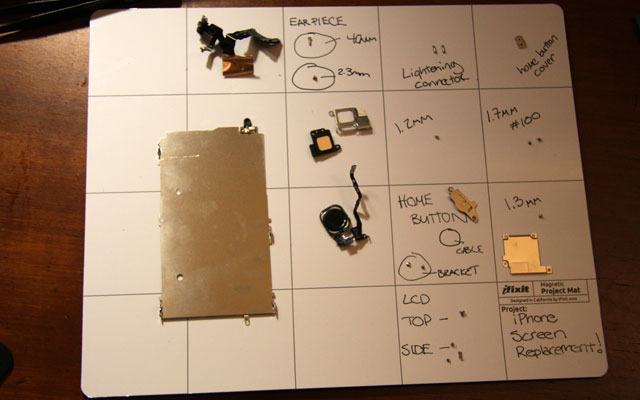
3. Take a picture of a Gadget/Electronic before dismantling it, or better, take photos of every step, so that you don;t get in trouble when it’s time to reassemble.

4. Take a photo of something interesting every day, different things obviously. Like, when you are visiting the Doctor, or going to the Bank. If you ever need to find what date you visited the doctor or bank. the Mera Data in your photo will be helpful. It’s in details.

5. Scan physical photos and documents using your camera, Evernote does a geat job in scanning documents, and it also saves them so that you can access from anywhere you want. Learn more about Evernote.

GoogleTranslate

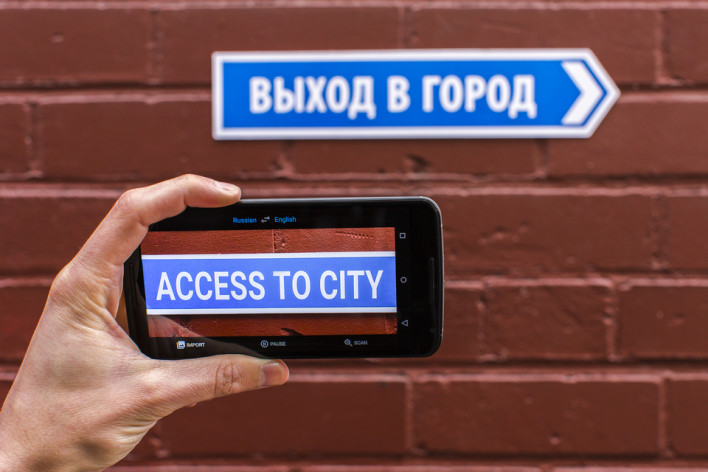
6. Translate Traffic Signs, Billboards etc in a foreign country using your camera with Google Translate. It translates things on the go, it’s going to save a lot of problems when you are travelling in a new country.

7. Grab text of a document or banner by taking a photo using your camera from Google Keep. It uses OCR (Optical Character Recognition) to recognize text in the images and produces texts that can be edited and copy pasted into other apps. More cool thing Google Keep can do ➝

8. Use your camera for scanning barcodes and QR codes by installing a third party app from Play Store. QR Codes are an easy way to send information. Many Business Cards have got QR codes that can be scanned to add to your contact list.

9. Become a Citizen Journalist by using your camera to report/broadcast something to the World. There are services like Periscope by Twitter, Meerkat and Facebook Mentions that let you live broadcast yourself to the world easily.

Installed Extensions Do Not Appear in the Chrome Bar? Here is How to Fix it

0

If you are a Chrome users, you must be aware of the importance of Chrome extensions. And I know how it feels when you can’t use your favourite Extension because it isn’t there, even after you have installed it.

Repair Chrome Extensions01

And it’s even worse when you go to the Extension listing in the Chrome Web Store and it tells you that you’ve already added it to your browser and there is no way you can add it again or some kind of re-download button.

Been there, done that.

You are not alone, I too have found myself in this situation many times. And I’ll tell you what to do. It’s the easiest way to get them back.

Actually, what happens is, these extensions either get turned off manually, you do not remember when you did that, and it’s okay don’t punish yourself. Or, the extension get’s corrupted for some reason.

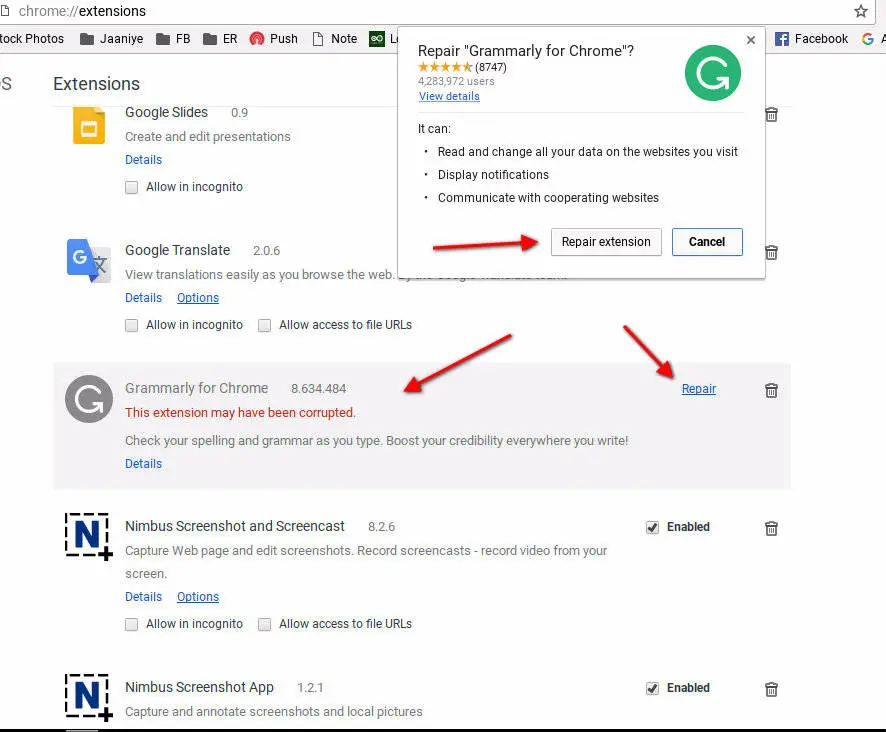
Either way, you have to visit the ‘Extension’ area in your Chrome Browser, You can find it under the settings. (or type chrome://extensions/ in the address bar)

When you reach to the list of Extension, find yours. See if it’s turned off, Tick the checkmark to enabled, or  If it is Corrupt, you will find the repair button to next to the Chrome extension.

Repair Chrome Extensions


The repair would re-download it which would probably solve the problem.

It if doesn’t get a repair, you can remove the Extension by clicking on the Delete icon and Download it again from the Chrome Web Store.

While we at this, don’t forget to check out the killer chrome features to make the most of your Chrome browser.

How to Directly Post Photos to Instagram from PC

0

As the word is going mobile, there are many struggles faced by PC guys (Mac users included). One such struggle is to post photos on Instagram from PC.

While Facebook, Google Plus, Tumblr (heck even Tumblr) all are in for making PC Guy’s life a little easier by letting their services usable on any platform. Instagram has always tagged themselves a Mobile First Company, and this sucks for a PC guy Mac like me.

I spend most of my time on the PC, I’ve got a couple of Instagram accounts (Both personal and Business accounts) that I manage.

Even though it allows for multiple accounts on the Smartphones, one still have to pick their smartphones up to post something to Instagram.

And it makes sense, I mean, you share photos that you capture using your Mobile’s camera, so this makes it quick to share. But why not the posting ability on Desktop?

Well, If you find yourself in the same spot, I’ve got a workaround to share with you guys, that will let you post photos to Instagram from Desktop.

A Little Techie Workaround

Well, don’t get scared, it isn’t that techie, just follow the steps and you are good o go.

First let me tell you how this workaround works. 

Instagram knows which device you are logging in from, if it’s a Smartphone, you get the options to post stuff. But if you are logging in from a Desktop PC, it hides the options.

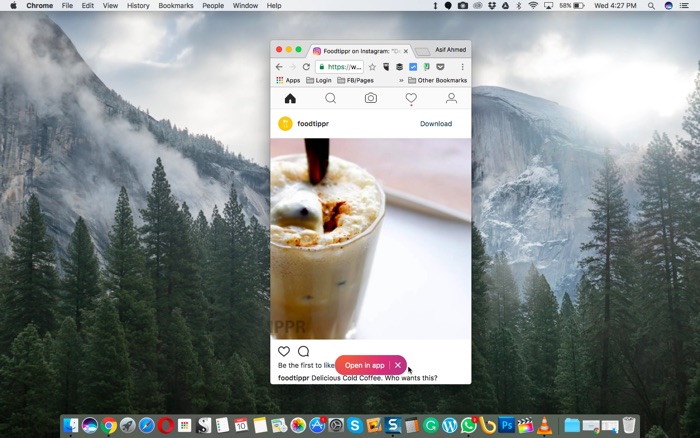
So, what we need to do is, tell Instagram that we are logging in from a Smartphone, even though we are doing it from the Desktop (Google Chrome)

Click on the vertical dots on the top right side of the Google Chrome browser,

Click on ‘More tools’, then select ‘Developer Tools’

This will open a panel with some codes that you don’t need to worry about, just find the device icon somewhere on top right side (refer to the image below)

Now, once you click on it, you will notice the Camera icon appears in Instagram, you can now select a photo from your Desktop and post it. Further steps are the usuals.

Non-techie workaround,

many people may not want to do this, even if it doesn’t harm you (or your computer) in any way.

You can install User-Agent Switcher Chrome extension from Chrome Web Store, it will do that same thing, you can select the User Agent of an Android or iOS device and open Instagram.com,

The Camera icon will appear and you will be able to post photos to your Instagram account from your Computer.

Read some really amazing articles related to Instagram

Should you install Google Chrome 64 bit or Google Chrome 32 bit on Your Laptop?

Whenever I buy a new Windows Laptop, I open Internet Explorer and Download Google Chrome. I recently found that Google Chrome now offers a 64bit version, I downloaded it. Though there is no visual difference between the 64 bit and the 32 bit, I thought it would be a good idea to mention the differences between the two version to let others know if it’s really worth installing the 64 bit Google Chrome.

With the release of Google Chrome 64-bit version, Google was seeking to increase speed, security and stability of the Chrome browser. Why a 64-bit Chrome? Firstly, processors running 64-bit are much faster in contrast with 32-bit ones and a browser that makes the most of this is always in order.

Google claims to have rolled out the 64-bit’s Chrome because they had observed a 25 percent improvement on average in terms of performance mostly on visual elements.

Improved security

Another reason for the introduction of 64-bit Chrome is the fact that Windows systems running on 64-bit are considered to be much better in terms of security in contrast with 32-bit systems.

The new Chrome for 64-bit users was using features from Windows 8 towards making it impossible for hackers to attack computer processes. Google has also claimed that 64-bit Chrome does not crash as much as the Chrome made for 32-bit users-wonderful news considering the low rate of crashing for both.

HTML5 Tests

HTML5 tests to weigh in on the compliance of both 64-bit and 32-bit Chromes showed identical or almost similar results. With most videos and cool effects on the internet running through HTML5, if a browser supports more of these the best the web experience.

It is worth noting that while the Chrome 64-bit and 32-bit are virtually identical in their HTML5 support, they outperform other commonly used web browsers.

Essentially, both Window versions in terms of performance rendering of a webpage and speed are very close and seemingly have no difference.

Stability

Security and stability of a browser are critical. In matters stability, the best one can do is to believe Google, considering that testing such a feature can take a very long time. However, performance measurement mostly on JavaScript functionality including the ease of handling common functions on JavaScript has indicated that the 64-bit Chrome is a little bit better by about a single percentage.

In terms of security as already mentioned, 64-bit Chrome is much better. It means that as Chrome 64-bit uses 64-bit processing effectively it is a better choice due to its protection against hacker attacks. 64-bit processors are much faster.

Ordinary users might not notice the difference

Of all the tests done to weigh in on the Chrome 32-bit and Chrome 64-bit and which you should use, the important thing is to look at the big picture on each version. It means if you are processing with 64-bit you have a powerful browser and more secure while at it.

Most of the differences between the two are very minimal and most average users will not decipher them, considering Chrome browsers are very effective and fast than most common web browsers.

After the unpopular Internet Explorer, only Google Chrome has a stable browser for 64-bit systems. While the differences and strengths might never be felt by ordinary users, the extra benefits such as better security, speed and stability make an upgrade to 64-bit worth it.

Anyone who loves watching HD videos and playing games through Google Chrome might want to upgrade as soon as possible.

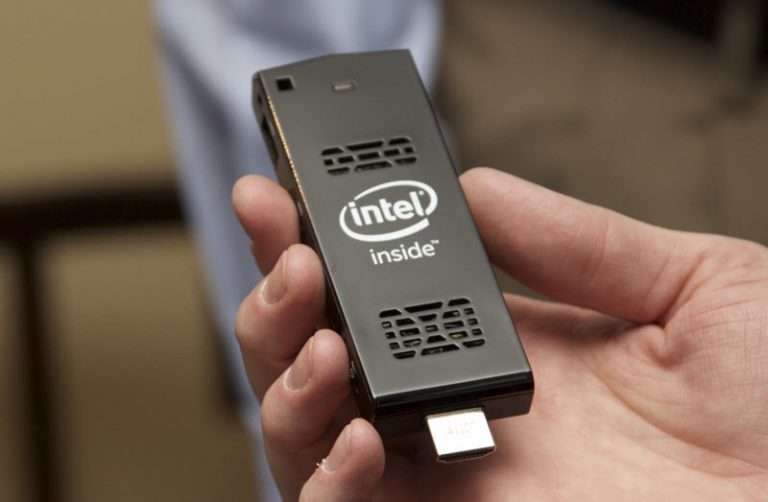
Now You Can Carry Your Computer in a Single Flash Drive Sized Stick

Ars Technica

It may sound hard to believe but the tech has gone this far, and  It may have been surprising when I wrote this post originally back in 2017, that Intel has made it possible.

Older information in this article has been replaced with relevant and new information about computer is that can fit into your pocket.

In 2021, which is almost about to end and we are going to enter in 2022, it does not at all seem impossible. In fact we have a lot of options these days, to carry e a powerful computer in our pockets.

Samsung Dex

Started off as an experiment and dedicated hardware, that could convert Smart TV into a full fledged computer, it has now evolved into something you carry with you everyday.

The Samsung flagship smartphones such as the Galaxy S series and the Galaxy Note series have got Samsung dex built right into the smartphone. All you have to do is enable it, and connect to a display, either with a cable or wirelessly (where both your smartphone and the display are on the same network).

It is powered by Android with some customisations by Samsung on top of it, to give you a desktop life experience.

So if you really serious about getting a computer with yourself, you can buy a Samsung Flagship instead.

iPads

Apple has also upgraded their iPads, by creating a more advanced iOS version for their tablet computers, it’s called iPad OS and it lets you do a lot of things that were limiting in iOS.

The Safari Browser lets you open websites in desktop mode, you can do that in Google Chrome Browser as well. And you can also get a detachable keyboard case either from Apple or from third party manufacturers that is usually one third of the price.

My recommendation will be go for the Logitech Keyboard case, which also comes with a small trackpad, giving you a more computer like experience in a tablet form factor.

Unfortunately, the browser still don’t match the browser is available on laptops, there is no plugin support, and it’s not going to be coming anytime soon because of the architecture of the iPad device, which is is closer to iOS than Mac OS.

ChromeTabs

Chrome tabs like the Lenovo Chromebook do it solve your problem of using a browser that supports extensions, in a tablet form factor.

In fact I have been using one from last one year. It’s incredibly amazing that a device, less than half the price of iPad Pro, full fledged Google Chrome browser with extension support in a similar form factor.

Learn more about Lenovo Chromebook Duet

Computer on a Stick

Unfortunately, the Samsung flagship smartphones are not in the affordable category. And if budget is an issue then you can go for the computer on a stick option, which is similar to what Intel has produced.

There are a lot of options available on Amazon, which you can check by clicking the link below.

Buy from Amazon

Best Options to Recharge Your Prepaid Mobile Number in India

0

The original post was written back in 2013, that’s several hundred years ago, considering how fast the tech is advancing. This post deserved some fresh update, so here it is. 

The world has become a better place to live ever since the services for Online recharges have emerged. But again, the market is getting cluttered with n the number of services.
Here is the list of a few trusted websites you can use to recharge your mobile phones online.

Prepaid numbers are safe and prevent you from getting shocking bills. The Indian Telecom Operators are quite nasty about Post Paid Bills.

But the problem will Prepaid numbers is, you need to load money regularly. Thankfully there are many services available in the market that lets you recharge your prepaid numbers instantly.

In this post, we will talk about the best options for it.

Use Mobile App of your Mobile Operator

Every Mobile Operator now has their app on Android and iOS to let you choose the Internet Pacs, Talktime Packs, Activate/Deactivate services.

So, it’s beneficial that you install your respective mobile operator’s app and use it to recharge your number.

Some of them even offer discounts and free talk time when you install and use their apps.

Currently, in India, there are three major players in the telecom sector. Vodafone, Airtel, and Jio. All these three operators have their apps from where you can recharge your mobile.

I find jio to be the best among the three telecom operators. It does not offer too many plans. Each plan has unlimited calling on any mobile network. The only difference is the amount of 4G mobile data you get in each plan.

UPI Apps

Google Pay / PhonePe / BHIM

All these up apps are used to make payments to merchants or other UPI contacts. They also offer this feature of paying bills and recharging prepaid mobile numbers. I find Google Pay to be the best among all. All

Use Payment Wallet Apps

These Payment Wallets are more than just an app to recharge your prepaid mobile number. You can use them at both offline and online stores as well.

They also keep coming with Cashback and Payback Offers. The more you use them, the more money you save, so it’s beneficial to use just one of them.

Mobikwik

Mobikwik makes it easy to manage your finances for mobile recharge and shopping online. Mobikwik keeps coming with new offers. I use it while shopping for something from eBay.

Check out how to get free money in your wallet.

Free Charge

Free Charge is the first website to offer coupons of the same amount you use to recharge your mobile. Suppose you recharged your mobile with Rs 100, you will get a coupon for the same amount, which can be redeemed at much famous shopping and eat outlets.

As you get a coupon for the same amount, you are virtually recharging your mobile for free.

Paytm

The use of PayTM has exploded in India, especially after the Demonetization. Almost every retailer in your locality would be accepting PayTM.

So you can add money to your wallet for shopping and recharge your phone with the money left in your digital wallet.

Jio Money

Jio Money is the new entry, and it’s a digital payment wallet from the newest Mobiel Operator Reliance Jio. Interestingly, the Reliance Jio’s Prepaid

Find Out What’s the Difference Between Windows 10 and Windows 10S

Microsoft recently announced a newer Operating System called Windows 10S before you jump to the conclusion that the Windows 10S is an updated version of Windows 10, we are talking about Microsoft, not Apple. (hint: iPhone 7, iPhone 7S).

The Windows 10S is more of a choice for consumers than an update.

The users have now got options to choose between Windows 10 and Windows 10S.

But the options, especially if they are pretty similar to each other, can create confusion.

So we thought why not clear the confusion by pointing out the difference between Windows 10 and Windows 10S. So here it is.

[su_table]

Windows 10 Windows 10S
Paid

Slower on cheaper Machines


Targeted at Creators/ Business Professionals, Homemakers (almost everyone)

Can install Software from Third Party Channels (Websites, Flash Drives, DVDs)

Windows 10 is Microsoft’s Latest OS


Not Power Effecient

Use any Browser

Free

Build to run smoothly on Cheaper Machines (starting $189 from DELL, ACER, ASUS, TOSHIBA etc)

Mainly targeted to Students


Can install Software only from Windows Store.


Windows 10S is upgradable to Windows 10 ( $49 for Others and For students it’s Free)

Power Efficient Laptops will have 10 hours + of battery life.
Edge will be Default Browser with Bing as Default Search Engine

[/su_table]

So these were a few key points that, I hope, will tell the difference between the two OS.

Windows 10S is more of an upsell, a free product to give the consumers a taste of their services.

It is also dubbed as the Competitor for Chromebooks since Windows 10S will power low efficient laptops starting at $189, these laptops will be manufactured by companies like DELL, ACER, HP, TOSHIBA etc.

There is so much that Windows 10S cannot do, one of them is the limitation of installing apps from the Windows Store (which seriously lacks some basic applications).

Maybe in future Microsoft gives some kind of option to install apps/software from outside the Windows Store or improves the store by introducing basic apps to it.

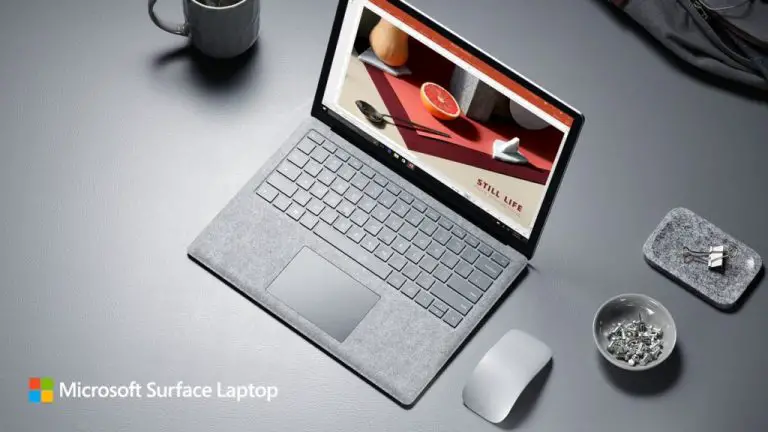
But till then, Windows 10 is your best bet. Check out the new Surface Laptops that are powered by the new Windows 10S. You can the option to Upgrade to Windows 10, so don’t worry.

How to Enable Dark Mode & Material Design in YouTube

0

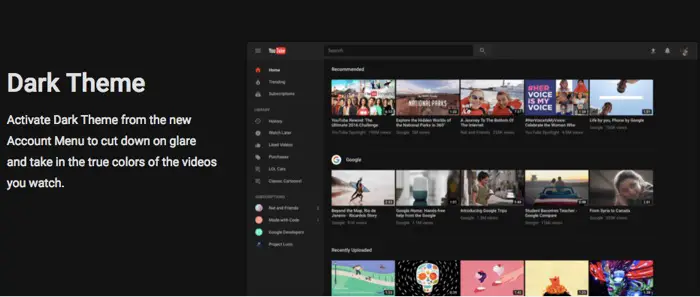
If you spend a lot of time on YouTube, it’s a good idea to turn on the Dark Mode to that you don’t get many stains in your eyes.

Earlier, the Dark Mode was achieved using a few tricks or by installing Chrome Extensions like the Magic Actions.

Well, YouTube has now that feature of Dark Mode built into it natively.

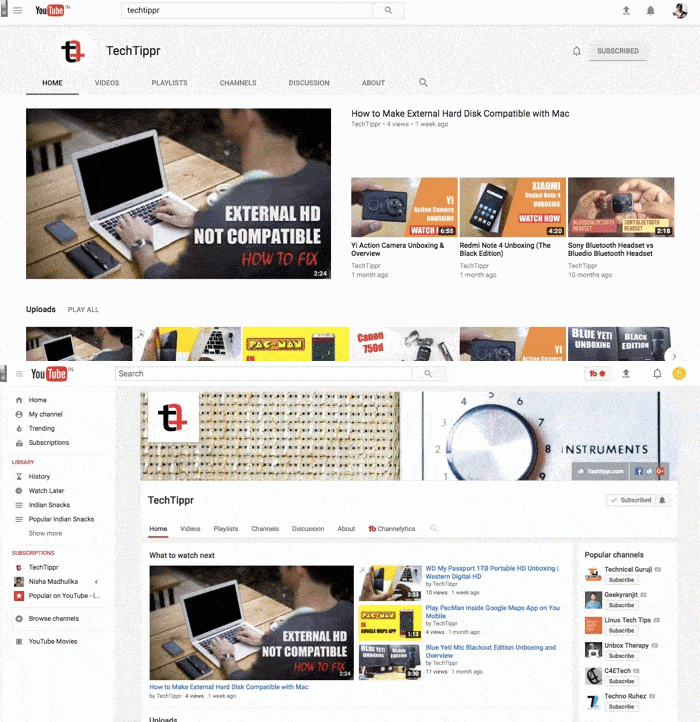
The Dark Mode comes with the new Material Design for YouTube which makes it look cleaner and smoother, like the Google Plus. The changes are not big but enough notice.

This is the GIF showing the design change for Channel Page. Notice the Channel art is not visible in the new design and the first video thumbnail is bigger. 

The new Material Design is applied everywhere, except the Creator Studio. You have your account Display Icon on the top right, from where you can find the options to switch between accounts, go to your channel or creator studio.

The Material design was actually rolled out as a test on one of my Channels but now it seems Google has given an option to enable it for people who want to enjoy the new YouTube.

How to enable Material Design for your YouTube Channel

Enabling the new design on YouTube is easy. Head over to youtube.com/new in your browser on your Laptop or Desktop.

You will land on the page from where you can enable the Material Design by clicking on the ‘Try it now’ button.

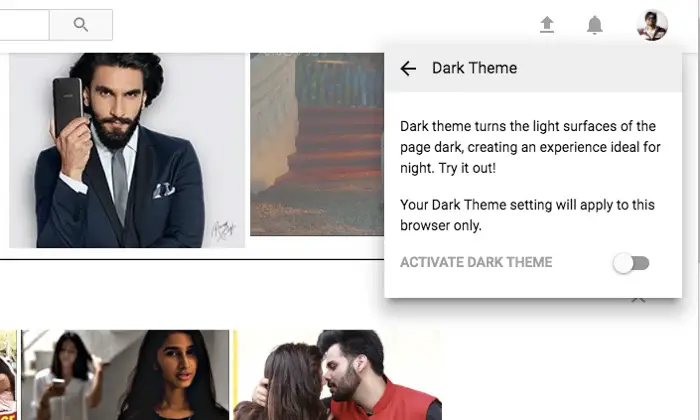
Once you head over to YouTube with a new design, click on the top right display icon of your account. You will get the Option for ‘Dark Mode.

When you select the option, you can Activate the Dark Mode from the pop-up. And it looks like this.

Now that the Dark Mode is available on YouTube for Desktop, It will be interesting to see a similar feature for the YouTube for Mobile as well since the majority of the people uses their Mobile phones to browse YouTube Videos.

Best Apps to Make Free Voice Calls Anywhere in the World via VoIP

0

The STD and Local Call Rates have dropped so much in the last few years, but when it comes to international calling rates, the prices are as high are they always were.

But with the internet growing rapidly and the 3G internet becoming more affordable, we can always use messaging apps for calling our near and dear ones absolutely for Free as far as you and the people you are going to call have the same app installed on their phones.

In this post, we are going to list a few apps that you can use to make Free international Voice Calls via VoIP (Voice over Internet Protocol).

Skype

image

Skype is pretty old, but it still, rules them all, and with everyone owning a Smartphone, they can easily get it on their phones. It’s best because you can make calls to anyone on Skype whenever the person is using Skype on Mobile or Computer.

Google Play | App Store

Facebook Messenger

image

Facebook’s messaging app is made for the messaging features of their core service, but it brought the features of voice calling between Facebook messenger app users of mobile and tablet PCs.

Google Play | App Store

WhatsApp

Skype might be the oldest service to make free voice calls worldwide, WhatsApp has over 1.2 billion users, which makes it more probable that everyone you want to call, is using WhatsApp.

Even I have started using it more than Skype when the voice calling feature was made available on WhatsApp.

Because literally, everyone I know uses WhatsApp.

Google Duo

After retiring their Google Hangouts video calling service, Google introduced Google Duo, which is a great app for making video calls one on one.

About Google duo as its video calling quality. And the fact that it is integrated with Google Home, so you can use voice commands to make calls to your contacts.

Available for Android, iOS, and Web

Viber

image

We have tried Viber and it too works really well, you can register using your mobile number just like you do on WhatsApp and other mobile messaging apps, but it also works on Desktop. And the recent updates brought group video calling to it as well.

And the recent updates brought group video calling to it as well.

Play Store | App Store

Botim App – For Calling UAE

Pretty much every app that offers a voice calling feature, is restricted in UAE. The Botim app is supported by Dubai, but it costs money, not so much, but it’s not free.

You can check out other workarounds if you are looking to make voice calls to Dubai. Check out the article.

Microsoft Launches Surface Laptops to Compete with Macbook Air

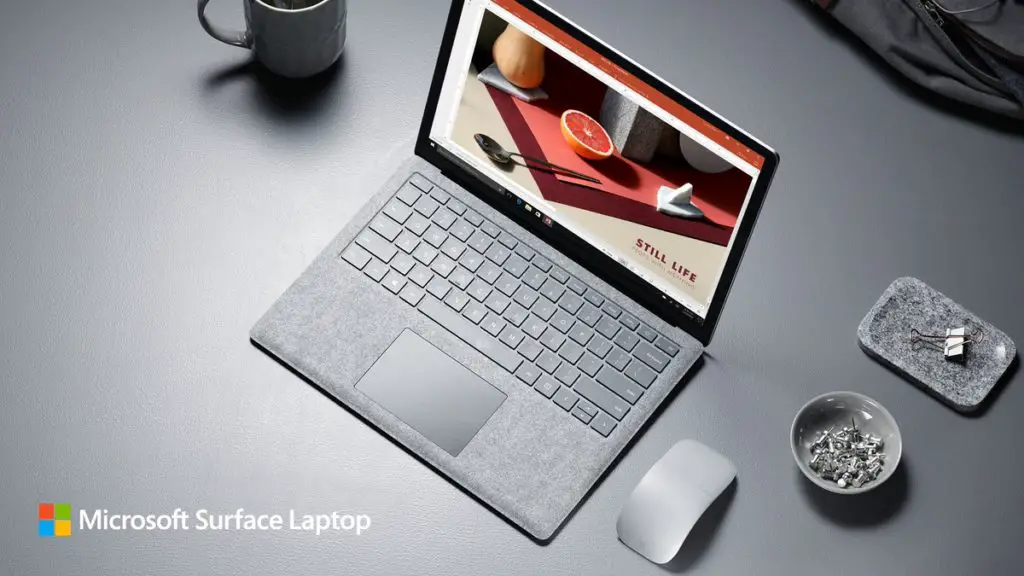
I the Start of May, Microsoft is challenging two different companies with one Product. Their new Surface Laptops that are running on a new version of Windows 10, that is called Windows 10S, which is lighter and will run smoothly even on entry level Laptops.

And if you haven’t guessed it already, the Windows 10S aims to compete with Chromebooks that are being adapted by students because of their smoothness and pocket-friendly approach.

We have talked about it in a sperate post, so let’s just talk about the Laptops instead. You can take a look at the video below. (or just look at the pictures instead).

https://www.youtube.com/watch?v=74kPEJWpCD4

Looking the design and the way it is being showcased, one can clearly make out they want to challenge Macbook Air,

in fact, I read the comments on some popular blogs, it was already filled with phrases like ‘next MacBook Killer’

The reason it is being called MacBook Killer is the specs and the design choices. The use of Core i5 and Core i7 processors giving battery power of around 14+ hours with a Display size of 13.5-inch.

How can it be a MacBook Killer when it runs on Windows 10S?

Microsoft may have unveiled them with Windows 10S, the hardware is quite sufficient to handle the Windows 10. In fact, users can upgrade to Windows 10 free of cost.

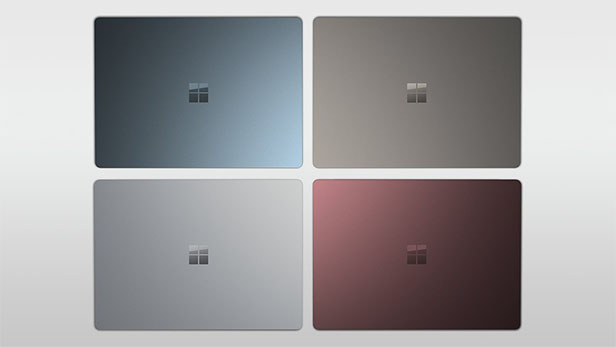
The Surface Laptops are full-fledged laptops, unlike Microsoft’s Previous Surface devices which are more like 2 in 1. (Tablet + Laptop). The Laptops will be available in four different colours and in different configurations.

The Core i5 variant has 4Gb of RAM, 128GB of SSD Storage and is priced at $999. The Surface Laptops will be available from June onwards.

Microsoft Brings A Free Lightweight Version of Windows 10 to Compete with Chromebooks

So Microsoft just launched a new set of Chromebook Surface Laptops. What’s special about them you may ask, well, they run on Windows 10S. (Yes a 10 with an ‘S’). You can read about it in a separate post.

Windows 10S is Microsoft’s attempt to compete with Chromebooks. Yes, it the ‘Lite’ version of Windows 10 that will power Laptops that will cost less and will target students, just like the Chromebooks.

Chromebooks may not be mainstream, but I can tell you they are amazing, I’ve actually used one for a long time. It’s the only limitation was, it was pretty limited without the internet connectivity.

Difference between Windows 10 and Windows 10S

There is not much difference between the two. In fact, Microsoft’s Windows 10S is more like Windows 10 than a Chrome OS since it can run a lot of apps that can be used offline.

The only limitation is the Apps can be installed from Windows Store only.  And it is an OS for low-end Laptops where running Windows 10 is a struggle.

A lightweight OS from Windows will assure users a smooth experience on Windows-based apps rather than opting for a different OS just for a smoother experience.

Is Windows 10S the first lightweight OS from Microsoft?

No, it is not, Microsoft actually launched Windows RT in 2011 for Tablet PCs when they were still Hot.

Windows RT aimed at low efficient devices and would only run Modern Apps, which make the Tablet PCs behave like a bigger mobile phone rather than a PC.

Microsoft learned from their failure of Windows RT and has made Windows 10S more like a limited version of Windows 10 that can run on less powerful machines.

Along with that, Windows 10S can also run tradition 32bit apps as well as Modern Apps provided they come from Windows Store. Microsoft is also working to brings popular programs to their store.

Price and Availability of Windows 10S

Like the Chrome OS for Chromebooks, the Windows 10S is a free OS, that will be available with on cheaper laptops from ASUS, DELL, ACER, SAMSUNG, TOSHIBA starting from $189, which will be coming on the market soon.

And just like we have a few premium Chromebooks, Windows 10S will run on few high-end machines as well, such as their newly Launched Surface Laptops are pretty powerful machines you can pick for $999 and they run on Windows 10S.

Microsoft gives you a choice, the users will have the options to upgrade to Windows 10, it will be Free to Students and cost $49 for others, which is still a sweet deal.

How to Install the Apps in Your Android Phone that are Not Available in Play Store

0

There could be several reasons you would want to install an app that is not available in the Play Store.

It could be an app which is not meant for your Android device like WhatsApp is not available for Android based Tablet PCs.

Apps like Pokemon GO, which is not available in every country.(Here’s how to Install & Play it in any country)

Apps like Prisma (next Instagram rage) beta version of the app has been pulled out of the play store. (Here’s how to Install Prisma App on Android)

Apps that are paid (assuming you’ve already bought them and want to run on another device or the device own by someone else in the family) (Here’s how to move apps from one Android to another)

In all these situations, knowing how to install an App in Android device when it is not available in the Play Store, will help you become The guy everyone in your extended family will turn to when they seek an advice for their next technical struggle.

How to install the app

It’s not rocket science but since there are thousands of people looking for the solution, here we go.

All these files that you install from Play Store are submitted by App developers so that it becomes easy for you to install any app from a single place, but these apps are also available in the form on a file (.APK file) either on the website of the developer or any other site, or you can simply get them from someone else via ShareIt or similar sharing app.

So, you need to get your hands on the .APK file of the particular app and move it to your phone’s (or MicroSD’s) storage which can be accessed from the File Manager. Once you locate the file, tap and install it on your phone.

InstallAPK

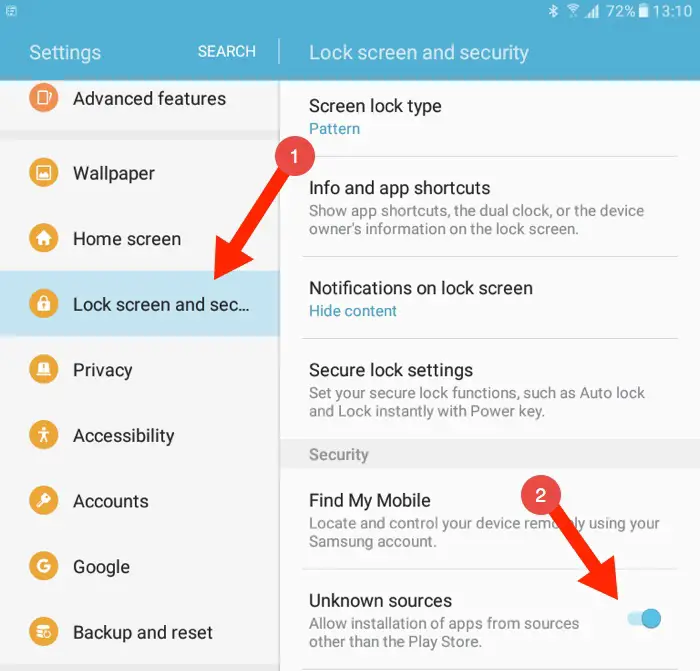
Note: Make sure you have marked the checkbox saying ‘Install from Unknown Source’ which is a rather scary way of Android to tell you not to do that but it’s okay if you get the file from a trusted source, like the Offical Website or a trusted person.

How to use microSD Card Memory as Internal Storage to Install More Apps

microSD cards or SD cards have been around even before the smartphones era, but they have been a blessing in disguise to anyone who owns a budget phone with less storage.

Mostly all the smartphones give the option to expand the storage by putting an external microSD

Smartphones, especially those in the budget range, come with smaller internal storage, even though xiaomi has done an amazing job by offering Smartphones like Redmi 4A at Rs 5900/ that have a standard storage of 16GB. But since Android OS is evolving, apps are becoming heavy and the average installs on smartphones is also increasing, even the 16GB feels a bit of shortage.

But since Android OS is evolving, apps are becoming heavy and the average installs on smartphones is also increasing, even the 16GB feels a bit of shortage.

Thankfully these external microSS cards can also be used for installing apps.

The options of using SD card for installing app was already there in the form of ‘Move to SD Card’ option from the Apps Manager section.

With Android 6.0 (Marshmallow) it has got a name of ‘Adoptive Storage’ and is more streamlined and easy to use than before.

Even though these options exist, doesn’t mean buying a phone with huge internal storage becomes pointless. The internal storage will always perform better than making the SD storage act as internal storage.

When you tap to open an app, the speed at which it opens also depends on the read/write speed of the storage it is installed on. This is where SD Cards can fall behind.

There are different types of SD cards available in the market, mostly classified in categories according to their read/write speed.

The newer ones like Sandisk Ultra has read/write speed of as much as 95MB/s

SO, if you are looking to use this feature of Adoptive Storage, make sure you have an SD Card that is fast enough.

Things to know before using Adoptive Storage

Before we talk about making the SD Card an Adoptive Storage, Few things to keep in mind,

  • Your smartphone needs to have Android 6.0 or above version running.
  • Your Devie Manufacturer has not disabled the Adoptive Storage feature.
  • You cannot use the SD Card on any other phone since it will be used formatted with the different file system to keep the installed apps secure.
  • Not every app can be installed on Adoptive Storage. Like the ‘Move to SD Card’ feature was limited to some apps, Adoptive Storage is also not supported by every app.
  • You can rollback whenever you want to use your SD Card as a normal storage option.

How to use SD Card as Internal Storage for your Android Smartphone

  • Insert the microSD card into your smartphone.
  • Open Settings, then Storage
  • You will notice your SD Card there, tap on it.
  • Tap on the top right-hand side to get the options.
  • Tap on Storage Settings and Choose ‘Format as Internal’
  • Tap on ‘Erase & Format’
  • The SD card is now ready to be used as Internal Storge where you can move your apps.

How to Rollback to using SD Card as a Portable Storage?

The rollback process is also pretty similar, to making the SD Card Adoptive Storage.

  • Open Settings, then Storage
  • You will notice your SD Card there, tap on it.
  • Tap on the top right-hand side to get the options.
  • Tap on Storage Settings and Choose ‘Format as portable’
  • Tap on Format and you are done.

You can now use the SD Card as a normal portable storage that can be used with any smartphone.

Western Digital My Passport External Portable Hard Drive Review

With Smartphones getting better cameras to capture high definition Phots and Videos, our digital library is growing year on year.

While we are thankful for services like Dropbox and Google Photos that let us back up our files, photos and videos in the cloud they are still limited and can do only a few  GBs of backup.

If you are a someone who likes to keep a collection of Movies, Documentaries or is simply shooting videos in 4K, knows the struggle of keeping the data backed up and accessible all the time.

Thankfully Technology is getting affordable and we can now get 1TB of portable hard drives in less than $100.

And that’s what I did,

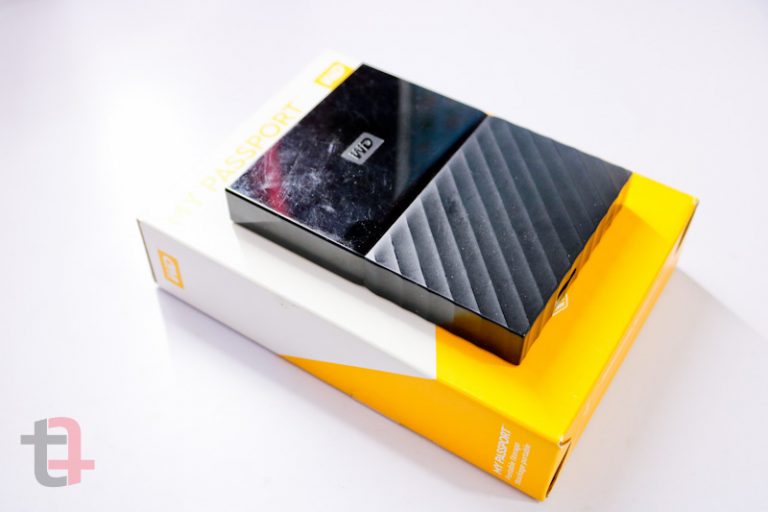
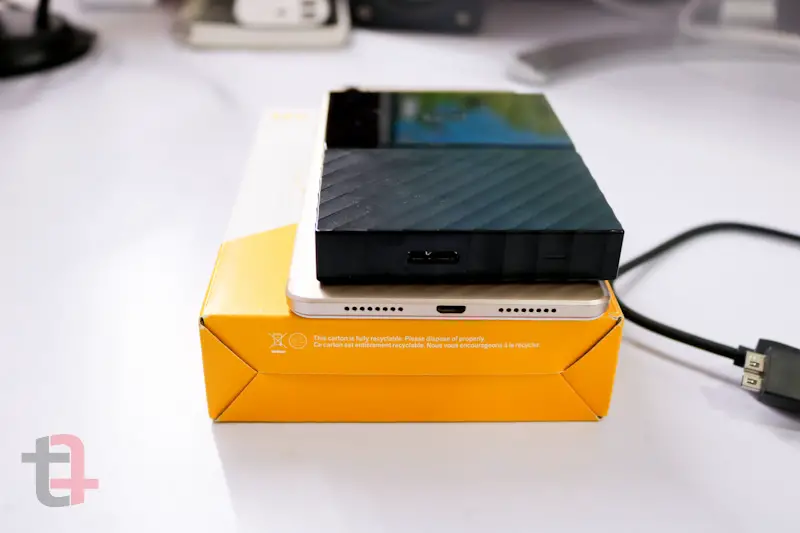
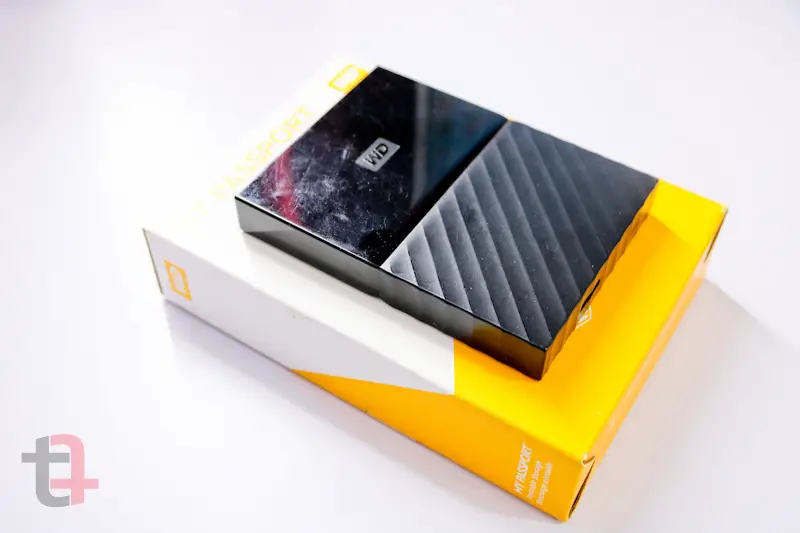
I bought Western Digital My Passport 1TB Portable Hard Drive. It’s been on the market for years, but I only needed it now since it was getting tougher to keep all the raw footage available all the time.

The Western Digital My Passport is available for less than Rs 4000/- in India and less than $50 in the US.

Buy from Amazon.in (for Indians)

Buy from Amazon.com (for the US)

*the prices keep fluctuating

Colors and Built Quality

It’s available in different color options, I bought the Black One because that’s the one that matches my Desktop’s color scheme, plus I feel black never get’s boring.

The built quality is not bad, but it’s not great either. It’s okayish considering the price you pay, I mean you are getting 1TB in less than $100. Last time I checked they were super expensive.

And there still are some expensive options in the market that are faster than your regular Hard Drives.

Yes, I am talking about SSDs, I bought a 120GB Samsung EVO SSD last year for Rs 4500/- ($50) I used it to make my 6-year-old PC fast (the boot time went from 45-60 seconds to 10-15 seconds). You can read about it here.

The design of  Western Digital My Passport Hard Drive is quite unique, half of the body is glossy and half of it has a Matte finish, it looks cool, even in plain black, but the shiny part is going to get a lot of scratches after a while. I took a great create of it but you can still see the scratches in the glossy part of the Hard Drive.

128GB Samsung EVO SSD

*You will have to buy USB 3.0 Enclosure Seperately Amazon.in | Amazon.com

Performance File Read/ Write Speed

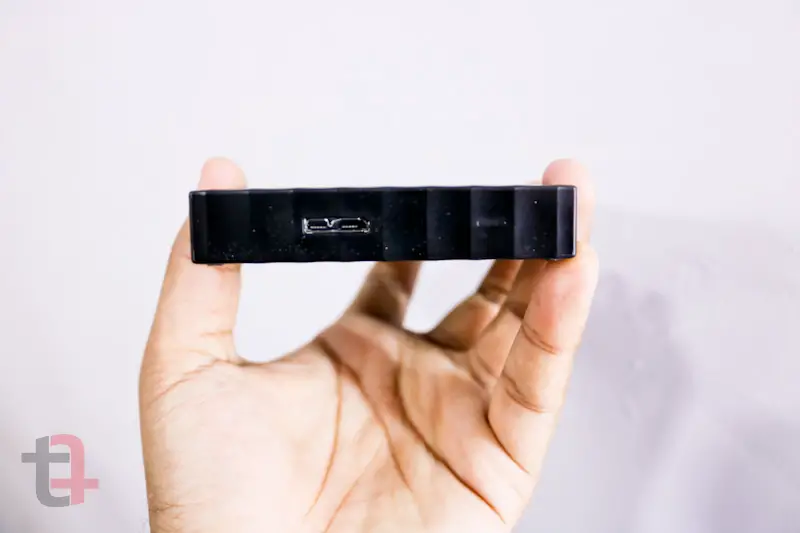
An SSD usually gives the file read/write speed of over 500mbps. In comparison to my Samsung Evo SSD, the Western Digital My Passport Hard Drive gives around 100mbps of read /write speed if you connect it using the 3.0 USB data cable that is provided with the Portable Hard Drive.

In my PC, which is a USB 2.0, the transfer rates were much lower, at around 30-40mbps. So you really need to have a USB 3.0 support on your PC or Laptop, most of the laptops these days have USB 3.0 port.

The speed doesn’t only matter in copying or pasting the files to or from the portable Hard Drive.

If your work involves in connecting your External Hard Drive to Computer and using a video editor to work on the files directly from the Hard Drive, you will need a Portable Hard Drive that provides the faster read/write speeds. Perhaps the SSD is more suitable (but it’s more expensive also)

This is why many people recommend an SSD for that purpose, but I am using Final Cut Pro Video Editor on my Mac (which has SSD Storage) to edit videos directly from the Western Digital Portable Hard Drive (connected via USB 3.0 giving me 100mbps read/writes) I didn’t find any problem so far, the workflow has been smooth.

1 out of 10 times I have seen drops in the frames while scrubbing through the video right after editing but I can live with it.

Choosing Between a Portable Hard Drive and an SSD

Talking about the Western Digital My Passport 1TB Hard Drive, I think is a better buy than an SSD ( which costs multiple times more than a Hard Drive) if you are simply looking to store heavy files and are not planning to travel with it most of the time.

Because if you do, you will have to take a good care of it for obvious reasons. It’s a Hard Drive and a fall can damage the Portable Hard Drive resulting in the data loss.

But don’t worry, it’s not that delicate, I’ve been traveling with it ever since I bought it, It’s usually in my backpack so that I can use the travel time to work for those files by connecting it to my MacBook Air

Taking about connecting it to the Macbook Air, it has a story to it, which is, it is not compatible with Mac out of the box,

To make it compatible with Mac, you have to format it with a filesystem that’s supported by Mac. Thankfully I was able to do that, you can read this separate post where I talk how to fix Portable Hard Drive compatibility issue with Mac, and this does not only work with this Portable Hard Drive but any.

So my verdict is, go for it if your planning to store loads of photos, videos, and movies and want to keep it handy, just don’t drop it (or buy some cover to minimize the impact).

It will still work if you are planning to edit videos (or any other resource intensive task) but don’t want to spend extra money on Portable Storage, got for Western Digital Portable Hard Drive.

And if you’ve got money, you don’t need this post baby, go buy anything from Amazon.

Check out the Unboxing Video of WD My Passport 1TB External Portable Hard Drive