Ultimate Guide to Make A Perfect TikTok Video. Everything You Need to Know About TikTok Video Size, Dimensions, and Format

TikTok is popular, and it popularised the vertical video format. But it has become a more diverse platform than just the 15-second funny lip-sync dancing videos. 

Many people have found their niche on TikTok, and they are creating content for fun and making a career out of it. Influencers and brands are using TikTok as a marketing tool to reach younger audiences and drive engagement.

TikTok has evolved beyond being just an entertainment platform for short lip-sync videos. It has become a multifaceted platform that offers endless opportunities to creators and brands alike. If you ever felt like joining TikTok and creating videos on it for you may already have been cheating videos on the platform, here is your guide to creating perfect to-talk videos that have the potential to go viral. 

What is the Maximum Size of a TikTok Video? 

The maximum size of a TikTok video depends on the platform from which the video is uploaded. If uploading to TikTok from an iOS device, the max file size can be upto 280 MB, while video from an Android can be up to 72 MB. The video file size is crucial when trying to upload a video onto TikTok. 

The size of the video doesn’t matter that much. What matters is what is the length of the video you are uploading. 

What is a perfect TikTok Video Length?

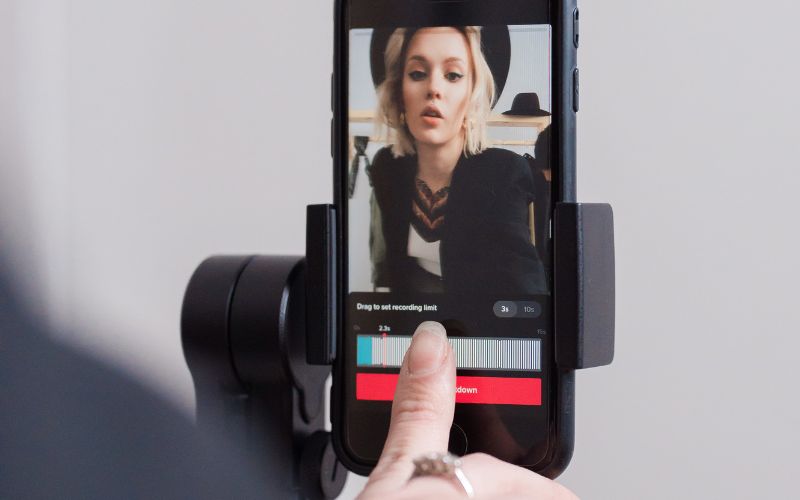
Videos started as 15-second clips, grew to 60-second clips, then 3-minute videos, and now 10-minute videos. The 3-minute video length was introduced towards the end of 2020, making more room for creators to express themselves. 

However, creators wanted more freedom, so they requested even longer. Hence the maximum video length is 10 minutes. Initially, videos began as brief 15-second clips but soon expanded to 60-second snippets, then 3-minute productions, and have now progressed to 10-minute features. 

The 3-minute length for the videos is introduced during the latter part of 2020, granting creators more space to express themselves. Although creators desired greater flexibility, they appealed for even lengthier durations, ultimately leading to the arrival of the 10-minute video.

A perfect to-talk video would depend on the making of the video. For example, the video of that canteen dancing or showcase of any talent would work better if they were shorter. 20 to 30 seconds would be apt. 

Videos, where you are teaching something or some tutorial, can be a little longer. But the shorter, the better in terms of virality.

How to Reduce the Length of a Video on TikTok?

If you want to reduce the length of a video on TikTok, there are several methods you can try. First, you can edit the video using the TikTok app’s built-in tools. These tools allow you to crop the video, speed it up or slow it down, or add music and visual effects.

Another option is to trim the video before uploading it to TikTok. This can be done using a video editing program on your computer or smartphone. 

What are the Ideal TikTok Video Dimensions?

Call do TikTok allows you to upload landscape for materials it is mainly a vertical format video.com. The recommended dimensions for a vertical video are 1080 x 1920 pixels with an aspect ratio of 9:16.

This is because the TikTok app is designed for a smartphone, and vertical videos are the perfect fit for that screen. However, TikTok also allows users to upload landscape videos with recommended dimensions of 1920 x 1080 pixels with an aspect ratio of 16:9. 

Why use a third-party app to create your TikTok video?

Using a third-party app to create your TikTok video offers several benefits. First and foremost, these apps usually provide additional features and editing tools that are unavailable on the TikTok app. This means you can create more professional-looking videos with better transitions, text effects, and filters.

Many awesome video editing apps are available for Android and iPhone smartphones. My favorite app is InShot, which offers many features you would want, making it great to talk with you. 

Some third-party apps even offer video templates that can be customized to fit the specific requirements of a TikTok video. One example is VideoLeap, which has pre-built templates where you only have to select your photos or videos and create travel, beautify, and product showcase videos in just a few seconds. Using a third-party app can help you make the most of your TikTok video and increase its chances of going viral.

Frequently Asked Questions

What resolution and frame rate is TikTok?

The resolution and frame rate of TikTok largely depends on the device being used to access the app. TikTok is designed to work seamlessly on both Android and iOS platforms, with varying resolutions and frame rates. Generally, TikTok videos have a resolution of 1080p (1920 x 1080) or 720p (1280 x 720).

However, the video quality depends on the device’s screen resolution or internet connection. Moreover, TikTok videos tend to have a frame rate of 30 per second (fps). Some devices may support higher frame rates, making the videos smoother and more fluid. Overall, TikTok has been designed to provide users with a high-quality video viewing experience, regardless of the device used.

What is the native TikTok Aspect Ratio?

 The aspect ratio for TikTok videos is 9:16 (Portrait Video), which means that videos should be 9 units wide and 16 units tall. This vertical orientation is ideal for viewing on mobile devices, where most of TikTok’s audience consumes content.

This aspect ratio allows TikTok users to create engaging, full-screen content that fills the entire screen of a smartphone. Creators must consider this when filming or editing their videos, as content that doesn’t fit within the recommended aspect ratio can sometimes appear cropped or distorted.

By adhering to the 9:16 aspect ratio, TikTok content creators can ensure that their videos look good and are optimized for maximum engagement on the platform.

How do you make a 16×9 video fit a TikTok?

It is easy to fir a 16:9 video on TikTok as it supports both Landscape and Portrait videos. But the 9:16 video should be preferred. The recommended ratio for a TikTok video is 9×16, which means that you will need to adjust the dimensions of your video to match this ratio.

One way to do this is to crop the edges of your original video by using a video editing software or app. This will reduce the width of the video while keeping the height constant.

Another option is to add borders or graphics to the sides of the video to fill the space, although this may not always be aesthetically pleasing. Once you have resized your video, ensure the content is engaging and relevant to the TikTok audience. By following these tips, you can create a video that will fit seamlessly into the TikTok platform and gain traction with viewers.

Why does TikTok Crop my video size?

TikTok may crop your video size for a variety of reasons. The most common reason is to adhere to the platform’s aspect ratio requirements. TikTok requires videos to be in a 9:16 format, which means that the width is nine times smaller than the height of the video.

If your video is not in this aspect ratio, TikTok will crop it to fit or add borders to fill up the remaining space. This is common for landscape videos, as TikTok focuses mainly on portrait-style content. Another reason TikTok may crop your video size is to avoid displaying unwanted or irrelevant content in the background.

This could include logos, watermarks, or other people who are not relevant to your video. Overall, TikTok cropping your video size is necessary to maintain the look and style of the platform and make your content stand out on the app.

Can you upload 4K to TikTok?

 You can upload 4K videos to TikTok but with some limitations. TikTok has updated its platform to support 4K videos. Although the app can only handle 4K videos that are 60fps, it may not play as smoothly on the platform if you shoot a video with a higher frame rate.

Moreover, you need a high-end device to shoot 4K videos, which may not be accessible to everyone. Also, many TikTok users watch videos on their smartphones, so the quality of the video may not be apparent, especially if they are not using a high-end device. Despite these limitations, uploading a high-quality 4K video on TikTok can be impressive and can attract new audiences to your account.

Is it possible to make TikTok videos longer than 60 seconds?

TikTok has updated its platform to support longer videos for maths as well. The first increase to the video length from 60 seconds to 3 minutes and later allowed some users to upload videos as long as 10 minutes. 

If you currently do not have access to the feature where you can post longer videos, you can update your app to try posting more content regularly to unlock the limitation. 

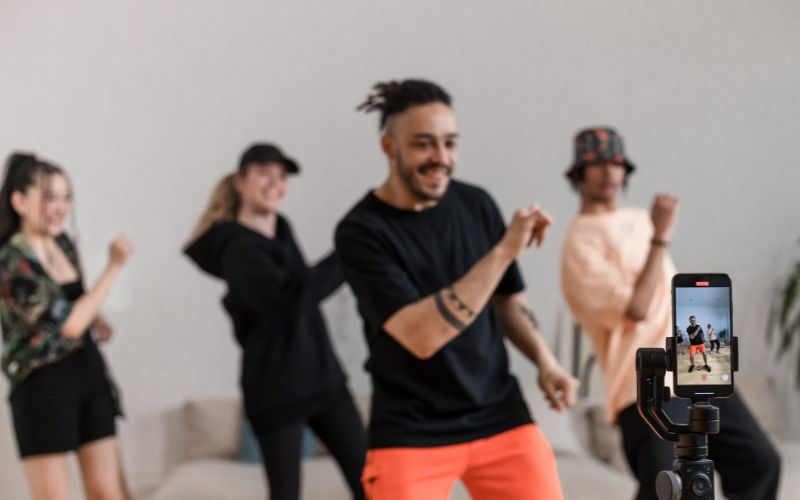
The videos that have the potential to go viral on TikTok are usually shorter. And smooth. Try recording videos using a smartphone with Optical image stabilization. Almost every flagship smartphone has this. But there are some affordable options also available.

How to Cancel Your Audible Subscription?

If you own Audible subscription that you no longer use any want to cancel the subscription it can be quite tricky to do it.

If you don’t properly cancel your Audible subscription you keep getting charged month on month. I can say that from person experience. It has happened to me twice so I am finally writing it tutorial about how you can cancel your order the subscription and make sure you do not get charged again.

Here is a video tutorial

What is Audible?

Audible is an Audiobook platform formed by Amazon. That catalogue of Audiobooks is quite vast, pretty much every book that is available on Amazon is also available as an Audiobook on Audible. All though the prices of Audiobooks are a little higher than the eBooks, they are my preferred format for consuming knowledge and information.

Audible also has a Premium membership, under which you get one credit every month with which you can buy any Audiobook from the catalogue.

It gives monthly and yearly subscriptions of Audible Premium Plus which also offers weekly podcasts in different genre.

But if you are looking for buying one book every no and then you may not need to get the subscription throughout the year you can just get it for a month get your credit and use that trade to buy the Audiobook.

Do this if the monthly Audible Premium Plus subscription is not for you

Interestingly the one credit you get in the Premium subscription can be used for buying any Audiobook available on the platform, and the price of the book doesn’t really matter that match so it is wise to get the Premium subscription for a month for that one credit and buy the book using that credit instead of buying it at its MRP.

But that tricky part is once you get the subscription it is quite difficult to get of the subscription or cancel the subscription. But I have this is why Amazon makes the deal so interesting that you can’t resist to get the membership.

Amazon is not the only company to blame here there are many other companies that makes it super confusing to cancel the subscription. For example, Netflix also makes the cancellation of separation is quite tricky.

How to cancel Audible subscription

Just like Netflix Audible also does not cave you the option to cancel the subscription in the app which you are using either on iPhone or Android. It can only be cancelled from the website, and that too, the desktop version of website not the mobile version.

Although there is a trick to open the desktop version of the website on mobile, we recommend you to use a large screen device a tablet PC or computer so that you can look at the screen and understand what’s going on there.

Once you open the website, and login to your account you will find ‘Hi Your name’ somewhere on the top right hand side when you click that you will find the option of account details.

It will take you to a page which will try to convince you to not cancel the subscription. But if you have made your mind click on ‘No thanks, Continue Cancellation‘.

On the next page it will ask you for the reason of your cancellation, and then again you will have to click on ‘Cancel Membership‘.

On the next page again it will try to purse with you into continuing the membership by counting the benefits Premium membership has. You will again have to click on ‘Continue Anyway

You will have to click on 4 buttons to completely cancel your Audible membership and the last one doesn’t even say cancellation.

It seems Audible is trying to trick people into letting them know that the subtracting has been cancelled on this third step but in reality it did not.

The next page will say that your Audible membership has been cancelled and you will still be able to use the membership benefits till the next billing cycle.

But at this point I am not sure. Maybe they will activate midway and you will be charged on the next billing cycle again.

So, to be double sure, you need to check the website once again prior to that. The easy way would be to snooze the cancellation email you get just after cancelling your Audible membership.

Just snooze the email one or two days before your next billing cycle so that it pops up again in your gmail inbox and reminds you that you need to open the website again to verify if your Audible membership is cancelled.

No Caller ID: Find out who calls you from an Unknown Number.

Receiving calls from unknown numbers can be both time-wasting and scary. Most people ignore these calls, but what if the caller is important or it’s an emergency call?

In this article, we will find ways to know the caller even if they use no caller ID to call you.

The first step is to answer the call and ask who is calling. If the caller won’t identify themselves, hang up and do not engage any further.

Another way to find out who is calling is to use reverse phone lookup services, which can identify the caller’s name and location. You can use call-blocking applications or ignore calls from unknown numbers. By following these methods, you can avoid wasting your time and feel safe when receiving calls from unknown callers with no caller ID.

What does “No Caller ID” mean?

“No Caller ID” refers to a phone call where the caller’s phone number or identity is not displayed on the receiver’s caller ID screen.

This could happen for various reasons, such as the person calling intentionally blocking their number, using a VoIP service, or if the call originated from outside the country.

In cases where the person calling is not known or the receiver is cautious, it is best not to answer the call or to let it go to voicemail.

If the person needs to call back, they can check their call log for the phone number and try reaching out through text or email before returning the missed call. The “No Caller ID” calls can also be used for fraudulent activities, so it’s best to approach them cautiously.

How Do Callers Hide Their Phone Numbers to be Unknown Numbers?

There are several ways for callers to hide their phone numbers and appear as unknown callers. One of the most common methods is to use a caller id blocking feature provided by the phone carrier, which allows the caller to hide their number from the recipient’s caller id.

Another way is to use an app or software that automatically blocks the caller’s number from being displayed on the recipient’s phone. Sometimes, the recipient may see a message like “Blocked Call” or “Private Number.”

However, there are ways to unmask the caller’s phone number by using third-party services or contacting the phone carrier. While some people may have legitimate reasons for hiding their phone numbers, others may use them for malicious purposes, such as scamming or harassing people.

Ways To Unmask “No Caller ID” Calls On iPhone and Android?

“No caller ID” calls are often considered spam, and it can be tough to identify the caller. However, with the help of some smart ways, you can unmask the caller ID and find out who is calling.

One way to unmask “no caller ID” calls on Android is to use third-party apps like WhoCallMeTruecaller, Nomorobo, and RoboKiller. These apps have features that can detect calls from spam numbers and unmask the caller ID.

Another way is to ask your phone provider to block “no caller ID” calls or allow specific numbers. Some Android devices have built-in features that can reveal unknown numbers by going to call settings and enabling the “Show caller ID” option. Using these methods, you can quickly unmask the “no caller ID” calls and avoid suspicious or unwanted calls.

How To Hide Caller ID On Android?

If, for some reason, you are the one who wants to hide the number, here is how you can do it. Hiding your caller ID on Android is a great way to keep your privacy intact. It’s quite easy to do, and it ensures that your phone number isn’t showing up when someone tries to call you.

There are just a few steps that need to be taken. Firstly, go to your phone’s settings and select ‘Call settings.’ From there, you can find options to hide your caller ID.

You can decide whether to hide caller ID calls for a specific contact or for everyone you call. Once enabled, your number will not appear on anyone’s recent calls list when you make calls.

If you’re an iPhone user, a way to block caller ID calls can also be found in the settings. Overall, hiding your caller ID is a simple and effective way to control your privacy when making calls.

Should You Answer Unknown Calls or Private Numbers?

Receiving calls from unknown numbers can often be a dilemma for individuals, as it is difficult to assess whether or not to answer them.

On the one hand, unknown calls can be important, and rejecting them could lead to missing out on significant information. However, these calls can often be unwanted and lead to spam or scamming.

Therefore, it is essential to be cautious and take precautions while answering unknown calls. It is advisable to block numbers that have given a wrong impression in the past or try a reverse phone lookup to identify where the call is coming from. 

The Android and iPhone devices give you easy features to block numbers even if it is by an unknown caller. Try blocking as many as you can. 

Not answering or screening unknown calls can also help reduce the chance of scams or unwanted calls. In short, it is best to be sure before answering calls from unknown numbers to avoid compromising security or privacy.

I found the Truecaller app to be pretty great at detecting spam and unknown calls because of the crowdsource data they have. It has saved me a lot of time as it automatically blocks numbers. You can check out this article to learn more about it

How to Connect Spotify to Alexa on Amazon Echo Device? 

Connecting your Spotify to Alexa will allow you to use Spotify to listen to Music, podcasts, and audiobooks on Amazon Echo devices.

The process is relatively simple and can be done using the Alexa app on your phone or tablet. 

How do you connect Spotify to Alexa?

First, open the Amazon Alexa app on your mobile device and tap the “More” button on bottom right.

Go to “Settings” and then “Music & Podcasts.” and then tap on “Link New Service.”. Tap on Spotify.

Follow the on-screen instructions, and sign in to your Spotify account. And you are done. 

How do you play Spotify music on Alexa Echo devices?

Once your account is linked, you can start playing Music by saying, “Alexa, play [song/artist] on Spotify.”

You can also control playback using voice commands, such as “Alexa, pause” or “Alexa, skip to the next track.” Connecting Spotify to Alexa is a great way to enjoy your favorite music hands-free.

You can also control the Music using the Amazon Alexa app on your mobile device. 

Can you use Spotify Free with Alexa?

Yes, you can use Spotify Free with Alexa through your smart speakers. Alexa is compatible with Spotify, both free and premium versions.

By linking your Spotify account with Alexa, you can easily use Spotify Free to play your Music using simple voice commands. The Amazon Echo and Echo speakers are intelligent speakers that work with Alexa, allowing you to access your music library using your voice.  

Can you use multiple Spotify accounts?

 Yes, you can use multiple Spotify accounts, but it depends on your device. For instance, if you have an Amazon Echo device, you can link multiple Spotify accounts to it. You must use the Alexa app on your smartphone, open the app, go to settings, select Music, and tap on Spotify. You can log in to your Spotify account or link to another account there.

Once you have linked your accounts, you can use Alexa to switch profiles by saying, “Alexa, switch profiles,” She will ask you which profile you want to use. If you have an Amazon account, you can easily switch between Spotify accounts on the app by logging in and out of each account in the settings.

Overall, using multiple Spotify accounts is possible, but the method may change depending on your device.

Here are some frequently asked questions related to connecting Spotify to Alexa devices. 

Why is my Alexa not connecting to Spotify?

If you are experiencing trouble connecting Spotify to Alexa, there could be several reasons.

Firstly, ensure your Spotify account is linked to your Alexa account. If not, you will need to link it through the Alexa app.

Secondly, check your internet connection and ensure it is strong and stable. Poor internet connectivity may cause interruptions in music playback, making it difficult for Alexa to stream songs from Spotify.

Another reason could be that your Alexa device is not compatible with Spotify.

If none of the above solutions work, try restarting your Alexa and Spotify accounts and relinking them through the Alexa app.

How do I relink Spotify to Alexa?

To relink Spotify to the Alexa app, follow a few simple steps.

First, ensure you’re logged into the same Spotify account you want to use with Alexa.

Next, open the Alexa app on your smartphone or tablet and navigate to the Music section.

From there, select Spotify and then choose “Link account.” You’ll then be prompted to enter your Spotify login information.

Once you’ve done this, Alexa should be able to play Music from your Spotify account without any issues.

If you’re still having trouble, try restarting your Alexa device and your smartphone or tablet. With a little bit of troubleshooting, you can relink Spotify to Alexa app in no time.

How do I connect my Spotify to Alexa echo?

Connecting your Spotify account to Alexa Echo is a simple task, and the process for all Alexa devices is the same.

First, you need to ensure that you have an active Spotify account. Then, you must download the Amazon Alexa app on your phone or tablet and log in to your Amazon account.

Once you have done this, select ‘Settings’ and then click ‘Music & Podcasts.’ Here you will find the option to link your Spotify account to Alexa.

Click the ‘Link New Service’ button and select Spotify. Next, log in to your Spotify account and allow Alexa to access your account. Once this is done, you can use Alexa to play Music from your Spotify library or any saved playlists. Overall, it’s an effortless process that takes just a few minutes to complete.

Do the Airpods work with Android Mobile?

If you are an iPhone user, AirPods might be the best thing that has ever happened to you. The seamless connection, uninterrupted audio quality, and ease of use make them a fan favorite among iPhone owners.

However, the question is, are they equally great when used with Android? Let’s find out. 

Do AirPods Work With Android?

AirPods can be used with Android phones, but they don’t work as well as iPhones. The quick pairing feature that makes AirPods so great is only available on iPhones, and while the audio quality remains decent, some of the other essential features are lost when used with an Android phone. 

The AirPods Charging Case has a specially designed chip from apple which talks to apple devices and mixes the seamless connection, but that does not mean it is not compatible with Android. You can pair your AirPods with your Android device using the Bluetooth feature. 

Will AirPods Still Sound as Good When Connected to Android Mobile?

The AirPods are well-known for their high-quality audio and seamless pairing with iOS devices. However, when it comes to connecting AirPods with an Android phone, it is natural to wonder if the audio quality will be affected.

In terms of pairing, AirPods with Android are just as easy to connect wirelessly via Bluetooth as they are with iOS devices. Nevertheless, there may be slight differences in audio quality because Apple has optimized AirPods for use with their operating system.

Despite this, many Android users have reported excellent audio quality, with some even preferring AirPods to other wireless earbuds designed for Android devices.

Ultimately, the audio quality may vary slightly depending on the specific Android device used and the individual’s preference. AirPods are compatible with iOS and Android devices and can provide high-quality wireless audio. 

There are alternative options available that are equally good both in design and sound quality. For example, Sony WF-1000XM4 comes with industry-leading active noise cancellation. The link to the complete list of alternative earbuds is available at the end of this article. 

What features do Apple AirPods offer when connected to an Android device?

Apple AirPods offer several features when connected to an Android device, despite being primarily designed for use with an iPhone. When connected through Bluetooth, the Android device can manage the playback of music, adjust the volume, and receive phone calls using the built-in headphone microphone.

However, some features, like automatic ear detection, may not work on Android devices. The latest AirPods Pro has a feature called “Hey Siri” that is an assistant trigger, only available when connected to an iPhone.

Moreover, the battery indicator for the AirPods may not be as accurate when connected to an Android device as it is when connected to an iPhone. The Apple AirPods are still popular with many Android users who appreciate the comfortable and wireless design.

The latest AirPods Pro also has a tracking feature that lets you track your lost airports using the find my app, which is exclusively available for iOS and Mac. Similarly, features like live listening, where you can keep your iPhone in another room and listen to the conversations using your airport, will not be available for Android. Features like the transparency mode might also not be available when AirPods are connected to an Android phone. 

Can you trigger Google Assistant using AirPods on Android?

Yes, you can trigger Google Assistant using AirPods on Android. However, the functionality of using AirPods on Android is limited compared to iPhones, where Siri can be used seamlessly with AirPods. To use AirPods with Google Assistant on Android, you must customize the assistant trigger using the Google Assistant app. The double-tapping feature of AirPods can be assigned to activate the assistant trigger.

It is important to note that not all AirPods models support this functionality on Android, and users should check if their wireless earbuds are compatible. Additionally, you must ensure that the Google Assistant app works correctly with your AirPods to use them seamlessly.

Should you buy an AirPods Pro if you don’t own an Apple device?

 If you don’t own an Apple device, it’s probably not worth buying an AirPods Pro 2. The AirPods Pro 2 are designed specifically for Apple devices and optimized for integration with the Apple ecosystem.

While they can be used with Android devices, they won’t have the same level of integration and may not work as smoothly. 

What are AirPods Alternatives for Android?

If you’re an Android user, many earbuds are available specifically for Android phones that may be a better fit for you, such as the Samsung Galaxy Buds or the Google Pixel Buds.

Additionally, suppose you’re looking for premium over-ear headphones. In that case, the AirPods Max is also designed specifically for use with an Apple device and may not be the best choice for someone who primarily uses an Android device. Ultimately, choosing earbuds or headphones optimized for your specific device is essential to ensure the best possible experience.

Find AirPods Alternative Earbuds for your Device on a Budget. 

Download Custom ROM for Oneplus 5T or later Oneplus Smartphone.

If you own an Android smartphone from OnePlus, specifically a relatively older one like the OnePlus 5T, you can give it a new life by installing a Custom ROM. A custom ROM is a modified version of the Android operating system that allows greater customization and features not provided by the manufacturer.

The monthly updates are anyways stopped for a smartphone this old, meaning you are still stuck with an older version of Android OS on it. Custom ROMs give you more advance software since the hardware is good enough to handle it. 

Before going to flash Custom ROMs

Before going to flash custom ROMs on your Oneplus device, it is essential to understand the consequences and benefits of doing so.

Custom ROMs are modified versions of the Android operating system that offer additional features and customization options unavailable in the stock Android.

However, you need to root your device to flash custom ROMs, which can void its warranty and expose it to security threats. It is also important to note that not all custom ROMs are stable and may have significant bugs that can compromise the performance and functionality of your device.

If you decide to flash a custom ROM, it is strongly recommended that you back up your data and revert to the stock firmware in case of any issues.

Best Custom ROM for OnePlus 5T and Later OnePlus Smartphones

If you’re looking for the best custom ROM for your OnePlus 5T, many options are available in the market.

  1. LineageOS: LineageOS is one of the most popular custom ROMs for Android devices. It is based on stock Android and offers a clean and customizable user interface. LineageOS also provides regular security updates and is known for its stability. 
  2. Pixel Experience: Pixel Experience is another popular custom ROM based on stock Android. It aims to provide a Pixel-like experience on non-Pixel devices and includes many of the features and apps exclusive to Pixel devices.
  3. Paranoid Android: Paranoid Android is a highly customizable ROM with a unique user interface and a wide range of customization options. It is known for its stability and performance and is based on the latest version of Android.
  4. Resurrection Remix: Resurrection Remix is a highly customizable ROM based on LineageOS. It offers various customization options, including support for custom themes and gestures. Resurrection Remix provides regular security updates and is known for its stability and performance.

Note: It’s important to note that installing custom ROMs may void the warranty, and it’s best to consult a developer before proceeding with the installation on your device.

If your OnePlus 5T, 6, 6T smartphone still doesn’t run smoothly, you can get a new OnePlus smartphone. Oneplus has branched out a few other devices in different price ranges, like the OnePlus Nord series cost under $300. Check it out on Amazon

How to Install Roblox studio on a Chromebook

Roblox Studio is a software program developed by Roblox Corporation that is used to create and develop games, experiences, and other content on the Roblox platform.

If you want to create your games or other experiences on Roblox, you must use Roblox Studio. It provides an easy-to-use interface and a wide range of tools that allow you to design 3D worlds, create game mechanics and rules, script behaviors and interactions, add audio and visual effects, and publish your content to the Roblox platform.

If you are interested, this article will walk you through installing and using the Roblox Studio on Chromebook. 

Can You Play Roblox on a Chromebook?

The answer is yes if you’re wondering whether you can play Roblox on a Chromebook. Chromebooks are designed to run on the Chrome browser but can also support other applications.

Players can easily play Roblox on a Chromebook without much hassle. Using a Chromebook device, players can download the game from the Google Play Store, which is pre-installed on most new Chromebooks. 

However, if your Chromebook doesn’t have Play Store installed, you can still play Roblox using the browser without downloading anything. Whether you’re looking to play Roblox on a laptop or a desktop, a Chromebook is a great device to consider.

The How to Install Roblox Studio on Chromebook

To install and run Roblox Studio on Chrome, you must follow this guide to ensure the installation is smooth and problem-free.

First, you must ensure that your Chromebook is up-to-date and compatible with Roblox (99% of the time, it will be).

Then, you must download the Roblox Studio app from the Google Play Store.

Once the installation is complete, you can start creating your own Roblox games from the comfort of your Chromebook. With Roblox Studio, the possibilities are endless, and you can let your creativity run wild.

Playing Roblox via Android App on Your Chromebook

Chromebook users can now enjoy playing Roblox via the Android app on Google Play Store. To run Roblox on Chromebook, you must have an Android-compatible device that supports Android apps.

After ensuring your device is compatible, the next step is to go to the Play Store on your Chromebook and download the Roblox app.

Once the app is downloaded, please tap on the icon to open it and follow the instructions to complete the setup process. Ensure to update the app to the latest version to avoid compatibility issues.

With the app fully installed and updated, you can start playing Roblox on your Chromebook just like on any other device. Enjoy playing Roblox on your Chromebook using Android apps!

Is Roblox Safe for Kids?

Roblox provides several parental controls, such as the chat filter and disabling in-game purchases. Furthermore, Roblox has a robust moderation system that monitors content and removes inappropriate games, behavior, or language.

The platform has an age limit of 13 or above to sign up, and users can report suspicious or inappropriate behaviors. However, parents still need to be aware that no online platform is 100% safe, and they should talk with their children about the potential risks of chatting with strangers or sharing their personal information.

Overall, the platform can be considered safe for kids to enjoy with appropriate parental guidance and moderation by Roblox.

Run Roblox on Chromebook without Google Play Store support.

If you own an older Chromebook that does not support Android Play Store, there are still ways to run Roblox on a Chromebook without the Play Store.

The simple option is to access Roblox through the Chrome browser, which can be done by navigating to the official website and logging in. 

The complex option is to use the Android app version of Roblox, which can be sideloaded onto the Chromebook. This can be done by enabling developer mode, downloading the APK for Roblox, and installing it through the Chrome browser. It’s important to note that running

Android apps on a Chromebook can sometimes lead to lag or other technical issues. Hence, having a powerful enough Chromebook to handle gaming on the platform is essential.

Best AirTag Alternatives for Android and iPhone Users

Don’t want to get sucked into the Apple Ecosystem by buying yet another product from Apple? Or maybe you belong to the other end of the spectrum, owning an Android. Whatever it is, here’s your list of the best AirTag Alternatives that work across platforms so that you don’t have to be an iPhone user for the rest of your life if you want to track stuff with the help of technology. 

What are AirTags, And What Are Its main features?

AirTags are small, square-shaped Bluetooth trackers that help you find lost or misplaced items. They work with the Apple Find My app on your iPhone, which enables you to locate your device or AirTag on a map.

AirTags use a patented technology by Apple to locate it precisely. When you attach an AirTag to your belongings, such as keys, luggage, or a wallet, you can track the item’s whereabouts in real time using the Find My app. It includes a replaceable battery; you can personalize them with free engraving. 

When an Apple device passes near one of your Airtags, the location of the lost item is updated and displayed on your device. The AirTag lets you easily track your essential items, such as keys, wallets, and bags. 

With its simple design and user-friendly features, the AirTag is a must-have tool for those who frequently misplace their belongings. Whether at home, in the office, or on the go, the AirTag is a reliable and convenient tracker that helps you find lost items in seconds.

Do AirTags also work with Android phones?

Unfortunately, AirTags does not work with Android phones as they are designed to work only with Apple devices. This means that if you have an Android phone, you won’t be able to use AirTags to find your lost items.

Nevertheless, if you are looking for an AirTag alternative that works with both iPhones and Android phones, consider the following.

What Are the Best AirTags Alternatives for Android and iPhone?

If you’re looking for the best AirTag alternative for Android or iPhone, plenty of options are available.

The Tile Pro

The Tile Pro is one of the most popular alternatives, offering a range of up to 400 feet and a loud ring that can be heard from a distance. 

The Tile Pro tracker’s battery (CR2032) lasts a year, but it’s replaceable, so you can swap it out when it runs out. Since the device is water resistant, you will not have to worry about it in the rain or similar circumstances. The Tile Pro is a bit more expensive than the AirTag and challenging to set up, but it has more features (like Smart Alerts) and lasts longer. 

You can skip the Tile Premium subscription and use the Tile Pro with Google Assistant and Amazon Alexa. The battery of the Tile Pro tracker, which is a CR2032, has a life of one year. However, you can easily replace it when it runs out. Rain or other similar situations won’t pose any threat to the device since it’s water-resistant. 

Though the Tile Pro is more costly than the AirTag and requires slightly more effort to set up, it boasts added features such as Smart Alerts and a longer lifespan. You can use the Tile Pro without subscribing to Tile Premium, which is compatible with Google Assistant and Amazon Alexa.

Buy from Amazon

Tile Slim

Like the Tile Pro, the device has a speaker and is water-resistant. It also has a voice assistant feature that allows you to ring the tracker or ask for its location. Anyone who needs to keep track of their belongings should consider Tile Slim, as it is relatively affordable.

Like Tile Pro, this gadget has a waterproof design and a built-in loudspeaker. It also boasts a voice-activated assistant feature that enables users to locate the tracker or trigger its alarm. Tile Slim presents a cost-effective option for those looking to keep tabs on their stuff.

It’s available in various colors, so you can choose the one that best suits your style. It interacts with the Tile app to track your item over 250 feet.

The Tile Slim’s battery lasts three years, a reasonable amount of time; however, it cannot be replaced or recharged. You have the choice of different colors to match your taste. The Tile app works with the device, enabling you to monitor your possession up to a 250-foot distance. Although the battery has a lifespan of three years, it is not interchangeable or rechargeable, but still practical.

  • THE THIN TRACKER – Tile helps you keep track of your things. Slide the Tile Slim into wallets and luggage tags or attach them to notebooks. Use our free app to find them.
  • FIND NEARBY — Use the Tile app to ring your Tile when it’s within Bluetooth range, or ask your Smart Home device to find it.
  • FIND FAR AWAY — When outside Bluetooth range, use the Tile app to view your Tile’s most recent location on a map.
  • FIND YOUR PHONE- Double press the button on your Tile to make your phone ring, even when it’s on silent.
  • NOTIFY WHEN FOUND — Enlist the secure and anonymous help of the Tile Network to help find your things. If your lost Tile is found, If your Tile is lost, add your contact information so you can be reached when someone scans the QR code on your lost Tile.
  • ANDROID, IOS & SMART HOME COMPATIBLE – Find your things with the free Tile app on iOS and Android devices. Tile also works with Amazon Alexa, Hey Google, and Siri.

Buy from Amazon

The Chipolo One

The Chipolo One is another popular choice, offering a slim design and an easy-to-use app that lets you easily track your items. While these options may not have all the features of the Apple AirTag, they are all reliable and effective trackers that can help you keep your belongings safe. Whether you need a GPS tracker for your car or a way to keep track of your keys, there’s the best AirTag alternative to suit your needs.

Here are some Key features of this tracker

  • FIND YOUR KEYS, WALLET, BAG, TOY, OR PHONE: Attach Chipolo to the items you misplace all the time and make them ring from your phone with the Chipolo app. Ring your lost phone by double-pressing the Chipolo. Compatible with Androids and iPhones.
  • GET AN ALERT WHEN YOU LEAVE THINGS BEHIND: Chipolo finders will remind you to take your keys and wallet with a friendly phone notification.
  • CHECK LOCATION ON A MAP: When the Chipolo is out of Bluetooth range, and you can’t ring it, check the last known location on a map in the Chipolo app or ask the Chipolo community to help you find it.
  • FREE EXTRA FEATURES: Share your Chipolo with your loved ones, set up voice commands on Google Assistant, Amazon Alexa, and Siri, add a widget to your phone’s homescreen, use Chipolo as a remote selfie button for your phone camera…
  • Compatible with Android and ios: The free Chipolo app is compatible with iOS 13 and later and devices running Android 7 and later. CHIPOLA ONE technical details: Up to 120dB loud ring, 2-year replaceable coin battery, connection up to 200 feet/60 meters, water-resistant (IPX5 rating). CHIPOLA CARD technical details: Up to 95dB loud ring, 1-year non-replaceable battery with a discounted renewal program, connection up to 200 feet/60 meters, water-resistant (IPX5 rating)

Buy from Amazon

Tile Mate Essentials 

Tiles were around long before airtags or anything else of the sort. They work through Bluetooth. It’s a crowdsourced location service. This means only people with bluetooth and location turned on and the tile app installed can help you find your device and only when they are in bluetooth range. 

If you are tracking luggage or anything else that could be far away from you, I will pay more for a different type of tech. Tiles existed before airtags and similar technologies and are based on Bluetooth. It is a location service that relies on input from the public. 

You must have Bluetooth, location services, and the tile app active to use it. In addition, the tracking only works when you are within Bluetooth range. If you need to keep tabs on an item such as luggage that is far away, it would be prudent to invest in a different kind of technology, even if it is more expensive.

Here are some Key features of this tracker

  • A VARIETY OF TRACKERS FOR YOUR THINGS – A selection of Tiles to help keep track of your keys, wallet, remotes, and more. Please keep track of more for less with our multi-packs or gift them to your friends and family.
  • FIND NEARBY – Use the Tile app to ring your Tile when it’s within Bluetooth range, or ask your Smart Home device to find it.
  • FIND FAR AWAY – When outside of Bluetooth range, use the Tile app to view your Tile’s most recent location on a map
  • FIND YOUR PHONE – Double press the button on your Tile to make your phone ring, even when it’s on silent.
  • NOTIFY WHEN FOUND – Enlist the secure and anonymous help of the Tile Network to help find your things. If your lost Tile is found, If your Tile is lost, add your contact information so you can be reached when someone scans the QR code on your lost Tile.
  • ANDROID, IOS & SMART HOME COMPATIBLE – Find your things with the free Tile app on iOS and Android devices. Tile also works with Amazon Alexa, Hey Google, and Siri.
  • TECH SPECS – Water-Resistant (IP67 rated), Up to 3-year non-replaceable battery, Up to 250 ft / 76 m Bluetooth range
  • UPGRADE TO A PREMIUM PLAN: Get proactive Smart Alert notifications when you leave something behind, and with Item Reimbursement, if we can’t find your Tiled item, we reimburse you.

Buy from Amazon

What is Samsung’s alternative to AirTag?

Samsung has released its alternative to Apple’s AirTag, the Samsung Galaxy SmartTag. This small device uses Bluetooth technology to keep track of your belongings, making it an excellent option for those who often misplace their keys or other essentials.

The Samsung Galaxy SmartTag boasts a long battery life, ensuring it will remain functional for an extended period. The device can be easily attached to bags, wallets, or pets by using the accompanying keyring hole, making it convenient. Overall, the Samsung Galaxy SmartTag is another excellent option for those looking to keep track of their belongings and ensure they are never lost or misplaced.

Samsung’s alternative to AirTag is incompatible with other Android mobile or iPhones. Please refer to the list above if you use a Non-Samsung Android mobile or an iPhone. 

Here are some Key features of this tracker

  • Tag it: Need to keep tabs on something? Attach a Galaxy SmartTag to those precious things in life.
  • Find it: If you lost your stuff, launch the app, and see where it’s been last. Retracing your steps is easy.
  • Take it easy: There it is! Thanks to Galaxy SmartTags, finding lost items is intelligent and simple.
  • *Use with a Galaxy smartphone running Android 8.0 or higher & RAM 2.0GB above. SmartThings app required.

Buy from Amazon

How to Reduce Lag in Minecraft Single Player and Multi Player

Tired of lag ruining your Minecraft adventures? Learn how to fix the problem and optimize your gameplay with our easy-to-follow guide. Start playing smoothly today!
How to fix Lag Issues in Minecraft on PC?

How to fix Minecraft lagging issues on PC?

If you’re experiencing Minecraft lagging issues on your PC, there are several ways to fix them. First, ensure your internet connection is stable enough to handle online gameplay. You can also check if your graphics drivers are up-to-date and update them if necessary.

Install new software or drivers to improve the speed and performance of your CPU and RAM. Check your video settings and lower the graphic settings, which can affect your FPS and cause gameplay to lag.

Try using the task manager to close any unnecessary programs or applications running in the background that can consume valuable resources. When all else fails, try connecting to a different Minecraft server or switching to a less populated one to reduce latency. Following these tips, you can fix Minecraft lag and enjoy a smooth and uninterrupted gaming experience.

Why are My Minecraft Servers So Laggy?

Minecraft lag is a common problem many players experience while playing this popular sandbox game. ‘lag’ refers to a delay or slowness in the game’s response time. There are various reasons why Minecraft can be laggy, including video settings, hardware limitations, and server issues. One of the main culprits of lag is typically the video settings. If your PC or laptop is outdated, it could be struggling to cope with the graphical demands of the game. Another possible cause of lag is a limited amount of RAM. If your computer doesn’t have enough memory, it can lead to unwanted delays in the game. Fortunately, there are several ways to fix Minecraft lag, such as optimizing your video settings or increasing the available RAM on your computer.

Lag types: Minecraft types of Lag and How to fix them

Minecraft lag is a frustrating issue affecting players on any platform. Different types of lag can occur in Minecraft, including latency lag, frame lag, and chunk lag.

Latency lag is caused by network issues and can be fixed by selecting a server with a lower ping or by installing a mod to reduce latency.

Frame lag is caused by insufficient RAM or GPU power, resulting in low FPS (frames per second). Players can adjust their game settings or upgrade their computer hardware to fix frame lag.

Chunk lag occurs when the game tries to load a large amount of data, such as a mob spawn or a new chunk and is commonly seen in survival mode.

To fix chunk lag, players can alternatively adjust their render distance or install a mod to optimize chunk loading speed. Lag spikes are also a type of lag that can occur in Minecraft servers and are caused by a sudden increase in player activity.

To fix lag spikes, players can reduce the number of players on the server or install a plugin to optimize server speed. Overall, Minecraft lag can be frustrating, but there are multiple ways to fix different types of lag and improve game speed.

Do you use plugins or mods?

As an AI language model, I do not play video games. However, I can share some information about using plugins or mods in Minecraft. First off, both plugins and mods can bring new features or functionalities to the game, whether it’s adding new blocks, weapons, or gameplay mechanics.

Plugins are typically used on servers and can affect how players interact with each other and the world. On the other hand, mods can affect the game’s performance, causing lag or slow game load times.

To install a mod, download it from a trusted source and manually add it to your game files. It’s important to note that plugins and mods can also affect the game’s stability, causing crashes or corrupted files.

Therefore, it’s always recommended to do some research and back up your game files before adding any new features to your game.

How to Reduce lag in Minecraft single-player

Minecraft is a popular game, but it can be frustrating to experience lag while playing. There are several steps you can take to reduce lag in single-player mode. The first step is to ensure that your game is updated and that your PC drivers are up-to-date. Next, adjust your video settings to optimize performance.

Select “Graphics” from the “Options” menu and adjust the graphical settings to “Fast” or “Fancy,” depending on your PC’s hardware. You should also adjust the “Render Distance” setting to reduce the number of chunks the game has to render simultaneously.

Restart Minecraft after these changes to ensure they take effect. If you are still experiencing lag, use the task manager to close any unnecessary programs running in the background.

Finally, ensure you have a smooth framerate by adjusting the “Max Framerate” setting in the graphical menu. These steps should help to reduce lag and improve your Minecraft experience.

How to Reduce lag in Minecraft multiplayer

To reduce lag in Minecraft multiplayer, check your internet connection speed. A slower internet connection can cause lag or delay between game actions.

If your internet connection speed is slow, try connecting to a different server or rebooting your router. If you use Wi-Fi, consider switching to an ethernet cable for a more stable connection. Another potential fix is to:

-Reduce your graphics settings to allocate more resources to the game.
-Turn off other programs, especially those using your internet.
-Turn off all browser windows.

If you’re still lagging, try asking other players on the server if they’re experiencing the same issues. It’s also possible the server itself is laggy, so there may not be much you can do about it.

How to Fix Lag in Minecraft Pocket Edition

Minecraft Pocket Edition is a popular app loved by gamers worldwide. However, lag can become a frustrating problem when exploring the virtual world, and it can ruin the gaming experience.

Fortunately, there are several ways to fix lag in Minecraft Pocket Edition. Firstly, adjusting the video settings is important; reducing the graphic settings and render distance can significantly improve the game’s performance. Secondly, allocating more RAM to the game can help it run better.

Regularly updating the app is also recommended, as each update may include optimizations that help fix lag issues. Another option is to change the animation and render settings or adjust the setting for smooth gameplay.

Lastly, players should minimize the chunks to a tolerable level to avoid lag while exploring. By following these steps, Minecraft Pocket Edition players can enjoy a smooth, lag-free gaming experience.

Learn how to download Minecraft for your Android mobile for Free

How do you edit your YouTube videos?

0

The quick answer is independence on the type of your video you are trying to make. You have a range of videos, from pranks to street interviews, comedy sketches, stand-up comedy shows, vlogs, tech videos, cinematic videos, and short stories. 

So all these different types of videos will have other processes for recording them. And also different styles of editing them. However, the technical part of d editing the video would be the same.

If you are a Youtuber or you want to become a Youtuber and want to get started with creating youtube videos, I have written a detailed article about getting started on youtube. You should check that guide to learn the basics of getting started on youtube. 

This guide will help you immensely even if you have already made videos. I recommend you check that out

Now if you want to know the technicality of editing a youtube video, I will provide that information on this topic since I have been editing videos for the last six years. 

What App/Software do Other YouTubers use to Edit Videos?

When it comes to editing YouTube videos, there are a variety of apps and software available that other YouTubers use. Some popular options include

  • Final Cut Pro,
  • Filmora,
  • Adobe Premiere Pro,
  • DaVinci Resolve etc.

It depends on what kind of videos you want to make and what type of device you’re using. If you have a Mac, Final Cut Pro is a great editing tool with all the features you need to create professional-looking videos. 

If you’re on a budget, Filmora is an excellent option with an easy-to-use interface. Adobe Premiere Pro is another great option with a wide range of video editing features but it comes with a higher price tag.

DaVinci Resolve is a free video editor for colour grading and professional video work. No matter what you choose, the most important thing is finding a video editing tool that fits your needs and helps you create the best video project possible.

How Does the Editing of Your Video Impact Its Performance?

Editing videos is an art that can significantly impact the performance of your video content, especially on platforms such as YouTube. It’s not just about cutting out unwanted footage or aligning transitions; it’s a tool you can use to convey your message clearly and to attract and retain viewers.

By editing your videos a certain way, you can tell your story how you want and present it engagingly. Attention spans are short, and people are likelier to watch a well-edited video with seamless transitions and coherent messaging.

Therefore, it’s crucial to edit your YouTube videos effectively to ensure that your content is well-received and drives the performance you want. Ultimately, it’s the editing of your video that can make or break your content’s success.

How to Edit YouTube Videos on iPhone or Android

You can download a video-editing application from the App Store or Google Play Store for iPhone and Android. Check out the best video editing apps for iPhone and Android. Once you have the app, import the YouTube video you want to edit onto your phone.

From there, you can start editing by trimming or cutting out sections of the video. You can add text overlays and video effects to make your video more visually appealing.

Add music to your video using the app’s audio library to enhance the audio. When you’re satisfied with the final product, you can upload it directly from your phone to YouTube. Though editing videos on iphone in Android is not a great experience, you require a lot of patience. 

Because of the constraint of the smaller screen and touch interface, some functions take time to perform. Though apps like Kinemaster and Inshot make editing videos on mobile platforms easy. 

I usually prefer editing youtube videos on my computer, Final Cut Pro is the software of my choice, and I use it on my Macbook Pro 16. But I still prefer editing videos on my iphone for my instagram really because it is easier as it is short on the iphone itself, and the videos are short, just 90 seconds, so it is not that. 

How to Edit Youtube Videos in the YouTube Video Editor After Upload

Youtube offers the option of editing videos on youtube studio, but the online video editor is quite basic and can do only a few things. It is not a full-fledged video editor. Currently, you can only cut a specific part from your video, which is helpful if you want to take out a particular position or have got a copyright strike for the audio you used. You can replace that song with a copyright-free piece from the youtube library.

I recommend editing your complete video using offline video editing software. Though there are several online browser-based video dating apps, if you are working with a lot of footage, uploading them to the server and then trying to edit them inside your browser is pointless. 

And if you have to do a specific edit, cut out a part of your video, replace the music, or blur faces, thankfully, the youtube studio editor works well.

To start editing, go to the YouTube Studio editor and access the video you want to edit. From there, you can trim or cut parts of the video, add captions, annotations or end screens, adjust the audio and visual effects, and even blur faces if necessary.

Remember that changes made after uploading may affect the performance of your video, so it’s essential to preview and save changes before making them public. It’s also recommended to notify your audience about any changes made to the video to ensure everything is clear. With the right tools and skills, editing a video after upload can improve its quality and viewer engagement.

How to Record and Edit YouTube Videos Easily? 

Being a YouTuber myself for more than half of the decade, I have created a system for editing my youtube videos, which is pretty amazing. I usually make tutorial videos that require me to speak in front of the camera and use screencasting to explain my points. You can read this article where I have written about my workflow of YouTube Video production

How to Fix Your Sleep Schedule | 5 Proven Ways and My Personal Experience

0

Are you struggling to fix your sleep schedule? You are not alone. Many people need help with maintaining a consistent sleep schedule. Let’s talk about some proven ways you can apply to fix your sleep. 

  • First, schedule a regular bedtime and wake-up time to program your body’s internal clock. 
  • Secondly, create a nighttime routine such as reading or a warm bath to help relax your mind and body. 
  • Third, limit your exposure to electronic devices before bed, as the blue light emitted can hinder your ability to fall asleep.
  • Fourth, avoid caffeine and alcohol before bedtime, as they can disrupt your sleep. 
  • Lastly, ensure your sleeping environment is comfortable, dark, and quiet. These methods have helped me fix my sleep schedule, and I guarantee they can help you too.
  • These were some scientific name bases that can help you fix your sleeping schedule but these are generic and you will find them almost everywhere on the internet. So I will talk about my experience and how I was ever able to overcome my late-night sleeping habits.

Why Does a Sleep Routine Matter?

When you have a consistent sleep pattern, your body learns when it is time to fall and stay asleep, leading to better quality sleep.

A sleep routine involves:

  • Preparing your mind and body for sleep, including establishing a regular bedtime.
  • Avoiding screens for an hour before bed.
  • Creating a comfortable sleep environment.

By maintaining a healthy sleep routine, you can get the sleep you need to feel rested and refreshed each day. A consistent sleep pattern can also improve mental and physical health, as sleep is crucial in supporting overall well-being. 

How Can You Reset Your Sleep Schedule?

Set a consistent bedtime and wake-up time to reset your sleep schedule, and stick to it even on weekends. It can help regulate your circadian Rhythm (more on this later), making it easier for you to fall asleep at night and stay awake during the day.

Avoid pulling an all-nighter and napping during the day, as this can disrupt your sleep schedule. You will find some advice on the internet that says you can pull in an all-nighter to sleep on time the next day. But not only will it rain your entire day, but you will also again return to your missed sleeping routine in a day or two. From my personal experience, I can say that.

Also, he cannot follow your sleeping schedule from day one religiously. Consider that you will have to follow. You have to keep yourself motivated to fix your sleeping schedule. 

Creating a relaxing bedtime routine can also help you wind down and prepare for sleep. Lastly, if you find it challenging to fall asleep within 20-30 minutes of going to bed, get out of bed, and do a relaxation activity until you feel drowsy. Adjusting your sleep routine may take time, but it is well worth it in the end for better sleep quality and overall health.

How Long Does it Take to Fix My Sleep Schedule?

 Fixing your sleep schedule can take some time as it is gradual. You cannot expect to change your bedtime drastically in just one night. As I said, it is a process that requires patience and determination. You will have to get yourself in the habit of going to bed and waking up simultaneously every day.

Consistency is key when it comes to fixing your sleep schedule. You may have to adjust your lifestyle, such as limiting caffeine intake, avoiding electronics an hour before bedtime, and creating a relaxing bedtime routine. Remember, habit takes time to form, and if you stick to your way, you will eventually see results.

Getting your sleep schedule back on track may take a few weeks or even months, but the key is to be persistent and stay positive. It’s just that you will have to train your Circadian Rhythm. 

What Is Circadian Rhythm?

Circadian Rhythm refers to the natural, internal process regulating the sleep-wake cycle of living organisms, including humans. The term originated from the Latin word “circa diem,” which means “around a day.”

This cycle is closely linked to the light-dark process of the environment and is regulated by a cluster of cells in the brain’s hypothalamus.

Disruption of this Rhythm can lead to various health problems, such as insomnia, depression, and even cancer. To regulate your circadian Rhythm, experts recommend sitting in sunlight for a few minutes every morning as it stimulates the natural production of hormones that help regulate the cycle.

At night, turning off the lights before sleeping is recommended to prepare your body to produce melatonin, a hormone that regulates the sleep-wake cycle. Keep your smartphone away or activating sleep mode that will dim the screen brightness, cut the blue lights and put the phone on silent. 

Is Screen Time Before Bed Messing With Your Sleep?

 Recent studies have shown that excessive screen time before bed can harm sleep. It messes up our Circadian Rhythm. Blue light emitted from screens, including phones, tablets, and televisions, can interfere with and trick our brain into thinking it is still daylight outside, disrupting our body clock and making it difficult to fall asleep.

It is recommended that individuals limit their screen time before bed to at least an hour, allowing the brain to reset and adjust to a sleep-friendly environment naturally.

Indeed, some of us cannot live without a smartphone, and we want it to be at our bedside just in case. But you will have to prioritize and choose between your sleep and some dopamine from browsing your Instagram feed. I have started to follow a rule where I keep my smartphone in the other room so that I don’t have the origin to check it, and I can spend some time by being mindful of how I spend my day and how I want to spend the next day. It cares about your mind. 

Does Meditation Help Adjust Your Sleep?

Meditation is one of the best ways to reset your sleep cycle. Meditating before bed can calm your mind and body, promoting better sleep quality and helping reset your sleep schedule.

Additionally, meditation can help to lower stress levels, making it easier to fall asleep and stay asleep through the night. So if you’re struggling with a disrupted sleep cycle, consider incorporating meditation into your routine to reset your body clock and improve your overall sleep health. 

Sleep Disorder Testing for Healthy Sleep

Suppose you have tried everything from changing your diet and exercise routine to cutting out caffeine and practicing relaxation techniques, and nothing seems to be helping. In that case, it may be time to consider sleep disorder testing.

Several tests can help diagnose a wide range of sleep disorders, including sleep apnea, insomnia, and restless leg syndrome.

These tests are often done in sleep medicine clinics and involve monitoring your sleep patterns, brain activity, breathing, and heart rate. If you suspect that you may be suffering from a sleep disorder, it is essential to consult with a doctor who can guide you through the testing process and help you get the treatment you need to improve your sleep and quality of life.

Can Pulling an all Nighter Reset your sleep Cycle?

Many people resort to pulling an all-nighter to fix their sleep schedule. While this may seem quick, it can do more harm than help.

The human brain needs proper rest to function optimally, and staying awake for an extended period can leave it exhausted and impaired. When we stay awake for too long, our cognitive abilities decline, and we become more prone to making mistakes and poor decisions.

Moreover, an all-nighter can disrupt our circadian Rhythm, making it harder for us to fall asleep at the right time in the future. Therefore, while it may be tempting to skip a night of sleep to regulate our sleep-wake cycle, it is not a sustainable solution and can have adverse effects on our health in the long term.

Make Setting a Consistent Sleep Schedule a Part of your Lifestyle

Some people are blessed to fix their sleeping schedule after partying hard on Friday, and they return to normal on Monday. For some people like me, we will have to struggle for weeks to get back to normal.

So there are some choices you will have to make. Some tough choices.

If you already wake up at 6:00 a.m. or 7:00 a.m. That could be a good routine for you. Getting up at 4:00 a.m. is not for everyone, and if you have struggled with it for a long time, it may not be for you.

I have followed all the things I mentioned in this article, and it has helped me immensely to fix my sleep cycle. I am still not a 4:00 a.m. guy, but it works for me to get up between 6 to 7 a.m. After a good 8 hours of sleep. 

How to Fix the Broken Keyboard Keys of Your Laptop Computer?

Get your laptop keyboard back in working condition with our comprehensive guide on fixing broken keys.

If one or more keys on your laptop keyboard are not working, you don’t have to toss out your laptop or spend a fortune on repairs. In this guide, we’ll give you a few tips on how to fix broken laptop keys and get your keyboard back in working condition.

What to Do if My A Key Is Not Working?

Remove any debris

The first step is to ensure no crumbs, dirt, or hair obstruct the key’s path. Use compressed air or a dry toothbrush to gently clean the area around the key and under the keycap.

Reattach the keycap

Sometimes, the keycap can become detached from the keyboard’s scissor-switch mechanism. To fix this:

Gently take off the keycap with a flathead screwdriver or a keycap puller.
Examine the small plastic pieces that attach the keycap to the base of the key.
Reattach any pieces out of place, and snap the keycap back onto the scissor-switch.

If the keycap is damaged or missing, you can find replacement keycaps online or replace the entire keyboard for a more comprehensive fix. If you use a popular brand laptop, you can change your keyboard by getting a new replacement keyboard.

Check the scissor-switch.

If reattaching the keycap doesn’t solve the problem, your scissor switch may be damaged or dirty. The scissor-switch is the pivot point underneath the keycap, allowing it to move up and down when pressed.

Try cleaning the scissor-switch with a cotton swab or compressed air to remove debris or dust. If the switch still doesn’t work, it may need to be replaced.

Fixing a broken key on your laptop keyboard can be simple with the right tools and techniques. Cleaning, reattaching, or replacing key components can get your keyboard back into working order in no time.

What Type of Keyboard do You Have?

There are different types of keyboards, including Mechanical and Membrane keyboards. Mechanical keyboards have individual switches below each key, resulting in a tactile and clicky typing experience.

On the other hand, Membrane keyboards have a layer of rubber or silicone beneath the keys, offering a quieter and more lightweight feel. If it’s your laptop keyboard, there is a 99% chance it must be a membrane keyboard.

If a key on your keyboard is broken, you may need to fix or replace it. You can replace the keycap if it’s just a broken keycap.

But you may need to replace the entire keyboard if it’s more severe, like a liquid spill or multiple broken keys. In some cases, a technician may be able to fix the issue for you, but if the damages are too severe, you will need to replace the entire keyboard.

How to Fix a Keyboard Key That Fell Off?

A keyboard key falling off can be frustrating, primarily if you must type for work or school. If you need to fix a keyboard key that fell off, there are steps you must follow. First, identify if you have a Mechanical or Membrane keyboard.

If it is not a laptop keyboard and a mechanical keyboard, try snapping the keycap back onto the switch.

If it’s a membrane keyboard, you may need to replace the whole keyboard or buy a replacement kit.

The replacement kit should include a new keycap and the tools necessary to fix your laptop keyboard. Make sure to follow the instructions carefully. Once you’ve fixed the key, please test it to ensure it works properly.

With patience and the right tools, you can fix a keyboard key that fell off and get back to typing.

Things You’ll Need to Fix Keyboard Keys

The essential tools to fix a keyboard include a flathead screwdriver and a regular screwdriver. Depending on the keyboard type, you may also need a specific keycap puller. Some alternative tools include tweezers, a spudger, or a thin plastic card, which can all be used to remove or reposition the keys.

Additionally, having a clean and clear workspace is essential to effectively remove and replace the keyboard key. Be sure to also clearly understand how your keyboard works before attempting to fix it. With the proper tools and knowledge, you should be able to quickly fix your keyboard key.

How to Fix Damaged Keyboard Keys Due to Liquid Spills

You can take steps to fix the keyboard key and restore it to working condition. First, you need to turn off and unplug the computer or laptop. Then, carefully pry off the affected keyboard key and clean the area with a damp swab. If the spill has caused damage to the membrane keyboard, you may need to replace the entire keyboard. However, if it’s a mechanical keyboard, you can remove and replace just the faulty key.

If the liquid spill is severe, you may need to replace the keyboard. Remember, patience is key (pun intended) when fixing a damaged keyboard, and it’s essential to take the proper steps to avoid causing further damage.

How to Fix Laptop Keys Not Working Because of Dirt

If the dirt is visible, you can use a pry tool to gently remove it from under the affected key. Alternatively, you can use compressed air to blow away any dirt or debris stuck underneath the key.

This can be done by holding the can of compressed air upside-down and spraying the key until the dirt comes loose. If these methods do not work, you may need to replace the laptop key or the entire keyboard. It’s essential to take care of your laptop keys to ensure they continue to work correctly and prevent any potential damage to your system.

What Causes Mechanical Keyboard Keys to Stop Working?

Mechanical keyboards are popular among gamers and typists due to their faster response time and tactile feedback. However, these keyboards can also experience issues like any other device.

One of the most common problems users encounter is when keyboard keys stop working. There can be various causes for this problem, including mechanical damage, a manufacturing defect, or dust and debris accumulation in the keycap or switch.

Over time, the keyboard keys may wear out or develop a faulty connection due to frequent use.

Sometimes, the issue can be fixed by cleaning the keycap or switch or replacing the faulty component. However, more severe damage or defects may require professional repair or replacement of the entire mechanical keyboard or keyboard key.

How Do You Fix a Dead Key on a Mechanical Keyboard?

Fixing a dead key on a mechanical keyboard is a common issue that can be fixed by following simple steps. The first step is cleaning the affected key with a compressed air can, which helps remove any debris or dust stuck between the keycap and switch.

If this does not work, the next step is to remove the keycap and check the switch for damage. If the switch appears damaged, it may need repairing or replacing.

However, if the key still feels sticky or unresponsive, apply a small amount of lubricant to the affected switch. This should make the key feel more smooth and more responsive, ensuring that your mechanical keyboard is back up and running quickly.

How do I fix unresponsive keyboard keys?

Unresponsive keyboard keys can be a frustrating issue, especially if it’s a key you use frequently. You can fix a few things before considering replacing the entire keyboard.

Firstly, try cleaning the key by removing it with a small tool, such as a flathead screwdriver. Clean the area underneath the key with a soft brush and rubbing alcohol. Reattach the key and test if it’s working again.

Another thing to try is resetting the keyboard settings by going to the device manager, locating the keyboard under “Keyboards,” right-clicking it, and selecting “Uninstall.” Restart your computer, and the driver should reinstall automatically. If none of these solutions work, you may need to replace the keyboard entirely.

Can keyboard keys be repaired?

Yes, keyboard keys can be repaired. However, it depends on the extent of the damage. If a key is stuck or not functioning correctly, it can be fixed by cleaning the switch or replacing the keycap.

Sometimes, damage to the underlying switch mechanism requires a more extensive repair, such as replacing the mechanism or the entire keyboard. In some cases, it may be more cost-effective to purchase a new keyboard rather than repair an older one.

Additionally, if the damage is caused by spilled liquid, the repair process may require complete disassembly and cleaning of the keyboard components. In any case, it’s essential to be gentle when repairing keyboard keys, as additional damage can be easily caused.

Why is my keyboard typing the wrong keys?

If your keyboard is typing the wrong keys, there can be several reasons behind it:
It could be due to physical damage or debris stuck under the keys, causing them to malfunction.

This can be solved by cleaning the keyboard properly or repairing broken keys.

It could be a software issue where the language or keyboard settings have been changed accidentally. To fix this, you can switch to your computer’s language settings and the correct language or keyboard layout.

It could be due to a virus or malware on your computer, causing the keyboard to malfunction. In this case, you should run a virus scan on your system and remove any harmful software.

It could be a hardware issue if it persists after cleaning and checking the software settings.
In such cases, you may need to replace the keyboard.

How to fix keyboard keys typing wrong characters

There are a few potential solutions if your keyboard keys are typing the wrong characters.

Firstly, try restarting your computer or device. This can sometimes solve the issue if it is a minor glitch. If the problem persists, try to clean your keyboard by gently removing any debris or dust affecting your typing.

Additionally, check your language and keyboard settings to ensure they are set to the correct region and language.

If none of these solutions work, it could be a hardware issue, and you may need to replace your keyboard or take it in for repairs. Keeping your keyboard clean and free of debris can help prevent these types of issues from occurring in the future.

How to fix keyboard keys repeating

One common problem with keyboards is when specific keys start to repeat themselves, disrupting your typing and making your work much more difficult. Luckily, you can try a few easy solutions to fix this issue.

Firstly, ensure your keyboard is clean and free from any debris or dust that may interfere with the keys. You can do this by carefully removing dirt or crumbs from the keys using a soft cloth or compressed air.

If the issue persists, try adjusting your keyboard settings, as your computer may be set up to interpret repeated keystrokes more sensitively than necessary.

You can do this by going to your control panel and selecting ‘Keyboard’ or ‘Hardware and Sound’, then adjusting the keyboard repeat delay and rate.

If none of these solutions work, it may be worth considering a physical repair, as the issue may be caused by worn-out or damaged keyboard switches.

How To Fix the Packet Loss and Lag on WI-Fi or LAN Internet?

In this article, you will learn some tips on how to fix packet loss and lag. Packet loss and lag are two common issues that can make your internet experience frustrating.

You might notice packet loss when you see some data missing from your internet connection, and lag when your online game or video streaming freezes or takes longer to load. If you want to fix these issues, you can try to reset your modem or router, update your software, check for malware, run a wired connection, and adjust your network settings.

These methods may help you to reduce packet loss and lag, and make your internet connection more reliable. With these tips, you won’t have to experience the frustration of seeing page load fails or waiting for your online game to catch up with your actions.

What causes packet loss?

Packet loss occurs when one or more packets of data traveling across a computer network fail to reach their destination. There are several reasons why packets may be lost. Congestion in the network is a common cause, as it can happen when there are too many data packets trying to travel through a network at the same time.

Other reasons for packet loss include hardware malfunctions, network interference, and network configuration errors. When a device is overloaded or not functioning correctly, it can cause packets to be dropped.

In addition, interference from other devices operating on the same frequency or signal strength issues can cause a network packet to be lost. Configuration errors, such as incorrect routing protocols and firewall rules, can also cause packet loss.

All of these issues can impact the efficiency and reliability of a network, leading to slower transmissions, lag, and disrupted connections.

Why am I getting packet loss with good Wi-Fi?

There could be several reasons for experiencing packet loss on a seemingly good Wi-Fi network. One of the most common reasons could be signal interference caused by the presence of other wireless devices or networks in the area.

I was facing a similar issue on my MacBook Pro when I connected my type C dongle to it. I found that it was somehow interfacing the the Wi-Fi receiver hardware inside my Mac. Connecting my MacBook Pro via Lan cable solve the issue whenever I was using the Dongle, However replaced it with a dongle that had a small type C wire to it.

Another potential cause could be outdated or faulty network equipment, such as routers or network cards. Replacing the equipment or updating the firmware could help resolve the packet loss issue Over the time, your Wi-Fi router will start having problems after running continuously for years. I started observing No Wi-Fi nights where I completely turn off the Routers at night, it has definitely improved the lifespan of devices for working properly, without any issues.

Poor network configuration or network congestion can also contribute to packet loss, which can be addressed by optimizing the network settings or limiting the number of devices connected to the network. Ultimately, identifying and addressing the underlying cause of packet loss is crucial for ensuring a stable and reliable Wi-Fi connection.

Why do I have packet loss with Ethernet?

Packet loss with Ethernet can occur due to several reasons. One of the common causes is the quality of the Ethernet cables used to transmit the data. If the cable is frayed, worn-out or not compatible with the device, it can lead to data transmission errors, resulting in packet loss.

Issues with the network interface card (NIC) of the computer or the router can also lead to dropped packets. Additionally, network congestion, high traffic, or a poor network configuration can also result in packet loss.

It is crucial to ensure that the Ethernet cables being used are compatible with the device and that the NICs are working correctly to avoid packet loss. Performing regular network checks, updating equipment, and properly configuring the network can also help prevent packet loss on Ethernet connections.

How do you calculate packet loss?

To calculate packet loss, we need to determine the number of packets sent and received. Usually, the sender device sends a specific number of packets, and the receiver machine acknowledges how many it received.

By taking the difference between the number of packets sent and the number received, we can determine how many packets were lost in transmission.

For example, if a sender sends 100 packets, and the receiver only receives 80, then there was a packet loss of 20%. Calculating packet loss is essential because it helps in diagnosing problems in the network and identifying the source of the issue.

There are several ways to check for packet loss:

  1. Using command-line tools: On a Windows computer, you can use the ping command to check for packet loss. Open the Command Prompt and type “ping -n 100 [IP address or hostname]” where “IP address or hostname” is the address of the device or server you want to check. This will send 100 packets of data and show you the percentage of packets lost.
  2. Network monitoring software: Network monitoring software can be used to monitor network traffic and detect packet loss. Some popular network monitoring tools include Wireshark, PRTG Network Monitor, and Nagios.
  3. Online tools: There are several online tools that allow you to test for packet loss, such as PingPlotter, Speedtest.net, and DSLReports.com.

Is some packet loss normal?

Yes, it’s important to keep in mind that some packet loss is normal on any network, and the amount of packet loss that is considered acceptable depends on the specific application and network requirements. Generally, packet loss rates of less than 1% are considered acceptable for most applications.

I hope you find this article useful. Save it for later reference or bookmark the page. Keep reading techtippr.com to make your tech life easy.

How to fix water damaged iPhone?

If you’ve dropped your iPhone in water or exposed it to moisture, and if you feel it is suffering from water damage, Read this article to know everything about this issue.

Water damage is a serious issue that can cause your device to malfunction or even stop working altogether. Having said that, if you have an iPhone 7 or above, it is highly unlikely that a simple submerge in the water will damage your iPhone as these devices have IP67 rating which offers several types of protections like Dust, Splash, Water Resistant for upto 15 minutes in 150 meter depth.

If your iPhone is older than iPhone 7 or has been under water for several hours, Try doing the following.

To fix a water damaged iPhone, the first step is to remove your Sim card and turn off your device immediately to prevent further damage. Then, gently dry your phone with an absorbent cloth and remove any excess water from the charging port, headphone jack, or any other ports.

Do not try to turn on the phone before it’s completely dried. To ensure proper repair, it’s best to take your water damaged iPhone to a trusted repair shop or to an Apple store, especially if you are unsure of how to open and disassemble your phone. With timely efforts, you may be able to revive your phone in no time.

How Does iPhone Water Damage Occur?

iPhone water damage occurs when liquid comes into contact with the inside of your iPhone. As we mentioned above, the iPhones since the iPhone 7 and iPhone XS, have been designed to be more water-resistant, but they are not waterproof.

If water or any other liquid is able to get into your device through ports, it can cause damage to the inside of your iPhone. Liquid damage can occur even from contact with a small amount of liquid, like a few drops of rain. Any exposure to liquid can weaken the internal components and cause damage to your iPhone. When this happens, your iPhone may not be able to function properly or may not turn on at all. So be careful with your iPhone and avoid liquid contact to prevent bad iPhone Water Damage.

Can iPhone Water Damage Be Fixed?

iPhones are known for their sleek and modern design, but unfortunately, they are not immune to water damage. If you have accidentally dropped your iPhone in water or spilled liquid on it, you may have experienced iPhone water damage.

The newer versions of iPhones are smart enough to figure out if your iPhone has come in contact with water. The charging of your iPhone is restricted and it can only be charged once it is dried completely.

Also, if your Phone falls in water, it will get into the speaker grill, and the loudspeaker starts sounding funny. It’s not a thing to worry since it starts working normally once the iPhone is dried. There’s are even some Shortcuts available to push water droplets out of the speakers. Although it doesn’t fully remove the water.

The good news is that there are options for repair. Depending on the severity of the damage, a water damage repair may be able to fix your iPhone.

Should I Repair My iPhone Or Buy A New One?

Deciding whether to repair or replace your iPhone can be a tough decision. One consideration is the age of your smartphone. If it’s older than five years, it’s likely time for an upgrade. However, if it’s a newer model, the decision may be more complicated.

If your phone has minor damage, it may make sense to have it repaired. The new iPhone may come with updated features and technology, and it may even be more cost-effective in the long run if you factor in the cost of continuous repairs and upgrades. Ultimately, the decision is yours and should be based on the state of your current device and your personal needs and preferences.

Should I use rice to dry my iPhone to deal with water damage?

Unfortunately, using rice to dry and retrieve a water damaged iPhone is not the best solution. While it may seem like a simple and easy fix, rice does not actually absorb moisture from the inside of the device. The water can also find its way deep into the phone, rendering the rice ineffective.

Additionally, the process of dropping an iPhone in water can damage the delicate ports, and the rice particles can get stuck inside, causing even further damage. To properly recover a water damaged iPhone, it’s best to turn it off immediately, remove the case and SIM card, and take it to a certified repair technician or service provider. Don’t attempt to turn it on or charge it until it has dried completely, or you could cause further harm to the phone.

Again, I’ve used my iPhone 12 Pro Max under water several times for recording videos. I’ve always found the speakers get affected because of the water and start sounding muddy, they it gets fixed once the iPhone is dried. IF you want to speed up the process, use hair dryer with the iPhone turned off. Don’t let it get too hot though.

I hope the following advices were helpful to you.

Beginner’s Tips For Online Casino Games

0

Online casinos have become hugely popular in recent years, with adults of all ages turning to these games as a way to have some fun.

Online casino games can easily be played at home or anywhere with an internet connection and often comprise titles that are easy to pick up and play, so many people turn to these games when they have a spare 5 or 10 minutes.

It can also be daunting at first, especially if you are not familiar with casino games. This post will offer a few tips for beginners that will help you get started and hopefully help you find a new hobby.

Pick A Trusted Casino Website/App

First, you want to find a trusted casino where you can play. These days, there are many options out there, but not all online casinos are equal.

You want to find a trusted online casino that offers excellent gameplay, strong security, and positive customer reviews. This will give you the best experience and provide you with peace of mind knowing that you are playing safely online.

Pick One Game

Much like walking into a casino for the first time, it can be daunting when you log in to an online casino and see all of the games available to you. If you are new to casino games, it is best to pick just one game to get to grips with at first.

Something like roulette is ideal because it can be quick and easy to learn and is good fun. You will often find that online casinos allow you to play dummy hands for practice (for no money), which can be a great way to build your knowledge and confidence.

Once you have mastered one game, you could then opt for something more complex like poker.

Create A Budget & Start Small

One of the most important tips when it comes to casino games is to set yourself a budget. You need to have a firm figure in mind for how much you are happy to spend and walk away if you reach this amount. You could also set yourself a time limit. When getting started, it is a good idea to place small bets – this will allow you to play for longer and keep your stress levels down.

Be Responsible & Have Fun

Casino games can be great fun, but any kind of gambling needs to be done responsibly. In addition to setting yourself a budget, you also need to make sure that you do not chase your losses.

You should also avoid playing under the influence of alcohol or drugs. Remember, online casino games are supposed to be fun – if you find that you are not enjoying them, you should stop straight away. 

Hopefully, the tips in this post will help anyone that is thinking about starting to play online casino games.

Online casino games can be great fun and an enjoyable hobby to add to your lifestyle, but they can also be daunting for a beginner, and you need to know how to play responsibly. 

How to Access Country Restricted Websites from Anywhere in the World

0

The Internet is meant for connecting the entire world to get information from any corner of the planet. That would be the basic definition of it. But the Internet is also used as a channel to distribute premium content. Unfortunately, due to the concerns of privacy, few companies make their website available to few countries (the US in this case).

Now, there is certainly a way to bypass this restriction. On a normal day, you might have to learn a thing or two about the technicalities of the Internet in order to get access to geo-blocked websites or simply access US Netflix or any American website or a website outside of your country.

But today, I suppose, is your lucky day, because you do not have to get your hands dirty with changing codes and stuff, and no, not even installing VPNs and stuff.

Use Opera Browser’s Inbuilt Free VPN

The opera browser has this amazing feature built into its browser, both for computers as well as smartphones, free VPN, which you will have to enable it yourself but after enabling it you will be able to use US IP Address or the IP address of different parts of the world, and access the websites that are restricted in your country.

Not only it unlocks websites, it also helps you with your privacy and security as the internet service providers will not recognise your location.

How to use Opera Browser’s VPN

Install the app on your device. If it is your first time installing the opera browser it will give you a quick way to set things upset as the look and feel of the browser with their or not you want to import browser history, cookies, passwords etc, from other browser’s. Whether you want to turn off or on the ads on the websites, and some other exciting features.

But the quick setup wizard doesn’t give you the option to enable VPN in Opera browser. You will have to do it manually. You can click on the Settings icon in the browser, appearing on top right side of the browser.

It will open a panel full of amazing features, a toggle button shows what features are enabled. You will not find Toggle button for enabling VPN, it says ‘Enable in Settings’.

The Settings page for VPN will show up after a popup warning talking you that using VPN can slow down the performance of the browser, which is an obvious thing. All the VPN connections as slow.

Once you have enabled the VPN, the VPN icon will appear in the address bar, just before the URL starts.

From here, you can connect or disconnect or select the location you want to connect to. The icon turns blue when it is connected and remains grey when it is disconnected.

After you are connected, you will be able to access the website which is restricted in your country.

Since the Opera Browser’s in built-in free VPN is also available for Android and iOS devices as well, you can browse restricted websites on your mobile phone. But if you are planning to use Netflix or other streaming services on your mobile phone, you will have to use a VPN provider.

The opera browser also has opera VPN Pro which is quite affordable at just under $5 per month. The good thing is, you can try the Pro version for free for 7 days.

But the built-in free VPN is always free, and it also works pretty good.

Here are some of the best VPN apps for iPhone. Most of them are also available for Android platform as well.