Are you looking to view the saved Wi-Fi password on your Android mobile? Continue reading this article to know how we can do this easily without using any app or hack.
You may have gotten Wi-Fi connection at home which you have connected on your Android mobile, how are you may have connected it somewhere else, and have completely forgotten him the Wi-Fi password.
It is easy to view the saved password of a Wi-Fi connection if you are on PC, but, on Android mobile, it is a little tricky, but it is possible.
How to View Saved Wifi Passwords on Xiaomi Mobiles?
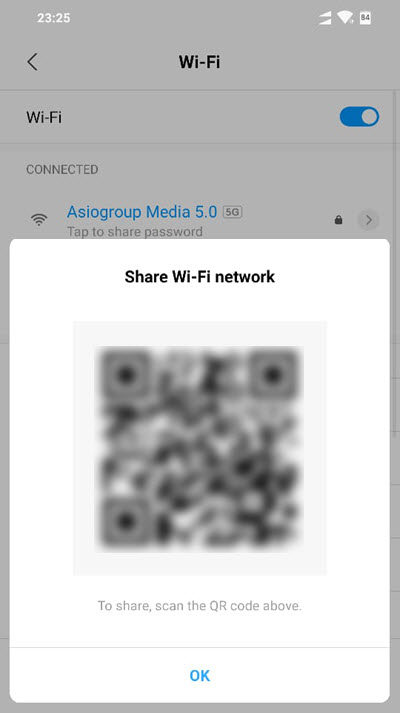
If you own an Android smartphone from Xiaomi, you may have noticed that they give you the option to share QR code that can be scanned by other smartphones, to quickly connected to the internet.
Although it comes pretty handy in connecting all other smartphones using the QR code, it would be convenient if you can view the password so that you can enter in other devices where scanning the QR code is not possible.
For that what you can do is, take the screenshot of the QR code.
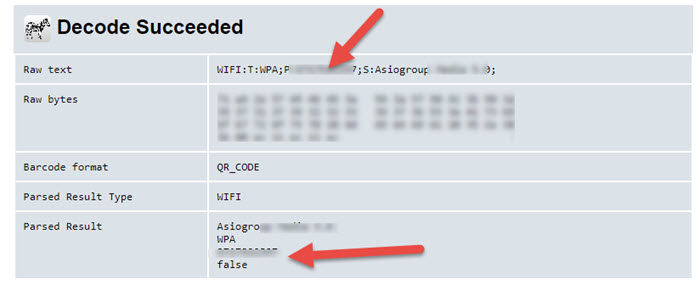
And then open the Google Chrome browser and open this website mentioned below.
It is a QR code and Decoder website, where you need to upload the screenshot of the QR code and decode it. The QR Code Decoder will easily decode and show you the password.
It is handy for viewing the password so that you can use it on other devices.
If you are already connected to the Wi-Fi, and you want to view the password, you can do so by logging into your router.
It is reasonably easy to log in to the router dashboard where you can find the Wi-Fi or wireless tab, and then give your password for the Wi-Fi.
Find out the router model.
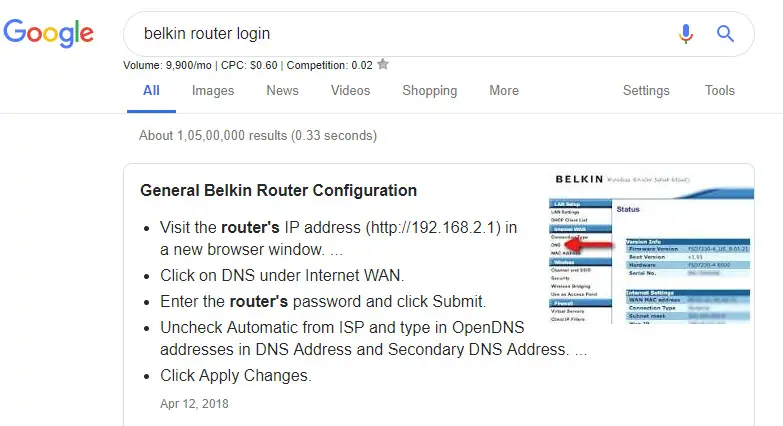
You first need to find out the model of your router and e manufacturer. For example, if it is a specific router from Belkin, you can search for the login address for the Belkin router in Google.
You can find the login address of any Router using Google search
The login address for Belkin would be something like this http://192.168.2.1, and you will have to enter this in your browser.
Once you tap enter, you will be prompted to log in to the Wi-Fi router page.
You can again search for the default username and password for the specific brand of the router. Mostly the username and password is ‘admin’, and sometimes you need to enter just admin and leave the password blank.
If the router has been set by the site engineer of your internet service provider you need to call them and ask for the login details of your router, they also follow it standard criteria to choose username and password.
Once you login to the router page, you can find the area where it is written Wi-Fi or wireless, it is the setting of the router where you can select the name of your Wi-Fi network and the password.
The password would be in Asterisk; there would be a box below it which you would have to check or uncheck to save the password. Once you do that you will be able to see the password.
So, this is how you can quickly view the saved password of your Wi-Fi on your Android mobile. Like I said, if you have a Xiaomi smartphone or any smartphone that offers you a QR code to connect to the current Wi-Fi network, you can take a screenshot of the QR code and use the mentioned website to decode it to view the password.
All the other methods where you have to install an app might work, but the probability is low because in my case they did not work at all.
I hope you find this article useful you can read more text related articles on our blog. Next time you have to search for something add ‘Techtippr’ to your tech query to find our articles.
Creating a unique and strong password is critical in today’s digital landscape. With the vast majority of our lives now online, our passwords are the first line of defense against cyber attacks.
The most important aspect of a strong password is randomness, with a mixture of uppercase and lowercase letters, numbers, and symbols that make them impossible to hack by brute force attacks. Instead of using predictable passwords like “password” or “123456”, choose a password that’s unforgettable and impossible to guess. Passwords that are easy to guess or commonly used are vulnerable to hacking attempts by cybercriminals looking to compromise your personal information. With a unique password that’s strong and impossible to hack, you can rest easy knowing your online accounts and sensitive data are secure.
Potential Threat of having Weak passwords on your online accounts
Unauthorized access: Weak passwords are easy to guess or crack, making it easier for hackers and cybercriminals to gain unauthorized access to your accounts and steal your sensitive data.
Account hijacking: If your account is compromised, a cybercriminal can use your account to send spam, distribute malware, or launch phishing attacks on your contacts.
Identity theft: Weak passwords can put you at risk of identity theft, where an attacker can use your personal information to open new accounts, make fraudulent purchases, or apply for loans or credit cards in your name.
Financial loss: If an attacker gains access to your financial accounts, they can transfer funds, make unauthorized purchases, or even steal your identity and apply for loans or credit cards in your name, causing you significant financial loss.
Data loss: If an attacker gains access to your online storage or cloud accounts, they can delete or corrupt your files, causing significant data loss.
Reputation damage: If your account is compromised, attackers can use your name or identity to post inappropriate or offensive content, causing damage to your reputation.
Create Strong Password with Password Generator Tools
Most of the services we use on the internet want us to create an account on their system, which makes it easier for them to offer a great user experience.
They can remember your preferences, they can know your name, your age, and all that stuff to give you a unique experience.
There are things that are required for creating an account, the username, and a password.
Now, the username can be revealed, since most of the services use the username to give the users a public profile link.
But password remains confidential, it should not be shared with anybody, neither online nor in real life.
But not telling your password isn’t going to guarantee that your online account is safe. If you are using passwords.
Then your online accounts are always in danger and a lot of people do not take this seriously and this is the reason why most common passwords are something like,
1234—-, password, petname, partnername, etc.
If you want to keep your online account secure you need to have e strong passwords that are not that easy to figure out.
Now, you can do a mix up of two or three words to create a password which would also be easy to remember but, there-there is something called brute force attack which can be done on an account.
In a brute force attack, the attacker will try to guess the password with its huge database of words and the combinations. It is surely a long process which might take days, but if your password is a word that can be found in a dictionary, then your account is not really that secure
This is why many internet services suggest creating an alphanumeric password which is a combination of numbers, special characters, and letters.
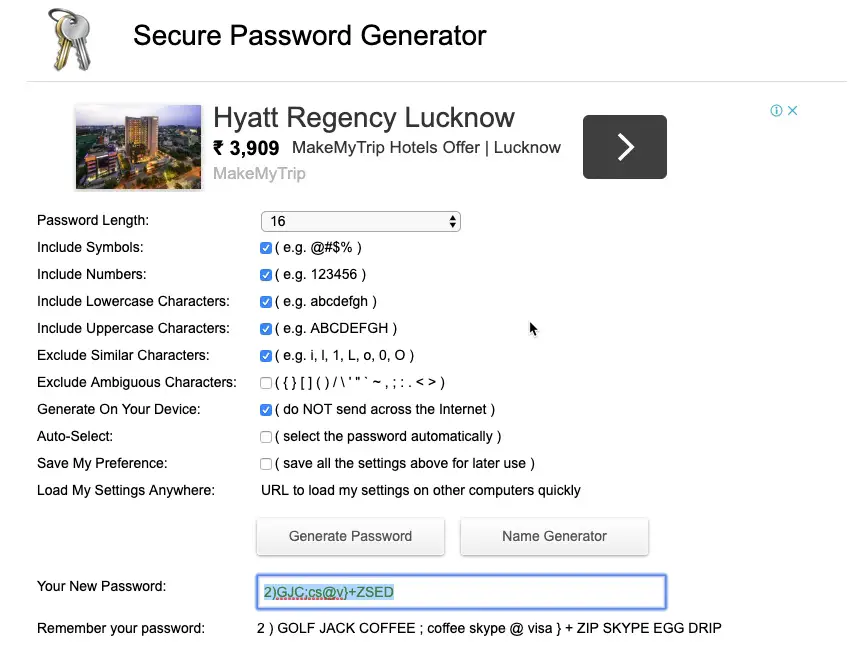
If you struggle with coming up with a strong password there are services available that were and use of for you.
On the website, you have the option to include the special characters, numbers, and letters, and the number of letters in a password.
You can then copy the password and paste it into the account where you want a strong password. There are many other websites like this but I would recommend using this.
If the website mentioned above does not work you can check out PasswordGenerator.org
Things to Keep in mind while creating passwords
When it comes to creating passwords, there are some important things to keep in mind. Firstly, it is always recommended to use a random password generator or a strong password generator to ensure that your passwords are truly random and hard to guess.
It’s important to avoid using the same password for multiple accounts, as this puts all of your accounts at risk if one password is compromised. Many devices and apps also have built-in password generators that you can use to create secure passwords. Finally, make sure that your passwords contain a combination of letters, numbers, and symbols, and include at least one uppercase letter and one lowercase letter, as well as one special symbol. It’s also important to manage your passwords carefully and never share them with anyone else.
By keeping these tips in mind, you can create strong, secure passwords that will help keep your personal information safe.
FAQs
How to remember such strong passwords?
You don’t really have to remember these passwords if you use a password manager, If you are using Google Chrome it has got an inbuilt Password Manager which works flawlessly.
Keeping track of multiple passwords is a challenge that we all face, especially when it comes to sensitive information. However, with the advent of password management systems, this task has become easier. Third party password managers like Dashlane, LastPass, and 1Password are popular choices among users. They not only store your passwords but also generate strong ones that are difficult to crack.
But did you know that Google Chrome comes with its own built-in password manager? With this feature, you no longer have to memorize or write down passwords separately.
Chrome Password Manager can also sync passwords across devices, making it an efficient and convenient tool. So, now you don’t really have to remember these passwords if you use a password manager – especially if you’re already using Google Chrome.
Will these strong passwords be brute force safe?
Usually, the brute force attack uses a database file which contains words that are in the dictionary, even with advanced methods it will be tougher near impossible to crack a password. The brute force attack is a common method of cracking passwords.
Typically, this attack uses a database of words from a dictionary to try every possible combination until the password is found. Even with more advanced algorithms, this approach can be tough, if not impossible, to crack when dealing with complex passwords.
This is why people are often advised to create strong passwords that use a variety of characters, both in length and character type. In essence, generating a password with a mix of uppercase and lowercase letters, numbers, and symbols makes it more difficult for hackers to crack. It’s like having a combination lock on a vault – the more complex, the harder it is to open without the right house numbers. Thus, it’s good practice to store passwords in an encrypted vault to add an extra layer of security.
Software data is growing exponentially, as is the need for database security. Businesses must ensure that sensitive information is secure across access touchpoints. This means you need to secure data access, storage, and processing. Securing sensitive data is crucial for higher user trust and better compliance with standards like GDPR and HIPAA.
Cloud-based ERP software like NetSuite enables businesses across domains to access real-time operational data. It is one of the fastest growing Software as a Service (SaaS)-based ERP software which provides a 360-degree view of the business. However, without proper security measures, NetSuite can be protected from cyber-attacks.
So, here is a comprehensive guide to NetSuite data security with top ways to protect sensitive information. But first, let’s understand NetSuite software and how it helps businesses.
What is NetSuite?
NetSuite is a cloud-based business management software that offers features to manage business operations. It can help you manage finances, supply chain, customer relationships, and eCommerce.
Further, it provides a fully integrated solution that enables businesses to streamline operations and improve visibility.
NetSuite gives you real-time insights into financials, inventory, sales, and customer data. It is highly customizable and helps you meet the unique needs of your business irrespective of the industry sector.
NetSuite follows a Software as a Service (SaaS) model where customers can subscribe to the services and manage business functions. In 2016, Oracle acquired NetSuite and integrated it into its core business offerings.
The financial management features NetSuite offers to include,
General ledger
Accounts payable and receivable
Budgeting documentation and forecasting,
Financial reporting.
Cloud-based software offers features for supply chain management like inventory, procurement, and order management. NetSuite also provides CRM features like sales force automation, marketing automation, and customer service management.
You can also use NetSuite for eCommerce functions like an online storefront, order, inventory, and fulfillment management. It allows you to integrate eCommerce platforms like Shopify, Magento, and WooCommerce.
However, NetSuite also needs enhanced security measures to ensure secure applications. Take an example of the Apache Log4J vulnerability found in NetSuite, which required an update from Oracle. So, you need to have effective NetSuite data securityin place to ensure better system protection.
Top 10 NetSuite Data Security Measures
NetSuite’s features offer real-time data, which means you need enhanced security to protect sensitive information. From encrypting the data to authentication processes and access policies, you can use different security best practices to safeguard NetSuite data.
Encryption
Users request data, and the front end of the NetSuite software fetches data from the database. If the communication channel is insecure, attackers can execute man-in-the-middle (MITM) attacks to access sensitive data.
So, how to secure your database?
Cryptographic encryption secure the communication between your NetSuite database and the user’s device. You can use digital certificates based on cryptographic encryption to secure a database. Secure Sockets Layer (SSL) certificate is a digital certificate that helps secure the data exchange and ensure protection against MITM.
You can get SSL certificates from a trustworthy certificate authority (CA). The first step to getting an SSL certificate is to submit a certificate signing request or CSR with your details. However, the validation of a certificate can differ based on the type of SSL certificate.
For example, if you request a Domain Validation (DV) SSL certificate, OV certificate, and EV SSL certificate. However, DV SSL certificate is helpful for small businesses, new startups, and smaller brands. It is easy to get and offers quick issuance of a certificate.
Role-based Access
Integrating software like NetSuite into your operations can lead to multiple access points. Multiple users at your organization may access data from NetSuite’s database for different business functions. Role-based Access(RBAC) policy ensures that data access is allowed only to authorized users with specific roles in the organization.
RBAC helps improve NetSuite data protection by providing secure data access. It enables organizations to restrict information access and prevent data leakages.
Multi-Factor Authentication
One of the significant security threats to NetSuite software can be unauthorized access initiated by attackers using social engineering practices. Attackers gain access to user credentials through a malicious link that the user may click under the pretext of being a genuine source.
Multi-factor authentication (MFA) is a security measure that provides additional protection for NetSuite data and prevents such attacks.
With MFA, users need to authenticate their identity using multiple layers of security to access the system. Apart from the email ID and password, users get a message or passcode on their device, which they must provide for authentication.
NetSuite offers several MFA options, including.
SMS Authentication- A unique code is sent via SMS to the user’s mobile device, which they must enter to access NetSuite.
Google Authenticator – NetSuite generates a unique code that users must enter in their authenticator app to access NetSuite.
Duo Security- The software sends a push notification using which they use can authenticate to access NetSuite.
Application-only Access
Software like NetSuite has several applications for business activities ranging from operations to human resources. Applying application-based access can provide granular restrictions and improve NetSuite data security. It allows organizations to restrict users from accessing specific application data in their domain or function.
Some of the benefits of an application-only access policy are
Limited access to specific applications
Control on which applications a user can access
Separation of information access based on function
Improved integrity of application data and code with restricted access
Enhanced NetSuite data protection
IP-Based Restrictions
Maintaining NetSuite data security can be challenging, especially if you have remote teams working worldwide. Fortunately, you can use IP restriction to ensure data security across geolocations. It is a process of limiting the data access to specified and registered IP addresses only.
Applying the IP restriction will allow admins to specify the IP addresses to log into the employee’s accounts and access data. If a user tries to access business data with an IP address outside the specified range, it will show an error.
You can use IP-based restriction with two main types of IP addresses,
Static IP- The IP address of a user remains the same each time they connect with the network.
Dynamic IP- The IP address changes when a user login or connects with the network.
Static IP is preferred for business data and SaaS-based software like NetSuite because dynamic IP keeps changing with each connection.
Redundant Infrastructure
NetSuite allows setting up a redundant server for your business operations. For example, if you have an eCommerce website with a mobile application. You can set up a redundant server with all the critical data and services. So if a cyberattack occurs, operations are not disrupted due to a redundant backup server.
The best part about this security measure is that it allows you to ensure that business activities continue even if a server fails due to a cyberattack.
Automatic Data Backup
Setting up automatic data backup is crucial because if there is a data loss due to a cyberattack, applications will be operational due to information in the backup. A data backup automatically backs up all your NetSuite data, including your customer files, applications, and databases.
If there is a problem with the server that hosts your NetSuite system or any other issue that causes data loss, you will have copies of your critical information to work from.
Idle Disconnect
If a user is logged in to NetSuite and moves away from the device for a long time, another person can misuse the account to access sensitive data. This is where NetSuite’s idle disconnect feature helps by automatically logging the user out of the session.
When you enable idle disconnect, it terminates the user session after 15-30 minutes of inactivity. This is important because most users have access to financial, personal, and sensitive data while logged in, and if a hacker gets access, it can lead to information leakage.
256-Bit Encryption
Accessing data from the NetSuite database over the internet can lead to cyberattacks. Attackers use malicious code injections and MITM to access data in transit. However, 256-bit encryption ensure NetSuite data protectionby scrambling the data into an unreadable format.
NetSuite comes with 256-bit encryption, so each connection with the software is secure from cyber-attacks.
Operational Security
When you think about how to secure your database, operational security becomes crucial. It is a set of processes to ensure security for software operations. In NetSuite, operational security means better data access control, an incident response mechanism, and secure network infrastructure.
To ensure operational security in NetSuite, you need to
Implement access controls and ensure that only authorized users can access NetSuite data.
Set up firewalls, intrusion detection systems, and network segmentation
Establish an incident response mechanism
Provide security awareness training to employees
Conclusion
Software like NetSuite does come with tons of security features that ensure data protection. However, cyber threats keep evolving, so you need to use different security measures to reduce data theft.
You can improve NetSuite’s data security by using better data access policies, limited permissions, operational security, and encryption. However, which security measure you should employ will depend on specific system requirements.
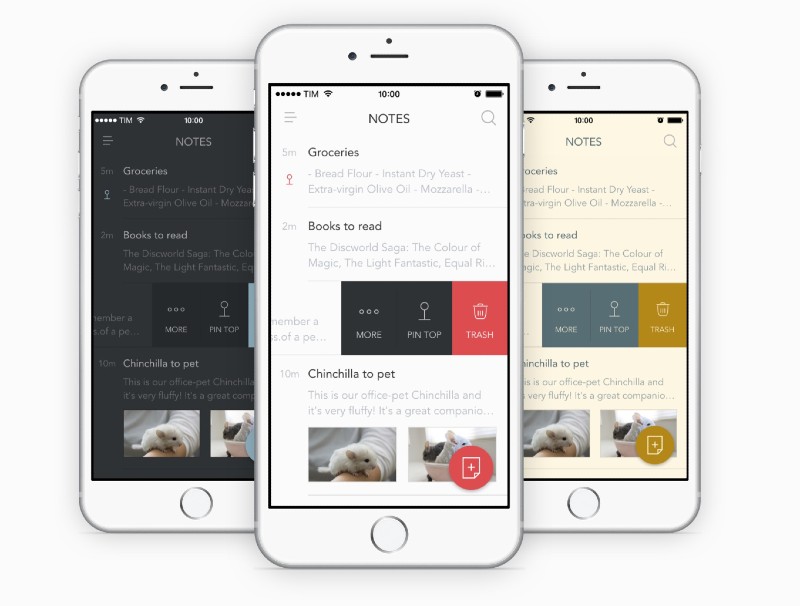
In this article, we will list out the best alternatives to the Evernote app. Evernote, once a reliable note-taking app, has lost its appeal to many users.
The reason behind this is because Evernote is not innovating, and its free version is quite limiting. This has led to many users searching for alternatives to use instead.
In this article, we will list out the best alternatives to the Evernote app. With the rise of technology, there are many note-taking apps available in the market, and some even offer additional features that Evernote does not have.
It’s important to explore these alternatives and find one that suits your needs. Evidently, it’s time for Evernote users to start looking for an alternative, as the number of options for note-taking apps is endless.
Watch the Video
The longtime here readers of my blog will know how much I love the Evernote app. I have been using which is from last 8 years, and it is literally one-third of my life saved digitally into the app.
But now I started getting sceptical about its future, it has already added limitations to its free account, and I can’t use it and more than two devices and keep things synced, one of the core reasons I started using Evernote in the first place.
So it’s time to look out for the best alternative to Evernote. If you are someone like me, who is looking for a way out of the Evernote, I hope you will find this article useful.
Why is it important for using a Note Taking App?
One of the most significant benefits of using a note taking app is the ability to take notes easily and quickly, without the need for pen and paper.
Also, some note-taking apps are free to use and provide a broad range of features like collaboration with a team, making them perfect for group project management. Not to mention, these apps are perfect for a quick brain dump of ideas, easily organizing them into an actionable plan.
Overall, note-taking apps are incredibly useful for staying organized, collaborating with your team, and ensuring productivity. Maybe Google Drive will be an option since it has support for folders so creating a folder and then putting all the files inside it makes sense, since I am already using Google Drive
Best Evernote Alternative Apps
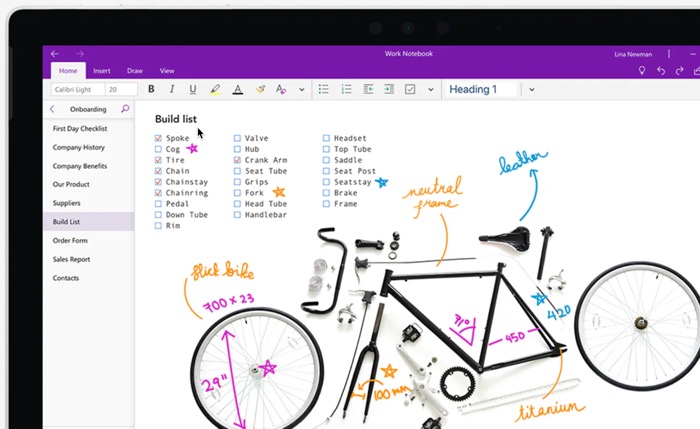
Microsoft OneNote
Onenote was actually my note-taking app of choice before I switch to Evernote, the reason was it was not available for Android.
This phone released for Android but it was too late for me to switch back, now looking at the OneNote app, it is even better than I used previously.
A bunch of features have been added to it, and it is now I truly cross-platform app. And I still love its functionality on Windows, which gives you the ability to take a screenshot of a part and make a note about it.
The Android app is equally good, you can create a notebook and then nose inside the notebooks. You can also put tags for easier Discovery.
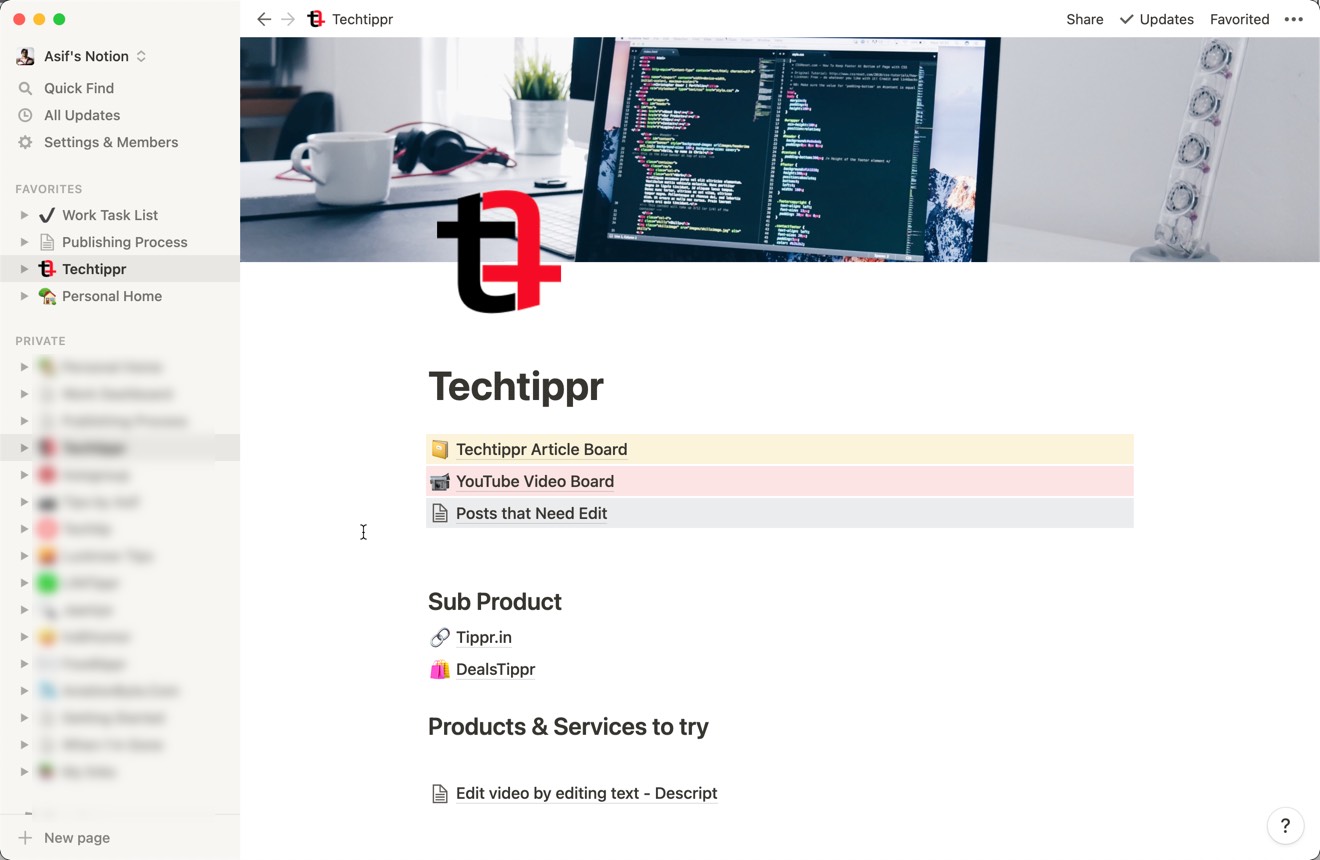
Notion as Alternative to Evernote
Notion is one of the most popular productivity apps in the market. It is a great alternative to Evernote because of its collaborative feature, template, project management, free version, and cross-platform capabilities.
With its collaborative feature, multiple users can work on the same document in real-time, making it perfect for team projects or group assignments. Notion also offers a wide range of templates, including project management, to-do lists, and habit trackers, which can help individuals organize their daily tasks and increase efficiency.
Additionally, Notion’s project management tool is excellent for keeping track of deadlines, schedules, and important dates.
The free version of Notion offers enough features to get started with the app, and its cross-platform support allows users to access their information from anywhere. Overall, Notion is an excellent productivity app that can help individuals and teams increase their productivity and ultimately reach their goals.
Google Keep is one of the top Alternatives
As a productivity app, Google Keep is a great tool for organizing notes and keeping track of important information. What sets this app apart from others, however, is that you don’t have to use or create a separate account to use it.
This makes it incredibly convenient for those who already have a Google account, as you can simply sign in and start using it right away. With features like the web clipper, you can easily save articles and items from the web, and with the ability to share notes, Google Keep is great for collaboration.
Even if you prefer taking handwritten notes, this app has got you covered; you can use the app to store and organize your handwritten notes as well. Overall, Google Keep’s accessibility and versatility make it a top choice for those looking to boost their productivity and simplify their note-taking process.
If you have used Evernote just for taking notes and setting reminders, you are going to love Google Keep because it’s more inclusive and past then Evernote.
You can also set location reminders which is my favourite feature of Google Keep that will remind you to take anything you want it to remind you whenever you are in a proximity to a certain location.
It’s completely free like all the products of Google. Here are some amazing features of Google keep you can check out
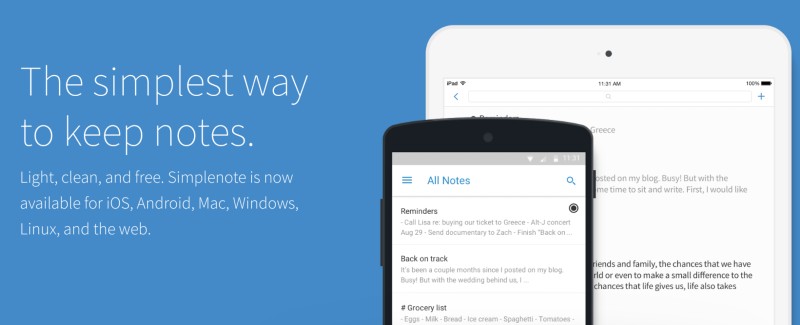
Simplenote
Simplenote has emerged as a formidable alternative to Evernote, particularly for users who are looking for a more minimalistic and streamlined way of taking notes. While it may not have all the advanced features of Evernote, Simplenote is still adept at task management and organization.
Its clean and intuitive interface makes it easy to use and navigate, and its search function allows you to quickly find what you need. Simplenote also offers some collaborative features, such as the ability to share notes with other users and work together on projects.
Overall, Simplenote is a great option for those who prioritize simplicity and efficiency in their note-taking and organization.
Milanote
Milanote is a platform that provides an alternative to Evernote. It lets you create notes and organize them in a visual way, which makes it easier to keep track of your ideas and projects. Milanote has a mobile app, which means that you can access your notes from anywhere, at any time.
Moreover, it also has a desktop version, which makes it more convenient to use when you’re working on your computer. The collaborative feature of Milanote allows you to invite others to work on the same project with you, making it an excellent choice for team projects. Overall, Milanote is a great Evernote alternative, as it offers a more visual approach to note-taking, as well as collaboration tools that Evernote may lack.
Bear
Bear is a note-taking app that offers a simple and elegant interface for taking notes. It is a note-taking tool that has been gaining popularity recently as an Evernote replacement.
The app offers a simple and elegant interface for taking notes that is easy on the eyes and mind. Bear is beautiful on both Mac and iOS and offers a free plan that comes with plenty of storage and features.
With Bear, users can create quick notes, todo lists, and even write longer essays. The app also offers markdown support, making it easier to format text and add links and images.
If you are looking for a more beautiful and streamlined note-taking app than Evernote, then Bear might be the app for you. Plus, it even allows you to import notes from Evernote, so you can make a graceful transition to the new app.
Apple Notes (Apple Devices Only)
Apple Notes is an excellent app for note-taking in the Apple ecosystem, making it the best choice for iPhone and Mac users. The app is free to use and comes built-in with all Apple devices, making it effortless to access and use.
The app allows users to add images, sketch, create to-do lists, and organize the notes according to their preference. Moreover, the app syncs easily across all devices connected to the user’s Apple ID, so you can take and access notes from anywhere, at any time. Importantly,
Apple Notes is an ideal app for those who use multiple Apple gadgets as they can access their saved notes from anywhere. If you’re an iPhone or Mac user and in search of a note-taking app, Apple Notes is the perfect solution for you.
Stick with what works for you
There are many note taking and productivity apps available in the digital world. I recommend trying a bunch of apps and finding the one that works for you.
These are the best note taking app, but the list is actually endless. So use all of them and see what works for you.
You can try, OneNote, Google Keep, Notion, or other similar apps. The key is to consider your needs and how the app can help you.
Take your time, experiment, and use them daily to see which one suits your workflow, work style, and preferences. Ultimately, when you find the right app, you will increase your productivity and get things done more efficiently.
There are many situations where you would want to record what’s happening on your screen.
From helping your relatives troubleshoot their computers, to uploading Tutorials and Gaming videos on YouTube, you need a good app that lets you record your screen.
In this article, I am going to list out some of the best screen recording software, that is also free to download and use.
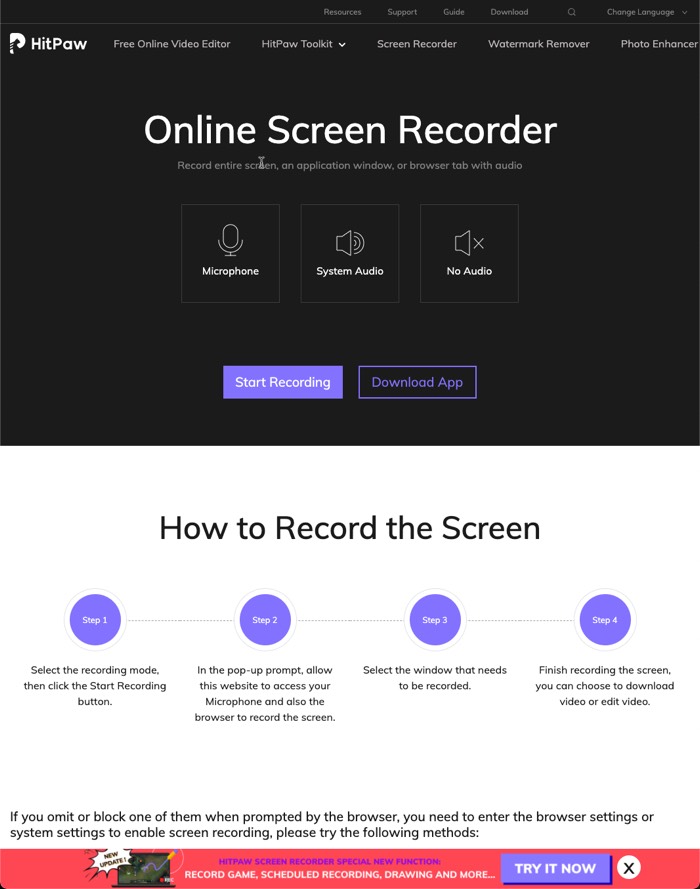
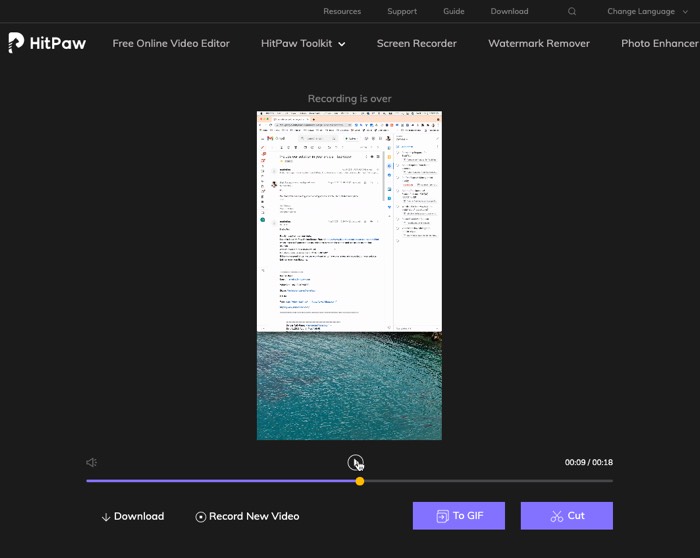
First on the list is HitPaw, an amazing screen recorder. The amazing thing about it is that it is a no-hassle screen recorder.
This online screen recorder does not require any download, you can access it right from the website.
Unlike many other online screen recorders I have tried in the past, it also lets you record any application window on your computer screen. I run a dual monitor setup and it recognized both the monitors.
Once you are done recording, you can trim the clip right inside the browser, or maybe turn it into a GIF.
Although this article talks about Free recording software for Windows, the Hitpaw online screen recorder can be used on any platform, including Chrome OS, since it can be opened in a browser.
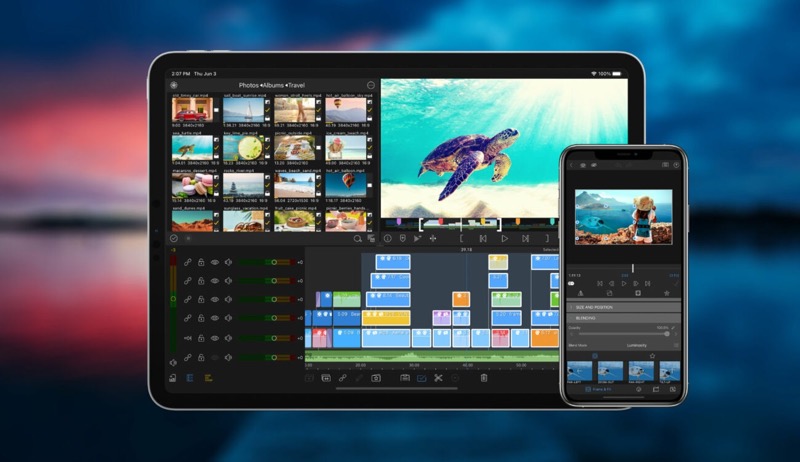
And if you want to edit those recording videos iMovie is one the best video editing
app for your pc. And now you can use iMovie on windows pc as well with a
certain method.
Do you need to record an upcoming webinar, capture an important video call or show your viewers and friends how to use a particular program? This software does it all and much more.
With Movavi Screen Recorder, you’ll quickly learn how to record a video from your computer screen or take a screenshot: capture the full screen, any region or application window, add a webcam and microphone, or record audio-only.
You can enhance your videos with on-screen drawing, mouse highlighter, cursor effects, and more. It’s also possible to trim your recordings afterward and save video in any popular format or upload it to YouTube or Google Drive right away. The cherry on top is the ability to schedule a recording task in advance, so you don’t miss any essential event.
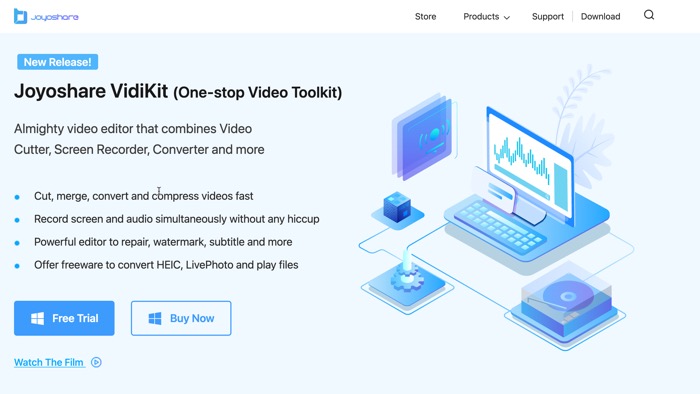
Joyoshare VidiKit is a lightweight, multifunctional screen recorder software, you can select the capture area as you want on the computer screen, and record both internal system audio and external microphone losslessly.
There are many formats available for you to choose, such as HD MP4, AVI, FLV, SWF, WMV, MKV, MOV, etc. It supports 4K and 60 FPS. You can also choose the highlight cursor when you are recording. Apart from Recording zoom meeting without permission, you have right to apply it to record video chats, lectures, games, etc.
Moreover, VidKit from joyshare is not just a Screen recording app for Windows & Mac, but a video toolkit with multiple other features such as cutting, merging and converting videos formats without losing quality. In a word, it is a very good video toolkit to meet all of your video needs in a professional way. As it’s powerful features, it is free, but with a watermark.
This app is pretty neat for creating screencasts, has a pretty solid built-in video editor for directly editing the recorded screen, making some changes to it, and then uploading it on YouTube.
You can also import videos from your computer and mix them up to create a nice-looking video.
And yes, this one is also free, you can download it from here.
As the name suggests, it’s a free screen video recorder for Windows.
It is also a screenshot capture tool, that allows you to easily record your screen.
The images can be saved in many different formats. Apart from the usual .jepg and .png, it also has support for BMP, GIF, TGA, and for video, it supports MP4.
8. Jing
Jing makes creating short tutorials for friends and family easy.
You can use it to create a short video to teach something how it’s done, whether it’s social media, uploading photos to Google, Facebook, attaching files to email, or using a particular website.
This software for recording your screen is clean and lightweight and is also a feature-rich app.
The free version offers almost everything for you to make short videos, it also offers premium features that can be enabled after paying a fixed amount.
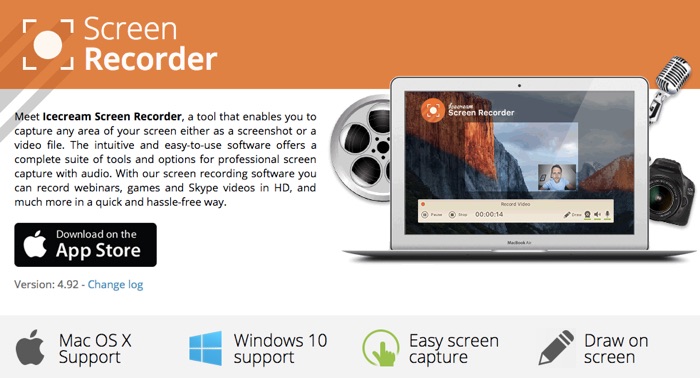
I’ve tried quite a few apps from Icecream, like their password manager, their apps are pretty nice for the price, which is zero, to start with.
It is one of the most popular free screen recorders for Windows. You can record your screen along with the audio of your computer, that is if you have connected a mic and are speaking while recording your screen. it does that natively.
It does that natively, which makes it suitable for Gaming Videos or Tutorials.
Apart from that, the app also supports picture-in-picture functionality, which makes you show yourself by recording yourself via a Webcam.
The UI is pretty basic but quite simple to understand and use.
It might only take a few days to get a hold of this application for using it to its potential.
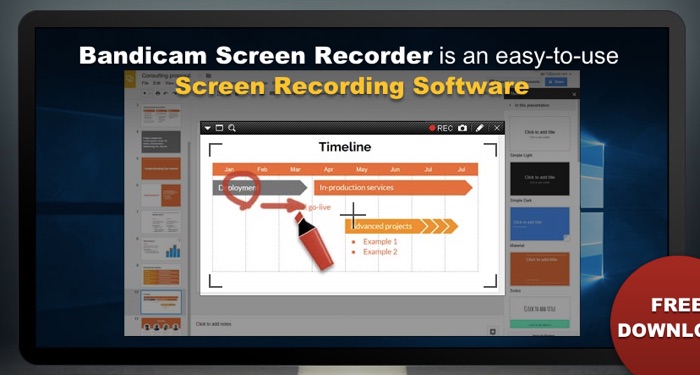
This little app might be pretty old, but works really well, you a record your screen, the entire screen or a particular region, or directly record your webcam connected to your PC.
You can also add music or your own voice using a microphone.
The free version of this app comes with a limitation of recording 15 min long videos, which is fine for many people.
If you want to create a tutorial video to teach something to your friends or family, this can be useful.
The only downside is, the free version adds a watermark to the video, So, I would recommend either go for the paid or pick any other from the above if you are looking to create videos for YouTube or a course. or for a presentation.
For that purpose, you can also check out the Camtasia, which is an amazingly cool app for both Windows and Mac.
The app is priced at $49.95, but it’s totally worth it.
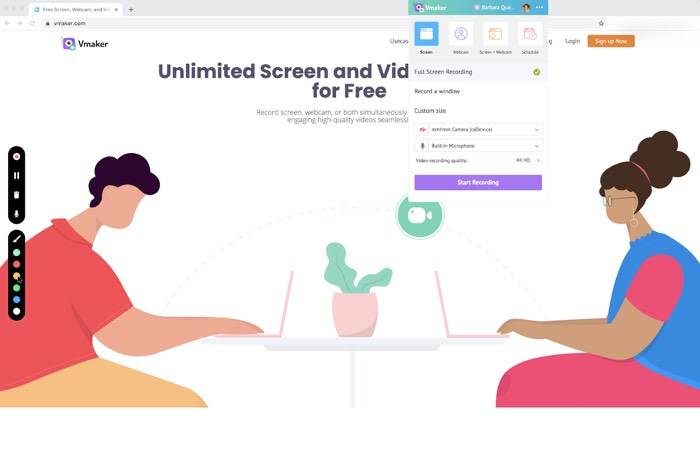
Vmaker Screen Recorder, the latest screen recording solution from the makers of Animaker Inc, allows users to record unlimited videos without any time restrictions. The best part about Vmaker is that there aren’t any pesky watermarks added to the screen recording files
Vmaker screen recorder not just offers free screen recording without any restrictions but also comes with a host of features making it one of the best screen recorders that are available on the internet. Learn more about Vmaker.
Unlocking an iPhone is an essential skill that every iPhone owner should know. But when we forget the iPhone password and enter the wrong password many times, iPhone is disabled how to unlock? In this article, we will explore five ways of how to unlock disabled iPhone without/with computer, using Lockout screen, Finder, iTunes, iCloud, and using an iPhone passcode unlocker.
Method 1. Unlock Disabled iPhone using Lockout Screen
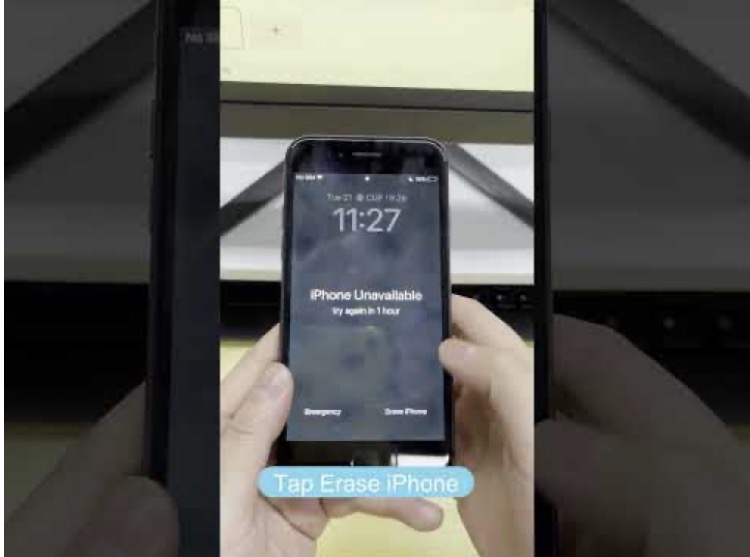
This is the first way we would like to introduce to unlock iPhone without computer if the iPhone you plan to unlock is iOS 15.2 or later. How to unlock a disabled iPhone without iTunes or computer by lockout screen? After you tried several times wrong passcode, it shows that iPhone Unavailable try again in 1 hour, and you will find an Erase iPhone option on the bottom of right corner. Click this button and input the correct Apple ID and passcode to proceed it. After few minutes, your iPhone will be erased including your iPhone screen passcode. You need to reset the iPhone as a new one.
Method 2. Unlock a Disabled iPhone with iCloud
How to unlock iPhone without passcode or computer? This is another way for you to unlock disabled iPhone without computer. If you have enabled Find My iPhone on your device, you can use iCloud to erase your iPhone and remove the passcode. To unlock your iPhone with iCloud, follow these steps:
Step 1: Go to iCloud.com on a computer or another mobile phone device and sign in with your Apple ID and password.
Step 2: Click on Find My iPhone, and select the iPhone you are going to unlock from the list of devices.
Step 3: Click on Erase iPhone, and iCloud will erase your device and remove the passcode.
Step 4: Set up your iPhone as new or restore from a backup.
Method 3. Unlock Disabled iPhone using iTunes
How to unlock iPhone when disabled? If you have synced your iPhone with iTunes on your computer, you can use iTunes to restore your iPhone and remove the passcode. To unlock your iPhone with iTunes, follow these steps:
Step 1: Connect the disabled iPhone to computer, and run iTunes on your computer.
Step 2: If iTunes asks you for a passcode, try another computer that you have synced your iPhone with, or make your iPhone in recovery mode.
Step 3: Click on Restore iPhone option, and iTunes will erase your iPhone and install the latest iOS version.
Step 4: As your iPhone is come back to factory settings, you need to set up your iPhone as new or restore from a backup.
Note that restoring your iPhone using iTunes will erase all your data, including your photos, messages, and contacts. Therefore, it is essential to back up your iPhone before restoring it.
Method 4. Unlock Disabled iPhone using an iPhone Passcode Unlocker
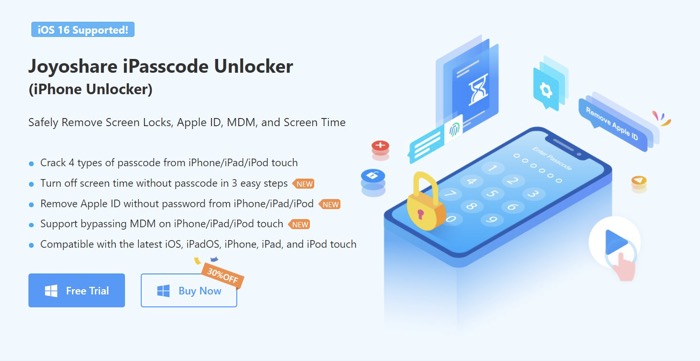
If the above methods do not work, and you are looking for a way of how to unlock disabled iPhone without iTunes, you can use a third-party iPhone passcode unlocker tool to unlock your iPhone. There are several third-party tools available claim to unlock your iPhone. However, you should be careful when choosing a third-party tool because some of them can damage your iPhone or steal your data. Here is a reliable third-party tool to consider which is called Joyoshare iPasscode Unlocker. Here are the key features of Joyoshare iPasscode Unlocker.
2. After deleting the password, any function of the mobile phone will not be affected.
3. Support screen lock removal for latest devices/versions.
4. Completely delete the previous Apple ID from your device.
5. Find or remove screen time/restrictions passcode for data loss.
6. Make sure your iPhone data security
Try below steps to unlock disabled iPhone by using Joyoshare iPasscode Unlocker.
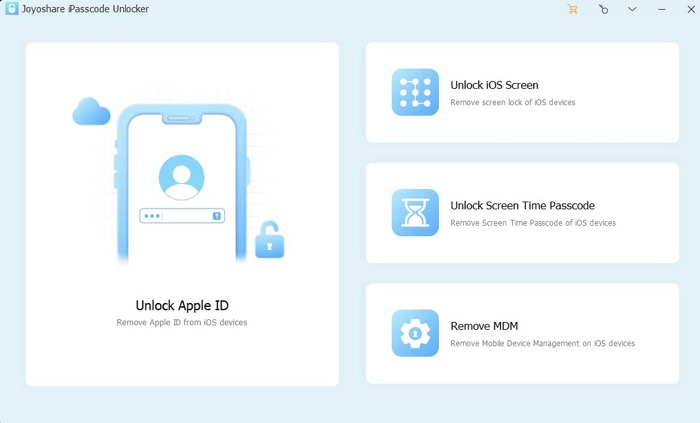
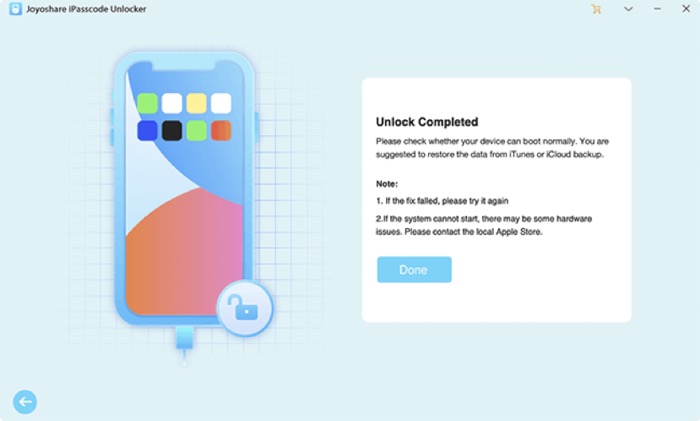
Step 1. Download Joyoshare iPasscode Unlocker, install and run it. On the home page, select Unlock iOS Screen. A screen with a Start button will occur. click it.
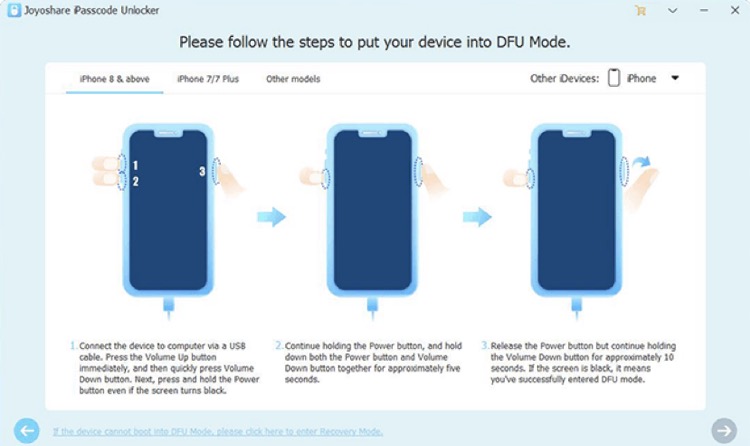
Step 2. Using your USB cable, plug your iPhone into your PC, and put iPhone in DFU or Recovery mode.
Step 3. Joyoshare iPasscode Unlocker will automatically detect your device model. Click the Download button to download a firmware package to unlock your iPhone.
Step 4. After that, click Unlock button, and your iPhone will begin to be unlocked, make sure the iPhone is connected via USB cable to continue, the unlocking process starts and takes a few seconds to complete, and you need to reset the iPhone as a new one.
Method 5. Unlock a Disabled iPhone with Finder
If you are looking more ways of how to unlock a disabled iPhone without iTunes, this is also a good way for you to do it when you are using Mac. Make sure your Mac has been updated to Catalina or later, use Finder to unlock your device. Below are the steps of how to unlock a disabled iPhone with Finder.
Step 1: Connect your device to your computer with a USB or USB-C cable or via Wi-Fi, and run Finder.
Step 2: Select your device from the menu and select Restore iPhone. Your iPhone will then be restored to factory settings.
If you are a video content creator, a YouTuber, or anything you like to call yourself, YouTube has introduced a feature that will be helpful for many people.
Now you can remove a part of the video you uploaded on the YouTube channel.
Earlier, YouTube had a video editor tool which was pretty helpful in making a few changes to the videos already uploaded on the platform. But it discontinued its video editor in 2017.
It became pretty troublesome for many YouTubers who wanted to remove a part that included a copyrighted song or anything objectionable from the video. There are n reasons why a Youtuber would want to make minor edits to their already uploaded videos.
YouTube has finally introduced a new video editor in its new Creator Studio, which is in beta.
The user interface of the new video editor in creator Studio looks more excellent than the previous video editor, which was available to YouTube Publishers.
YouTube has been working on a new interface for the creator Studio dashboard and rolling out new features to it continuously. The video editor is one such feature that will allow you to edit your videos even after uploading them.
Currently, the video editor in the creator studio is limited to just trimming the videos or adding or removing screens. Still, looking at how too many features have been added to the creator Studio beta in the past few months, it seems the video editor will soon be getting more options.
We are yet to see the Colour Grading and the Stabilization option, a popular feature in the previous version of the video editor.
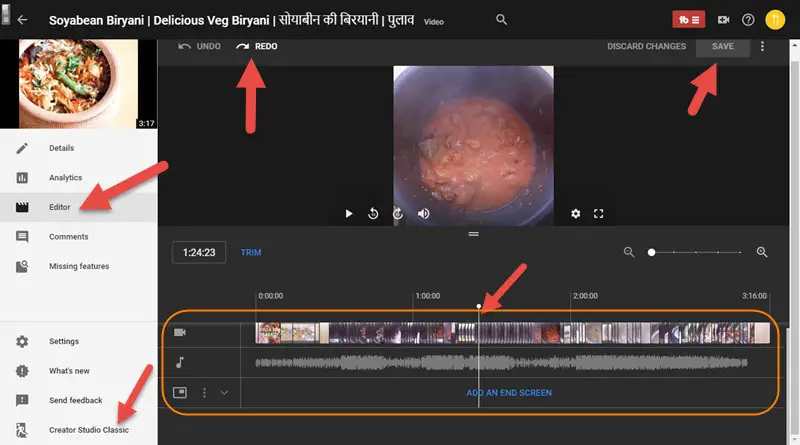
How to trim your YouTube videos in Creator Studio
To access the new video editor, you need to switch to the Creator Studio (Beta), the option which can be found on the bottom left or right-hand side of your screen.
Once you are in the Creator Studio (Beta), click on the ‘Videos’ option in the left panel, and then open any of the videos you want to edit.
Once you have opened the video, several options appear in the left panel, one of which would be ‘Editor.’
Clicking on the editor will open the video editor, which looks like a native video editor with the proper layer-based timeline. Currently, there are three layers:
For the music
For the video footage
For the end screen
You can move the scrubber over the video timeline and split it by right-clicking and then clicking on ‘Split, but she has selected two points you can slice.
You can then preview your results, and if you are happy with them, you can save them or click on the undo button to get back to the previous form.
Again, if you are a Youtuber, this will be a handy feature in many cases. I have got my YouTube channel where I have felt the need to delete a portion of the video, and thankfully I can do it now.
Are you trying to figure out how to watch a particular TV show but need help figuring out where to start? With so many streaming platforms like Netflix, Prime, and Hulu, it can take a lot of work to keep track of which service has your favorite shows.
In this article, we will explain exactly how to find which streaming platform is providing the show you are looking for.
There are several ways to find out which streaming platform a particular TV show is available on:
Do a Google search
You can search for the TV show’s name on Google and include “streaming.” For example, “Friends streaming.” The search results will likely show you which platforms the show is available on.
Although the direct links of the streaming shows on these platforms do not get indexed in Google, you may find a link to a post that gives you that information.
And most of the time, you won’t even have to click on that link. You will get the answer in the google search itself.
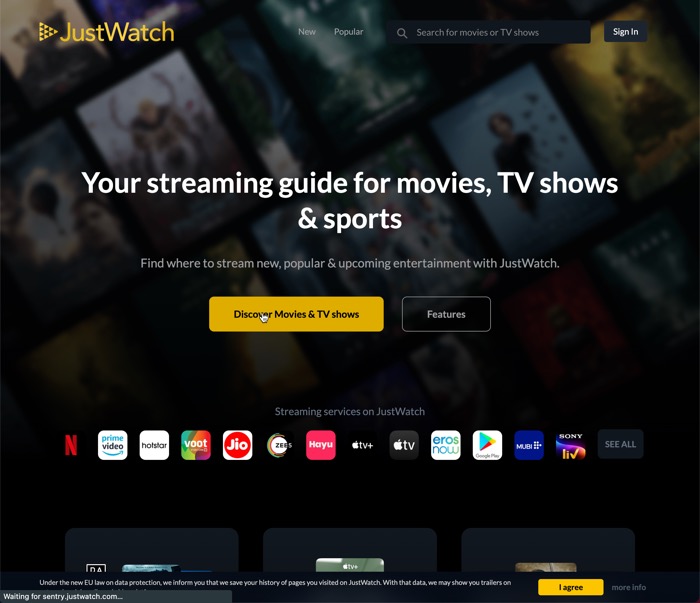
JustWatch
If a simple google search does not give you a satisfactory answer or needs to be corrected, you can check out this website. JustWatch is a website and app that allows you to search for movies and TV shows across multiple streaming platforms. You can enter the name of the TV show, and it will show you where it is available to stream.
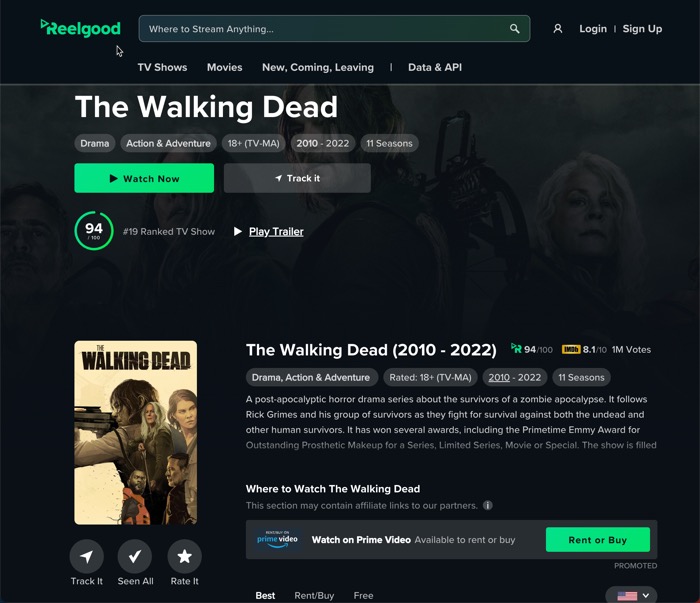
Similar to just watching, this one is also a good website for finding a TV show platform.
You can use Reelgood to browse popular movies and TV shows, see what’s new and popular on various streaming platforms, and track the shows and movies you’ve watched or want to watch. You can also search for specific titles and see which streaming platforms offer them.
Streaming platform search
If you know which streaming platforms you subscribe to, you can search on each platform to see if the TV show is available. For example, if you have a Netflix subscription, you can search for a TV show on Netflix.
Also, due to the copyright restrictions of the contracts based on geo locations, a particular show might be available on Netflix in the US rather than in Germany or the UK.
In that case, you can also use a VPN and connect to the ip address of that country so that the TV Show gets unlocked for you.
Find it on Social Media
You can also ask on social media platforms like Twitter or Facebook if anyone knows where the TV show is streaming. There may be fans of the show who can help you find it.
I hope you find this helpful article, and the tv show you are looking for can be found using either of the methods mentioned in this article. We have many articles about solving common tech problems, so visit again.
When picking the best Android apps, you have so many choices that it can quickly become overwhelming. With thousands of apps available for download, how do you decide which is right for you?
It can be tough trying to find the perfect app that will suit all your needs and wants, and even tougher when you’re not sure what you need or want in the first place.
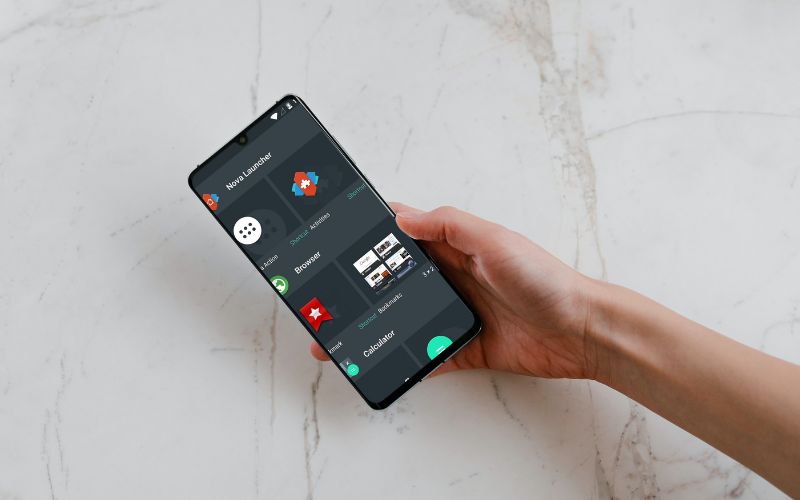
1. Launcher app
We recommend you install the Nova Launcher. Over the years, we have tested a bunch of launcher apps available in the Play Store, and we have hooked on this particular app launcher, the Nova Launcher.
It’s a smooth and light launcher, packed with unique features that are unavailable even in the stock or any other 3rd party launcher.
Why is it useful?
Android smartphone has different mobile phone manufacturers, and they have their customization on top of Android. This means the User Experience (UX) differs on every Android mobile.
If you want to have a consistent experience on any mobile phone, the first thing you should do is, install the Nova launcher app and have the familiar UI.
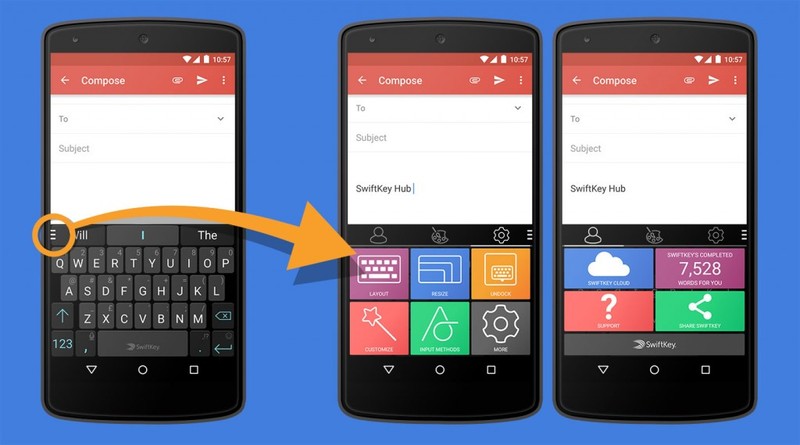
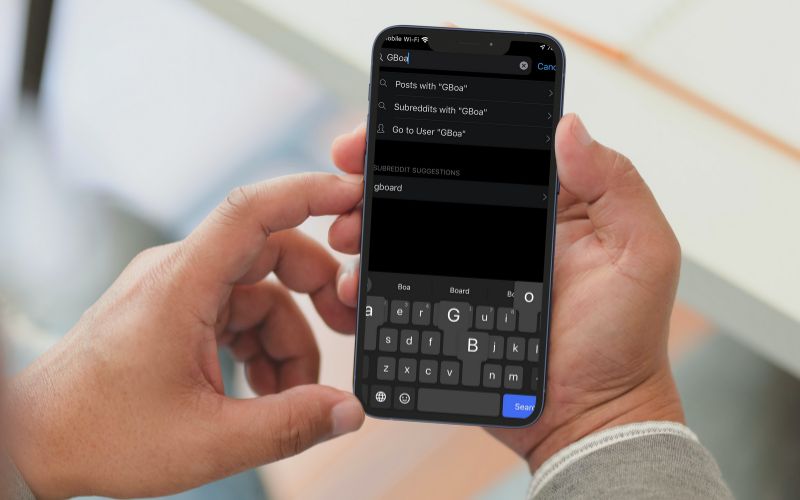
We recommend the SwiftKey Keyboard app, which has got millions of installs. I have been using the app since 2011 and have seen it evolve into one of the best keyboard apps you can install on your Android device.
Microsoft has recently acquired it, and fortunately, the company has pledged not to shut it down and continue bringing updates to it. Microsoft killed this iPhone app; only the Android version will go further.
Why is it useful?
It gives you unique features like a Clipboard Manager, AI-based world predictions, Gesture typing, and the ability to customize your keyboard by choosing a theme.
We recently compared Swiftkey with Gboard, which is another excellent keyboard for Android from Google, the Gboard app has the same purpose of providing the superb experience of typing on mobile phones. SwiftKey is our recommendation as of now.
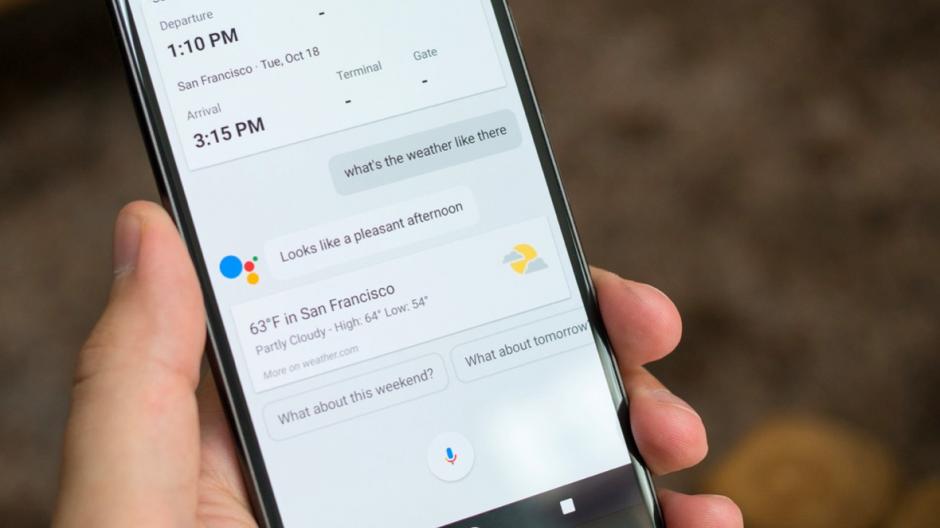
We recommend Google Assistant for Reminders, navigation, and knowing about other little things in your daily life.
Google assistant is quite helpful in doing small tasks such as setting the alarm, finding the weather, time, sunrise or sunset, and finding small pieces of information just by using your voice.
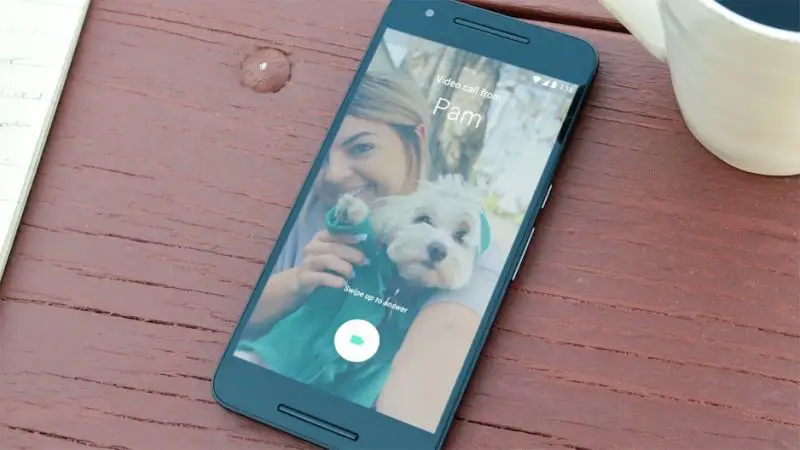
We recommend Google Duo for video calling. It is the best video calling app available for Android right now; the quality of the video is fantastic, and it offers 1 on 1 video calling and voice calling.
It has unique features like “Know Know,” which lets you preview the caller before receiving the call.
Why is it useful?
It is also an fantastic app for video calling on mobile data. In case of data fluctuations, it does not disconnect the call and disables the video but makes the audio available and then brings the footage back once the internet is back to high speed.
Previously we used to rely on Evernote for almost everything, but now we have shifted to Notion, which is much better.
It offers a broader range of features, including databases, task management, and project collaboration, all in one platform, while Evernote mainly focuses on note-taking and organization.
We recommend WPS Office + PDF, a free alternative to MS Office Suite. The WPS office supports all primary formats and is perfect for opening document files you received via Email or messaging apps.
The app will let you view, create, edit, and convert documents into PDFs, all on your Android mobile.
It is not just a file manager app; it also has an in cleaner that can easily let you find duplicate images on your mobile phone and delete them in just one click.
Other features include:
Managing the apps installed on your mobile.
Clearing the cache.
Sharing files with other users.
It’s a must-have app on any Android mobile.
I will use Google Drive for cloud storage. Google Drive offers 15 GB of free storage, enough to save your documents and essential files in the cloud to access them from anywhere you want.
If you use Google docs and other office apps offered by Google, Google Drive App will let you access all your document files.
We recommend Google Chrome browsing websites on your Android device, it already comes bundled with Android devices, but you can update it from the Play Store to get the latest features.
If you use Google Chrome on your PC, then Chrome for Android will make your life easy by letting you access all the tabs from your Android device so that you don’t have to sit in front of your PC to finish off your work.
We recommend the MX Player for your Android device since it supports all the major formats for video and audio.
The app has tons of features that will enhance your video viewing experience on your Android device.
The app lets you play videos in the background to listen to songs. If you have a video file of a particular song, it also enables you to lock the screen so that accidental tabs on the screen can be prevented while watching the video.
Simple controls like increasing the volume, brightness, or zooming the video can be done by making gestures on the screen.
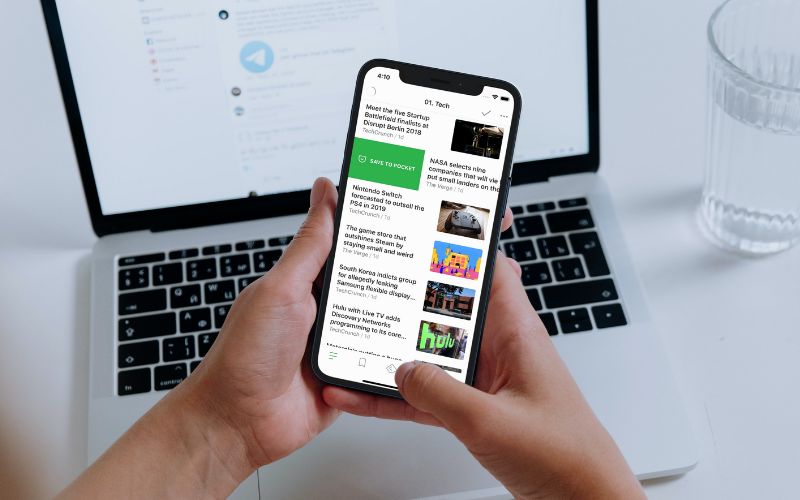
We recommend Feedly app for reading your favorite blogs in an excellent clutter-free interface.
Feedly is one of the best RSS feed readers for Android devices. If you love reading blog posts and have some favorite blogs, you can organize them in Feedly and read them all in one place.
The app also features a read-it-later feature to save the best blog posts for reading later.
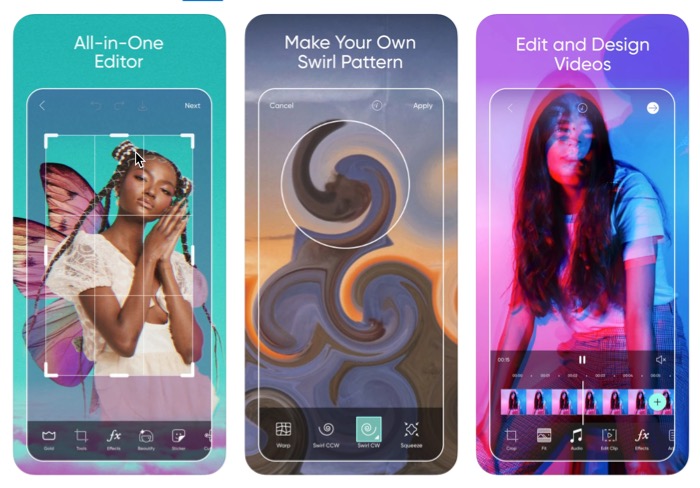
The InShot video editing app is quite simple to use and lets you add multiple clips and effects. Many video creators also prefer using the short app on their mobile phones to create Instagram Reels and YouTube Shorts.
However, if you are looking for a more powerful video editing app on your mobile phone, then you should try Kine Master app which offers a lot more features, but comes with a bit of learning curve.
You can use Xrecorder from InShot for Screen Recording.
If you want to troubleshoot something or if you want to teach how to do a particular thing on an Android phone, you can record the screen using this app and send it to the person who may need the help.
We use this screen recording app to create screencast tutorials and stream your gameplay on YouTube or Twitch.
The internet is an incredible resource for information and images, but finding what you’re looking for can be tricky. Have you ever wondered how to search by video or photo on Google?
In this article, we’ll show you how to do a reverse image search and get the most out of your inquiries with Google. You may be surprised at how easy it is to locate images and videos using Google.
To reverse-search a video, you will first need to take a screenshot of the video, or the thumbnail, since Google does not allow uploading the video file in their Google search.
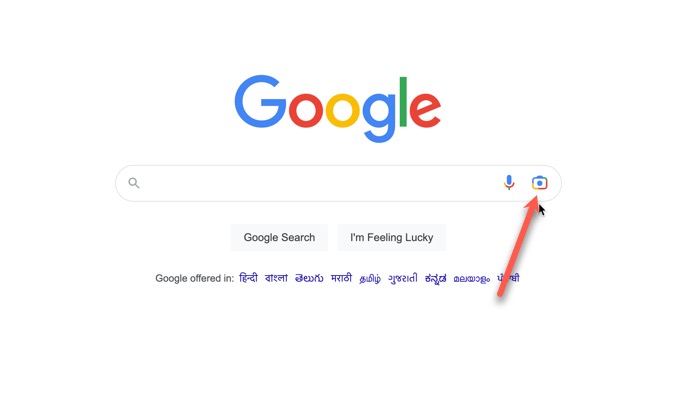
Once you have done that, open Google and click on the camera icon on the right-hand side of the search field.
Paste the video’s URL, upload the image file, or drag and drop it from your device to search for it. Google will then provide related results, including relevant websites, images, and videos that match your search.
Additionally, always check for the video’s authenticity by performing a fact check. It is essential to verify the source and credibility of the video to avoid spreading misinformation. Following these simple steps, you can quickly and efficiently find and fact-check videos on Google.
Reverse video search is a type of search where you can input a video or video clip, and the search engine will try to find similar or related videos based on the visual content of the input video. In other words, it allows you to find videos visually identical to the one you inputted.
Reverse video search uses advanced computer vision technology, such as image recognition and machine learning algorithms, to analyze the content of the input video and then compare it with other videos in its database. This technology can identify specific visual features of a video, such as objects, scenes, and even colors, to find other videos with similar visual content.
Reverse video search can be helpful in various contexts, such as in media and entertainment industries for copyright infringement detection, in law enforcement for identifying suspects, and in marketing and advertising for finding similar content for promotional purposes.
Why Do a Reverse Video Search?
A reverse video search is a valuable tool that enhances how we search for video content. It is a process of uploading a video or a still image to a search engine, and the results will display related content or similar content that has been published before.
This functionality provides advantages for different people, from content creators to regular users. Content creators can use reverse search to verify if someone has used their video content without giving proper credit.
Simultaneously, regular users can use this method to identify the source of a video, which is essential in preventing misinformation from spreading. In summary, the reverse video search provides a reliable technique for finding video-specific information that would otherwise be difficult to acquire.
How do you perform Reverse Video searches?
Using an example, let me show you how to perform a reverse video search. A couple of weeks ago, I came across a process video that was too good to be true. I want to check the authenticity of that video as the content was unbelievable.
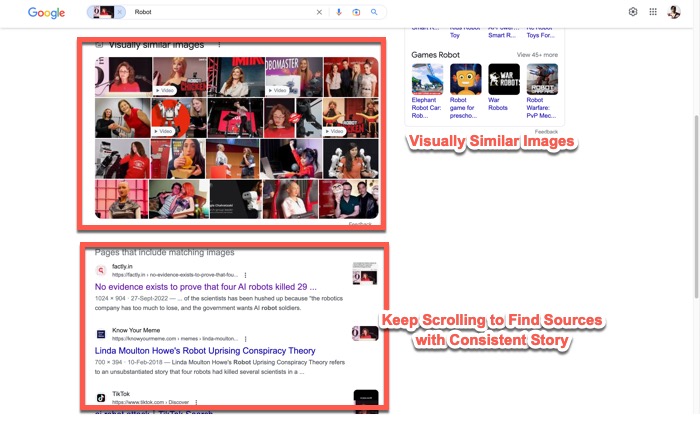
I took a screenshot of the video and used the google reverse image search feature to find out if there was any news reporting related to that video. Google reverse image search gave a few results, and I found a helpful video on the first page of the result.
I have used a similar reverse image search technique in many articles. It remains my best to do so. You will find this technique in an article I wrote months ago. The report also contains a lot more other valuable methods you should know.
How to Search by Video or Image on Mobile
Since the mobile version of the google website doesn’t show the camera icon feature where you can upload the image, searching by video or photo on mobile is slightly different.
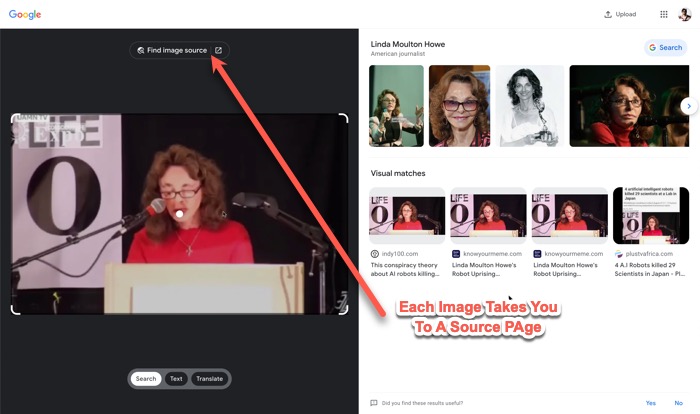
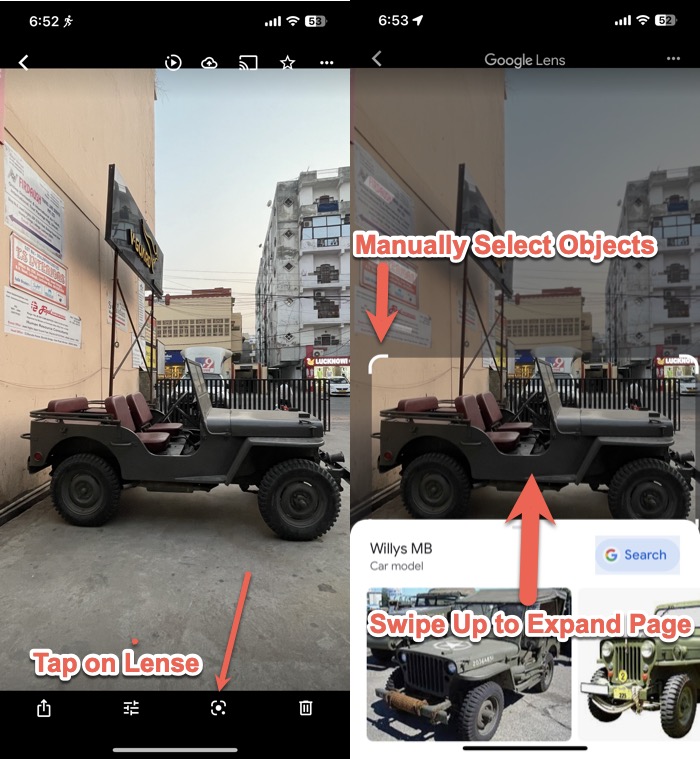
Possibly the city of this article, I suggest you install the google photos app on your Android or iPhone from the play store or app store, respectively. Google photos have a built-in feature called google lens, which works on similar image recognition technology. Google reverses image search works.
You have to open the screenshot of that video or the image you want to reverse search in the google photos—lens icon (refer to the image). Once you tap on it, the apple automatically highlights the object in the picture, or you can also manually select the thing you are trying to search for.
You can swipe up to expand the search page and look for visually similar images. You can tap on any pictures to go to the source page.
Search on Google Using an Image
Just like you would search by video on google, you can search by image also. Searching by video would also require this technique only since google only allows you to make a rivers image search using an image. It’s quite a valuable tool to find out if a viral story is fake or not
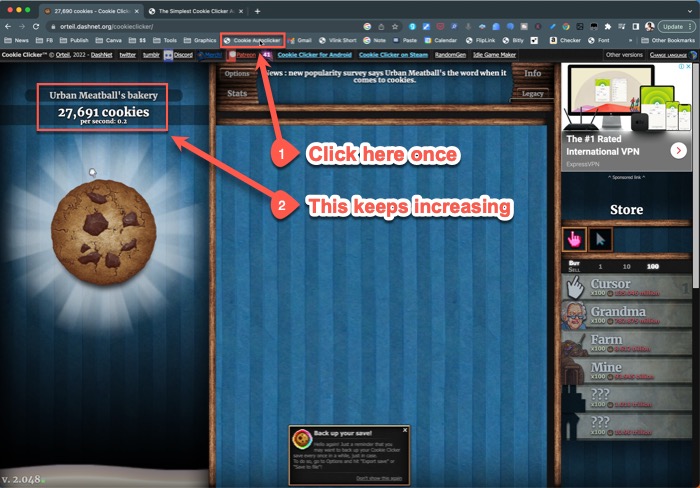
If you are looking to hack the Cookie Clicker game or want cheat codes to get ahead of everyone else, then you should know a few things.
Firstly, hacking a game is unethical and can get you into a lot of trouble if you are caught. Secondly, plenty of cheat codes are available for the game that can help you progress faster without risking your reputation or legal troubles.
Some of the most popular cheats for Cookie clicker include the “Infinite Cookies” code, which gives you an unlimited supply of cookies to spend on upgrades, and the “Golden Cookie Cheats,” which allow you to obtain golden cookies and other rare items quickly. If you want to use cheat codes, remember to have fun and play the game responsibly.
What is Cookie Clicker Game?
Cookie Clicker Game is a popular online game that has gained immense popularity amongst gamers worldwide. The gameplay revolves around clicking on a cookie to gain points, which can be used to purchase upgrades and other bonuses to increase the speed and efficiency of cookie collection. This game is as addictive as the Coin Master game, where you must build your castle by collecting coins.
This game is based on a simple concept but with several layers of complexity, making it engaging and addictive for players. Players may click multiple times per second; later, they can hire grandmas and factories to produce cookies automatically.
Cookie Clicker is known for its simplistic design and has seen a surge in popularity due to its ability to be played on various platforms. Moreover, the game has created a massive online community where players can communicate, share strategies and compete against one another.
Cookie Clicker Cheats on Chromebook
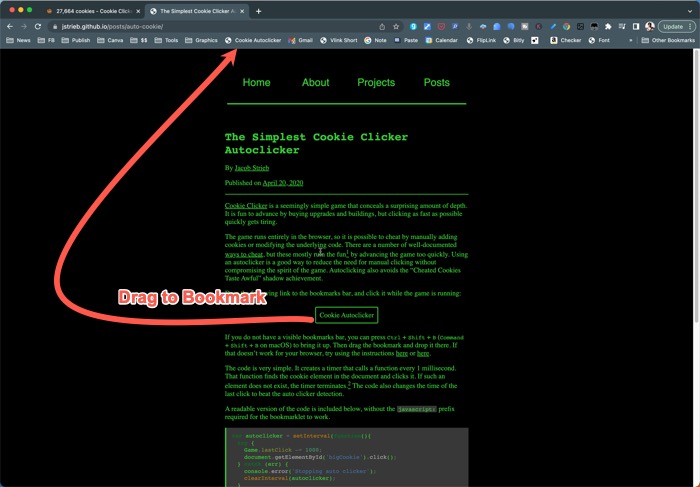
You have to click on the cookie to generate more cookies. The cheat code is that there are auto-clicker scripts available that you can easily use to generate fixes automatically. There is a bookmark that you can use for auto clicks.
Go to this website, and you will find the Bookmarklet. It would help if you dragged it to your browser’s Bookmark Bar. If it is not visible, make it visible by clicking on the ‘Always Show Bookmark bar’ from View in the Menu bar.
Once on the game, click on this Bookmarklet to generate unlimited clicks.
You can use the Cookie Clicker cheat codes on your Chromebook. However, it is essential to note that the developers do not encourage cheating in games which may impact the game’s fairness.
Several codes are available, and you can select the ones that suit your interest. Once you have the cheat codes, enter them into the Cookie Clicker game on your Chromebook. The codes will enable you to gather cookies faster and proceed with the game at a faster pace.
Therefore, if you wish to enjoy the experience of unlimited cookies in Cookie Clicker, using the cheat codes on your Chromebook can be a suitable option.
Cookie Clicker Cheats in Google Chrome
Since Chromebook majorly works on Chromium, the browser is the same. This means everything we mentioned above will also work for Google Chrome on PC and Mac.
Cookie Clicker Cheats in Firefox
If you’re looking to cheat through Cookie Clicker, Firefox has some handy options you can try. One option is to create a bookmarklet that will allow you to click automatically on the cookie in the game.
Right-click on the bookmark toolbar and select “New Bookmark.”
In the “Name” field, enter a name for your bookmark, such as “Cookie Clicker Auto-Click.”
In the “Location” field, enter the following JavaScript code:
Click the “Add Bookmark” button to save the Bookmarklet.
To use the Bookmarklet, click on it while on the Cookie Clicker website, and it will automatically start clicking the cookie every 10 milliseconds.
You can then click on the Bookmarklet whenever you want to add more cookies to your tally. Firefox also has an add-on called “user script for auto clicks.” The script runs in the background and automatically clicks on the cookie for you. Download the add-on, install it, and let it do the clicking for you. With these two options, you should be able to rack up scores of cookies in no time.
Cookie Clicker Cheats in Microsoft Edge
If you are using Microsoft Edge, it’s built on Chromium, so you can refer to the Chromebook section of this article to learn how to use the cheat.
Generate Auto-clicks using A Mouse.
If you have a Logitech G604 or similar kind of mouse that supports the customization of keys, you can set a macro to click infinitely when you click a button. You can use this technique for this game as well. It’s pretty cool. It is also amazing to boost your productivity. Check out the full review
How to Hack Cookie Clicker?
Some cheat in Cookie Clicker by using third-party tools or scripts that manipulate the game’s code to give them an unfair advantage. These tools can automate clicking or generate cookies in large quantities, making it easier to progress through the game quickly.
Another way people cheat in Cookie Clicker is by manually editing the game’s code using a web inspector or a text editor. This allows them to change various aspects of the game, such as the number of cookies or the upgrades they have purchased. Although, the last I check, it’s impossible to do it anymore.
However, it is essential to note that cheating in Cookie Clicker or any other game is unethical and can ruin the fun for others. Additionally, some games have strict rules against cheating, and using cheats can result in a ban or other consequences. It is always best to play games fair and square and enjoy them as intended.
When it comes to owning an iPhone, you have countless options for apps that can make your life easier. With so many choices available, it’s tough to pick the best ones.
In this article, we take a look at some of the top rated and most convenient apps out there for your phone. We will discuss why each one is worth downloading and how it can help improve your day-to-day life.
Best Keyboard app
My best keyboard app for iOS has been de-listed by Microsoft. Fortunately, the people who have already installed it will be able to use it until they delete it from their phone or get a new one.
But don’t worry. Gboard is still there, and it is still better than the native iOS keyboard.
iOS already comes with a fantastic note-taking app. It’s Notes. It gets synced with all other Apple devices, your Mac or iPad. It lacks a few key features, which is complemented by Notion.
Previously this used to be Evernote, but now we’ve shifted to Notion completely. It is so much better than any other note-taking app ever used.
We recommend a file manager app for iOS devices. File manager is a free ad-supported app that will fix your need for a file manager on iOS devices.
The app has a clean interface to create files and folders easily. You can also add various cloud services such as Dropbox, Google Drive, One Dive, etc.
Safari is impressive and excellent, but if you are outside the Apple ecosystem or use Google Chrome on your MacBook, Chrome on your iPhone can solve many problems.
All your saved passwords will be available in Google Chrome. Your browsing history gets synced flawlessly.
While Safari is sufficient for many people, if we use Google Chrome on PC, then the Google Chrome app on the iOS device will help us get all our bookmarks and browsing history on our mobile phone, which is helpful and quite productive as well.
I have tried many screens or getting apps for iOS, but I found the native screen recording option on iPhone is the best. You don’t have to install another app for similar functionality.
By default, the screen recording does not record sound from the microphone. If you want to enable that, just long press on the screen record option in the control center, which allows enabling the microphone.
This way, you can record the screen and your voice if you are creating a tutorial for someone.
Best Video Editing app
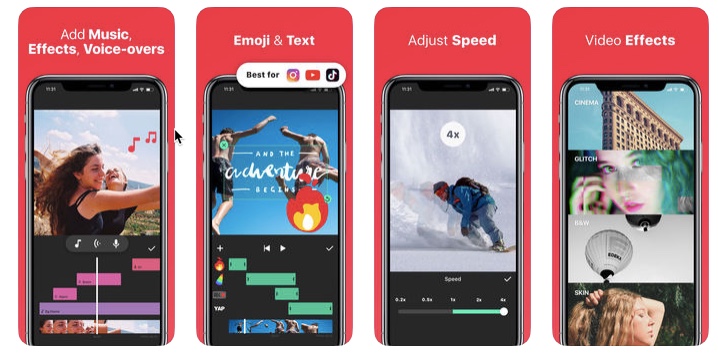
There are so many video editing apps available for iOS, but I find InShot to be the simplest to use, providing good results. Plus, it’s free.
If you watch an Ad for it, it even allows you to create videos without a watermark.
We recommend Feedly for reading articles from websites in a friendly clutter-free interface.
Feedly is one of the best RSS feed reader software for iOS devices.
If you would love to read a blog post, I have some favorite blogs. You can organize in Philly and read your favorite position in one place.
The app has two modes, night mode, and Elite mode, and it also has a ‘ read it later feature so that you can save the best blog post for reading later.
We recommend Google Drive as the best cloud storage app for iOS devices. Even though Apple offers iCloud, which has 5 GB of free space for every iOS account, Google Drive offers 15 GB of free storage, and the fact that the service is tied to a Google account makes it here to access your content (files, images, etc.) from PC.
If you use Google Docs and other office apps offered by Google, then the Google Drive App will also let you access them easily.
To make a water elevator in Minecraft, you must acquire soul sand and magma blocks. First, place soul sand at the bottom of your column, then cover the top with a block to form a one-block gap.
Next, place a magma block on top of the covering block. After that, use a water bucket to fill the gap on top of the soul sand, thus creating your water elevator in Minecraft.
To add the bubble column feature to your water elevator, you can plant kelp in any water block. Keep the kelp growing tall by adding a water source block on top of it.
To prevent the flowing water from messing up your elevator, create a two-block space around the elevator’s column. This step-by-step guide should help you make a functional water elevator in Minecraft.
What Is a Water Elevator in Minecraft, and How does it work?
A water elevator in Minecraft is a vertical transportation system that allows players to move up or down using water flows. It is a straightforward machine that uses the water’s physics to push the player to the desired destination.
The process includes creating a vertical shaft using blocks of choice, such as glass or cobblestone, and placing water sources at the bottom and top of the shaft.
Players can activate the elevator by entering the bottom water source, which pushes them up to the top or jumping into the upper water source, which carries them down to the bottom.
This type of elevator is also helpful for transporting mobs. Overall, a water elevator in Minecraft is an efficient and straightforward way to move vertically in the game.
What Do You Need to Make a Water Elevator?
You’ll need a few things to make a water elevator in Minecraft. First, you need a water bucket to obtain water to make the elevator. You will also need either kelp or soul sand and magma blocks.
Kelp is the more accessible, straightforward choice because it can be obtained through the game and grows upwards. If you choose this option, you will need several pieces of kelp to place on the top of your elevator.
On the other hand, when placed in the water, soul sand and magma blocks create water bubbles that players can ride to ascend and descend.
The size of your elevator is up to you, but it’s essential to remember that you will need enough blocks to create a shaft for the bubbles to move through. Once you have all of your materials gathered, you can begin building your water elevator in Minecraft.
Video Guide to Make A Water Elevator in Minecraft
FAQs to Make A Water Elevator in Minecraft
Frequently asked questions about Minecraft water elevator are.
Can you still make water elevators in Minecraft?
Yes, water elevators are still possible in Minecraft using soul sand and magma blocks. Players can create a vertical column of water source blocks and place soul sand at the bottom and magma blocks at the top to create a water elevator.
When players enter the water, the bubbles generated by the soul sand will lift them while the magma blocks pull them down, making the elevator functional.
What Block makes a water elevator in Minecraft?
The soul sand block is used to make a water elevator in Minecraft. When players place soul sand in a water source block, it creates bubbles that push items and players upwards. Players can ride the water elevator to higher elevations by standing on the bubbles.
How do you make a water elevator in Minecraft without kelp?
Here are the steps to make a water elevator in Minecraft without kelp:
1. Build a tall column of blocks where you want your water elevator to be. The column should be at least 2 blocks wide and 5-6 blocks high.
2. Place water sources on the top of the column, but leave one Block empty at the top.
3. Create a door or a breakable block at the space so that you can easily step out of the elevator when you get to the top.
4. Place a sign on the wall of your column near the bottom.
5. Create another space, at least one Block wide, one Block below the sign, and put a water source in the space.
6. Then, break the Block under the water source on the lower level.
7. Water will flow from the top of the elevator to the bottom. When you swim into the water stream, hold down the jump button, and you will move up the stream to the top of the elevator.
How do you use soul sand as an elevator?
Here’s a step-by-step guide on how to use soul sand as an elevator in Minecraft:
1. Find a location for your elevator: You can make an elevator in any location in Minecraft, but it’s easier to build it in a central location like your base.
2. Gather materials: You’ll need soul sand (at least 2 blocks high) and any block you choose.
3. Place the blocks: Choose where you want your elevator to be and place soul sand blocks on top of each other. You need at least two blocks to create an elevator.
4. Create a water source: Once you’ve placed your soul sand block, you need to create a water source block. Place a water bucket on top of the soul sand blocks, and it makes a water source. The water source will carry you up to the surface.
5. Add a counterweight: Sometimes, the elevator will instantly carry you to the surface, and you might need more time to get out of the water stream. Add a counterweight to help slow the elevator down. You can use any block of your choice.
6. Test your elevator: Once you’ve placed everything, test your elevator to ensure it works correctly by swimming into the water stream.
There could be many reasons why Face ID is Not available on your iPhone. In this article, we will discuss the issues related to Face ID and their possible solution to fix them and continue to enjoy the seamless experience of unlocking your iPhone.
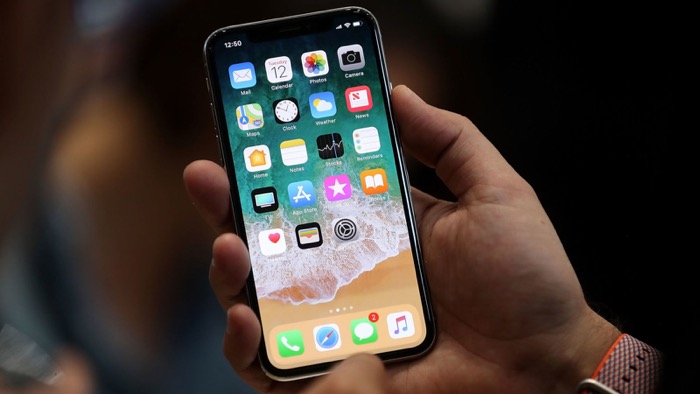
Apple is known for its customers’ privacy and security, so they always aim to improve iPhone security features. Face ID on iPhone was introduced in 2017 with the iPhone X as one of the most reliable and secure ways to unlock your device.
Biometric authentication uses facial recognition technology to confirm your identity, replacing the traditional Touch ID fingerprint sensor. It also enables secure login to bank and shopping apps with a quick scan of your Face.
Face ID is a more privacy-friendly way to unlock your iPhone as it doesn’t store any image of your Face on Apple’s servers. Apple also added the feature to all their new iPhones because it has proven to be a more seamless and intuitive experience than repeatedly entering passcodes.
Hence, Face ID became a welcome addition to the iPhone’s security features, enabling users to unlock their devices securely and conveniently.
Why Is Your Face ID Not Working?
Some causes of face ID not working could be poor lighting, a damaged sensor, or even a software glitch. If you face such an issue, various solutions exist to fix your face ID. You can try setting up face ID again, resetting your device, or even seeking professional help if the problem persists.
Restart Your iPhone
Just rebooting your iPhone can fix most of the issues, especially regarding Face ID. If you are facing any Face ID issues, it is recommended to restart your iPhone, as it can help fix Face ID issues caused by the Face ID components and make it work smoothly again.
If your Face ID suddenly stops working, you can try to turn off your iPhone by holding the power button and sliding it off.
After waiting a few seconds, press the power button again to turn it back on. Once the iPhone has been restarted, you must enter your passcode to unlock it, as the Face ID won’t work until it has been fixed. Overall, restarting your iPhone is a quick and easy solution to fix common issues and can also help prevent them from occurring.
Is Your iPhone on the Latest Software?
It’s important to ensure your iPhone is running the latest software to access the newest features, improvements, and security patches. If face ID is not working on your iPhone, it could be outdated software.
To check if your iPhone is on the latest software, go to Settings > General > Software Update. If a new update is available, you can download and install it from this screen. Remember that updating your iPhone may take some time, so ensure you have a strong and stable Wi-Fi connection before starting the update process.
Additionally, back up your iPhone before updating in case any unexpected issues arise during the process. So, always keep your iPhone on the latest software to enjoy the best possible experience.
Check if Your iOS Devices Have Face ID?
Every iPhone introduced after 2017, including the iPhone X, features Face ID technology. However, it’s not limited to just iPhones. The iPad Pro also includes Face ID to unlock and access the device. If you’re in the market for a new iPhone and are interested in Face ID, you won’t have to worry about which specific model to purchase. Look for any iPhone that has been released since 2017, and you’ll be able to enjoy the benefits of this technology.
Check your Face ID settings.
Go to Settings > Face ID & Passcode to check your Face ID settings. Here, you can set up Face ID, enable or disable Face ID for specific tasks, and troubleshoot any issues with Face ID. If Face ID is set up correctly, you can use Face ID to unlock your device, authenticate purchases, and more.
Reset Face ID and Set It Up Again
If your Face ID is not working, you can reset it and set it up again. Firstly, go to settings and navigate to Face id, then select “Reset face ID.” Afterward, you must set up your face ID again by scanning your Face. Please take it in good lighting and save different angles for better recognition.
It’s important to note that if your iPhone is not updated, it may also cause face ID not to work correctly. Another thing that can impact the functionality of Face ID is if you’ve changed your appearance drastically. Restarting your iPhone can also help if Face ID is not working. Following these steps, you can successfully reset and set up Face ID on your iPhone.
Clean the Face ID Sensors
One of the reasons that cause Face ID to stop working is that the sensors on the iPhone’s front camera are not clean. Therefore, cleaning the Face ID sensors regularly is essential to ensure optimal performance. However, users must exercise caution while cleaning their Face ID sensors, as harsh chemicals or abrasive materials can damage them.
Using a soft, lint-free cloth and gentle rubbing are recommended methods. Another reason Face ID does not work is the presence of a poorly placed screen protector. Therefore, users must ensure their screen protectors are properly aligned with the sensors. Regularly maintaining the Face ID sensors is key to the smooth functioning of this feature on the iPhone.
If Truedepth Camera Malfunctions, Look for iPhone & iPad Repair Options
If none of these solutions work for your phone, it’s time to look for repair options for your iPhone. If your iPhone or iPad’s Face ID is unavailable due to a malfunctioning TrueDepth camera, you can take it to an authorized Apple repair center to get it fixed.
You can search for local independent repair shops or services that offer mail-in repairs. These services will be able to fix any issue you are experiencing with your phone, including a broken screen or a malfunctioning Face ID.
Use Apple Watch to Unlock Your iPhone
If the Face ID on your iPhone is malfunctioning, and you do not feel like repairing it, here is an alternate solution to unlock your phone without a passcode.
You can use your Apple Watch. First, ensure that the “Wrist Detection” option is enabled on your watch. Next, keep your Apple Watch on your wrist and close to your iPhone.
When you attempt to unlock your iPhone with your Face, it will analyze the watch on your wrist, and if it is unlocked, your iPhone will unlock as well. It is a convenient solution, especially for those who do not want to carry two devices or enter a passcode frequently. However, in some cases, this feature may not be practical, such as if someone were to steal both your watch and phone. Nonetheless, it is a useful feature in case of Face ID malfunctions.
Minecraft is a video game that was released in 2011 by Mojang Studios. The game is open-world and allows players to explore, create and survive in a blocky universe. Players are able to collect resources and use them to build structures and create tools to aid in their gameplay.
Minecraft has gained immense popularity over the years, with over 91 million monthly active players. Its popularity can be attributed to its limitless possibilities, allowing players to create whatever they can imagine, from complex architectural designs to entire functioning cities. It appeals to all ages and allows for both solo and multiplayer gameplay.
Additionally, it has a strong online community with endless mods and user-generated content. Its simplistic design and infinite possibilities make it a universally loved game that continues to capture the hearts of millions.
Minecraft 1.18.1 brings a new ore distribution system, which makes finding important materials much easier.
Copper ore can be abundant in the new and improved deep-late caves, while lapis lazuli can still be found in all the usual places, such as underground lakes and caves.
Redstone is still primarily found in the same locations, but players can now see it more clearly thanks to the improved ore textures.
The rare emerald ore is still exclusive to the extreme hills biome, and diamonds remain one of the game’s most valuable and sought-after materials.
With the new Minecraft 1.18 ore distribution, players can now more easily track down the resources they need to survive and thrive in Minecraft.
How Minecraft 1.18 Ore Distribution Works (2023)
Minecraft 1.18.1 has introduced changes to how ores are distributed throughout the game. The ore distribution now varies based on the biome, world height, and other factors.
For example, diamond ore is most commonly found between y=5 and y=12, while gold ore is more abundant between y=32 and y=79. On the other hand, spawning beds in the nether can be found anywhere between y=-16 and y=128. Moreover, Minecraft 1.18.1 has also changed the chunk base system, making finding diamonds and other valuable materials easier.
However, players must still dig down to y=0 to access the most precious ores, such as emeralds and diamonds. The new update also introduces new dripstone caves in the badlands biome, which offer a unique environment high invaluable resources.
Finally, how lapis and other ores generate has been changed to enhance the player’s experience further. These changes in Minecraft 1.18.1 have revamped the game’s ore distribution and added new challenges and adventures for players.
What is Ore Distribution in Minecraft?
Ore distribution in Minecraft refers to how resources such as coal, iron, gold, and diamond are generated and distributed throughout the game’s world.
These resources are essential for players to progress, as they are used to craft weapons, tools, armor, and other important items.
Ore distribution in Minecraft is randomized, meaning that a player may find a large deposit of iron in one area but no coal or diamond in another.
The distribution of ores is affected by the biome, terrain, and altitude of a player’s location, and some ores are more common in certain areas than others. Players must explore different parts of the Minecraft world to access all the resources they need, and strategic mining can increase their chances of finding rare ores.
Minecraft 1.18 Ore Distribution Guide
Minecraft 1.18 introduces a new ore distribution guide, changing how ores are found in the game. The update adds new biomes and, with it, new ore distribution patterns.
The y-level for diamonds and emeralds has been lowered, meaning they are now found more easily. Copper has been introduced as a new ore and can be found in any biome at any level. The ore distribution in Minecraft 1.18 varies by biome, so players must adjust their level to mine accordingly.
The best levels to find iron, for example, vary depending on the player’s biome. With the new changes to ore distribution, players must consider which level to digging in to get the specific ore they need. Knowing the ore distribution in Minecraft 1.18 is important for players who want to collect resources effectively.
Ore Generation in Biome-Based Minecraft 1.18.1
Ore generation in biome-based Minecraft 1.18.1 is a crucial aspect of gameplay. In Minecraft, ores are found in specific biomes with different frequencies and probabilities.
Ore generation determines the distribution of minerals such as copper, gold, and emerald ore in Minecraft’s Overworld and Nether dimensions.
The Badlands biome, for example, is a great place to find gold ore due to its high spawn rate. Biomes will generate a set number of ores below y=256, which means diamond and emerald can only be found at that level, and emerald ore can only be found in the Extreme Hills biome.
Therefore, the distribution of ores varies according to each biome, creating unique gameplay experiences that require players to explore and mine in different areas to find the minerals they need.
Explore the New Minecraft 1.18.1 Ore Distribution
Players of Minecraft have been eagerly anticipating the new update, which includes changes to the game’s ore distribution.
The updates significantly alter ore generation below the bedrock layer, which will impact how players collect resources. With the new update, players must explore the world more thoroughly to find the desired ores.
Specific types of ore will spawn only in specific biomes or at specific depths, forcing players to be strategic in their search for resources. It is also worth noting that the new update doesn’t change the game’s mechanics but provides greater complexity and diversity in gameplay.
Players can dive into Minecraft 1.18.1 and explore the updated ore distribution system, which will bring new challenges and adventures to the game.
On which level can diamonds be found?
In Minecraft, diamonds are one of the most sought-after items as they are essential to creating powerful weapons and tools needed to advance in the game.
Players must go deep underground to find diamonds, which can only be found on specific levels. In the Minecraft 1.18 update, diamonds can be found between levels Y=0 to Y=15.
Players must dig through layers of stone and other materials to uncover these precious gems. It can be difficult and time-consuming, but the reward is worth it.
Therefore, players must have the proper tools and equipment to mine diamonds, such as an iron or diamond pickaxe. Finding diamonds can greatly benefit players in their gameplay and lead to many successful adventures.
Finding things as simple as draft reals on Instagram can sometimes be tricky. It took me a while to figure out where the drops were saved.
I am a technical guy, and if it had got me confused, many people would be too.
Instagram is a mobile-first company. It means many features are exclusively available on the mobile app rather than the website.
For example, you can post reels from your desktop, but it will not give you access to the music library of Instagram, which is the essence of Instagram Reels.
What is the use of Drafts on Instagram?
You may have some videos you want to post at Reels. You want to work on adding music and effects to those reels, but you want to keep them private.
Saving them as draft makes sure all your edits on the video are saved so that you can come back to it whenever you want and don’t have to start from scratch.
The draft feature is also quite helpful in batch work, meaning you can create multiple videos all at once, save them as drafts, and keep posting them at a regular interlock time.
This is quite a great strategy; if you want to grow on Instagram, post the release regularly. You are saving them as drafts will save you a lot of time.
Where are the Reel Drafts saved on Instagram?
Whenever you try to post a Reel, you will have to swipe right from your Instagram feed to access the camera.
Then you will have to make sure you are on the Reels tab. From there, you can swipe up or tap on the ‘media icon’ in the bottom left. It will open the media from your Camera Roll.
The media is displayed in grid form. The first grid is the ‘Drafts’ for Instagram Reels. Tapping on it will take you to ‘Drafts’ where all your saved Drafts will be visible.
Tapping on them will again put them in the Reels Editor, where you can write the caption, add locations, music, stickers, etc., and ten taps on Share to Publish.
How to Save Draft Reels on Instagram
This one is relatively easy. Whenever you are trying to post, and you feel like you don’t want to post it right now, you can tap on the cross (X) icon on the top left, and a pop-up will appear, giving you the option to discard or save it as a draft.
When you type save as a draft, it will be saved.
How to delete saved Draft Reels on Instagram
You must access the draft section to delete the saved drafts. You can follow the steps mentioned in the second paragraph of this article.
Once you are on the drafts page, you can tap on the dots appearing on each Draft reel. It will give you the option to Duplicate or Delete the Draft.