Using Samsung Galaxy Tab A as a Primary Computer and Phone

0

Samsung Galaxy Tab A is a SIM Card Enabled Tablet PC with some nice features,  sleek design, and a great battery. I bought the device because I wanted a portable device that,  I can take with me everywhere I go to and get my stuff done, things that doesn’t really require much computing power but can’t be done on the phone either. So I’ve been using it since last few months and here is my review.

The Specs of Galaxy Tab A

Galaxy Tab A is an 8 inch tablet PC, which is pretty much the size of iPad mini but it’s much, much better than the iPad mini at least for me, I can say that because I’ve used iPad Mini as a primary computing device before this tablet, it just couldn’t get my stuff done, partly because of the limitations of the OS.  And it was damn slow.

I know it doesn’t make sense to compare these devices as the iPad mini is actually a tablet PC from 2012 and This tablet PC is from 2015.

I agree that the iPad mini is a much superior built device than Samsung Tablets and people have been actually using the iPad Air as their primary computer device, but my requirements are little different than others, which I’ll talk about in this article in some time.  In this section, we talk about the specs.

[su_table]

Screen Display8 Inches
Resolution768 x 1024 pixels (~160 ppi pixel density
ProcessorQuad-core 1.2 GHz
OSAndroid 5.0 – Lollipop
RAM / Internal Memory2GB RAM / 16GB Internal (Supports OTG up to 64GB)
Camera5 MP Primary  (Video Recording in 720p) / 2MP Front Camera
Battery4200mAh – Non-Removable
Weight313 g (11.04 oz)

[/su_table]

Screen and Display

Though the screen is not the best part of this tablet PC, I don’t find any problems with this, it is clearly not a luxury device and I don’t use it to read magazines or play games. I find the display satisfactory for my use case.

Turning Auto Brightness makes the screen viewable in the bight light as it brightens but gets too dim indoors.

Processor  

The Samsung Galaxy Tab A has a Quad-core  processor clocked at 1.2 GHz, truly not the powerful thing available right now butt then again, it is decent enough to let me run multiple apps simultaneously and truly multi-task.  A couple of tabs opened in Google Chrome, and other apps like Facebook, Twitter, Instagram, Writebox and Google Docs, and even YouTube app. I keep switching between these apps and have never faced any type of lag.

I keep reading other people’s experiences where they say Android isn’t smooth but I have never faced any app crash since I have been using this device.

Camera and Sound

Samsung Galaxy Tab A has  a primary camera of 5MP and front Camera of 2M, definitely not a selfie camera, but it’s an 8-inch Tablet PC and you are very unlikely to hold it for taking a selfie. But I’ve found it quite usable for Skype sessions I do with friends and family. Apart from that, I don’t use it ever.

This Tablet PC is also my phone and I do find myself using the primary camera at times, like  taking a group photo, or a photo of something for Instagram or Twitter or scanning a document in Evernote.

I do miss the Flashlight, but not for taking photos, though. I used the flashlight as a torch a lot. I miss it, but it’s not the use case for everybody.

I am attaching sample photos taken using this Table PC in different conditions.  

If we talk about sound, it has only one speaker grill at the bottom, but the sound it audible, I’ve enjoyed a couple of YouTube videos along with friends, they said the sound is impressive.  

Memory

It comes with 16GB of inbuilt memory, which can be less when you are using the Tablet PC as your primary device and want to keep all your important files handy, or you want to take your music collection with you, you will run out of space very quickly.

Thankfully it supports external storage up to 64GB. I’ve currently got 100 songs, three HD movies and there are 88 apps installed on it. And have 1GB of free memory. So I am still not using a memory Card.

I usually delete the movies and add the ones I want to see, and also carry a 16GB USB flash drive which is loaded with files. And then there is obviously Google Drive where I’ve got 1TB storage that I got when I bought HP Chromebook 14.

Using Samsung Galaxy Tab A as My Primary Computer and Phone

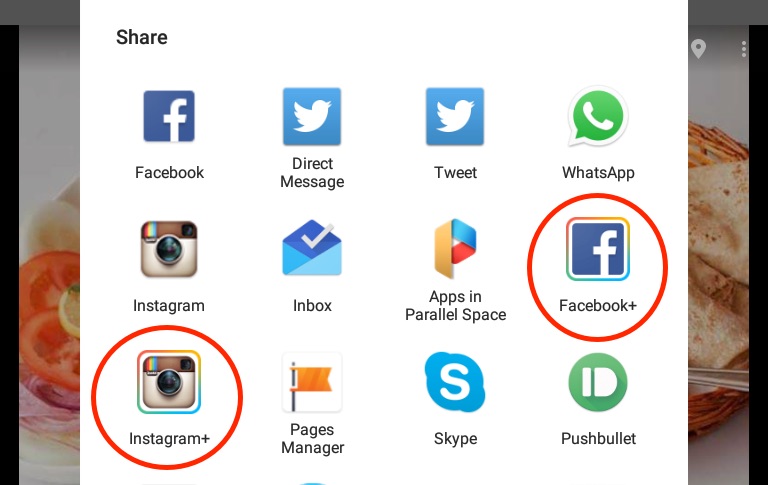
I was once out with family and had just my phone with me, I had to do some work which consisted of creating a graphic using some data I had kept in the Evernote and sharing it across social networks.

Though it isn’t impossible to get this done on a phone, it took my over 30 minutes to do what could have been done in less than 10 minutes if I had my PC with me, or maybe, 15 minutes of the Tablet PC.

And this didn’t happen just once that changed my mind and convinced me to go for a tablet PC.

I wanted a device that I would take with me all the time, I had a tablet PC before, but I never carried it because I believed I had my phone with me, which (almost) does everything I want to do when I am away from the PC.

Samsung Galaxy Tab A is a suitable choice for me as I had to take it with me because it I my also my phone, and the bigger screen made me get my work done faster.

The bigger battery is another thing that is making me happy, it lasts for a day and a half if I use it for longer writing sessions on the device. Like this article, which is solely written on the tablet PC.  

Before using this device as my primary computer, I always believed that tablet pcs are just mobile phones with bigger screens, but I didn’t know how much of a difference it can make in productivity and getting things done on the move.

I am using a Bluetooth Headset for taking calls and listening to the music. The Tablet PC is in my bag when I’m not surfing the web or reading my books in the amazon Kindle app and I can still answer calls or listen to music using the Bluetooth Headset.

I’m not using a physical keyboard, but I’m still able to write 800-1000 word articles using thumb typing. Holding it for the longer sessions isn’t an issue either, it is lightweight even with the leather cover I purchased for it.

Recommended: Best Android Apps for Writers 

Reading is also a nice experience on this device because of its size of a regular book. As I said, holding it in hands isn’t tiring. In fact, this device has a  reading mode which is one of many features in Samsung Android Skin.

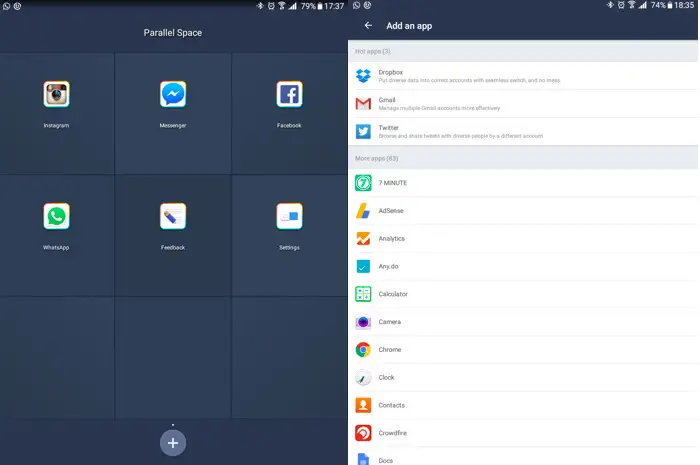
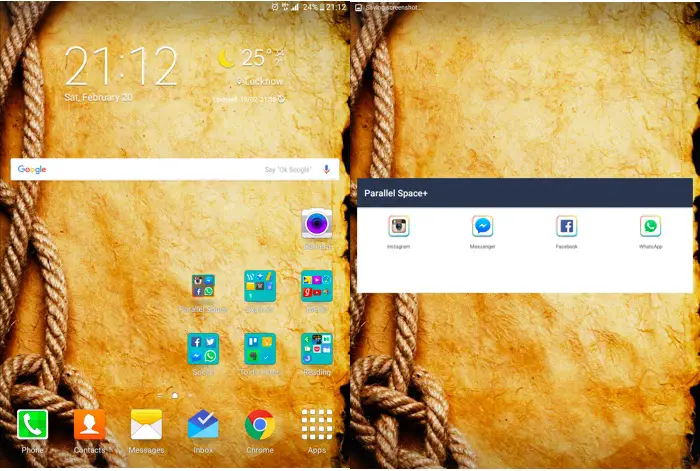
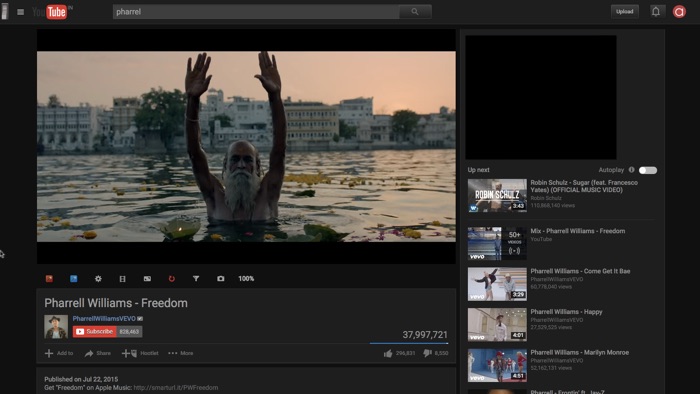
Samsung has implemented features like Popup Windows and Split Screen which makes It a truly multi-tasking device. Though I don’t find myself using it much apart from entertaining myself with a YouTube video in one-half of the screen and browsing Facebook, Twitter or Instagram in the other half.

I am satisfied and happy with Samsung Galaxy Tab A as my portable computer and a mobile phone. Hopefully, I’ll keep it like this until I get bored or I need to experiment some other device like this. 

[su_table]

amazonRs 17,999/-[su_button url=”http://tippr.in/SamsungGalaxy_Tab_A” target=”blank” style=”soft” background=”#0095DA”]Buy Now[/su_button]

[/su_table]

How to Disable AutoPlay of Videos in Facebook

0

You may have noticed a lot of videos appearing in your newsfeed lately. This is because Facebook’s desire to beat YouTube at the video. We have a talk about this in detail in a separate post. You can check it out if you want to know.

Also, the larger media groups are moving their focus to the videos. And this is why. We have a lot of videos in our newsfeed.

And to give it a boost, Facebook AutoPlays them in your timelines even when you haven’t clicked on it.

The video starts playing when it reaches the viewing area, and you can watch the entire video if you stop scrolling. And this happens in both mobile and desktop version of Facebook.

Thankfully, the AutoPlay videos are muted, I still have to pay for the data when I am using my mobile internet, plus, it’s annoying, distracting and lets you spend more time inside Facebook, which is even more dangerous than paying a little extra for the data.

So, there is an option to disable this, but Facebook being Facebook, has hidden this somewhere in the settings that it took me months to find out.

Okay, not months but it’s still tough. Today, I sat down and finally found it.

Disable AutoPlay in Mobile App

When you click on the horizontal bars at the top right of the app, it takes you to the various settings, under the Help & Settings you will find App Settings, just tap that and you will find the way to disable this bugger.

Disable_AutoPlay_FacebookApp

Just set it to ‘Never AutoPlay videos’ and you are good.

Disable AutoPlay in Facebook Desktop version

Disabling Video Autoplay on Facebook desktop version is a bit tricky, earlier they used to have the option to disable it, but over time, they have become more aggressive towards their goal to beat YouTube, and have decided to remove it.

They now just give you the option to select the quality of video (SD and HD). Direct link

If you still want to disable it by going the hacking way, you need to do it inside your browser.

Disable_AutoPlay_FacebookDesktop

Assuming you use Chrome like most people, you can do it by typing chrome://settings/content in the address bar and selecting ‘Let me choose what content to play’.

Finally, you will be able to get some work done and not watch the amazing people doing awesome things in the world while you are struggling with your task in your office.

In case you need help with getting productive, this guide should be helpful 

Useful Tips that will make you more productive

This App Can Literally Help You Writing Faster

0

Sometimes writing something not good enough is better than not writing anything at all. This helps overcome the Writer’s block, which is quite common among writers.

Staring at the black screen for a long time or stuck at finding the most appropriate word before proceeding further.

Changing writing apps can help you write more, changing devices can help you write better, but this is one kind if a thing that stays with you, it’s a habit. That’s why it stays with you no matter how hard you try.

The World’s most dangerous app is the writing app you might need if you want to fight that habit of stopping and find better works or thinking to make the sentence better. Because first draft’s don’t have to be perfect.

themostdangerouswritingapp01

This app The Most Dangerous Writing App forces to you keep writing because if you stop, it will delete all your writing progress. That’s brutal, I know.

And when I say It Destroys, it literally means Destroying your Writing

themostdangerouswritingapp02

I tried this tool myself, and I even tried tricking when I kept writing by deleting a line and rewriting it again, it still catches me and destroys all my writing, I am writing this article in the same app and it took me 3 trials to reach here, all my writing were destroyed in first two trials.

The Most Dangerous Writing App is a  Web App, and it opens in a browser tab just like any other website. You can set a session to keep your writing safe, set a timer of the session, like 5 minutes, 10 minutes. and you cannot stop before that, but if you do, you win and your work is safe.

themostdangerouswritingapp03

So keep typing, and yes, it really works, this is the fastest first draft I have ever written, and it doesn’t matter if this post has errors, I am going to move it to Grammarly for quick fixes and move it to the WordPress editor and publish it.

At the bottom of the app, you see Word Count and Typing Speed. So, when I type without worrying about the typos and grammatical errors. my typing speed is 56 WPM, and I think if I write carefully, my speed is somewhere between 36-40 WPM and I still have to look for the errors and typos.

So this App might help you write faster

While I am surely not going to use this app for the longer form writing (Calmly is there for that), research-based articles, but it’s still a fun app to write pieces of articles or a pre Writing exercise.

The Most Dangerous Writing App

Calmly Is A Great Writing App for Chrome

I have been loving writing inside the Calmly App, it is by far one of the most polished Chrome apps I have ever come across. Surely there are a bunch of them but if you are on the lookout for a writing app, It’s surely a winner.

Being a web publisher, I spend most of my time behind a computer screen, hitting my fingers on the keyboard to and seeing words develop into sentences and then into an article.

It is a creative job, but it can easily get boring. Anything repetitive is boring. To keep myself motivated, I also keep changing my Keyboards, I also keep changing my Keyboards, and sometimes my Macbook.

I also keep changing my Keyboards, I also keep using different writing tools, sometimes Google Docs, Sometimes Windows Live Writer, MS Word and what not.

But my most favourite tools are Chrome apps because I can use them both on my PC and Mac. Writebox has been one such app I have been using for a long time. But ever Since I started using Calmly, it feels I am want to come to my Laptop, launch Calmly and write something.

Formatting Options in Calmly

Calmly_Writing App01

The thing I love about Calmly (or any writing app) that it shows you your formatting on the page, I love seeing the Headlines in H1 tag, and subheadings in H3 tag, it tells how my article is building up.

Calmly offers formatting tools to Bold, Italic, Headings, Quotes or add Bullet Points to the text and even hyperlink the texts.

  • There is a Dark Mode,
  • Focus Mode,
  • Option to choose between three fonts,
  • Options to choose the Width,
  • Option to choose text size between small, normal, large.
  • Typewriter Sound
  • Dyslexic mode

Now, Focus Mode and Dyslexic mode is perry cool addition to a writing app. The Focus mode fades all the paragraphs you have written and highlights only the current paragraph, which helps in focusing on the writing. I call it the Cafe mode. Just put it one and people passing by won’t be able to read what you have written except the current paragraph.

And the Dyslexic mode changes the font to make it easy for Dyslexic people to read what they write.

The reasons mentioned above were enough for me to choose Calmly as my default writing app, but it also lets you add images. And with the kind of typography Calmly has, it feels somewhat like the Medium editor, which has become one of the most popular platforms for writers

Using Calmly on Macbook Air

Calmly_Writing App03

There are only a few Chrome apps that can run in a truly full-screen mode on a Mac, and Calmly is one of them. Writebox works best in PC and Chromebook, but in Mac, it only opens inside the browser and not as a separate Window, which was the reason I stopped using it on Mac.

I did try another Writing app, which could run in full-screen mode, has even multiple colour styles, but didn’t really excited me to write, I take notes, but for writing full articles, it couldn’t become my default app. (I am talking about Writer)

Recommended: Best Chrome Apps than can run offline

Calmly runs in full-screen mode and offers everything Writebox offers, and even does it better than Writebox.

For example, Saving articles on Cloud is brilliantly done. It saves, whatever you are writing, in Google Drive.

It doesn’t offer Dropbox integration, but you can still export your writing in a txt format and save it anywhere, you would have Dropbox installed on your Computer anyway. But the Google Drive integration works really well.

Using Calmly on a Desktop PC

Calmly_Writing App02

All of the above writing was done in Calmly on Macbook Air and I opened my Desktop PC to write this section, all the previous writing appeared (loving the sync feature)

There is a slight difference in the Mac and PC UI because the Chrome itself has some difference. but Calmly feels mostly the same on both the devices. I usually don’t use my Desktop for writing.

I mostly use it for formating and posting the article which requires a lot of screenshots. Calmly is great because I can retrieve my writing on the Desktop and shift it to the WordPress Editor to post it.

Calmly is available in Chrome Web Store for $3 and is free to try.

Install from Chrome Web Store

Stop Gmail from Redirecting to Inbox by Google

0

So, do you use Inbox by Google? I am sure you must be enjoying the Inbox Zero. It actually did help me achieve Inbox Zero, the state when you stop worrying about your messed up Inbox.

Inbox by Google has become my default tool, I love it so much that one day, I allowed Google to Redirect me from Gmail to Inbox by Google.

But here is the problem, I use Gmail for much more than using the Google Account Email. I have several others emails added to it via the POP/IMAP Emails feature in Gmail. Sadly Inbox by Google doesn’t have this options, and if you ever need to do some changes, like, adding or removing emails, or changing other things available in the Gmail settings.

It can’t happen if you have selected the Redirect from Gmail to Inbox by Google. No matter what you do, you will be redirected to Inbox by Google and there is no way to get into the Gmail settings, except for one, and that is, to disable the redirect.

Thankfully this options is easily accessible in Inbox by Google. Just click on the ‘Settings’ and go to the ‘Other‘ section and uncheck ‘Redirect Gmail to inbox.google.com’

Redirect Gmail to Inbox by Google

There used to be a link at the bottom of Inbox by Gmail menu that said something like ‘Take me to Gmail’ But Google decided to remove it to make users stay on Inbox.

Sidenote: When I landed on Gmail after removing the redirect, I found that my Inbox zero wasn’t actually an Inbox Zero with other 100 unread emails. I would still be using Inbox by Google, and wish if Google brings these Gmail settings to  it someday, but then it’s going to be too crowded like the Gmail.

I guess you don’t always get everything you want. till then, this trick surely makes the life easy.

Run Multiple Accounts of Any App on Android

0

Who in the world doesn’t own multiple accounts on the same services, I have separate Google Accounts for personal stuff and work stuff, I’ve got multiple Instagram accounts, Twitter accounts as well. And I know a lot of people who are just like me.

I know a lot of people who would stop carrying their second phone if they can run multiple accounts in a single app, like two WhatsApp accounts in one phone, or two Facebook account in one app.

Though there are apps that now support multi accounts, like Gmail, Twitter and Instagram, but there are people who have got another account on Facebook, now, don’t ask me why.

On PC, it’s a lot easier, just install different browsers and open your accounts in them, as many as you want. But doing the same on Mobile is a bit tricky.

This is where the Parallel Space Comes in Handy 

ParalleSpaceApp

Parallel Space is an app that makes it possible, Parallel Space app creates a virtual app drawer where you can add as many apps you want. And configure them with your second account.

You don’t even have to install the apps, you can simply add the apps that are already installed on your phone. The Parallel Space app itself is just 2MB in size.

How to use Parallel Space App

ParalleSpace_MultipleApp

Install the Parallel Space App from Play Store, open it and Tap on the Add Button (+) from the bottom to add the apps where you want to run your second account.

Now when you launch the apps, you can configure them using the credentials of your second account. For example, I wanted to run my second Instagram, so I just added the Instagram App and configured it using the login credentials of my second account.

ParalleSpaceApp_AppFolder

From the Settings of the Parallel Space app, you can create Shortcut for the apps, it created a Folder on the Home screen, which contains all the apps added in the Parallel Space App. You can also swipe from Bottom Left or Bottom Right to Open the App Drawer of Parallel Space to launch the apps with second accounts.

How to share something to the second accounts

ParalleSpaceApp_Sharing

The sharing with second accounts works like the way it works with other accounts,

For example, I am using my second Instagram, Facebook, and Facebook Messenger account in the Parallel Space app. And, the second Instagram, Facebook, and Facebook Messenger app have a plus (+) sign in their icons when the list of Apps appear.

If I have to share something on the second Instagram account, I have to tap on the Instagram Icon with a plus sign, same goes with any other app that’s configured with Parallel Space.

How Notifications Work for Second Accounts 

ParalleSpaceApp_Notifications

The Notifications also work the same way to do for other Apps. The Parallel Space App has to be always running in the Background to keep getting the notifications.

Make sure you give the App the permissions it requires to keep running in the background or Whitelist this app if you are running any Task Killer app on your phone.

Parallel Space is a great app and solves a big problem for many people who carry another phone just to access their second accounts. It is also great for people who own Dual SIM Phones and want to use Two WhatsApp accounts at once.

Install from Play Store 

YouTube Tips & Tricks to Enhance Your Video Watching Experience

0

Youtube is slowly overtaking any other form on content available on the Internet. It’s just one website offering videos v/s a few hundred websites offering text, image, .gif type of content. Pexeso has shared some mind blowing status about Youtube.

We know it’s your favourite way of entertaining yourself. It’s too addictive. Once you go inside, you will end up watching a dozen videos until you realise it’s already lunch time.

Seeing your love for the YouTube, we have come up with a few tips and tricks you can use to make your Youtube video watching experience better than ever.

Get More Controls Over the Videos

Magic Actions for YouTube is a Chrome extension that gives you more control over Video. You can expand the videos into cinema mode so that it covers the entire browser, unlike full screen which covers the entire monitor.

YouTube Tips & Tricks

Different filters can be applied to the videos, you can increase/decrease the volume by scrolling over the video (like to do in the VLC player).

The night mode is also great for late night video watching sessions, to keep your eyes from too much strain.

And it also lets you grab a screenshot of any frame.

Recommended: How to take Screenshot on PC

Create a playlist to share multiple videos at once

YouTube has this feature of creating a playlist, whee you add multiple videos to enjoy them without having to find the next one after one is finished.

YouTube Tips & Tricks

There are several steps involved, You can click on the Plus icon (✚), then create a new playlist and add the video to it, add all other videos you want to watch.

you can access your playlist from the library section. You will also find the share button there.

It does involve a few steps to make them happen, however, if your purpose is to only share it, or only enjoy once, here is a quicker option.

A normal youtube video link looks like this →

https://www.youtube.com/watch?v=LlY90lG_Fuw
https://www.youtube.com/watch?v=UfGMj10wOzg
https://www.youtube.com/watch?v=ZbZSe6N_BXs

For every video, the link remains the same, just the video id changes (in red).

You jut have to make change to the URL and add the Video IDs to it after a comma, just like this →

http://www.youtube.com/watch_videos?video_ids=ID1,ID2,ID3

Now, in the above URL, _videos?video_ids= was added and then three videos IDs (ID1,ID2,ID3) were added.

You can see how it will work by clicking the URL below.

http://www.youtube.com/watch_videos?video_ids=LlY90lG_Fuw,UfGMj10wOzg,ZbZSe6N_BXs

Watch Later to Catch up the video on different device

As we are talking about the Playlists, there is already a playlist you will find in YouTube. It is called Watch Later.

YouTube Tips & Tricks

Just add a video to Watch Later, you can continue watching it on another device (Tablet PC or Phone) You can also go through the History to find the recently watched video from the same account.

But Watch Later works well for me as I watch a lot of videos and it might take a while to scroll through the history.

Watch YouTube Videos on the TV with Chromecast

Chromecast, a small device that you need to plug into your TV, you can then Cast the videos from your YouTube app to the TV.

YouTubeTips07

Watching those epic fail videos with family on the bigger screen of the house is quite an experience. Chromecast is available for a price of $49.

Watch Videos in 360p on Slow internet to Skip Buffering

Actually, most of the time, YouTube automatically sets the quality of a video depending on your internet speed.

YouTube Tips & Tricks

But sometimes, the Internet is too slow, the 360p videos are watchable enough, especially on the Mobile devices.

Run YouTube Videos in the Background on Your Mobile

Sometimes, you just want to enjoy the music on YouTube and do other things while making the YouTube run in the background.

But the limitation of Mobile OS keeps you from doing the same on Smartphones, we talked some trick we can use to enjoy YouTube while doing other things on the mobile.

The Flynx app is the better and no-brainer solution that can let you run YouTube videos in the background, more details can be found here.

Remix OS Brings Android OS on Desktop PC

Ever wanted to run Android on your PC? I guess we are on the same boat, with a few million others. We all want to experience that shit .

Remix OS brings Android to Desktop

RemixOS01

Android is the most popular OS in the world, it started with powering Smartphones, then Tablet PCs, now it powers TVs, Watches, Cars and maybe one day, it will power a coffee maker too.

But what about the Computers? the Real Computers. Well, this is why Remix OS was born.

Can a Mobile OS really let you get your work done? This has been the question from a long, really long time..

And people who think it can, have written a lot about their experiences of using the iOS on iPads and using them as their Primary Computer.

Even I have done that when I tried using iPad mini as the primary device, but nobody really talks about Android that way.

For a lot of people, it’s just a half-baked and cluttered Mobile Operating system that’s just good enough for using on Mobile Phones.

And perhaps, even Google doesn’t want you to think that way, because, for people who want to do something like this with a lightweight and free OS, they’ve got the Chrome OS, which powers their Chromebooks which never really picked up by the mainstream consumers.

So, Can Android be used as a full-fledged OS on a Desktop?

RemixOS03

I’ve actually seen a few netbooks (remember those cheap, small 10-inchish netbooks) running on Android. But I’m not sure how would anyone get the Android OS on their Laptops and PCs (real Computers).

Remix OS 2.0 is the solution for getting Android OS on Desktops. Remix OS, quite obviously, is built on the Android OS, making it more flexible which can make more sense when running on a PC.

It takes Multitasking to the next lever as you can run multiple apps in different windows, all at the same time. There is a Taskbar (App Drawer) which gives it a feel of s Desktop OS. There is notifications, File manager, ability to use Keyboard & Mouse.

Google Play has all the apps you would want, to get your stuff done, It has the Google Office Suite, Microsoft Office Suite, and many other apps to choose for accessing or creating office files. Though you have to install the apps from a third party website like APK Mirror

How to run Remix OS on Desktop

Those who interested in trying this new OS, Jide Technology, the developers of Remix OS share a disclaimer which reads something like this 

Disclaimer: RemixOS 2.0 is the initial version and is intended for developers and early adopters who don’t mind a bug or two. Android was designed for touchscreens and as there isn’t a touchscreen on most PCs, we want you to be aware that apps may perform differently. We’re asking for developers and testers to help us optimize Remix OS for Android PCs.

RimixOS04

First, you need to download the installer package (Around 700MB) on your PC

The Remix OS runs on a USB Stick, So get a USB Stick with 8GB (or more) space on it. To get a smoother experience of the OS, the USB should have 20MB/s write speed (the USB 3.0 ones). Slower ones will also do the job, but you might get a few errors here and there, plus slower to load.

Remix OS can run only on Computers that powered by AMD or Intel Processors. Netbooks (or Chromebooks) with ARM Processors won’t be able to run Remix OS.

Your Computer must be able to boot from a USB, which is usually available in mostly all the Computers coming these days, if your PC it bought 2010 onwards, you’re good.

The installer Package will also have the RemixOS USB Tool (a .exe file) which will let you make a bootable USB Stick with Remix OS on it.

RemixOS06

Once you make a Bootable USB with RemixOS, you can start using the RemixOS on any computer that will let you boot from USB. It runs pretty much like a Live CD (like the Linux).

At the time of the Boot, Remix OS has two options 

  • Guest Mode where no data will be saved after the sessions. You start a fresh every time you plug your USB stick in a PC.
  • Resident Mode works a bit more like a personal computer where your data is saved so that you can continue using it the next time.
Lon Seidman / YouTube

In both the cases, you can plug the USB stick in a PC and start using the Remix OS, However, you might want to go with Resident mode if you want to keep a personalized home screen.

Despite Remix OS doing all the modifications on Android to make it suitable for running in a Desktop environment, which is, the ability to use Keyboard & Mouse, the apps still work the way they do on a Smartphone.

While Remix OS 2.0 is certainly not ready for the masses as it brings a few errors and there is a lot of room for improvement, It still gets your stuff done. When I was using Chromebook HP as my primary computer, I loved the super lightweight and smoothness but missed using the apps that were on Android.

Google is working on bringing Android and Chrome OS together, until then, Remix OS fills the gap.

Keyboard Shortcuts in Mac You Should Be Using Everyday

Are you a mac user? I know how much you love these multiple finger gestures, they are super cool, they let you get more done in less time. Who wants to make clicks here and there if they can move their fingers around a sleek aluminium trackpad to get their stuff done.

But let me tell you, the Keyboard shorts come in handy and they add them to your already awesome workflow, you become super productive.

So, in this post, we are going to list the Keyboard Shortcuts in Mac OS that you should be using on a daily basis.

First thing first, Familiarise yourself with the Command Key with a symbol of (⌘). Then there is Options key, it has alt written on it. And then Control key and also the Shift Key. Mostly all the shorcuts require you to use these keys, so you should know about it.

Symbols on Important Keys in Mac OS.

[su_table]

  • Command ⌘
  • Shift ⇧
  • Option ⌥
  • Control ⌃
  • Caps Lock ⇪
  • Fn

[/su_table]

KeyboardShortcuts02

Command-Q: Clicking on the cross in apps on the top left doesn’t really closes the app. You still have to quit it by doing right click on the icon in the Apps Dock or Quit from the App Menu. So, Command-Q is easy. Learn it.

Command-T: This shortcut comes handy when you are inside a browser, be it Safari, Firefox or Chrome, it will open a new tab for you.

Command-Shift-T: This works only inside Chrome However, It helps you open the recently closed tab. You can use it to keep opening the closed tabs. Comes in handy in many cases when you accidently close a tab or want to refer to it again.

KeyboardShortcuts01

Command-tab: This will let you switch between the active apps on your Mac. Just hold the Command key and keep pressing the tab key to go to the next app. You can use Command-~ to move back to the previous app.

Command-C & Command-V: For copying and for pasting, text, image and other file types from one place to another. You can also move the files by Cutting (Command-X) and Pastin to a new location (Command-V).

Command-F: This is a simple keyboard shortcut that can saves tones of time. It lets you search for a particular worn in a long document. Hit Command-F and put a word which you think should be in a particulr section, and mac will highlight the word in the document allowing you to jump to it directly.

Command-Shift-3: Lets you take screenshots on Mac. You might need one at some point of time, For Example, if you want to show someone how to do something on mac, you can easily create screenshots using  Command-Shift-3, it will take the screenshot of the entire screen. To capture a particular section of your screen you can use Command-Shift-4, you will be able to select the area you want to capture.

Tip: You can find the Screenshots on automatically saved on your desktop. 

KeyboardShortcut03

Command-Shift-A, Command-Shift-U, Command-Shift-D. These KEyboard shortcuts work in the Finder window. In Finder, if you need to quickly move between folders you can use these keybboard shortcuts to land in particular folder, Command-Shift-Applications, Command-Shift-Utilities, Command-Shift-Desktop

KeyboardShortcut04

Command+Delete: In Manc, there is a delete key which works has a backspace key in Windows. And to delete a file, you need to right click on it and then select ‘Move to Trash‘. This can also be done conviniently using the Command-Delete keyboard shortcut. And if you do Command-Shift-Delete, it won’t go to trash and get deleted permanently’

Command-Shift-F. This shortcut turns Chrome browser into Truly full screen mode, like the one you get in Windows when you press F11. You can do Command-Control-F to Full Screen in Safari browser.

 Find all the Keyboard Shorts used in Mac Os 

How to Move A Tumblr Blog from One Account to Another

0

I found this question on Quora while browsing the website. Here is what is asked.

I recently created a blog for my son, who is 17. Currently, the blog has pictures and memories from his birth until now. The blog is a “secondary” blog linked to my primary blog account.  At some point after he turns 18, he wants to take control of the blog and blog his college experiences.   Please help

The answer was little outdated so I thought I’ll write a short tutorial as I too found myself in a situation where I had to move a Tumblr blog from account to another.


Note: Tumblr does not offer the functionality of merging two accounts right now. You can only move a blog if its a Secondary one creted under one account. 

When you log in to the account where your secondary blog is associated, click on the top right corner on the Account Icon. This will show you options for your primary blog (your account) and your secondary blog.

TransferTumblrBlog01

Click on the secondary blog to get its options, then click on members. Tumblr lets you add members to a secondary blog just like Facebook and Google plus does for their Pages. So that multiple people can manage it.

TransferTumblrBlog02

You have to invite the other account to become a member of the secondary blog by putting their email.

Once the email is sent, the other account holder has to click on the confirmation email saying you’ve been added as a member to this blog.

TransferTumblrBlog03

After clicking the link, it redirects the user to Tumblr, where you click on Members area and see your account is added.

TransferTumblrBlog04

Now, when you see it from the first account, it will give you options to ‘Promote to admin’ and ‘Leave this blog’

TransferTumblrBlog05

At this point, both the accounts can post to Tumblr. If you want to completely move the blog to other account, just Promote to admin and Leave this blog.

This is it, hope you find this Tutorial useful. Keep reading Techtippr.com for making your tech life easy.

Best To-Do List Apps For Your Mobile

Why do you use To-Do Lists for everything? One friend was making fun of me on my habit of putting everything on a list.

I just smiled and few minutes later, when the conversation shifted to something else, I saw him complaining, for about how he just forgot to visit the bank to submit the check. I smiled and told his that’s why.

Perhaps, he didn’t get my point but I want to you know. To-Do Lists are important if you really want to get your work done. Now, it depends on you whether you do it on time, but To-Di list will be helpful in knowing that’s there to be done.

Tp-Do lists

Few years earlier, Pen and Paper were just for To-Do lists, and to some extent, they still make a good choice. But a mobile phone is something we carry all the time. And it’s not just for WhatsApp or Taking Selfies, is it?

So, we are listing the best To-Do list apps you can get on your phone. Choose it and dump everything in the list and leave a better, stress-free life.

Best To-Do List App for Android

Any_Do App

Any.Do: Simplest of all, but beautiful UI, Free version has Two (Back and White) themes. You can set repetitive tasks, e.g monthly utility bills, daily pills. Use it to tell yourself to drink water, get up from your desk, walk, get tomatoes, practically anything.

6 Powerful Features of Google Keep You Should Know About

Google Keep: Google Keep is a simple and great app from Google, I use it as Sticky notes for remembering small things. I use Google Chrome browser on all my devices, so I’m always logged in. It fast and saves time. It has location alarm as well. Learn more about Google Keep.

EvernoteApp

Evernote: Evernote is bigger, think of it a complete Notebook you would carry if it was physical. You can save documents, photos, articles, idea etc and you can also use it as a To-Do List. It has a reminder as well. Which makes it qualify for the To-Do list.

WunderlistApp

Wunderlist: You will become a fan once you start using it. It’s a list of To-Do lists, you can create multiple lists in it. A list for everything from Work to Personal Stuff, to a Wishlist, Shopping list and what not.

TrelloApp

Trello: Trello, offer a lot of features, if Evernote marries Wunderlist, the baby would be Trello, Trello would inherit more features. It offers visual boards, where you can create lists. each list can have tasks, there are labels, commenting system, reminders to track the progress of the tasks.

These tasks can be moved between Lists and can be assigned to others, making it a great tool for collaborating on projects.

There are more apps and more arise every week, but these are the ones I have used myself and found great success. Also, they are truly cross-platform so that you can use them on multiple devices. You will love it.

If you’ve got any favourites that you think should be in the list, feel free to tell us in the comments, we will be happy to add it if it qualifies. Keep reading Techtippr for making your tech life easy.

22 Awesome Tips to Get Work Done Faster

Did you ever wish there was more time in a day so that you could finish your work in time? You are not alone. We are in Majority.

Thanks to technology, if you are someone who uses a Computer for work, I’ve got few tips to share for you to get work done faster.

1. Use a To-Do List App. There are plenty of them, I use Any.Do, Google Keep, Evernote & Trello for various kind of work.

2. Use CTRL +F to Search Something in a long Document. You might say silly, it’s obvious to use it, but then why don’t you use it more often?

3. Use Google Chrome. It’s the fastest of all Browsers, and as it is from Google, all your Google is synched across devices, including login credentials, bookmarks, and even app data. Become super productive with Google Chrome

[su_expand height=”400″]

Use_Google_Now[/su_expand]

4. Use Google Now more Often. A perfect personal assistant, use it more often to set reminders, Just say Okay Google, and then your query. I use it for waking me up after a nap or alerting me to turn off the stove or moto after 15 minutes. Find more Google Chrome tricks.

5. Use Keyboard Shortcuts. There are more keyboard shortcuts than CTRL+C and CTRL+V. Different apps have different shortcuts, but mostly they are similar. Learn it, use it.

6. Use Pushbullet to get your mobile notifications on PC. It’s a magical app which has saved me tons of time. Its a must have app for anyone who has a habit of leaving their phone in the other room while working on PC, or stays on the PC more than mobile. Learn more about Pushbullet.

7. Use Gmail Offline (Link). It lets you do stuff inside Gmail even when you are not connected to the Internet. Imagine you find yourself in a situation where you need to look at something in your Gmail and there is no Internet. Yes, it happened to me once. I thank Google Offline from the bottom of my heart. Find more amazing Google Chrome Apps.

8. Transfer files between PC and Android Faster Wirelessly. There is AirDroid, then there is ShareIt. You don’t have to carry a data cable anymore. Control your phone from PC.

9. Use Bluetooth headsets to Enjoy Your Music on Mobile & Laptop. I am talking about BT Headsets similar to this one. Connect them Wirelessly and enjoy your music rather than spending time untangling the earphones. And yes, you won’t have to get up to read your phone to answer that call.

10. Use Grammarly to find Grammatical errors and typos faster. It’s a tiny Google Chrome app that stay with you as your private English teacher wherever you have to type words, be it a Facebook post, a Tweet, a comment, email or long articles. It saves a lot of time in proofreading.

PomodoroApp

11. Use Pomodoro Apps to work. It’s an awesome technique to put your focus on a task for 25 minutes then take a 5 before starting another Pomodoro (of 25 minutes). Then you take a longer (20-30-minute) break after 4 Pomodoro. More about Pomodoro on Lifehacker

12. Use Dropbox or Google Drive for storing important files in the Cloud. You can always have an access to your important files when they are in the cloud. If you use MS Office Suite, save files in Dropbox. I use Google Docs (which is a part of Google Drive). Everything I’ll every need is in the cloud. Do it for your files.

13. Use your Camera phone to Scan Recipes & Documents. You can use Evernote to save them, it does a pretty nice job at scanning documents. I’ve got all my important receipts, bill, IDs in Evernote (locked inside a password obviously). Check more about Evernote.

14. Grab text from Pictures using Google Keep. Just take a picture of the document and Google Keep gives you an option to extract the text from the picture using OCR (Optical Character Recognition). Check out more about Google Keep.

GetMoreDone01

15. Use Google to find how to spell a word correctly. Type few words, which you think makes sense in describing what you are looking for, Google will ask Did you mean ‘xxx’. Most of the time, that will be your answer. Find more Google Search tips

16 Save long articles in Pocket App for reading later, on your Mobile/tablet. You don’t wanna waste your work energy in an article about Cats, but you don’t wanna pass it either. Solution? the Pocket App.

17. Use your camera phone for remembering what things to pick when you are in a shopping store the next time. Use it to click picture what’s in your fridge, it helps you remember, you can use the Meta data of an image to find when and where the photo was clicked. More smart usage of camera phones.

18. Never forget to pick flowers for wife/girlfriend or husband/boyfriend when are near a flower shop. With Location alarms, it is possible to set a location and get notified when you are around it. Google Keeps lets to set location alarms pretty easily. Check out more about Google Keep.

19. If Google is not giving you answer, try YouTube and learn from a video instead. It’s used by over a billion people, thousands of hours worth of content is being uploaded every minute. It probably has the answer to your query as well.

20. Use Inbox by Google if you get tons of them. It’s an amazing tool if you are struggling to achieve Inbox Zero (a state where you’ve addressed every email sent to you). It categorizes the emails and shows you emails in like, Today, yesterday, This month. It becomes psychologically easy to tackle emails this way.I am loving it. Check out our review.

NoisliApp

21. Use Noisli while working on your project when there is too much noise around you. It offers a variety of background noises that can actually boost your productivity, like a waterfall, a noise table fan, sound of fire, running trains, or the environment of a cafe. I use it when I’ve got kids around and they make a lot of noise. Check out Noisli

22. Use Time Tracking apps to find out where does your time go. Rescue Time and Desk Time are two tools you can use to sort thing out by finding and limiting the things your are wasting your time on.

How to Block a Phone Number on Your Mobile

We love our Smartphones, our window to the entire world. But we still hate annoying calls.

I wish there was a way I could stop these sales people calling me to pitch their stuff.

Ever since I installed the Trucaller App on my Android it’s helping me save time I used to spend being nice to these local guys who just think of me as a number to achieve their monthly target.

It easily tells you who it is calling and you can then make a guess why. Apart from the regular sales guys, there are calls that just love to annoy you. Simple solution? Block their calls

How to block a number in your phone.

Your phone already knows you will need to block a number at some point of time, and that is why there is an option to Reject/Block calls from a particular number.

Tap on the number in the call log, and find options, it can be ‘More, ‘View More’ ‘Menu’ depending on the Handset you are using. You can easily find it.

If not, worry not, Install Trucaller if you haven’t already, it’s a must have App. You should install on day one of owning your phone.

Open the Trucaller app, it borrows the call log of your phone and offers more features on top of it. One of it is to Block and Report a Number.

Tap on Block & Reject and get rid of all the calls from that number.

Read Next: How to Check if Your Account Has Even Been Compromised in a hack Attack

Essential WhatsApp Tips You Might Find Useful

Over one billion people are now using WhatsApp on a daily basis, and for a good percentage of it has WhatsApp as their primary communications.

Though everyone is an expert at using WhatsApp, we want to show you some tips that will help you use the messaging service in a better, far better way.

Use WhatsApp from Desktop

From last few years, there were a lot of people, including me, who wanted to find a way to use WhatsApp from Desktop. Though, there were ways to do that in the past, none of them were official, leaving users at risk of getting their PC injected with virus and trojans.

WhatsApp recently introduced ‘WhatsApp for Web’, it lets you use your WhatsApp from Desktop. They have been adding more functionalities since then.

You can now, change Status, Profile Pictures, Mute Conversations etc directly from the PC.

Doing this saves a lot of time when you are on PC most of the time and your phone is away.

The Possible Ways You Can Use WhatsApp on PC

Set Different Notification Tones for Groups and Individuals

WhatsAppTips03

By default, the WhatsApp Notifications are same as SMS notifications, and the majority of people doesn’t bother to change it to something else.

You can set different Notification Tones for Groups and Individuals so that you know what kind of message it is based on the Notification Tone you hear.

Group Messages mainly MEMEs, PJs and Forwarded Messages, you might want to give them a skip for a few minutes or hours, depending on how busy you are.

Mute Individual Conversations

To take our previous point one step further, you can now mute individual conversations just like you could mute Group Conversations.

This comes handy when you are friends with a chatter, whose lone job in the world is to message you.

Setting Your Privacy Levels

WhatsAppTips05

After WhatsApp was acquired by Facebook, it introduced new privacy settings to WhatsApp. You can not set who can see your ‘Last Seen’
Your Status and Your Display Picture.

There are three levels to choose from, ‘Nobody’, ‘Contact List’, ‘Everyone’. You can do this individually to all the three things.

Disable ‘Read Receipts’ for Individual Conversations

WhatsApp brought a lot of criticism when they brought that ‘Double Tick in Blue Color’ which means the Reciever of the messages has read your message.

WhatsApp has to add an option to disable that, which makes it helpful to avoid the liability of replying after reading the message.

Related: WhatsApp Finally Let’s You Know When Your Message has been Read

Switching your WhatsApp Account to a Different Phone Number

WhatsAppTips04

If you are planning to change your phone number for some reason, you can always create another WhatsApp account on it, its free right?

Yes, but what about those Groups you are added in. There are Family Groups, Old School Groups etc where it might be a task to get added again.

The simple solution to this problem would be to Switch your existing WhatsApp account to a different phone number. You will remain added in all the groups.

This saves a lot of time if you are added in too many groups and you don’t to follow up with admins asking them to add you back.

Essential Tips to Prevent Your WhatsApp Account

Keep a watch of the WhatsApp Web Tab

Beware that anyone who gets access to your WhatsApp on your phone can use this feature to access your WhatsApp from PC, even when you are not around, and as long as your phone is connected to the Internet.

It is advised to keep checking the WhatsApp Web Tab every now and then and log out from Active Sessions that seem Suspicious.

Never share WhatsApp confirmation code with anyone

Few instances have come to an occurrence where girls were asked by their friends and even acquaintances for the codes sent for Confirming the installation of WhatsApp on a new device.

What they used to do is, they try installing WhatsApp on their devices using the Victim’s number and ask for the confirmation code. Once the code was given, the WhatsApp Account is hijacked until the Victim claims it back by reinstalling WhatsApp on their device.

This is it, for now, we will add more when we find more, or you can tell us if you’ve got anything to share. We will add it here.

How to turn off the Google Chrome Notifications from Websites

0

Notifications are good, they update you on things that matter to you. They are on your phone, they are on PC, they are there even in real life.

But today we talk about the Notifications from websites you once browsed and it tricked you into sending notifications whenever there an activity on the website.

Welcome to Website Notifications in Google Chrome. Too many websites have started pushing notifications.

Facebook is one of it. And if you use Facebook, like other 1.5 billion people, you know how irritating it can be to keep getting these notifications when you are doing something important.

What worst part? you get notifications when you have not even opened the website. I mean I didn’t sign up for this.

Google Chrome has hidden the option to turn if off somewhere deep inside their settings options. But we found it for you. Yes, we care for you. :-)

Anyway, to turn it off, you need to go the Chrome settings by clicking on the Horizontal bar icon on the top right (the Hamburger icon). Then click on Settings and then Show advanced settings

Under the Privacy section, you will find Content settings

A popup windows will appear and you will have to scroll down to the Notifications section. Here, you can either select ‘Do not allow any site to show notifications’, it will prevent Notifications from every website.

You might not want it if you are using WhatsApp for Web or need notifications from other and just want to remove a particular website.
Then click on Manage Exceptions.

This will give you a list of all the websites that is allowed or blocked, you simply select the website and remove it from the list,

The next time it asks you to send the notification, simply click on Block. and you are good to go.

While we are at it, I want to tell you I just found out how to turn Google Chrome in Full-Screen mode in Mac.

Did you know that already? You are so cool. :-)

Running Google Chrome in Truly Full Screen Mode in Mac, just like this

New to Mac? I am using in from last six months, and I thought Mac doesn’t offer a Full-Screen mode for browsers.

I tried maximizing the chrome using the ‘Full Screen’ icon situated beside the ‘Zoom’ icon in the Customization area of Google Chrome.

But it just used to maximise the window, which still shows the Address Bar, Browser Tabs, and the Browser Menus. That’s approx 50px area I would love to use for viewing a website or writing a document in Google Chrome just like I am doing right now.

I am a fan of Full Screen Mode, especially in Laptops, where the screen is tiny, and I want all of it to work. It also lets you work in Distractions Free environment.

You can’t see the block, the battery, Wi-FI and other icons, no tabs etc. This all works in favour of me to actually feel good about my work.

I tried, CMD + F (replicating the Crtl+F as in Windows PC) Didn’t work.

I tried the ‘Zoom Icon’, didn’t work.

Then, I tried  CMD+Shift+F and it worked. it was so easy, shame that I didn’t know about it.

Did you know about it? I gotta say how cool you are? are you interested in writing for us? :-)