Why Electronics Must Be Removed from Bags at Airport Security

As you move through airport security, you’re instructed to remove all electronics from your carry-on bags and place them in their own tray.

This step is mandatory during the screening process, but why can’t electronics just stay in your bag for X-ray scanning? There are several important reasons electronics must be isolated

Isolating Electronics Aids Functionality

Isolating electronics by placing them in a separate tray aids the functionality of these automated threat detection algorithms in a few ways:

Clearer Imaging

With electronics mixed in among other bag contents, X-ray images can become cluttered and unclear. Overlapping items may obscure potential threats.

By removing electronics to their own tray, security personnel get unobstructed views of your devices, bags, and other items separately for more accurate screening.

Reduced Clutter

Electronics, especially densely packed ones like laptops, tablets, and chargers, can create clutter within a bag. Isolating them reduces the chances of overlapping images and makes it easier to distinguish between items.

Pinpoint Scanning

Advanced X-ray systems use automated threat detection algorithms that can analyze images for dangerous items.

Isolating electronics in a tray allows the scanning equipment to concentrate directly on those high-risk devices without interference from other bag contents. Their internal components and circuitry receive enhanced scrutiny.

Preventing Signal Interference

Some electronics can potentially cause interference with scanning equipment signals due to their internal components and battery power. While airport scanners are designed to minimize interference, removing electronics further reduces any risks of the images being distorted or compromised. Keeping them separate ensures maximum detection accuracy.

Streamlined Screening Processes

With electronics placed directly in trays, TSA agents can immediately identify them and focus visual checks on those devices, which often warrant extra attention. This is much easier than having to search through bags to find electronics scattered among other items, improving inspection workflow.

Standardized Procedures

Mandatory tray removal of electronics follows standardized TSA regulations applied at all airport checkpoints. This consistency ensures fair treatment for all passengers regardless of individual guards on duty. Travelers know what to expect, and guards know the proper procedures to enforce.

While X-ray technology has improved to scan bags fully loaded with items, electronics still pose unique risks and screening challenges. Isolating them into dedicated trays mitigates that threat.

The minor inconvenience to travelers is well worth it for the enhanced security assurance. So next time, obediently place your laptop, tablets, and other devices in a tray without complaint!

Electronics that are commonly required to be removed from bags during airport security checks

Laptops and Large Tablets

Risk: Laptops and large tablets have dense internal components that can obstruct the view of other items in a bag when scanned. They can also be used to hide dangerous objects or components.

Rationale for Removal: Removing laptops and large tablets from bags allows security personnel to get a clear, unobstructed view of these devices. It helps ensure that these items are not being used to conceal prohibited items, ensuring the safety of air travel.

External Batteries and Power Banks

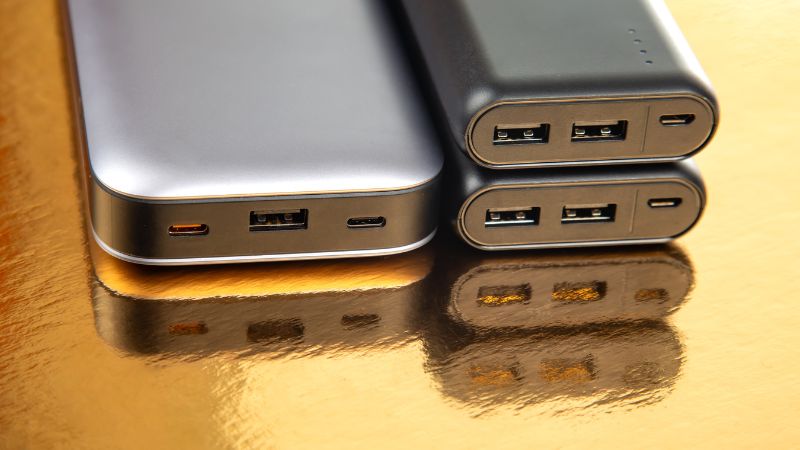
Risk: External batteries and power banks can vary in size and shape, and some may contain wiring or components that can be manipulated to hide threats. There have been instances where power banks were modified to smuggle explosive materials.

Rationale for Removal: Isolating external batteries allows security personnel to examine them closely and verify that they are not being used to conceal dangerous components. This helps prevent potential threats from being disguised as harmless electronics.

Large Camera Equipment

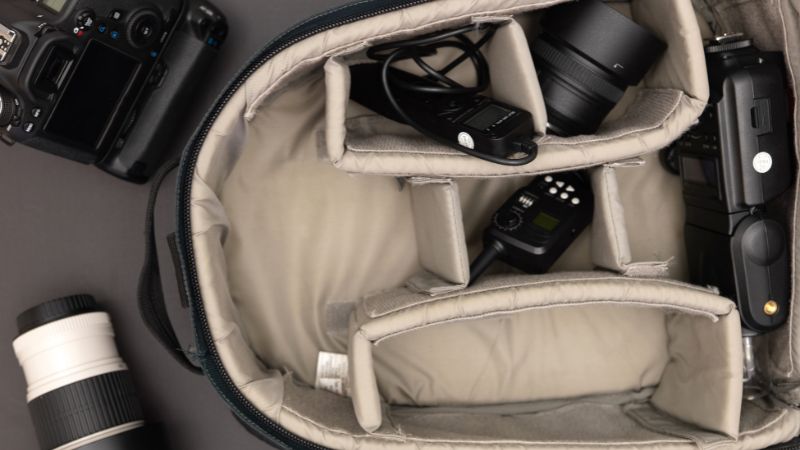
Risk: Cameras and camera accessories, such as lenses, tripods, and lighting equipment, can contain intricate parts that may raise suspicion or obstruct the X-ray image.

Rationale for Removal: Separating camera equipment from other items enables security personnel to thoroughly inspect these devices. This is particularly important as camera gear could potentially be used to hide prohibited items or threats.

Electronic Game Consoles

Risk: Game consoles have multiple components and wiring, which could potentially be exploited to hide unauthorized items or substances.

Rationale for Removal: Taking electronic game consoles out of bags for screening ensures that security personnel can assess them accurately and verify that they are not being used for illicit purposes.

Smart Devices with Large Batteries

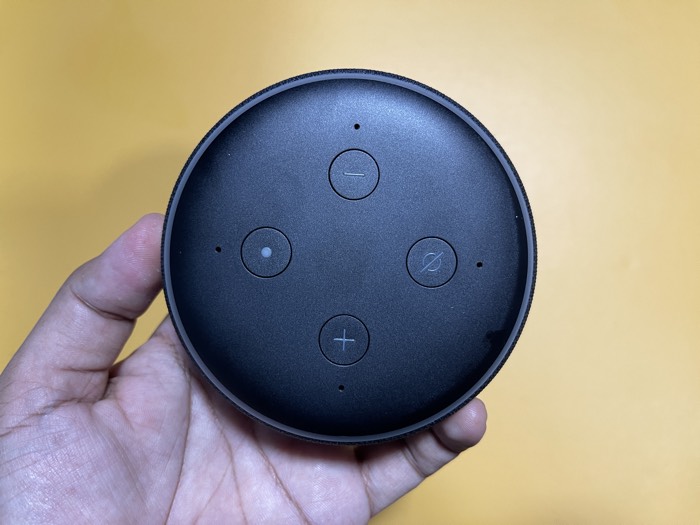
Risk: Devices like large e-readers or portable speakers with substantial battery capacity might have hidden compartments or be used to mask threats.

Rationale for Removal: By isolating these devices, security personnel can examine them more closely to rule out any potential threats or prohibited items hidden within them.

Electronic Accessories and Cables

Risk: Cables, chargers, and accessories can be tangled together, making it difficult to determine their contents from an X-ray image.

Rationale for Removal: Placing these items separately in a tray prevents confusion and ensures that security personnel can quickly identify and analyze them.

How to Quickly Airdrop Files from Mac to iPhone or iPad

Airdrop is an easy way to wirelessly transfer files between Apple devices. Here’s how to utilize Airdrop to swiftly send files from your Mac to your iPhone, iPad, or other iOS devices.

What is Airdrop?

Airdrop is Apple’s proprietary close-range wireless transfer system. It uses Wi-Fi and Bluetooth to share files between nearby Apple devices, without needing internet.

Airdrop works between Macs, iPhones, iPads, and iPod Touches. You just need to be signed into the same Apple ID on all devices.

Watch the Video

Standard Airdrop Method

The normal way, the regular way is whenever you are accessing a file like this by going to any of the folders over here and if you want to send this file, you can right click or use your two fingers to tap on the trackpad.

You will get these options. You can click on share and then you get the option to airdrop.

Once you click on that option and you have got the other device in someone’s hand or on your own hand, you will get that device here and you can tap on that and it will be sent.

The default way to Airdrop from Mac is:

  1. Right-click the file you want to send.
  2. Choose “Share” then select “Airdrop” from the menu.
  3. Select the receiving device from the Airdrop popup window.
  4. Accept the transfer request on the receiving device.

This works well but takes several clicks to initiate each time. Let’s look at some shortcuts to streamline the process.

My Custom Shortcut to Airdrop Files

I have created a shortcut to make it even easier, and the shortcut is based on a utility which is a paid utility and it got famous last year which was NotchDrop.

A developer utilized this notch area on MacBook 16 and all the MacBook computers that have got these notch.

Whenever if you have to send a file to someone, all you had to do was drag your file over to this area and drop it. It would work in a similar manner like it will open the airdrop popup where you will be able to select that person’s device and send it.

Airdrop Files with just Drag and Drop

Quite similar to that, I created a shortcut and it’s totally free. You can download my shortcut from the link in the description or you can create your own. This is the shortcut, and I have added the icon of the shortcut in the docs area.

Now if I have to send a file to someone, drag that file over to this and this will work in a similar manner. It will pop up the Airdrop feature where I will be able to select anyone’s device.

You can click the icon to instantly open Airdrop’s sharing window and select a recipient device. Much faster than the manual menu steps!

Alternatively, you can highlight a particular file which you want to send or number of files.

If I want to send two files, I can select these files. Once these files are selected, all I have to do is go here and click on this icon. It works in a similar manner, opens the pop up where the device will be visible and I will be able to send it.

I think it is a little faster than doing a right click then selecting shear and then selecting this. So it requires three clicks whereas this requires only two clicks or maybe this one only requires one click.

You can download my Custom Shortcut

With these tips, Airdropping files from your Mac to iOS devices takes mere seconds. Streamline your workflow and simplify sharing with these Airdrop enhancement.

How to Make Macbook Not Sleep

0

MacBooks and Macs are designed to enter sleep mode when inactive to conserve battery life and energy usage.

However, you may want to disable sleep at times to maintain active processes. Here’s how to prevent your Mac from automatically sleeping.

Watch the Video

Why Your Mac Sleeps

By default, Macs are configured to sleep after a set period of inactivity. For laptops on battery, this may be 10-15 minutes. For plugged-in computers, around 30 minutes.

The display turns off first, then after continued inactivity, the Mac will enter a power-saving sleep mode. All open apps and activities are suspended.

Sleep saves energy and prevents battery drain when you step away from your computer. But sometimes you want to keep the Mac awake longer.

Changing the Inactivity Timeouts

The timeouts that trigger sleep are configurable in your Mac’s System Preferences. Here’s how to adjust them:

Go to System Preferences > Battery

For battery power, adjust “Turn off display while on battery power” and “Put hard disks to sleep when on battery power”

For plugged-in, adjust “Turn off display while on power adapter” and “Prevent computer from sleeping automatically when display is off”

Increase the times or set to Never to make your Mac stay awake longer before sleeping.

Preventing Sleep on Power Adapter

The most direct way to stop sleep is using the “Prevent computer from sleeping” option while plugged in.

Enabling this in Battery preferences will keep your Mac awake even with the display off, as long as it’s connected to power.

This is useful for long downloads, rendering projects, or other tasks you don’t want to interrupt if you step away from the computer.

Why You May Want to Allow Sleep

While disabling sleep can be useful temporarily, there are downsides to leaving a Mac perpetually awake:

  • Drains battery rapidly when not plugged in
  • Can overheat device if running resource-intensive apps
  • Some processes may freeze or get stuck without sleep/reboot cycles

Use good judgement when disabling sleep. Letting your Mac nap regularly is healthy! But for short term needs, you have control over the inactivity sleep settings.

7 Awesome Free Cribbage Websites to Try

0

Are you tired of endlessly scrolling through social apps and craving a mood change? Well, how about spicing things up with a thrilling game of Cribbage?

It’s time to step into the world of classic card games but with a modern twist – online Cribbage websites! Whether you’re a seasoned Cribbage pro or a complete newbie, these awesome free websites have covered you.

So, let’s take a break from the usual and dive into the exciting realm of Cribbage fun. 

Cribbage online

Cribbage-Online is an excellent platform to enjoy the game of Cribbage conveniently and for free. This user-friendly website offers a variety of features that cater to both beginners and experienced users alike.

One of the standout features of Cribbage Online is its online multiplayer capability. Players can compete against real-world opponents from all around the globe, adding a social and competitive element to the game. 

For those seeking to hone their skills, the website also provides the option to play against a computer opponent at various difficulty levels.

This feature allows players to practice and improve their cribbage strategies at their own pace. The website’s accessibility is a significant advantage as it requires no software downloads or mandatory account creation. Players can jump right into the action, enjoying a seamless cribbage experience without any hassle.

Cribbage JD

If you’re a fan of Cribbage and looking for an exceptional online gaming experience, look no further than Cribbage JD.

This website offers a rich and complete cribbage site with impressive graphics, an engaging achievement system, and robust progress and statistic tracking.

Whether you prefer playing against the computer to sharpen your skills or challenging real live opponents, Cribbage JD caters to all types of players. 

What sets Cribbage JD apart is its availability on Android and iPhone, ensuring you can enjoy the game on the go while seamlessly syncing your user stats and level across devices.

Despite its many strengths, Cribbage JD does have one minor limitation. The absence of an in-game chat feature outside of the Facebook version means that you’ll have to opt for the Facebook platform if you wish to chat with your friends while playing. 

Cribbage Pro

Cribbage Pro is a highly popular website on various platforms, including Windows, Mac, Android, and iOS devices.

This free website, with optional in-app purchases, offers a host of enticing features that cater to cribbage enthusiasts of all levels. One of the main attractions of Cribbage Pro is its versatile gameplay options. 

Players can enjoy both single-player and multiplayer modes, providing the flexibility to challenge computer opponents or engage in thrilling matches with real friends online.

Additionally, it offers a range of computer opponents varying in difficulty levels, ensuring that players can find suitable challenges based on their skill levels.

Cribbage with Grandpas

Cribbage with Grandpas is a unique and humorously entertaining site that stands out from the crowd. What sets this app apart is the ability to create a personalized grandpa character to play Cribbage against, making it a one-of-a-kind and hilarious concept.

Using an in-depth character builder, players can design a cartoon version of their own grandpa, adding a delightful personal touch to the gaming experience. 

This feature adds a sense of nostalgia and warmth as players engage in cribbage matches against their virtual grandparents.

Aside from its distinctive character creation, Cribbage with Grandpas boasts a visually appealing user interface that enhances the overall gaming experience.

The witty and fun dialogue between the player and the virtual grandpa adds a charming and comedic element to the game, ensuring moments of laughter and amusement throughout.

Cribbage by SNG Studio

Cribbage by SNG Studio is an exciting mobile adaptation of the classic card and board game. With this site, players can enjoy challenging matches against computer opponents at different difficulty levels, ranging from Easy to Expert.

The game’s unique betting structure adds an extra layer of excitement to the gameplay. Players who dare to take on tougher opponents have the opportunity to earn larger rewards, making the experience both thrilling and rewarding.

Cribbage by SNG Studio offers a personalized touch, allowing players to select from eight distinct card backs and choose high-resolution backdrops and tables. This customization feature adds a touch of personality to the game and lets players create an environment that suits their preferences.

Even for beginners, Cribbage by SNG Studio proves to be a user-friendly experience. The scoring system is automatic, taking the hassle out of keeping track of points and making the game accessible and enjoyable for players of all skill levels.

eCribbage

If you’re seeking a competitive cribbage experience online, eCribbage is the place to be. This platform serves as the hub for competitive cribbage play, and it has become the go-to destination for serious cribbage enthusiasts. eCribbage hosts online tournaments in partnership with the American Cribbage Congress (ACC).

Players participating in these tournaments have the chance to earn Internet Rating Points (IRPs). The player with the highest points earns the prestigious title of Internet Champion, while the top 10% of players receive an invitation to a live Tournament of Champions held in Reno. 

For cribbage players aiming to establish their internet prowess, eCribbage is the ultimate destination. With a thriving community of players, there’s always someone to challenge, and the competition is fierce and engaging.

eCribbage offers an impressive array of 12 different cribbage variations, allowing players to explore and enjoy various gameplay options. One exciting feature is the opportunity to play against the renowned HAL bots, which adds a thrilling challenge to the cribbage matches.

Cribbage at Cardzmania 

CardzMania offers a versatile and engaging online cribbage experience, catering to players of all levels. One of the standout features of CardzMania is its customization options.

Players can tailor their cribbage games to their liking by adjusting settings like the number of points needed to win, the number of cards dealt, and even the layout of the cribbage board. This level of personalization ensures that each game is unique and enjoyable for every player.

The clean and intuitive user interface enhances the overall gaming experience, making it easy to navigate and enjoyable for players of all ages.

Additionally, CardzMania tracks detailed statistics, allowing players to monitor their progress and see how they improve over time. The leaderboard adds an element of competition, motivating players to strive for the top ranks and showcase their cribbage skills.

How to Wrap Images, Text, and Logos Around Objects to Create Mockups Without Photoshop

Product mockups are a great way to showcase branded designs. But mockups usually require Photoshop, an expensive and complex program. Thankfully, there are free online tools that make mockup creation easy, even without Photoshop skills.

In this article, we will learn about free tools you can utilize to achieve your design goal.

An Overview of the Mockup Process

Here’s an overview of the steps we’ll cover to wrap images around objects to make mockups:

  • Find a suitable product photo and brand assets like logos or text
  • Use the free web app Photopea to layer and warp images to fit the product contours
  • Adjust blending so the design integrates realistically with the photo background
  • Export the Photopea result and polish further in Canva using templates
  • Optionally leverage AI tools like DALL-E 2 or Microsoft Designer to auto-generate ideas

With this process, anyone can create stunning branded mockups with just a browser and basic photo editing skills.

Watch the Video

Using Photopea to Manipulate and Blend Images

Photopea is a free online image editor with similar tools as Photoshop. First, upload a product photo and your logo or other design.

Use the Transform Warp tool to contour the brand image around the product’s shape and perspective. For cylinders, warp in an arc shape to match the curvature.

Enable Blending Modes like Multiply to integrate the design into the background. This makes it look natural rather than layered on top.

Photopea enables powerful editing without needing to install anything. And it’s completely free!

Polishing and Enhancing Mockups in Canva

After saving your Photopea result, import it into the free graphic design platform Canva. Canva has mockup templates to build on your base image.

Enhance by adding backgrounds, textures, animations, text, and other elements. Canva streamlines graphic design with its huge library of content.

Download your polished mockup from Canva. The PNG or JPG result is ready to use for your brand’s needs!

AI Assistance for Mockup Inspiration

For fresh ideas, leverage AI tools like Microsoft Designer. Generate new mockup concepts customized to your prompt

AI capabilities can surpass what humans imagine alone. But for final execution, you still want manual editing control. Use AI for ideation, not final output. I love Microsoft designer because it speeds up the creative process of selecting fonts, color scheme and layout, it gives you tons of options from your image and text inputs.

Flexible Options for All Mockup Needs

With the range of free software available today, stunning mockups are possible without expensive tools like Photoshop.

If you feel that Photopea is a little too technical for you, you can try the Mockup options available in Canva. Although the option for Mockup are pretty limited, since canva is a template based tool, where you get template for everything, it’s still great for a lot of people who love ‘done for you’ designs.

Canva has mockups for showcasing Printables, Frames, Product Packaging, T-Shirt, etc. Plus, it’s available under the free plan.

6 Clever WhatsApp Tricks and Tips to Boost Productivity

0

WhatsApp has over 2 billion users worldwide. Beyond basic messaging, the app contains hidden features that can optimize your workflow and save time. Here are 5 clever WhatsApp tricks every user should know..

1. Create an Empty Chat as a Personal Notebook

Create a new group chat with a contact, then immediately delete them to create an empty one-person Group. Rename this chat something like “Notes” or “Quick Docs.”

Now you have your own private notebook within WhatsApp! Use it to store important info like addresses, checklists, documents, reminders, and anything else you want quick access to.

Pin this quick docs chat to the top of your list for easy access. It’s more convenient than traditional notes apps in many ways.

2. Save Numbers Without Adding Contacts

When you get a new number, add it to your personal WhatsApp chat instead of your contacts. This lets you access the number for calls or messages without cluttering up your contacts list.

Ideal for situations like contacting local businesses, rideshares, or anything temporary where you don’t need to save the number permanently.

3. Send Large Files up to 1GB

WhatsApp’s normal file send limit is just 100MB and for videos recorded using WhatsApp, this limit is 16MB. But you can send files up to 1GB in size using Document Send in the Attachment Menu.

This is perfect for sending photos, videos, PDFs, ZIP files, presentations, or other large documents via WhatsApp conveniently.

4. Use WhatsApp on Two Phones with Linked Devices

Linked Devices allows you to use one WhatsApp account across multiple phones. Set up your main phone number as the primary, then link a secondary mobile device.

Even without your primary phone connected, you can still chat and access your WhatsApp account from the linked secondary device. Useful for work phones, tablets, or dual SIM setups.

5. Post High Quality Photos and Videos in Status

When posting to Status, use the “Document” option to share photos or videos in high original quality rather than compressed.

Also useful for sharing portrait orientation photos/videos since Status crop square by default. This trick preserves media in full quality as you intended.

6. Send Video Notes

WhatsApp has now introduced a feature where users are able to send quick video notes. It already allowed users to send voice notes, and now users can also send video notes. To do this, you have to tap on the microphone icon in the chat window.

Tapping once will change the icon into a video camera recorder. If you tap and hold the icon, the front camera will open with a countdown from 3, 2, 1.

You will be able to record a short video of up to 1 minute. When you release your finger, the video will be sent. This is the fastest way for visual communication.

Normally, if you have to send a video recording of yourself, you would have to perform multiple steps, such as tapping on the camera icon, flipping the camera from back to front (since this icon will open the camera by default), recording your video message, and then sending the video message.

The UI of this short video note is also pretty cool to see; it’s in a circular form and keeps playing in a loop. It screams out to the user to tap and watch the video, which makes it pretty hard to not notice any video message.

Get More from WhatsApp

With over two billion users, WhatsApp packs helpful features beyond basic chatting. Implement these handy tips and tricks to become a WhatsApp power user.

Save time, stay organized, improve workflows and collaborate better using WhatsApp to its full potential. Try these five tips to boost productivity and streamline your usage.

Find more Whatsapp Tips and Tricks here.

How to make an Excel Spreadsheet into a Google Doc

While Excel is undoubtedly a powerful tool for data analysis and number crunching, it often hampers the collective effort when working in teams.

Google Docs, on the other hand, offers a range of collaborative features like real-time editing, comments threads, and easy sharing options that make working together seamless and efficient.

Need to gather input from multiple stakeholders? Convert that bulky Excel sheet into a Google Doc to enable simultaneous editing by multiple users no matter where they are.

Convert Excel Sheet into Google Spreadsheet Instead of Google Docs

While is possible to convert an Excel sheet into Google Docs, the right application suite from Google for Excel Sheet is Google Spreadsheet. However if you still want to convert excel sheet into Google Docs, Skip to this section.

Microsoft Excel and Google Sheets have very similar core functionality and features for spreadsheet creation and data analysis. I would estimate the similarities to be around 90% or more in terms of basic spreadsheet capabilities. Here’s a breakdown:

  • Interface layout – Nearly identical with cells, rows, columns, tabs, toolbar buttons, etc. Around 95% similarity.
  • Calculation and formulas – Excel and Sheets support the same formula syntax and most of the same built-in functions like SUM, AVERAGE, VLOOKUP, etc. Around 95% overlap.
  • Charting – Both allow creating charts and graphs from data. Chart types and customization options are comparable. Around 90% similarity.
  • Data analysis – Both provide pivot tables, sorting, filtering, conditional formatting and other data tools. About 90% similarity.
  • Collaboration – Google Sheets includes real-time co-editing, comments, version history. Excel’s collaboration features via Office 365 are roughly 80% similar.
  • Mobile apps – Fully functional apps available. Usage and features are about 90% alike.
  • Add-ons and integrations – Excel has more third-party add-ins. Sheets has more built-in integration with other Google services. This area differs the most. Maybe 60% similarity.

Good thing about using Google Spreadsheet is you can open the Excel Sheet files in it without using any conversion tool. Simply open Sheet.new in your browser, it opens a new spreadsheet.

When the new Spreadsheet opens in your browser, click on file and then click on import. Google stretch sheet will allow you to import .xls files which is format for Excel spreadsheet.

99% of the chances are you will not lose in functionality which you have any excel spreadsheet. All the formulas for calculations would be like a different, for which you can take the help of Google.

Now let’s come back to how you can really convert excel sheet into google talks.

How to convert Excel Sheet in Google Docs

You can open a new document in google docs by typing Docs.New. This will open a new Google docs file. you will not find any option to import like you did in Google spreadsheet and the open option will not let you open any unsupported format including .xls.

So for that, you will require a third-party converter to 1st convert the XLS file into Docx, which is the file format for Microsoft Word. And then only you will be able to upload that file through Google docs..

I am using a website called Online2PDF to convert the XLS file into Docx. Once you get your converted file and save it on your computer. The file in Google docs.

Here, the new file might be opened in a new tab via pop-up. So keep an eye whether your browser blocks in pop-ups.. if it does, you just have to allow the pop-ups for Google Docs (which can be done from the address address for), and when you upload the Docx file to Google docs it will be opened in a new tab.

You will get the complete data. Whatever date you had in the excel sheet file, he will be able to see it Google docs you will not be able to use any functions or formulas, to do that, please refer to the first section of this article, where we import the excel sheet file into Google spreadsheet.

How to Airdrop On Android Device (Android to iOS or Vice Versa)

Learn about how to transfer files wirelessly between devices from cross platforms. I have previously shared some useful methods to transfer files from Android to Mac or Android to iPhone or vice versa. But, this post mentions various methods you can use depending on your requirement.

Also look for the method #3, which works like the native Airdrop feature.

Method 1: Cross Platform Apps

This is where you require to install the app on both devices (receiver and the sender). It is required because both the apps will create a personal Wi-Fi connection and use that connection to send files wirelessly..

Xender

I have used Xender app a lot in the past. Although the installation process is simple, it’s tricky to understand how to send files from Android to iPhone or from iPhone to Android. Check out the video below if you find it confusing.

Airdroid

Airdroid is also is a super useful app that can let you send files across platforms. This one is so good for Phone to PC transfers that it is among one of my first apps I recommend to install on an Android mobile.

Apart from the ability to send file from mobile to laptop, this also has the feature of sending files between Android to iPhone or vice versa.

Method 2: Almost Native Solution

This is the method you have to install the app on only one device. i.e, Your Android. The app is called Snap for Android. You can install it from the Play Store.

And on your iPhone, you can open Safari and open this website (Snapdrop.net), it will give you an interface similar to Snap for Android on your Android mobile.

For this work, both Android and iPhone device need to be on the same Wi-Fi network. the devices will be visible in the app interface. If you want to send file to iPhone, you have to select the iPhone icon on the Android device, and if you want to do the opposite, you have to tap on the Android icon, visible on the interface on Snapdrop.net on iPhone.

It’s quite useful solution for people who share files, like songs, photos or other file format with your friends once in a while.

Method 3: The Native Solution

This method was just like AirDrop, although it requires a bit of technical knowledge.

I came across this post on X (former Twitter), which shared a brilliant that works like the native feature, although you will still have to install an app on your Android device, there is no action needed to be taken on Mac apart from accepting the file which you usually do when you receive AirDrop files from other iOS devices.

The user shared the Github Repository which has all the source code for the app. Unfortunately I couldn’t find the APK file so that it can be easily installed, which means, you will have to figure it out by reading this post, which gives you the magic of combining an APK from the source code.

Note: Using this feature requires both devices to be on the same wi-Fi network.

Airdropping files from Android to Mac

Like I said in the article above, you have to combine the source code of Warpshare on Github into an APK and install it on your android. And then next time you have to share something, you can tap on the share button, find WarpShare, select the Mac, and send the file.

Airdropping files from Mac to Android

The above solution only works when you have to send five from android to Mac, but if you want to do the opposite opposite, sending from a Mac to android, you can use another app which you need to install on mac computer, and nothing on android.

The source course for this app is also available on GitHub. It’s actually a port of the nearby feature which is android native. Just like AirDrop is iOS and Mac native.

How to find Wi-Fi password?

0

Well, if you forgot the password to your WiFi, there is an easy way you can find out what the password is.

The only thing you will need is a device – computer (Windows/Mac) or iPhone/Android – that was previously connected.

How it works?

When a device connects to a WiFi network, it saves the password automatically by default. This means even if you didn’t manually save the password, it is stored on that device for any WiFi networks it has connected to before, like your home, a local cafe, or a friend’s place.

So how do you find the saved WiFi password?

On a Windows computer, here are the steps:

1. Open the Control Panel and go to Network and Internet > Network and Sharing Center.

2. Click on the WiFi network name and then Wireless Properties.

3. Go to the Security tab and check the Show characters box to view the password.

the exact method for each windows, operating system would be little different, but the above instructions will give you an idea how to look for this option. If not, you can check out this article that goes in detail about finding Wi-Fi passwords on specific Windows operating system.

Find Wi-Fi Password on Windows using Command Prompt

  1. Open Command Prompt: Press the Windows key, type “cmd”, and press Enter to open Command Prompt.
  2. List Wi-Fi Profiles: Type the following command and press Enter:netsh wlan show profiles This command will display a list of all the Wi-Fi profiles that have been saved on your computer.
  3. View Password for a Specific Profile: To view the password for a specific Wi-Fi profile, type the following command, replacing “WiFiProfileName” with the name of the profile you want to see the password for, and press Enter:netsh wlan show profile name="WiFiProfileName" key=clear Look for the “Key content” field under the Security settings.
  4. This is where the Wi-Fi password for that profile will be displayed in plain text.

To view Wi-Fi passwords using this method, you typically need administrative privileges on the computer. Also, this method only works for Wi-Fi networks that your computer has connected to in the past and for which the password has been saved.

Also check, Useful Windows Command Prompt Tricks You Should Know

On an iPhone, here is how to find the password:

1. Go to Settings > WiFi and tap the “i” next to the network.

2. This will open a new page where you can tap on the Asterix to reveal the password. It will use face unlock to authenticate the request.

3. The password will be revealed and you can copy it to share with someone else.

If you’re searching for Wi-Fi password on Mac check out this guide

And on Android, here are the steps:

1. Open Settings > WiFi and long press on the network.

2. Tap on the password to view it.

Some android phones, however will not let you see the password. But here is the work around for that.

mostly all android phones will let you share your mobile phones Wi-Fi with others by giving you a QR code. Any user can scan the QR code and their phone will be connected to the same Wi-Fi network.

You can use this method to connect connect other mobile devices or you can also extract the password from the QR code. Here is how you can do it.

As you can see, it’s very easy to find the saved password for a WiFi network you’ve connected to before on any device. Thank you for reading! Let me know if you have any other tech tips you need help with.

How to Use WhatsApp on Apple Watch

The Apple Watch is an amazing compliment to the iPhone. One of its best features is the ability to use WhatsApp directly from your wrist. Here is a guide on setting up and using WhatsApp on your Apple Watch.

Prerequisites for Using WhatsApp on Apple Watch

Before diving in, an important note – using WhatsApp on the Apple Watch requires having an iPhone paired with the Watch.

If you have the Apple Watch non-cellular version, then you will have to keep your iPhone with you all the time because it will rely on your iPhones connection.

This is why I recommend everyone to go for the cellular version of Apple Watch. Because now then you will be able to use your Apple Watch independently. Check out this article do you know how awesome, an Apple Watch cellular can be?.

Although you are still required to have iPhone with you for setting up the ability to use WhatsApp on your Apple Watch. Continue reading the article for the tutorial.

First step is making sure you have an iPhone with the latest version of WhatsApp on it, and an Apple Watch paired to that iPhone.

Managing Watch Apps from the iPhone

Once you have your Apple Watch set up, you can customize it using the Watch app on your iPhone. This is where you manage Apple Watch settings.

Open the Watch app and select “Apps” to see which installed iPhone apps have an Apple Watch version. These Watch apps are automatically enabled.

Note that not every iPhone app offers an Apple Watch app. Select apps like WhatsApp provide some level of Apple Watch support.

WhatsApp’s Limited Native Watch App

Currently, the native WhatsApp support on Apple Watch is limited. You can receive WhatsApp notifications on your Watch and read full messages. However, you can’t directly reply to messages from the Watch interface.

The workaround is using Siri on your Watch to record and send WhatsApp voice messages. Say “Hey Siri, send a WhatsApp voice message to [contact].” Then your message will be sent hands-free.

So with only the native app, WhatsApp capabilities are restricted to reading notifications and Siri voice replies.

Using a Third-Party Watch App for Full Chat Access

To gain full WhatsApp access directly on your Watch – viewing chats, sending messages, etc – you need a third party Watch app.

Search the App Store on your Watch for “WhatsApp” and you’ll find several options. Find the best apps list at the end of this article. Install one of these apps to enable full WhatsApp chat functions from your wrist.

Follow the selected app’s setup instructions to link it to your WhatsApp account. Most provide step-by-step guidance during first launch.

WatchsApp is one such app you can use, although, the process of installing it and setting it up on your Apple Watch is pretty simple. Just follow the instruction mentioned after the installation.

You have to link the WatchsApp with your WhatsApp. Follow the steps.

  • Open your WhatsApp on your iPhone.
  • Go to WhatsApp settings tab on linked devices and then
  • Open WatchsApp app on your Apple Watch
  • Scan the QR code.

WatchsApp pretty much works like WhatsApp web but on a smallest screen like on your Apple Watch, you will be able to do all the things you can do on WhatsApp web.

Unlocking WhatsApp’s Potential on Apple Watch

While native support needs improvement, with a third-party app you can enjoy the full WhatsApp experience on your Apple Watch.

View chats, send messages, even initiate calls – all without needing your iPhone in hand. It becomes an independent communication device.

So if you regularly use WhatsApp, be sure to install a companion Watch app for maximum convenience. Your inner wrist is the new home for WhatsApp.

Pro Tip: instead of using the tiny keyboard of Apple Watch, series 7 and above, use the dictation feature or try sending voice notes as it’s less frustrating and more practical to use WhatsApp on such a tiny device.

Best Apple Watch Apps to use WhatsApp on the Watch

WatchsApp: This is the app we talked about in the article article above. Below some other apps, you might find useful for using WhatsApp on your Apple Watch.

Chatify: Chatify is a live chat software designed to help businesses strengthen their customer relationships. It offers features such as team collaboration, unlimited agents, automated answers, and more1.

WhatsUp: WhatsUp is not an app, but it might be a typo for WhatsApp. WhatsApp is a freeware, cross-platform, centralized instant messaging (IM) and voice-over-IP (VoIP) service owned by Meta Platforms2.

WatchChat: WatchChat is an app that allows you to send and receive WhatsApp messages on your Apple Watch. It offers features such as access to all of your WhatsApp chats, sending and receiving voice messages, replying to chats via keyboard, quick replies, dictation and scribble, and more3.

WristChat: WristChat is an app that brings the WhatsApp experience to the Apple Watch. It uses the WhatsApp Web API to access user messages in a watchOS app and provides an interface designed for the Apple Watch

I would recommend you use your iPhone to install the app.

Check out these amazing Whatsapp tips and tricks that will make your life easier.

How to Rename Multiple Files at Once on Mac

When dealing with large numbers of files, having clear and organized file names is crucial. But renaming files one by one is tedious and time consuming. Thankfully, MacOS offers batch renaming to rename multiple files in just a few clicks.

Watch the Video

Why Batch Rename?

You may find yourself needing to rename many files at once for various reasons:

  • Making file names more descriptive after importing media files from a camera.
  • Organizing screenshots by adding a descriptive prefix to their names.
  • Standardizing file names to a consistent naming convention.
  • Adding sequence numbers to duplicate filenames to distinguish them.
  • Removing long unwanted prefixes or suffixes from file names in bulk.

Manually renaming each file would take ages. Batch renaming completes the task rapidly.

Selecting Files to Batch Rename

First, gather the files you want to rename into a folder or on your desktop. You can select files from multiple locations too.

Select the files you need to rename en masse. On Mac, you can click and drag to select multiple files at once. Or press Command+A to select everything in a folder.

Accessing Batch Rename

With your files selected, right click on one of them. In the menu, choose “Rename ## Items…” where ## is the number of selected files.

Alternatively, you can press Control+Click while files are selected. This also brings up the batch rename menu.

Adding New Names and Formats

In the batch rename window, you’ll see renaming options. Choose “Name and Index” from the Format dropdown menu.

This lets you set a custom text name, followed by an incremental number added to each file.

Type your custom name in the Custom Format field. As an example, “Project Report Draft” would rename files as Project Report Draft 1, 2, 3 etc.

You can also choose other formats like adding/removing text, date, and more.

Executing the Batch Rename

Once you have your new naming convention configured, click Rename.

MacOS will rapidly run through and rename every selected file sequentially. Even hundreds of files just takes seconds.

The filenames are now updated en masse with your new consistent naming format applied.

Additional Batch Renaming Tips

A few extra batch renaming tips:

  • Add a prefix instead of full name, like “HR – ” to label files.
  • Start file names with numbers to force alphabetical/numerical order.
  • Add date stamps like year-month for chronological ordering.
  • Test run first by renaming copies instead of originals.
  • Give very long names to reduce likelihood of accidental overwriting.

With the ability to rename masses of files in a few clicks, you have no excuse for disorganized file names. Put MacOS batch renaming to work for you!

More Mac Tips Here

Want to subscribe for X Premium? Here are the things you should know

0

So just after writing a few days after this article, Elon musk, the owner of Twitter has changed its name. It’s called X now. and every feature that had the reference name of Twitter is replaced.

For example, Tweets are now Posts, Retweets are now Reposts, Twitter Blue was Blue for a few days and now it’s called Premium. X uses the term Verified on the left side bar, and also gives a notification on the right side bar to let people subscribe to Premium. Tweetdeck is also rebranded as XPro and some Pro features have been added to it. More info about XPro here.

Twitter has made an announcement regarding their decision to restrict access to TweetDeck by introducing a paid subscription model under the name XPro.

This change is part of a series of recent modifications implemented by Twitter with the aim of increasing their number of subscribers and overall revenue.

However, it remains uncertain whether this strategy of limiting access to the tweet tracking tool will successfully encourage more users to pay or if it will instead lead to frustration among them.

More reasons to subscribe to XPro

Want to subscribe to Twitter Blue and save up to 30%? The verification badge, or BlueTick, now comes with this subscription. In addition to the badge, Twitter Blue offers other features too.

Key features offered under Twitter blue subscription

  • Edit Tweet: This feature allows you to edit Tweets for up to an hour after they have been published.
  • Half ads: This feature reduces the number of ads you see in your For You and Following timelines by 50%.
  • Bookmark folders: This feature allows you to organize your bookmarked Tweets into folders.
  • Reader Mode: This feature turns long Tweets into a more readable format.
  • NFT profile picture: This feature allows you to set an NFT as your profile picture.
  • Custom app icon: This feature allows you to customize the app icon on your device.
  • Custom app color theme: This feature allows you to customize the color theme of the Twitter app.
  • Early access to features: Twitter Blue subscribers get early access to new features before they are released to the general public.

In addition to these features, Twitter Blue also offers a few other benefits, such as:

  • Support from a dedicated team of Twitter experts.
  • The ability to give feedback on new features and products.

How to save 30% on your Twitter Blue Subscription?

Twitter blue would be cheaper if you subscribe through the website not from the app store or play store. It would be up to 30% cheaper.

Currently twitter allows users to subscribe to twitter blue we are app store or play store but the thing is it includes the platform fee as well which is 30% that’s why it is hulk expensive if you subscribe via the app store or the play store.

Best option is to go to the website if you don’t have a desktop computer you can open twitter in your browser on your mobile phone you will get the 30% cheaper subscription rate.

Save 20% More with the Annual Subscription

If you are looking to try what’s the fuss about Twitter Blue, you can go for the monthly subscription, but if you are certain that these features will be helpful to you, you can go for the annual plan which will save some more money.

Go for the annual plan which will get you more savings in comparison to the monthly plans.

Save even more by becoming a creator

Elon Musk has tweeted that Twitter will be sharing revenue with the creators.

Twitter has been testing out ads placements and now the ads are visible between the tweets of the users.

Also, in a recent tweet in reply to YouTuber MrBeast, Elon said that they will be trying to match the per view ad rate of YouTube on Twitter and asked him to upload his videos on Twitter as well.

So while twitter is not ready as a video sharing platform, but with increased video limit under twitter blue subscription, it opens a lot of possibilities for creators.

So, if the Twitter user is browsing your tweets and they come across the ads, the revenue from the ads generated will be shared with you.

So it means that you will be indirectly earning back your twitter blue subscription money.

A Guide to Creating X Threads Posts And Promoting Them

If you are on this page looking to learn how to create Twitter Threads, you might already know how powerful Twitter X can be. So I’ll not get into why you should be creating content on Twitter X. Let’s talk about with athletes straightaway.

So just after writing a few days after this article, Elon musk, the owner of Twitter has changed its name. It’s called X now. and every feature that had the reference name of Twitter is replaced.

For example, Tweets are now Posts, Retweets are now Reposts, Twitter Blue was Blue for a few days and now it’s called Premium. X uses the term Verified on the left side bar, and also gives a notification on the right side bar to let people subscribe to Premium. Tweetdeck is also rebranded as XPro and some Pro features have been added to it. More info about XPro here.

Twitter X was created as a microblogging tool where users didn’t have to overthink about forming long from the point they could say whatever they wanted to say in 140 character limit later this was doubled. Right now, at the time of writing, it is 280 characters.

But since it is a place where almost every celebrity, politician, sportsperson, TV journalist, and entrepreneur is available, it has many people coming on the platform to see what these people are up to.

And while they are at it, they would also be using it as content consumption to enhance their knowledge on a particular topic. The feature, Twitter thread, allows users to combine the bunch of tweets to put up information in a friendly format that could be easily propagated on the platform.

How to create Twitter X Threads

To create a Twitter thread, you need to:

1. Start with a tweet that introduces the thread.

2. Add a tweet for each point you want to make in the thread.

3. You can also add images to the Tweet if there is something complicated you want to share.

4. The last tweet should be a CTA (call to action) asking The Reader to follow you for more similar content. You can also quote another thread you created similar to the thread you are creating.

How to create a Thread on the Twitter X

Although it is pretty easy to create Twitter Threads on your mobile phone, it is suggested you use a laptop because this will also give you more room to visualize the tweet, it and you also can type faster. It also allows you to form all your tweets all at once and then tweet them.

When you try to do a similar thing on your mobile phone, the keyboard obstructs half of your screen, preventing you from viewing all your tweets.

To create two Threads on the Twitter page natively, you can click on the plus icon (+) to add another tweet that would be 280 characters or less.

Third-Party Apps to Create Twitter Thread

I also discovered it an excellent tool for creating Twitter threads. It’s called Typefully, and it’s a pretty straightforward tool. Authorize using your Twitter profile, and you are good to start the threads.

The UI of type looks as if you are creating a blog post, and the only thing is you can separate each paragraph into different sweets. There is also a feature that shows you preview the tweets how they would look when it is Tweeted.

We also offer a premium plan, where you also get options to schedule your Twitter threads, which is pretty powerful for consistency if you want to grow on Twitter. The premium version also gives you stats to show how your products are performing.

The Chirr app is another excellent tool for creating Twitter threads. And it is also recommended that you use this app on your laptop instead of your mobile phone because this way, you will also be able to preview what your Twitter thread will look like on the page itself.

The app automatically splits your writing differently when you put a period after the sentence. Although the UI is not as intuitive as on TypeFulley, it’s still a good alternative.

The Chirr app also puts its features like Scheduling and Stats behind a paywall, which is not too much if you are getting Great Value out of it.

Few Tips to Enhance Your Tweets

Use Features Like Quotes, Media, Retweet

Once you have created a Twitter thread and these tips can be helpful to promote them on Twitter. Whenever you find the relevant conversation on Twitter, you can reply by quoting your thread.

Not only with other people’s conversations, but you can also use this tip in your threads. Whenever you find something that needs more elaboration and have created a thread around it, you can Court that thread.

I have consumed a lot of Twitter trades that way.

Twitter allows you to add photos and videos to add weight which can help create stunning Twitter threads. Use web apps like Canva to create stunning graphics. It has templates for infographics where you can put up information that would be difficult to put up in text format. 

Keep it Simple

Don’t use complicated language. If you are talking about something for the general public, try avoiding jargon that only people working in that industry understand.

I would instead follow someone and read their content it who would write a sentence to define something instead of using a technical term of which I will have to find the definition myself.

So if you are out there who want to create the best Twitter trends, I hope this article will help you think about that goal. 

Is Netflix Cracking Down on Password Sharing?

Netflix relies on paid subscriptions for revenue. So when accounts are shared beyond households, it’s a thorn in their side. Recently, Netflix has rolled out tests to limit password sharing. What does this mean for users?

The Password Sharing Crackdown

For years, Netflix took a lax approach to password sharing between family and friends. But with saturating growth in major markets, Netflix is eager to convert “borrowers” to paying subscribers.

Signs of a crackdown emerged in early 2022. Tests began rolling out asking users to verify their home network. This detects accounts being used outside of one household.

When the system flags an account as suspect, the user receives a prompt. It asks them to confirm access from that new network or device. If they can’t, remote users could be logged out. Check the last section of this article, if you are curious to know how does Netflix detect password sharing?

Gradual, Location-Based Implementation

Netflix confirms they’re testing tools to limit sharing. However, the roll out seems gradual and targeted so far.

Some regions have seen more prompts than others. Access via TVs and living room devices appears to trigger more verification requests than mobile.

Netflix is likely monitoring reaction and fine-tuning their approach as they expand the tests. For now, enforcement seems more bark than bite in many areas.

Workarounds Exist…For Now

Savvy users are finding ways around the new restrictions, for now. Some solutions to continue sharing include:

  • Having borrowers periodically change IP and GPS data via VPNs or proxy servers.
  • Temporarily linking borrower devices to the account owner’s home network through tethering and hotspots.
  • Periodically changing the account password and sharing the new one.

However, as Netflix bolsters its anti-sharing systems, these loopholes could soon close.

What Does This Mean for Sharing?

The days of carefree Netflix password sharing appear to be ending. The tests indicate Netflix is serious about converting borrowers to paid accounts.

In the near future, expect fuller enforcement where those outside households will be blocked or prompted to sign up. Home network verifications will likely become the norm.

For now, sharing still works in many cases, but users should be prepared for the inevitable squeeze. The free ride is coming to a stop.

How does Netflix detect password sharing?

  1. IP Address Tracking: One common method to detect password sharing is by monitoring the IP addresses that are accessing an account. If multiple IP addresses from different locations are frequently accessing the same account, it could indicate unauthorized sharing. However, this approach has limitations, as multiple users might legitimately access an account from different locations (e.g., family members in different households, travelers).
  2. Device IDs: Netflix might also track the unique identifiers of devices used to access an account. If a single account is being accessed from a large number of devices in a short span of time, it could be an indicator of password sharing.
  3. Geolocation Data: Netflix could use geolocation data to determine if account access is happening from different regions simultaneously, suggesting that the account is being shared beyond reasonable use.
  4. Behavioral Analysis: Netflix could analyze user behavior patterns to detect anomalies. For instance, if an account is suddenly streaming content on an unusual number of devices or if it starts streaming content that is not consistent with the account owner’s historical preferences, it might raise suspicion.
  5. Account Activity Monitoring: Netflix could monitor the concurrent streaming sessions on a single account. If an account is being used to stream content on multiple devices simultaneously, it could be an indication of password sharing.
  6. Machine Learning and AI: Netflix could employ machine learning algorithms to detect patterns of usage that deviate from typical user behavior. This could include analyzing factors such as the types of content being streamed, the times of day the account is being used, and the devices used.

What are the current plans offered by Netflix?

Netflix offers a range of plans tailored to your entertainment needs, with the number of simultaneous viewers determined by your plan.

For instance,

  • Standard plan at $15.49/month allows streaming on 2 devices concurrently,
  • Full HD streaming, and the ability to download on 2 devices. (Moreover, you can invite an additional member to share the account).
  • The Premium plan, priced at $19.99/month, permits streaming on 4 devices simultaneously,
  • Ultra HD streaming, downloading on 6 devices, and the option to add up to 2 extra members.

Each profile has its own login, but the number of viewers at once is determined by the plan’s screen limit, which ranges from 2 to 4 devices based on the plan you choose.

Snagit by Techsmit Makes it Super Easy to Create & Edit Screenshots

If you are into screencast tutorials or have to spend a lot of time taking screenshots on your computer to help people do certain things, is a tool that can Speed the process up.

Snagit by techsmith, is an incredible app available for both Mac and PC, it not only lets you take screenshot of the entire monitor screen, but you have full control to select what part of your screen you want to capture.

More control over screenshots

And if you want to capture a particular window, it can automatically snap to it so that you do not have to spend time selecting it manually.

This can be done in multiple ways, You can either click on the capture button by opening the Snagit app, or you can click on the quick launch icon what the Snagit app on your computer.

My favourite way to capture screenshots is to use customisable keyboard shortcuts.

Easy to make edits

The beauty of Snagit app is not just grabbing the screenshot but also giving you the ability to make changes and manipulate it in many ways.

The Snagit app comes with an inbuilt image editor which pretty much offers every feature you would require to manipulate and create professional-looking tutorials from images.

It has tools to draw different shapes on the screenshots, put arrows, write down something, highlight, or blur.

You can use these tools in combination with each other to create screenshots tutorials that are easy to understand by using the number stamps to count the steps to do something specific.

Multipurpose image editor

It not only allows you to edit the screenshots but you can edit any image inside it.

So this is one image editor you would require to install on your computer if you have to do manipulations in other photos as well.

For example, you can take photos from your DSLR camera open it in Snagit image editor and then resize it in just a few clicks.

Snagit image editor is particularly helpful if you are a web publisher or someone who works in social media management. It gives an easy option to write down something on an image before sharing it.

You can also go more aggressive by changing and the style of image you have created. You can choose from different tiles for perspective, half-torn page, reflection etc.

Create Memes and other social media friendly images

If you select the option to keep it running in the background you can easily access it in just a single click which makes it super easy and convenient to use it as a tool to create a MEME or other social media friendly images.

The newer version Snagit 2020 comes with a bunch of templates, one of the template is MEME template, where you have to drag and drop in an image, write something about and below it, and save to share on social media.

Create PowerPoint presentations, eBooks, Infographics

If your presentation requires you to Grab a screen of a website or simply a part of something available on the web you can grab a screenshot using does Snagit tool and then make edits using the Snagit editor.

To make it even more professional, you can use the templates insights 2020, where you can use more than one image on a single page and then save that page as jpg, png, bmp or even .pdf.

The Template feature of Snagit 2020 is particularly helpful for creating presentations in ebooks, and even infographics.

Download Snagit Free

With all these fantastic features and tools in just one app, the Snagit bi TechSmith comes with a price. Fortunately, it is quite affordable at only $49 for an individual license.

Snagit also gives one-month free trial with no limitations.

Download Snagit from Techsmith

Snagit vs Native Screenshot Feature on Mac and PC

Although I have already written plenty of things about Snagit app, which is my favourite tool for creating screenshots for tutorials on my blog, here is a quick comparison of the Snagit versus The native screenshot feature on Mac and PC.

I hope this will give you a fair understanding whether or not you would benefit from Snagit or whether or not you should invest your money in buying the Snagit app if you can achieve what you are looking for with the native screenshot feature on Mac and PC.

First, let’s talk about how to take a screenshot on a Mac and a PC

Native screenshot feature on Mac

In Mac, you can either take the screenshot of the entire screen or take a screenshot of a selected portion of your screen.

Take a screenshot of the entire screen

  1. Press Shift-Command (⌘)-3. (you’ll hear a camera shutter button sound)
  2. Find the screenshot as a .png file on your desktop.

Take a screenshot of a selected portion

  1. Press Shift-Command-4. The pointer changes to a crosshair.
  2. Move the crosshair to where you want to start the screenshot, then drag to select an area.
  3. While dragging, you can hold Shift, Option, or Space bar to change the way the selection moves
  4. When you’ve selected the area you want, release your mouse or trackpad button. To cancel, press the Esc (Escape) key before you release the button.
  5. Find the screenshot as a .png file on your desktop.

Take a screenshot of a window

  1. Press Shift-Command-4. The pointer changes to a crosshair.
  2. Press the Space bar. The pointer changes to a camera.
  3. Move the camera over a window to highlight it.
  4. Click your mouse or trackpad. To cancel, press the Esc (Escape) key before you click.
  5. Find the screenshot as a .png file on your desktop.

Native screenshot feature on PC

You can take the screenshot using the Print Screen key on your keyboard that resides on the top right-hand side.

In most laptops, it works in a combination of Function Keys (fn), So, you will have to press fn+ Print Scr to capture the entire screen.

Then open Paint and press Ctrl + v on your keyboard, this will paste the captured screen on the canvas inside the paint app.

You can then make any edits you want, like cropping a particular area, doodling over the screenshot and then You can then save it on your PC.

If you are going to email the image or post it online, you should save it in .jpeg format instead of .png format because the size of your image will be small and it will quickly get uploaded if you have a slow connection.

Taking screenshots on both Mac and PC is not tough; you can learn the keyboard shortcuts mentioned above and create screenshots pretty easily.

You won’t specifically need a third-party app like Snagit just for taking screenshots, if you have already invested in a photo editing app, such as Photoshop, or even free photo editors such as GIMP.

Even if you do not have God Photoshop or GIMP, you can still use free image editing web apps, like imageonline.co, pixlr.com/editor etc.

Taking Screenshots using Snagit

Navigate as it is available off for both PC and Mac give few different ways to take screenshots, and since it visually shows you which portion you want to travel from your computer screen, it makes it easy to take the screenshot which speeds up the process.

Apart from using the keyboard shortcut, which is the easiest way, you can also use the icon in the Quick Launch bar, or merely the capture button in the Snagit app to capture a screenshot.

The best part of using screen Snagit for taking a screenshot is that it automatically opens the screenshot in the Snagit editor which is a multi-purpose image editor.

You don’t have to go and look for the screenshot and then import it into your image editor to start working on it, so it reduces multiple steps between taking the screenshot and editing it.

And since Snagit is designed explicitly for creating screenshots does negative, there have all the tools which help you in hands your screenshots to make them look professional. There are a variety of use cases where you can benefit from Snagit. Taking a screenshot is just part of the workflow.

You can use the screenshot and customise it for your PowerPoint presentation for web tutorials, by using arrows, shapes, dialogue boxes, numbers, and much more.

Apart from that it also can be used as a told to resize photos compress photos do small manipulations add text to them, about all the features in detail in this dedicated article, about Snagit by techsmith.

So, if you are someone, who spends their day job in front of a computer, and has to work with a lot of screenshots or images, and your work ranges from social media management to providing technical support, Snagit can enhance your productivity.

The individual licence costs just $49, but you can also Downloads Snagit Free as it offers one-month free trial without any limitations.