Need to isolate vocals or instrumental music from an audio track? Thanks to advancements in AI, specialized web apps can magically separate vocals and music with just a few clicks.
Check out the Video
Check out VocalRemover.org
VocalRemover.org is a free web app powered by AI that splits audio into two isolated tracks:
Vocals only
Music/instrumentals only
It works by analyzing the unique characteristics of vocals compared to accompanying music. The AI then intelligently extracts the voice, leaving just instruments behind.
To use it:
Go to VocalRemover.org
Upload your chosen audio file or enter a YouTube link
Click “Separate Vocals” and wait for the AI to work its magic
Download the isolated vocal and instrumental tracks
VocalRemover does an shockingly good job isolating the vocals, providing studio-grade splits.
Use Cases for Vocal Removal
There are many creative uses for stripping vocals from music:
Make custom karaoke tracks by removing vocals from popular songs
Sample acapella vocal riffs for remixes or music production
Create meme-worthy clips from movie dialog with music removed
Produce soundtrack instrumentals for video projects
Remove background music from audio recordings to isolate speech
For Content Creators
For YouTubers, streamers, podcasters and other content creators, VocalRemover is an invaluable tool. You can erase background music from clips flagged for copyright issues. Or liven up stale footage by laying new music underneath.
The AI vocal/music separation opens up new creative possibilities for audio and video editing. And it’s completely free!
I have previously shared a similar type of trick to remove background music from vocals. The tool is called Descript.
While descript provides similar vocal isolation capabilities, its limited free plan makes VocalRemover.org an appealing forever-free alternative for casual users.
By leveraging the power of AI, tools like VocalRemover make tasks like music production, editing, and content creation far more accessible. The future of AI-assisted creativity is bright!
If you are a content creator, check out our Content Creator Guide series to make better content.
As a parent and a member of your family, you may not want certain sites to be accessible to kids or even grown ups on your household.
In today’s age, when everyone has their own devices, keeping a tab on everyone’s online activities is quite hard. Surely, you can make a set of rules to be followed. Here are some general tips that may be helpful.
Educate Your Kids About Online Safety
Have open conversations with your kids about online safety and setting boundaries on what sites they visit. Establish shared guidelines.
Use parental control features built into your operating systems and devices. All major platforms like Windows, iOS, Android have options to restrict access.
Install family safety apps or DNS filtering services designed to block unsuitable material. Research reputable services.
Enable safe search settings on browsers, YouTube, and search engines to filter explicit results.
Place internet-connected devices in open family areas rather than private spaces.
Set screen time limits on devices to control exposure.
Monitor browsing history periodically, with your child’s knowledge.
The most effective strategies involve education, communication, and mutual understanding.
Despite doing all this, but content, not suitable for kids, will still find its way to their devices. This is why you need to use solutions available to block these websites.
Using DNS Filtering for your Home Wi-Fi
DNS (Domain Name System) filtering allows you to block certain websites and content by routing domain requests through a filtered DNS server.
Rather than connecting directly to the website’s IP address, requests first pass through the filtering DNS which can deny access.
Benefits of DNS Filtering
Some benefits of setting up DNS filtering on your home WiFi include
Blocking access to inappropriate, dangerous or distracting sites like pornography, gambling, etc.
Safeguarding children from viewing adult content and predators.
Increased privacy by blocking ad trackers and malware domains.
Ability to set filtering rules and whitelists for each device.
Works across all connected devices and browsers that use the WiFi.
Many free and paid filtering server options.
How to Set Up DNS Filtering
To enable home DNS filtering, you’ll need to:
Choose a filtering DNS provider like OpenDNS Home or CleanBrowsing.
Configure your router’s DHCP settings to assign the filtering DNS servers rather than your ISP’s servers.
Set your router’s DNS settings itself to also use the filtering servers.
With the right DNS filtering service configured on your home router and WiFi, you gain better control, security and privacy across your networked devices.
Do it on Individual Devices
If you don’t want to put restrictions on the entire home network, you can block sites, on individual devices.
For Android Devices
Go to your Android phone’s settings. Search for Private DNS and open it. Tap on Private DNS and type in DNS Provider Hostname ‘family-filter-dns.cleanbrowsing.org‘. Save it. Now, no adult website will open.
For Apple Devices
To set this in your iPhone, go to Cleanbrowsing.org/filters Scroll down and tap on Family Filter. Here, you have to do Download Configuration. Press Allow.
Then, go to iPhone’s settings. Go to Profile Download and tap on Install. Install again and done. No wrong websites will open.
If your kids are under 13 years of age, and they have their own devices, you should consider creating their Gmail accounts, which will let you control ther devices as parents. It has more control than just blocking unwanted sites. Check out detailed article.
Losing a smartphone is always a Nightmare especially when does not want his expensive and you have got a lot of personal data on it.
Thanks to the technology available, it is now possible to track a mobile phone, and thanks to Google for making it easier than ever before so that anyone can track their own mobile phone using their Google account credentials.
Before we go any further to talk about how you can track your lost Android mobile, I would like to mention a few important things that will allow you to use this feature.
✔ You should have a Google account added to your Android smartphone. This is very likely that you do have Google account added if you have used Play Store to install apps, navigated using Google Maps and whatnot.
✔ Just make sure you know your Google account login credentials because you will be needing them to login clear Google account from PC.
✔ The other thing is that, in order for this feature to work, your phone needs to be connected to the internet. Fortunately, with mobile data getting cheaper and more accessible majority of us have got at least the mobile data on, on our smartphones.
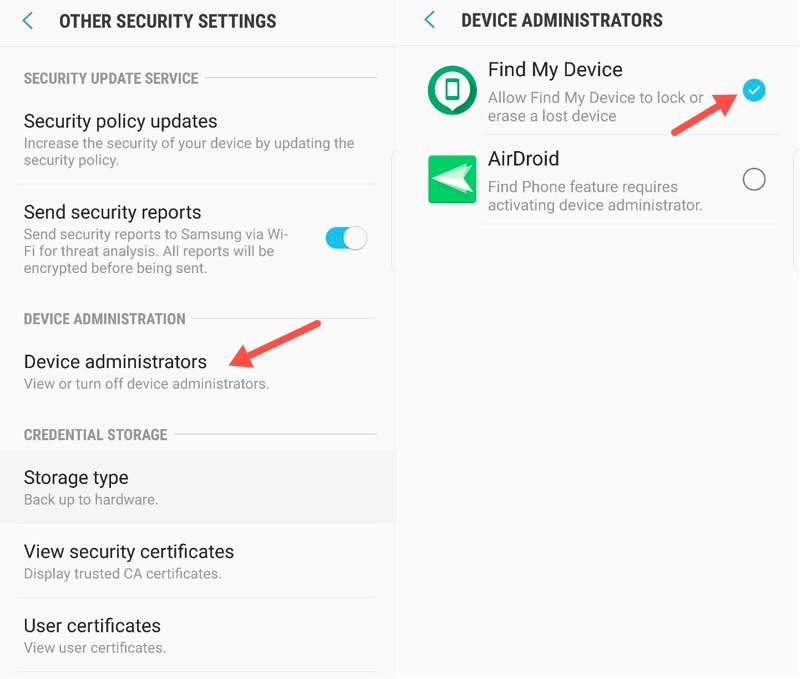
Enabled ‘Find My Device’ on Android ASAP
You need to have this enabled before it gets lost. If this is not enabled, this method will not work.
You can enable Find my Device by going to the security section from *Settings then tap on Device manager. You will find the ‘Find my device’ option and make sure it is checked.
*This may be different depending on the smartphone OEM.
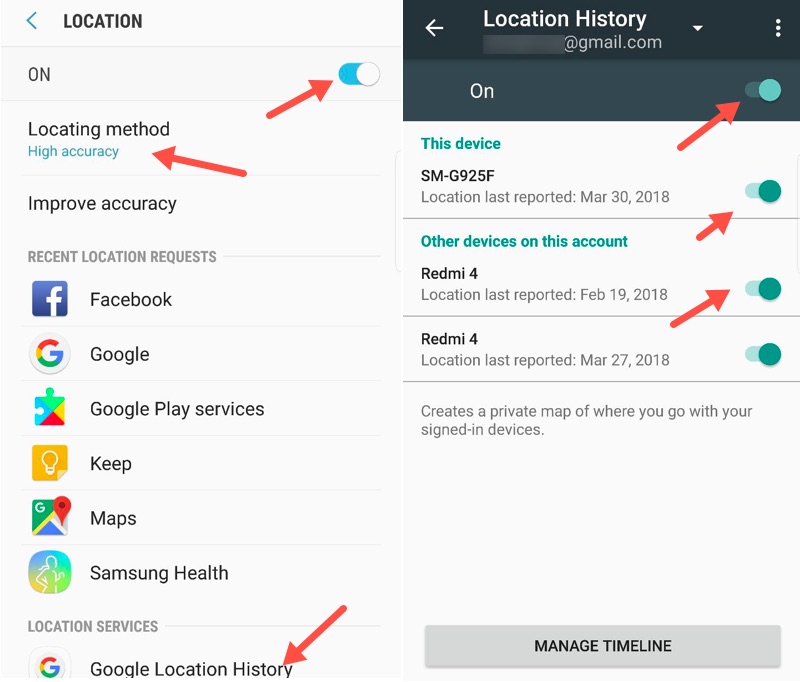
Tap on back to go back to the settings area again then tap on ‘Location’, and make sure it is turned on with location method being ‘high accuracy‘.
Below the same window, you will find ‘Location history‘ make sure it is also turned on. If you have multiple devices signed into a single Google account, make sure all your devices are turned on for location history.
Note: Mostly all these settings are turned on by default, but it is better to verify it to avoid any mishappening.
How to track your lost Android mobile using Google find my device manager
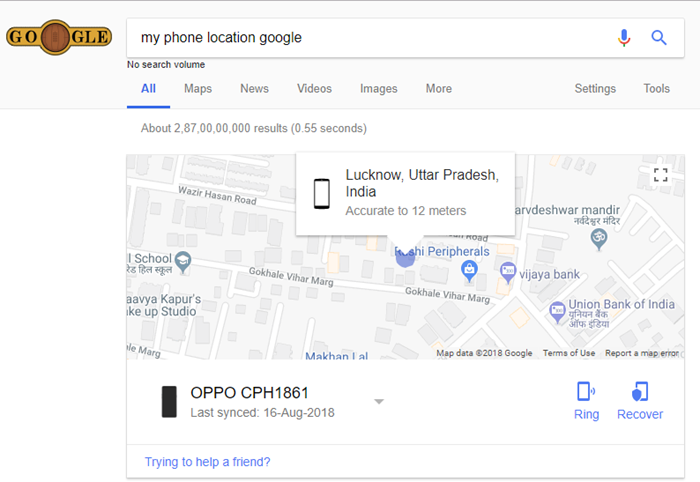
Open Google Chrome Browser on your laptop or PC, and make a Google search something like ‘find my phone location‘ or, ‘track my phone‘. You will find the option to track your mobile phone right on the search result.
You get two direct options one is to Ring your smartphone, which will bring it for next 5 minutes (even if your phone is on silent mode),
This is quite helpful even if your phone is not lost and you just looking at it in your home and it’s on silent. Using this trick you can bring your phone and find it, I guess 5 minutes are more than sufficient to turn your phone upside down to look for the smartphone.
Anyway containing to the tutorial,
You can click on the ‘Recover’ option on the search result to find more information about your smartphone. Alternatively, you can click on this link to go directly into Google Find My Device Manager.
You can also type directly in your browser address bar, it would be ⟶
myaccount.google.com/find-your-phone.
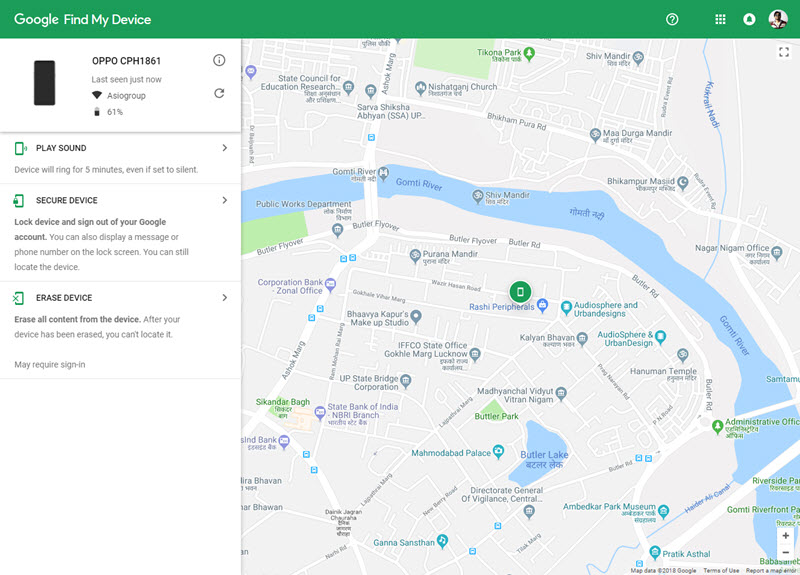
In Google Find My Device Manager, you can locate your smartphone on Google Maps to a very high accuracy.
Please note that Google would show the last location recording when the internet was enabled on the smartphone.
You can also check whether the smartphone is connected to a Wi-Fi and how much battery is left on the smartphone.
You can Ring your phone,
You can lock it down and log out of your Google account, and,
You can even erase all the data on your device remotely, which would be the last resort and it’s just the data you are worried about.
Check out this video tutorial showing you how this feature works.
If you’re looking to track your lost iPhone you can check out this article.
Losing your mobile phone can be extremely stressful. Your private data, accounts, and contacts are suddenly compromised. Thankfully, there are steps you can take to protect your information and prevent misuse if your device goes missing.
Act Quickly to Remotely Lock Your Phone
Immediately remote lock your phone using the device manager app. For Android phones, use Find My Device. For iPhones, use Find My iPhone.
Remote locking secures the device with a passcode and displays your contact details on the lock screen. This prevents access and alerts good Samaritans about returning your phone.
Temporarily Suspend Service to Disable Functionality
Contact your mobile carrier quickly and request suspension of service for the SIM card in the lost phone. Temporarily deactivating service renders the phone unusable for calls, texts, and data.
This is crucial to prevent misuse of calling, messaging, and consuming mobile data on your account. Most carriers can instantly suspend service once notified.
Erase All Personal Data Using Remote Wipe
If there is no hope of recovery, remotely factory reset the phone using your device manager app. This erases all accounts, contacts, apps, media, and other private user data.
Wiping the data ensures your info doesn’t fall into the wrong hands if the device isn’t retrievable. It’s an essential safeguard of your privacy.
Change Passwords and Beef Up Account Security
Take action to protect online accounts that may have been logged in on the lost device:
Update passwords on accounts like social media, email, and financial apps.
Watch for unauthorized access attempts and review account activity regularly.
Removing Access and Unlinking the Lost Device
Go through accounts connected to the lost phone and unlink it:
Remove the phone number from online accounts like social, shopping, and other apps.
On iPhones, use Find My iPhone to unpair the missing device from your iCloud account.
On Androids, remove device access via your Google account settings.
Inform Contacts About the Missing Phone
Let friends, family, and coworkers know about your missing phone in case they are contacted fraudulently from your number.
Warn them not to send sensitive info or engage with any suspicious communications from your device. This helps prevent social engineering attempts.
By taking quick, proactive measures, you can mitigate risks and prevent negative consequences if your mobile phone is lost or stolen. Act fast to lock it down, wipe it out, and wall it off.
5 Ways to Retrieve Your Mobile
After you have done the following steps mentioned in this article, you can try retrieving your mobile phone.
If there is mobile data connection on your mobile, all is not lost. You might still be able to retrieve your mobile phone. Check out this article that goes in detail about different ways you can try retrieving mobile phone.
How to Track Your Lost Android Mobiles
If you have lost your android mobile phone, you might be able to get your smartphones location using google feature called find my Device.
For this to work, you will require the same google account which is locked into your android mobile. Use a computer and or different mobile phone to access find my device. Do a google search with the keyword ‘Find my device’ and click on the first link, or directly click on this link. Check out this article for a detailed step by step guide
How to Track Your Lost iPhone
Similar to the Android’s ‘Find My Device’, the iPhone also has a feature called ‘Find My’. In fact, it’s a better than Android’s ‘Find My Device’, because even when your iPhone’s battery dies, some amount of battery is reserved to make the phone findable.
Which means, you will be able to track the exact location of the lost iPhone. There are also some third party apps that can help you find your lost iPhone.
Check out this article that goes in detail about different apps that will help you get your iPhone back.
Chromebooks saw huge growth over the past few years as budget-friendly, web-focused laptops. But with sales slowing in 2022, is a Chromebook still a smart buy in 2023? Let’s examine their pros, cons, and outlook.
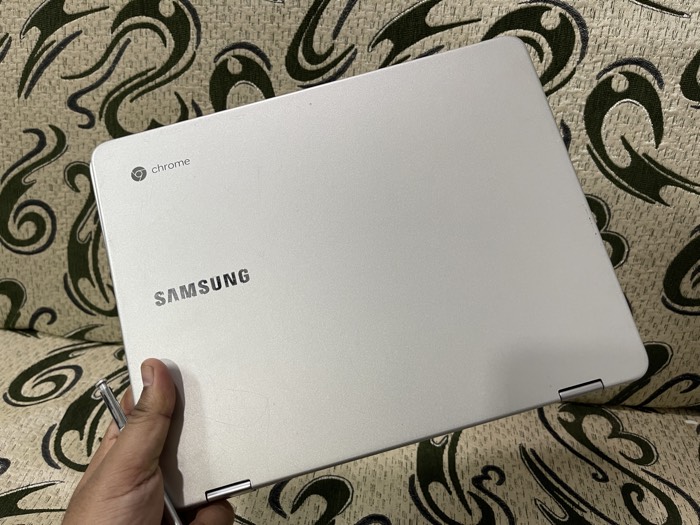
They were quite a thing a few years ago. I loved them, loved them so much that I bought three of them. I still have the Samsung Chromebook Plus.
But I hear the term ‘Chromebooks’ a lot less in 2023. Are people done with it? are there any better alternatives? or are Tablet PCs a true replacement? we find out in this article
The Appeal of Chromebooks
Chromebooks are laptops running Google’s Chrome OS operating system. Their key advantages include:
Low cost, with models starting around $150-$200 new. Great value.
Instant boot-up and software loading thanks to solid state drives.
Long battery life, commonly 10+ hours. Great portability.
Auto sync and backup to the cloud. Easy accessibility.
Regular OS and security updates direct from Google. High reliability.
These factors made Chromebooks a hit, especially in education. They provide a streamlined experience for basic web browsing and Google Workspace apps.
Slowing Sales and Competition
However, after years of growth, Chromebook shipments slowed in 2022. Contributing factors include:
Weakened demand from schools as education budgets declined post-pandemic.
Supply chain constraints hampering production and inventory.
More competition from discounted Windows laptops and tablets.
While still maintaining 13-15% market share, Chromebook’s momentum has slowed. Tablets and low-cost PCs are luring some budget buyers.
Chromebooks Launched in 2023
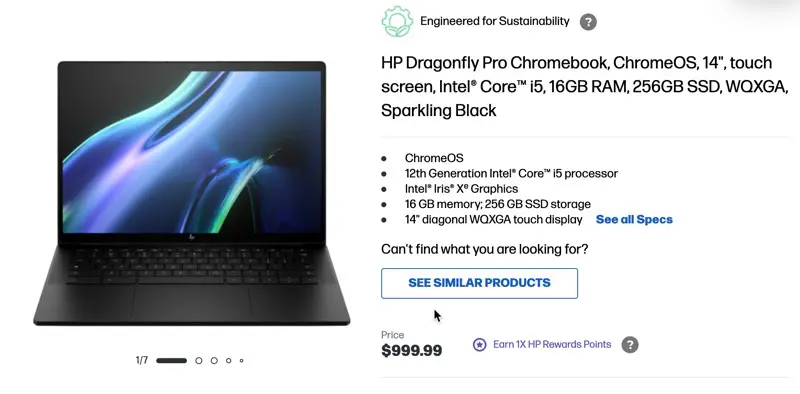
HP Dragonfly Pro Chromebook
The HP Dragonfly Pro Chromebook is the best overall Chromebook. It is a premium device with a sleek design, powerful performance, and long battery life. It also has a number of business-friendly features, such as a MIL-STD 810G durability rating and a fingerprint reader.
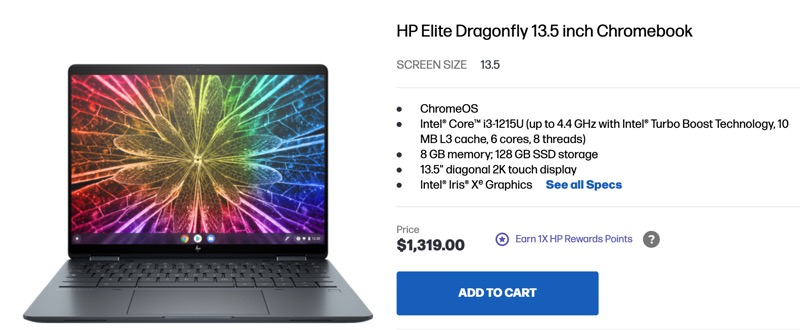
HP Elite Dragonfly Chromebook
The HP Elite Dragonfly Chromebook is another great option for business users. It is similar to the Dragonfly Pro, but it has a slightly lower price tag. It also has a number of security features that make it ideal for use in the workplace.
Acer Chromebook Spin 714 (2023)
The Acer Chromebook Spin 714 (2023) is the best Chromebook for most people. It offers a good balance of performance, features, and price. It has a 13.5-inch touchscreen display, an Intel Core i5 processor, and 8GB of RAM.
Samsung Galaxy Chromebook 2
The Samsung Galaxy Chromebook 2 is a great choice for media consumption. It has a beautiful 13.3-inch AMOLED display and a powerful Intel Core i5 processor. It also has a built-in S Pen for taking notes or drawing.
Asus Chromebook CX5601
The Asus Chromebook CX5601 is a good option for students. It is affordable and has a long battery life. It also has a 15.6-inch display, which is larger than most other Chromebooks.
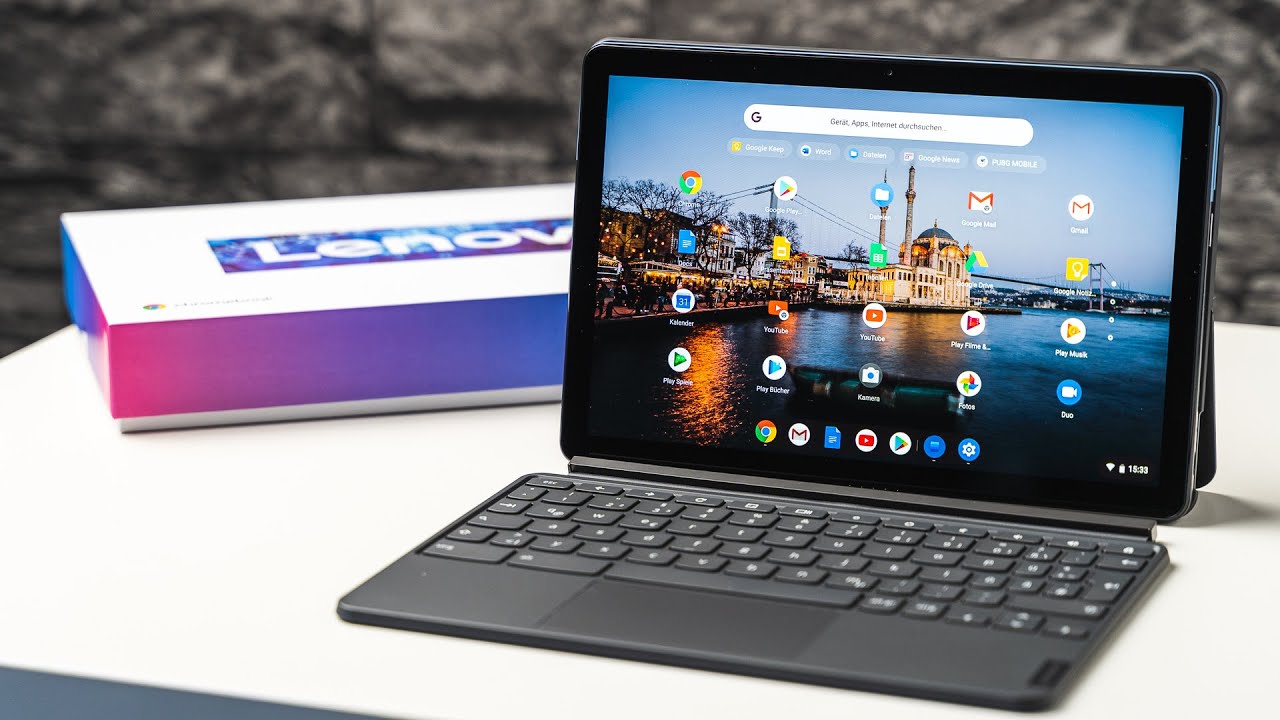
Tablets are Becoming More Like PCs
Apple’s iPads have reduced the line between a Tablet PCs and an actually PC or Laptop. With a range of accessories available for Tablets like iPad, Samsung Tab and Tabs from other OEMs, the Tabs are capable of doing a lot more than they used to do a few years ago.
Google’s itself is working on their Pixel Tab, powered by Android.
Here are some tablet PCs with detachable keyboards that can serve as alternatives to Chromebooks
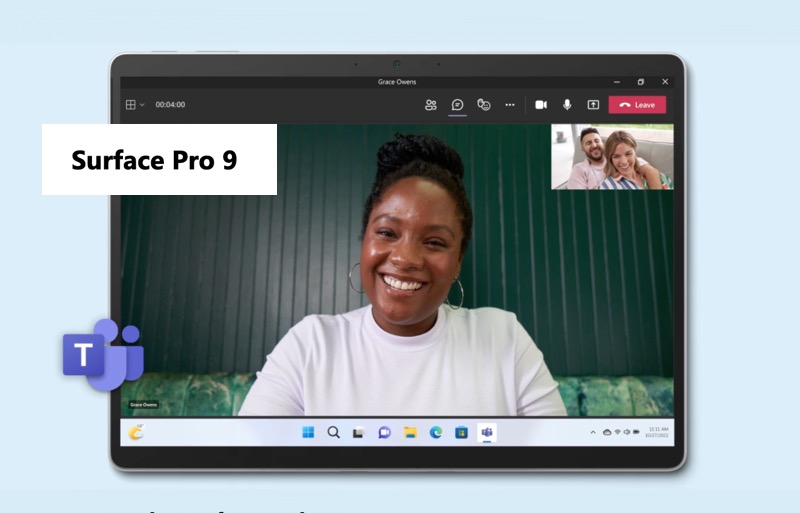
Microsoft Surface Pro
The Surface Pro tablets run Windows and have detachable keyboard covers and pen input. Great laptop replacement.
Microsoft Surface Go 3
More affordable and portable Surface tablet with keyboard cover option. Runs full Windows.
Apple iPad Pro
Powerful iPadOS tablet with keyboard case and Apple Pencil support. Great for creative work.
Lenovo Yoga
2-in-1 tablets with 360 degree hinges and keyboard. Run Windows. The Yoga Book is especially slim.
HP Elite x2
Business-oriented tablet with keyboard case and Windows OS. Good performance.
Samsung Galaxy Tab S7/S8
Android tablets with attachable keyboard covers and S-Pen. DeX mode for productivity.
Asus Transformer – Windows tablets with docking keyboard design. Transformer Book series are high performers.
Acer Switch Alpha 12
Detachable 2-in-1 tablet with keyboard dock. Fanless. Runs Windows.
Google Pixel Slate
Now discontinued but can still find them. Detachable keyboard and pen input. Runs ChromeOS.
It can be embarrassing if you send a message to someone on WhatsApp that you regret later, and WhatsApp it.
This is why they introduced the Delete for everyone feature. With the feature, users were able to delete the messages they’d already sent under the 7-minute window.
If you’ve spent more than 7 minutes sending the message, the feature can’t help you, because it won’t be there. You have now 2 days to request to Delete the message.
Watch the Video
It has saved me from so many bad situations when I commit to something in a flow, but then delete the message and replace it with another one, a diversion message to avoid that awkward moment.
It makes people think the deleted message might be a typo or something similar to the one they’re reading but a better rephrased one.
What happens when you delete a message that has a single tick ✅?
Let’s just understand what different ticks mean, if you already know, you can skip this part.
Single tick ✅ means, the message you sent, has gone to the WhatsApp server, and has been saved there,
Double tick ✅ ✅ means, the recipient’s Whatsapp has internet access and the message has been delivered.
Blue double tick ✅ ✅ means, the recipient was online on WhatsApp and they’ve read the message.
You have the feature to delete the message in all of the three stages as long as it’s under 7 minutes.
And in all cases, the message will be deleted, and “Deleted for everyone” will be shown like in the screenshot. The recipient will know a message has been deleted.
Some people are confused as to whether this will be displayed if it’s just a single tick ✅ since it’s not been delivered yet.
But the message is already on the servers, it just has to be delivered to the recipient’s phone.
So, it appears to let them know a message was se deletent but it got deleted.
How to Delete. A WhatsApp Message
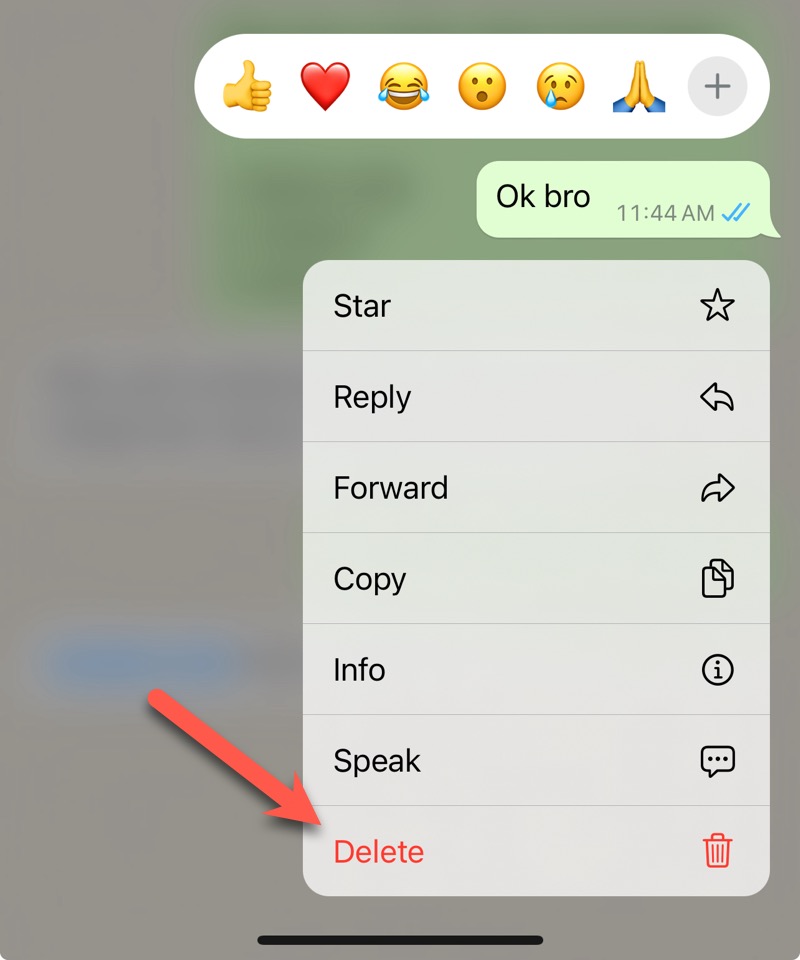
If it is not clear already here is how you can delete our message after sending it. Long press on the message you want to delete, you will get these options in the popup, tap on delete.
On the next screen tap on delete icon again and select Delete for everyone. And the message will be deleted.
How to Delete Multiple Messages?
If you want to delete multiple messages you can select other messages after selecting one message. After selecting multiple messages, tap on Delete icon. And after that, tap on Delete for Everyone.
What happens if you block the person temporarily?
The outcome would be the same, doesn’t matter if you block or not. Once the message is on the WhatsApp servers, it goes there.
Capturing sharp, blur-free photos and videos requires keeping your camera steady. Both optical and electronic image stabilization help reduce shake, but work in different ways. Here is an in-depth look at how the two stabilization technologies compare.
What is Optical Image Stabilization?
Optical image stabilization (OIS) is a hardware solution that physically moves lens elements to offset camera shake. Here’s how it works:
Gyroscope sensors inside the camera detect tilt and motion.
Special actuators can tilt or shift lens elements on two axes.
When camera shake is detected, lenses shift in the opposite direction to stabilize.
By stabilizing the optics internally, OIS allows slower shutter speeds without blur from handshake. It works for both photos and videos.
OIS has no image quality penalty since stabilization happens optically. But the gyroscopes and actuators require space, adding size and cost.
Watch the Video Explanation
What is Electronic Image Stabilization?
Electronic image stabilization (EIS) uses a software technique to smooth out video footage. It has two main steps:
Analyzing pixel data across frames to detect camera shake.
Shifting the video frame position slightly to compensate for shake.
Rather than moving optics, EIS shifts the digital video content itself. This introduces a minor crop, resulting in some potential image quality loss.
EIS relies on processing power rather than physical components. So it’s easy to implement in smartphones and video editing apps.
Comparing OIS and EIS
Here is a comparison table for Optical Image Stabilization (OIS) vs Electronic Image Stabilization (EIS):
Feature
Optical Image Stabilization
Electronic Image Stabilization
How it Works
Physically shifts lens elements to offset camera shake
Digitally shifts video frames to offset shake
Based On
Hardware (gyroscopes and actuators)
Software algorithm
Stabilizes
Still photos and video
Mainly video
Quality Loss?
No
Minor loss from digital processing
Effective For
Low light & slow shutter photos
Smoothing minor bumps in video
Found In
Lenses, camera modules
Smartphone and camera processors
The takeaway? OIS is critical for crystal clear handheld photos. But combining both OIS and EIS gives the smoothest, steadiest video possible.
Best Smartphones with OIS Feature?
If you are looking for a smartphone for better photography and mobile film-making, you should check these smartphones.
Suppose you take a lot of videos from a Smartphone, Personal, YouTube, or Facebook. If you are into Mobile filmmaking, having Optical Image Stabilization (OIS) in a smartphone can drastically improve the quality of the video.
The OIS was an exclusive feature that was only available on high-end smartphones. Thankfully, there are a few smartphones that are still affordable and have got this feature.
I wrote this article where I mentioned some affordable smartphones with the optical image stabilization feature, and it was pretty popular among mobile filmmaking enthusiasts.
Because, with a bit of practice, you could achieve smoother shots, which you could get using a Smartphone Gimbal.
But, now that the Smartphone Gimbal prices have come down, and the costs of premium smartphones having optical image stabilization have become overpriced, it doesn’t make sense to go for a higher-end smartphone if you are on a budget. Check out the article if you are on a budget.
Check out the list of Smartphones having OIS
These are a few generation old smartphones, but nothing drastic has changed in the smartphone market over the years. So, with the one or tow year old hardware, you can still use these smartphones without any issues.
*The list is in no particular order
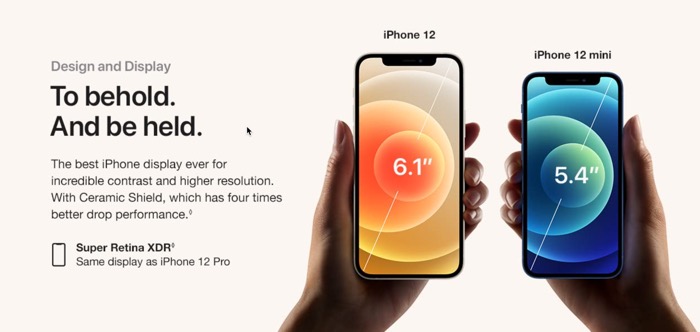
iPhone 13 Mini
If you are strictly looking for a smartphone with a great camera under budget, then iPhone 12 mini can be considered. Although it’s a few generations old, the cameras in iPhone 12 was remarkably better than the cameras in iPhone 11.
The 64GB variant is more affordable than the OnePlus 9, the most value-for-money flagship android smartphone available in the market, with a fantastic set of cameras.
Sadly Apple didn’t launch an iPhone 14 mini, but you can still go for iPhone 13 mini if you ca nraise your budget a little high. The iPhone 12 mini is still, which has the same set of cameras the iPhone 12 has got.
The only complaint of iPhone 12 mini owners is its battery life, which can be solved using a power bank. Considering it is tiny, it is an excellent device for taking videos of high quality.
Poco F4 is actually a flagship smartphone and a sub brand of Xiaomi, but Xiaomi is known for its affordability. That’s why despite being packed with features, the Poco F4 only costs $450.
The Poco Smartphones are something else, I mean I bought the Poco F1 in 2018 and it’s still with me, is able to handle heavy games and runs smooth. Image getting this one, which is actually highest specs possible for a smartphones in 2023.
It has a 6.72-inch FHD+ display, Qualcomm Snapdragon 695 5G processor, 6GB/8GB RAM, 128GB/256GB storage, 50MP main camera, 8MP ultrawide camera, 2MP macro camera, and 16MP front camera. It also has a 4500mAh battery with 33W fast charging. Price: $299.
Like other Flagships on the list, the Zenfone 7 has all the high-end specs, a great camera, and good looks. Unlike every other smartphone with Notch, Punch Hole design, Asus gives you a clear all-screen experience with its unique flip camera mechanism.
The Zenfone 7 doesn’t have the OIS, but the gyro-based EIS is pretty impressive. I am still using the Asus 6z as of 2021 because I love the phone, and sadly Asus didn’t launch the phone in India. So alternatively, you can buy an Asus 6z in India. It’s still that great.
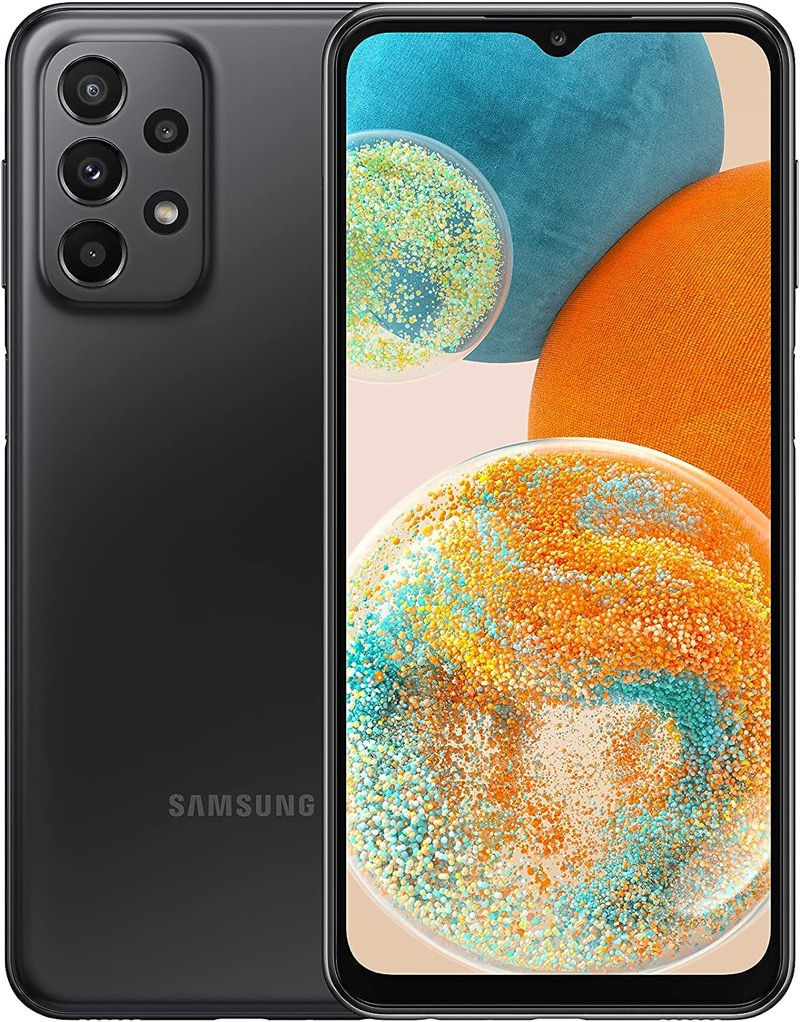
It has a 6.6-inch FHD+ display, MediaTek Dimensity 700 5G processor, 4GB/6GB RAM, 128GB storage, 50MP main camera, 8MP ultrawide camera, 2MP macro camera, and 5MP depth sensor. It also has a 5000mAh battery with 25W fast charging. Price: $299.
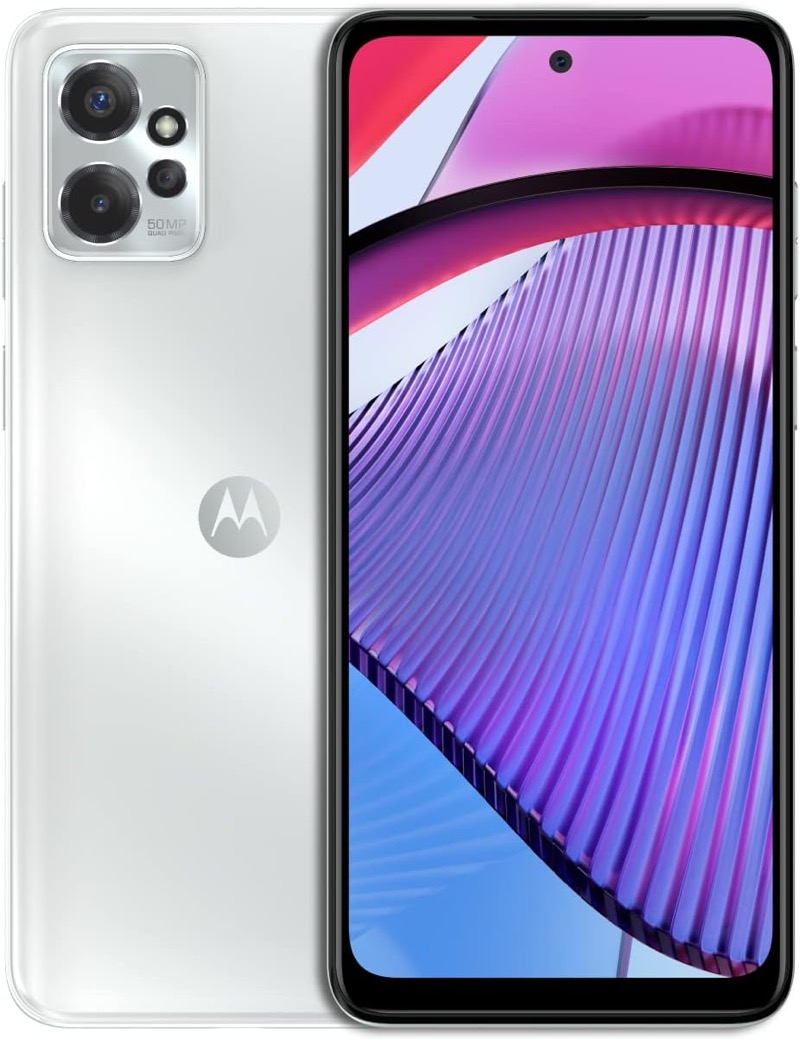
It has a 6.8-inch FHD+ display, Qualcomm Snapdragon 695 5G processor, 6GB/8GB RAM, 256GB storage, 50MP main camera, 8MP ultrawide camera, 2MP macro camera, and 2MP depth sensor. It also has a 1080p OLED display, a stylus, and a 5000mAh battery with 10W fast charging. Price: $249.
If you do not find these smartphones a good buy or outside your budget, you can still shoot high-quality videos with only EIS smartphones. Or get a Mobile Gimbal that’ll take care of the OIS part and works with almost every smartphone.
I have posted a few videos I shot on my Instagram account using my phone. Follow me on Instagram to see it yourself.
Lately, more smartphones are launching in the market with the EIS feature. You can find it in the Mid Range segment of smartphones from Xiaomi and other companies. You can go through this article to find the difference and decide for yourself.
Instagram limits clickable links to only User Bio, for security reasons and to avoid spam. Surprisingly, Youtube has also followed suit, and stopped clickable links for Youtube Shorts.
Anyway, let’s get back to the topic.
You may come across non-clickable links in captions or comments that you want to access. Thankfully, here’s a clever workaround to open these links from Instagram posts.
Watch this Short Video
The Problem with Non-Clickable Links
When scrolling through Instagram, you’ll likely see posts with links in the image description or comments. But tapping these links does nothing – they aren’t clickable or tappable.
Instagram disables links outside of bios to prevent spam and phishing attempts. But this also blocks users from accessing useful links that appear in posts.
The @mention trick used to open profiles from captions also doesn’t work for links. So iPhone owners need another solution to access non-clickable Instagram links.
Using Screenshots to Open Links
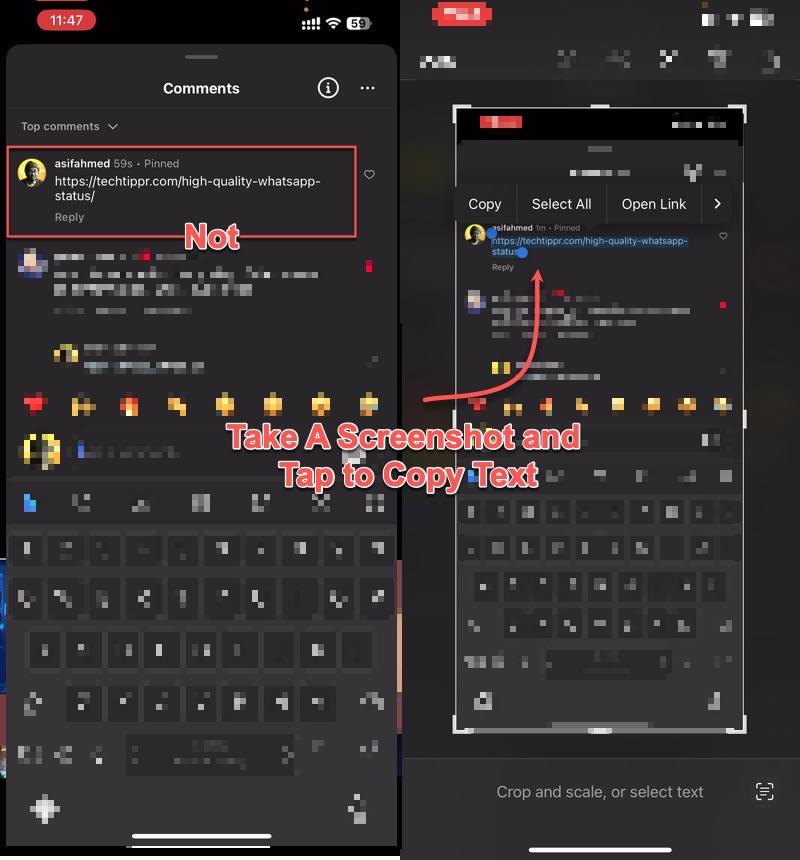
Here’s the trick: take a screenshot of the post containing the link, then open the link from the screenshot.
For iPhone Users
On iPhone, take a screenshot of the Instagram post with the non-clickable link visible. Crop the screenshot so only the link is shown.
Open the screenshot in your Photos app. Press and hold the link shown in the screenshot. A menu will appear with the option to “Copy Text from Image”.
Tap this option. The link text will be extracted and copied. Now when you paste it into Notes or Messages, the link will be clickable.
This handy workaround is powered by a new iOS 16 feature that recognizes text in screenshots and makes it selectable.
So iPhone users on iOS 16 or later can easily convert non-clickable Instagram links into accessible, clickable links. It takes just a few taps.
While not an ideal system, it provides temporary access until Instagram hopefully implements clickable captions to match their feed links. In the meantime, leverage your iPhone’s OCR screenshot power to open unclickable Instagram links!
For Android Users
Android mobile phone also office similar functionality. It has got a feature called Google Lense, which is also integrated in Google Photos. So the process of taking the screenshot would be similar to that of iPhone.
Once you have taken the screenshot open it in Google Photos, then tap on the google lens icon appearing at the bottom bar of Google Photos app. This will use android ocr technology to find out elements in the screenshot. And you will be able to highlight and copy the text, including the hyperlink.
When you have copied the link, you can open your mobile browser and paste the link in the address part to access the link.
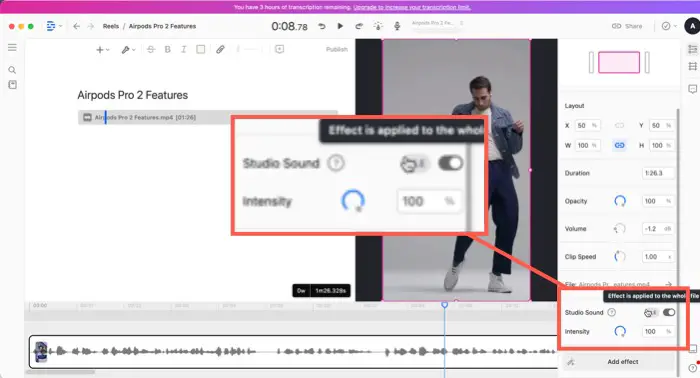
InShot is a versatile video editing app for mobile. It provides professional tools for trimming clips, applying effects, and more.
I create almost all my Instagram Reels using the InShot app. I love the convenience of being able to edit videos on mobile phone. That’s why I created a series called mobile filmmaking where I showcase tips, tricks and resourceful tools for people who want to create contact using their mobile phones.
InShot is a paid application, but it also allows people to use it for free, However, it adds its logo watermark when exporting unless you upgrade.
Here’s how to remove watermarks and save videos in HD from InShot for free.
Watch the Video
Getting Started in the InShot App
First, install InShot from the App Store on your iPhone or Android device. Open the app and tap “Video” to start a new project.
You’ll need to allow InShot access to your photo gallery. Now you can browse and select a video clip to edit.
Enhance and Edit Your Video
InShot provides extensive editing and enhancement capabilities like:
Trimming clips and rearranging segments
Adding text, stickers, and animated overlays
Applying filters, color grading, and other visual effects
Inserting background music or voiceovers
Edit your video however desired, whether adding stylish effects or splicing segments. Tap the checkmark when finished.
Removing the Watermark
By default, a prominent InShot watermark is applied in the bottom corner. To remove it:
Tap the X icon on the watermark preview.
Select the “Free” removal option.
Watch a 30-second video ad to completion.
After the ad, the watermark will be gone!
Exporting Your Video in HD Quality
With the watermark removed, go to the export screen. Make sure to select:
“HD” for the highest 1080p resolution.
“MP4” for universal format compatibility.
“Maximum” bitrate for minimal compression.
This exports your video in full quality up to 1 GB in size. The file will save to your camera roll for easy sharing.
Avoid Paying for InShot Pro
Watching short ads is a small price to pay to unlock InShot’s pro exporting features for free. You get Hollywood-style editing tools and indistinguishable quality without the monthly subscription.
With these simple steps, you can create spectacular watermark-free videos with InShot at no cost. Polish your clips and share them in stunning HD resolution!
If you are into mobile film making you should check out these free video editing apps available for Android and iPhone
Adding clickable timestamp chapters to your YouTube videos makes them more engaging, search-friendly, and easy to navigate. But manually entering timestamps for chapters can be extremely tedious. Here are two methods to simplify the YouTube chapter creation process – one paid and one free.
Watch the Video
Method 1: Using the TubeBuddy Extension (Paid)
TubeBuddy is a popular Chrome extension for YouTubers, packing tons of analytics and productivity tools. One handy feature is its chapter creation capabilities.
After installing TubeBuddy and linking your YouTube account, click the “Chapters” button it adds to your video editor. From here, you can:
Add chapter titles and timestamps with one click.
Divide the video into logical sections like Introduction, Overview, Conclusion.
Insert a chapter screenshot to give viewers a preview of that section.
Reorder chapters easily by dragging and dropping them.
TubeBuddy chapters save directly to your video for viewers to see. The downside is that the chapters feature requires TubeBuddy’s $9/month Star plan. But for avid YouTubers, the time savings may justify the cost.
Method 2: The YouTube Chapters Editor Extension (Free)
For a free alternative, the YouTube Chapters Editor Chrome extension works directly on YouTube Studio. To use it:
Open the YouTube Studio editor for the video you want chapters on.
Click the extension icon to activate the editor panel.
Play through the video, pause at logical breakpoints, and click “Add” to insert chapters.
Title each chapter appropriately based on the content.
Click “Save” when finished to add the chapters to the video.
While not as robust as TubeBuddy, the Chapters Editor gets the job done without any subscription. Just watch your video start-to-finish, pausing to add timestamped chapters at key points.
Tips for Efficient Chapter Creation
Adding chapters as you edit makes things easier than doing it after. Consider:
Adding obvious segments like Introduction, Overview, Pros/Cons, Conclusion
Inserting title slides in the timeline to indicate the start of a new section
Not going overboard – focus on 4-6 high-level chapters
Keeping titles short but descriptive
Proper chaptering takes some work initially, but ultimately enhances the viewer experience and discoverability of your videos. Just use the method that best fits your budget and channel size.
Adobe Photoshop is the industry standard for image editing, but it requires an expensive subscription and only runs locally on desktops. You need computers with heavy processing power otherwise it is going to be a nightmare try to use photoshop on a lightweight, student friendly laptop.
But thanks to the growing popularity of web apps, you can get similar features just why accessing these web apps in your browser. In this article we will learn about one search cool alternative to Adobe Photoshop that has pretty much every feature of Photoshop.
Photopea provides a free, browser-based alternative for basic to intermediate photo editing needs.
Watch the Video
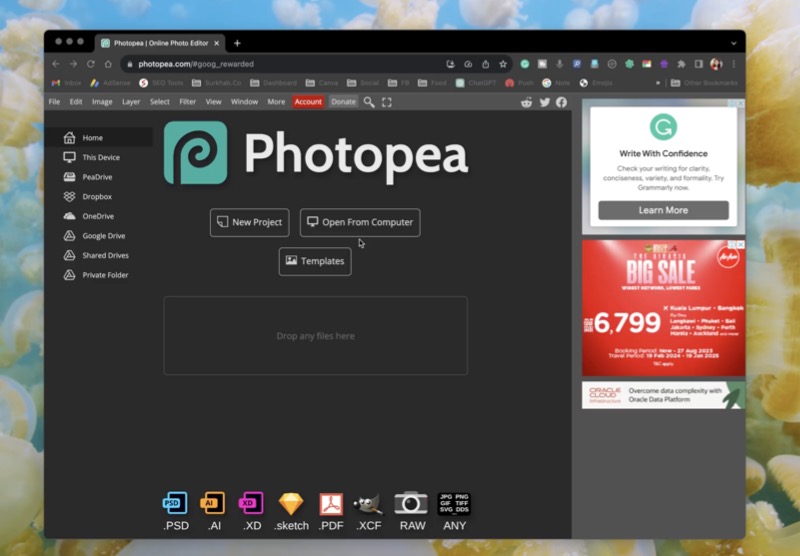
What is Photopea?
Photopea is an advanced online image editor that works directly in your web browser. It doesn’t require any software installation or account registration.
Photopea contains many of Photoshop’s core features for manipulating photos, including:
Layers for stacking and blending image elements
Selection and masking tools for isolating areas
Filters like blur, sharpen, distort, and color adjustment
Drawing and shape tools
Content-aware fill for seamless object removal
Support for PSD, XCF, Sketch, XD and other file formats
Photopea runs fully online, meaning you can access it from any device with a browser – laptops, tablets, even Chromebooks.
Here is a table comparing the features between Adobe Photoshop and Photopea.com
Feature
Photoshop
Photopea
Layers
Yes
Yes
Selection Tool
Yes
Yes
Drawing Tool
Yes
Yes
Filters and Effects
Yes
Yes
Color Adjustments
Yes
Yes
Text Tools
Yes
Yes
Shapes
Yes
Yes
Pen Tool
Yes
Yes
History Panel
Yes
Yes
Masks
Yes
Yes
Content-aware Fill
Yes
Yes
Benefits of Photopea Over Photoshop
As an online Photoshop alternative, Photopea offers several advantages:
Completely free to use with no account needed
Works on any device and operating system
No software installation required
Lightweight performance in the browser
Auto-saves progress to prevent losing work
Can open and edit Photoshop PSD files
For casual users, Photopea provides powerful photo editing without the cost or hardware requirements of Photoshop.
Use Cases and Limitations
Photopea covers a wide range of basic and moderate photo editing needs for free. This includes:
Removing backgrounds
Layering elements and graphics
Applying filters and adjusting color
Cropping and resizing images
Drawing shapes and text
However, Photopea lacks some of Photoshop’s advanced capabilities like comprehensive liquify, lens correction, Camera Raw, and 3D tools. Extensive or professional projects may require upgrading to Photoshop.
But for everyday image editing involving layers, adjustments, and composition, Photopea gets the job done for free. The convenience of the browser-based interface makes it accessible for casual photo projects.
If you need top-tier image manipulation capabilities, Adobe Photoshop remains the industry leader. But for budget-conscious users, Photopea provides an excellent free alternative online.
In fact I have become so if efficient at it, I have uninstalled Adobe Photoshop from my Mac computer. And I use Photopea.com whenever I have to work with .PSD file or have to work in use cases where Canva doesn’t offer that feature, such as Product Mockups.
I have written a detailed guide about creating product Mockups using Photopea.com and I know it is not as great as Adobe Photoshop, but you will still be able to get the results that will match 90%.
Applying for a passport means you’ll need a proper passport photo. But you no longer need to visit a photographer or printing studio to capture one. With your smartphone camera and a handy web app, you can take and format passport photos from home.
Watch the Video Tutorial
Capturing a Great Photo with Your Phone
First, take a well-lit headshot photo with your phone’s camera in portrait/vertical orientation. For best results:
Use a plain wall as the background to avoid distractions.
Position yourself facing a window for ample lighting on your face. Avoid shadows.
Get close enough to fill the frame with your head and shoulders.
Maintain a neutral facial expression. No smiling or raised eyebrows.
Shoot the photo in a high resolution setting.
Many passport photo criteria are meant to show your face clearly. A quality phone camera can capture excellent shots meeting these needs.
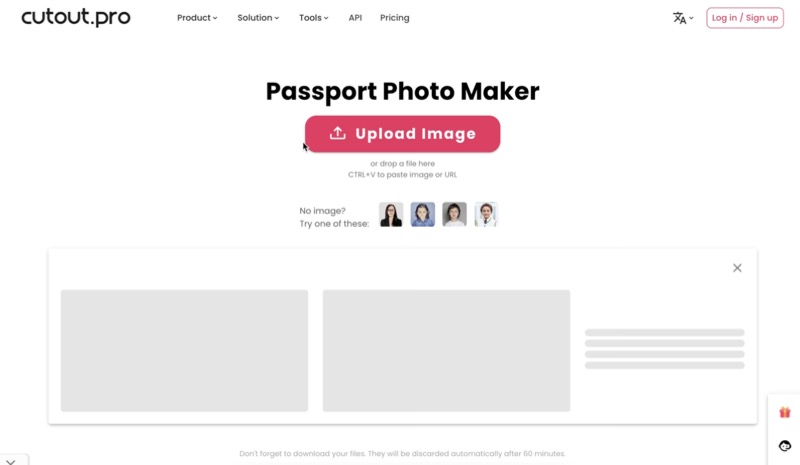
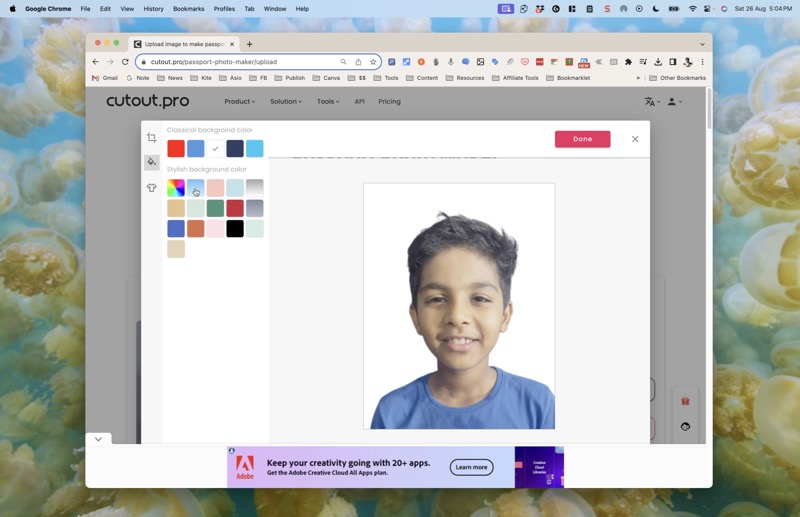
Preparing the Photo with Cutout.pro
Next, visit Cutout.pro in your phone or desktop browser. This free online editing tool will convert your photo into passport photo size.
Upload your headshot picture and let Cutout.pro remove the background automatically, leaving just your face.
On the left, select your country to automatically set the correct passport photo dimensions. Or manually enter the pixel size.
Pick a plain white or light gray background color for best results. Avoid busy patterns.
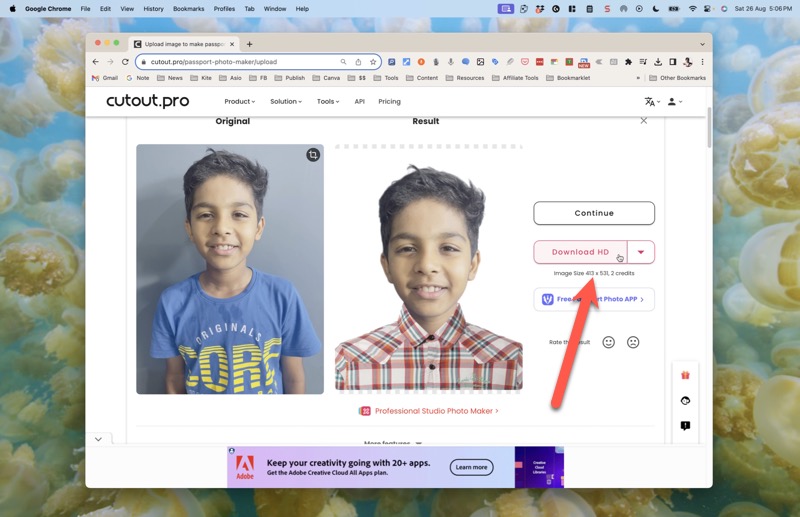
Change Outfits Virtually
Cutout.pro has a handy feature that can digitally alter your clothing. This allows switching to a suit jacket or formal outfit to meet passport photo attire requirements.
Simply click the Outfits tab, select a look, and the app will convincingly adapt your image. Just another way phone photos offer flexibility over studio shots.
Download and Print
When finished, download your properly sized and formatted passport photo files. Print them at the highest quality settings on photo paper.
Cutout.pro makes it easy to take passport pictures at home with your phone. Ditch the studio and print convenient passport photos for all your upcoming travel needs.
If you don’t already know about one use case of Android TV, you can screen mirror your other devices to utilize the big screen.
You can either use it for viewing your mobile or laptop content on a big screen or mirror your device to do things on a bigger screen.
Update: Since the first method does not work for everybody I have added few more methods and work arounds to screen mirror iPhone on android.
Watch the Video Tutorial
Things are pretty easy if you have got an Android phone, several Android TV gives you the option that is built natively on their TVs.
When both the devices are connected to the same Wi-Fi, you can go to the wireless display option on your Android device and then screen mirror on Android TV.
Things get a little tricky when you have got an Android phone because both belong to different platforms. Apple loves to limit its stuff on their ecosystem.
They do have got a screen mirror feature on their devices, but it exclusively works on Apple TV. If you have got an Apple TV, you can screen mirror your Mac Book or your iPhone or your iPad, but if you try to do this on an Android TV, it is not available natively.
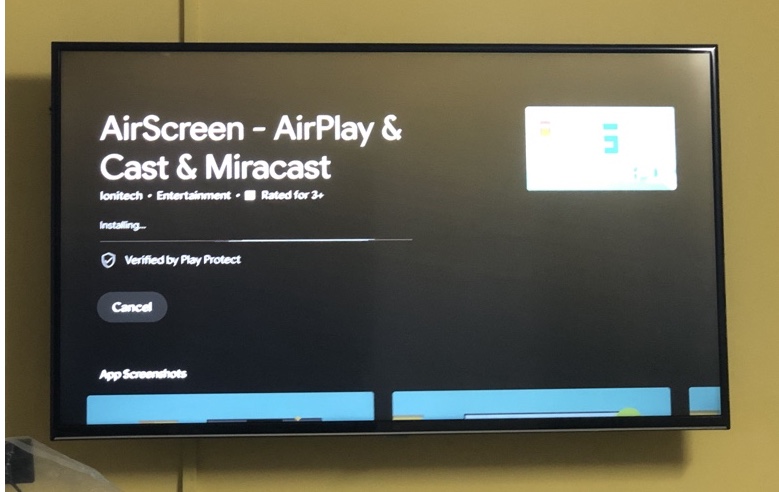
Install AirScreen on Android TV
It is where third party Apps come in Play. Thankfully it is pretty easy to install a third-party app on Android TV. You can go to the Play Store and find an app called AirScreen.
The app is freely available in the Play Store; however, it is on a freemium model, which means you will see ads.
But, I found that ads are pretty minimum, and during one and half hours of screen mirroring time play, I witnessed only two ads, which can only be a script using the TV remote.
You can try the service Yourself by screen mirroring your iPhone on your Android TV, and if you like it, you can get the paid subscription, which will eliminate ads.
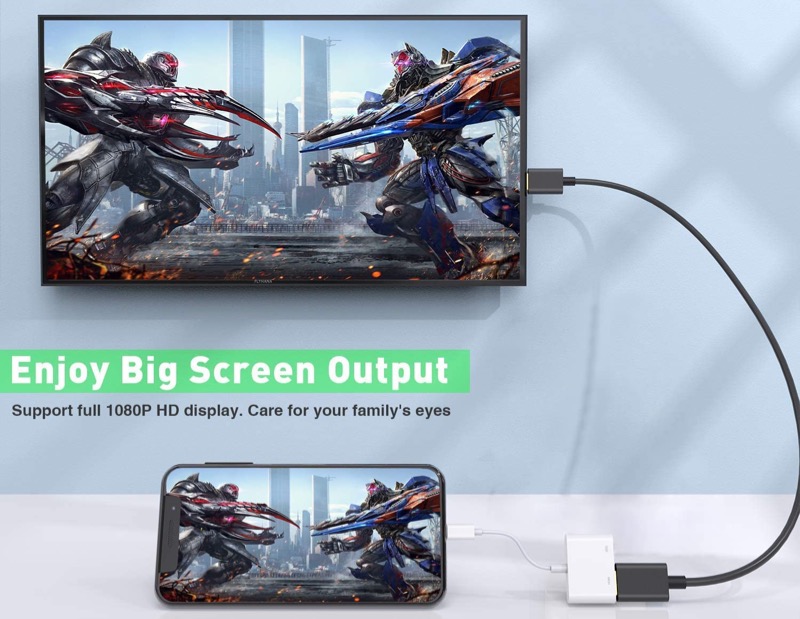
You can connect your iPhone to your Android TV via HDMI using Apple’s official lightning digital AV adapter and an HDMI cable. This will display your iPhone screen on the TV.
Also, since it is not a wireless connection, It is more reliable.
If you have an Apple TV, you can AirPlay your iPhone’s screen to the Apple TV plugged into your Android TV’s HDMI port. Then it will show up on the Android TV.
Steps are as follows
Connect an Apple TV box to an HDMI port on your Android TV.
On your iPhone, swipe down from the top right corner to open Control Center and tap Screen Mirroring.
Select the Apple TV from the list of available devices.
This will use AirPlay to wirelessly mirror your iPhone display to the Apple TV.
With the Apple TV connected to your Android TV’s HDMI input, the iPhone screen will now be displayed on your Android TV.
You can also do this mirroring directly from apps that support AirPlay like YouTube, Photos, etc.
The Apple TV will simply pass through the AirPlay stream from your iPhone to the Android TV.
Use a wireless screen mirroring app – ApowerMirror
Some apps like ApowerMirror can create a virtual AirPlay server to let you wirelessly mirror your iPhone to Android TV over the local network.
Steps are as follows
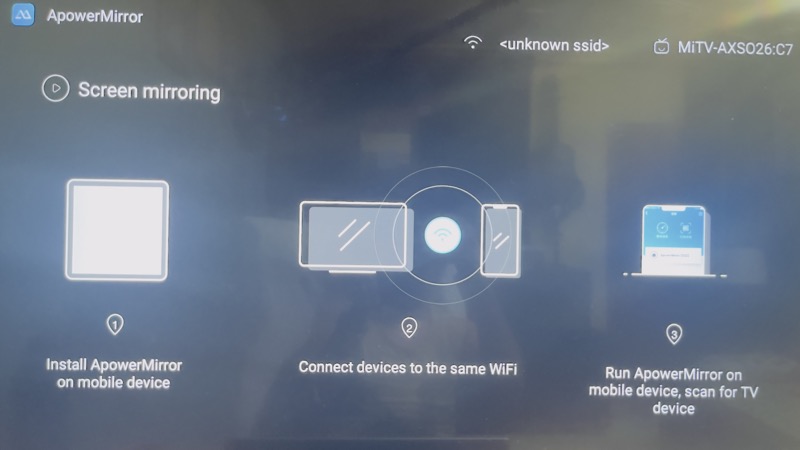
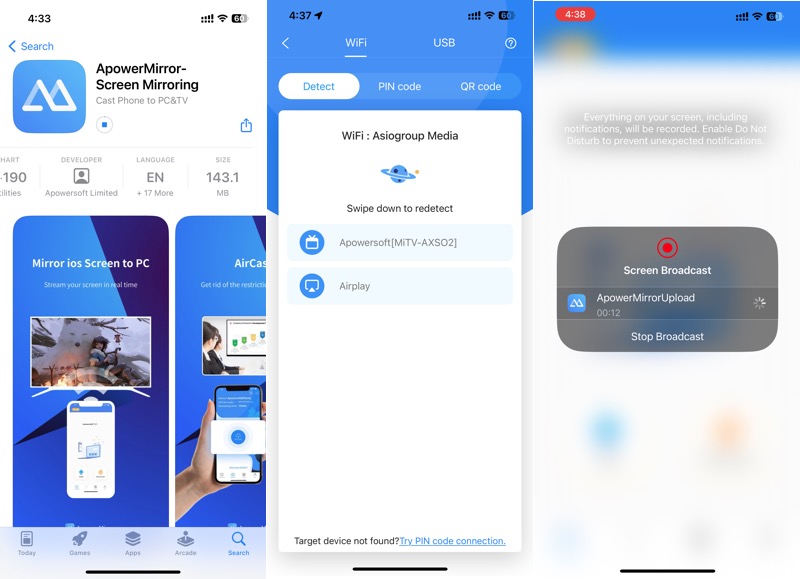
Download and install ApowerMirror on both your iPhone and Android TV.
Open the app on your Android TV and follow the instructions.
Now on your iPhone, open ApowerMirror App and Tap on LocalCast and select your Android TV from the list to initiate mirroring. It would be something like Apowersoft[TVName-XXX]
The app sets up a virtual AirPlay server to send your iPhone screen wirelessly over WiFi to the TV.
Note: If you are looking to mirror netflix from your mobile phone to tv check out this article.
Utilize Big Screen using Screen Mirror
There are many use cases for using a screen mirror feature. Do my best use case is to edit videos on mobile phones using the biggest screen as a reference.
The wireless connection between Android TV and iPhone is source mode that I do not find any lag while making quick edit too short videos that I want to post on social media.
Another use case would be to show photos to a group of people on a bigger screen so that you do not have to share your mobile phone with everyone.
I often use the screen mirror feature to use the 43-inch Android TV as an external monitor when I am working on my laptop I can move one tab on the bigger screen so that I can reference it without having to switch between tabs.
Once you try it yourself, you will find your use case, and you are going to love this feature.
Find more interesting articles on the blog that can make you take life easy.
On your Mac’s hard drive lives a hidden world of behind-the-scenes files that keep your computer functioning properly. While accessing these hidden Mac files can be useful in certain situations, they are generally best left undisturbed.
Watch the Video
What Are Hidden Files on a Mac?
Hidden files are system files, configuration files, logs, caches, and other data that macOS hides from view in the Finder interface. Examples include:
.DS_Store – Tracks custom folder views
.TemporaryItems – Stores temporary files
.Trashes – Stores deleted files before emptying trash
.Spotlight-V100 – Spotlight index and search data
Hidden files handle critical background processes but aren’t necessary for daily use. Apple tucks them out of sight to prevent accidental deletion or changes that could cause stability issues. If you are looking to hide a particular file on your mac, check out this section.
When Would You Need to View Hidden Files?
In most cases, hidden files don’t need to be accessed. However, there are instances where seeing hidden files can be beneficial:
Diagnosing performance problems or app crashes
Identifying malware or unauthorized changes
Recovering unsaved documents
Clearing caches to reclaim space
Gaining insight for advanced customization
Accessing hidden files should only be done with caution and if you understand their purpose.
How to View Hidden Files on Mac
Here are three ways to reveal hidden Mac files:
Use Finder – Press Command+Shift+(.) period to toggle hidden files on/off.
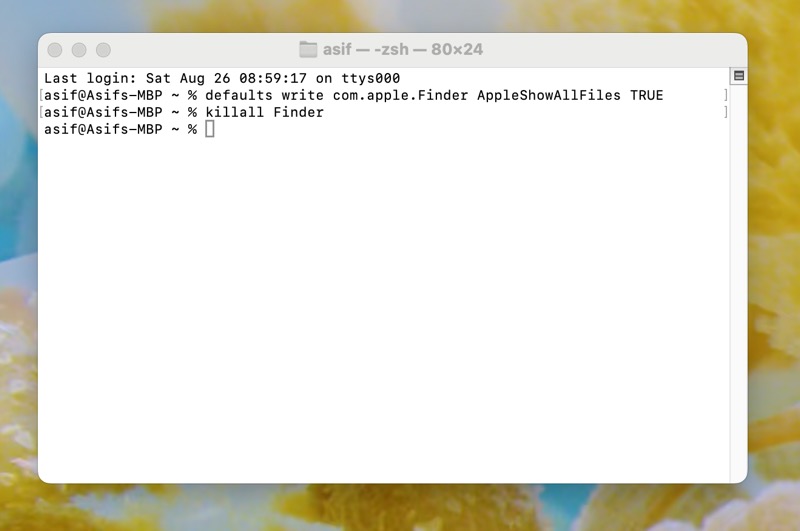
Use Terminal – Run the command: defaults write com.apple.Finder AppleShowAllFiles TRUE (to make changes appear in Finder, type this in Terminal – killall Finder)
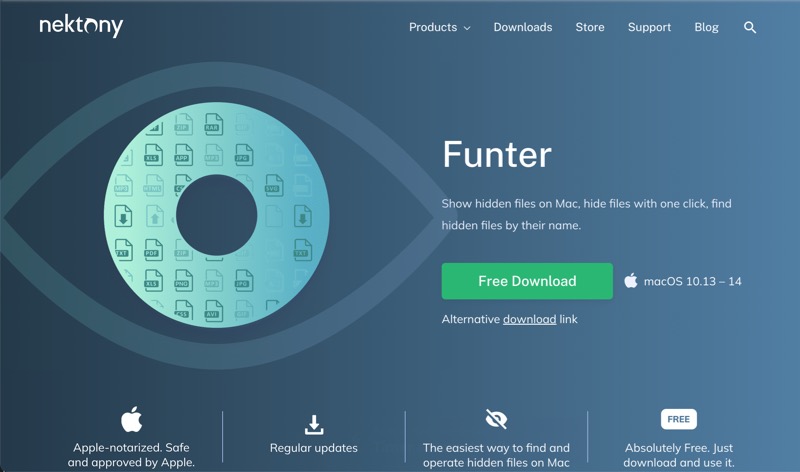
Use third-party software like Funter – This gives you a simple on/off toggle for hidden files.
To re-hide files, simply reverse the Terminal command or toggle the visibility off again in Finder or your preferred app.
Let’s discuss all these three methods in detail
Use Finder
The easiest method to locate concealed files on your Mac is by using Finder. Follow these steps:
Click on the Finder icon in your dock to launch Finder.
Open Mac Finder to begin uncovering hidden files on your Mac.
Navigate to the desired folder where you wish to find hidden files.
Press Command + Shift + . (the period key) to reveal hidden files within the folder.
To hide the files again, simply press Command + Shift + . again.
Additionally, you can display hidden Mac files on your desktop by clicking it and pressing Command + Shift + ..
Use Terminal
This method of using the Terminal app to view hidden files on your Mac computer is a little technical but faster. Let’s look at the steps in involved in achieving our goal.
The Terminal app allows you to directly input commands into your Mac’s operating system, thereby altering its functionality.
To use Terminal for revealing hidden files, follow these steps:
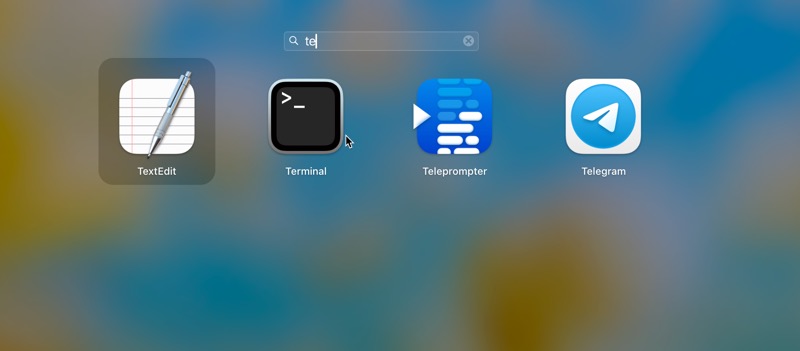
Launch the Terminal app from Spotlight or from the Launchpad by doing a four finger squeeze in gesture, and then using the search box to search for the terminal app.
Once the terminal app is opened type the following script.
The first command will make the finder app unhide all the hidden files on your mac. And the second command will refresh the Finder app making the changes.
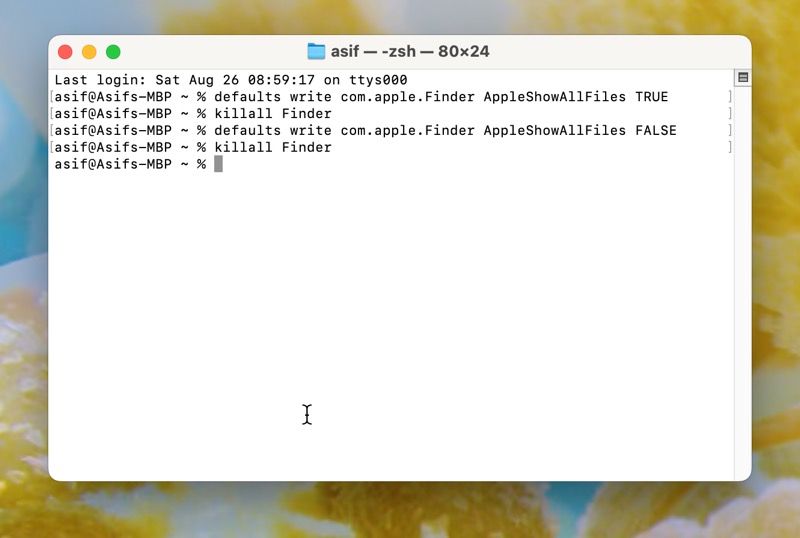
To revert the changes, or to not view the hidden the files again, type the same command and change TRUE, to FALSE.
Use third-party Apps
If you want you can also use third party apps like Flunter to view the hidden files on your mac computer. These apps will give you easy toggle button to enable and disable viewing hidden files.
But my personal recommendation would be the first method which I think is the easiest of all and does not required you to install anything extra on your computer or even memorize any command.
How to hide any file on a mac computer
Now let’s see how to hide a file on your mac computer. The process does not require you to install anything on your computer or memorize any command.
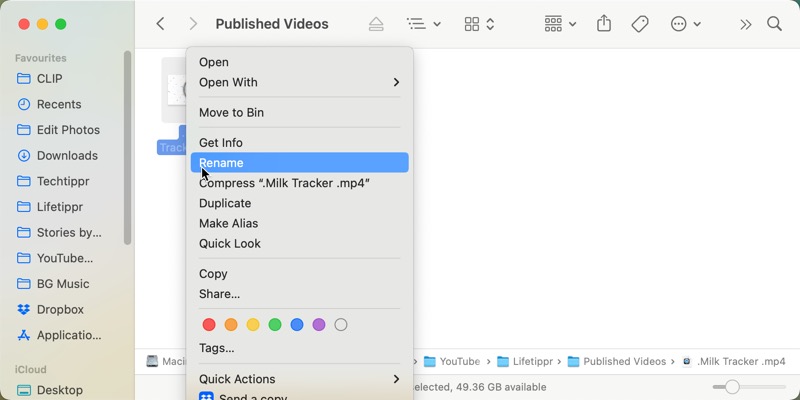
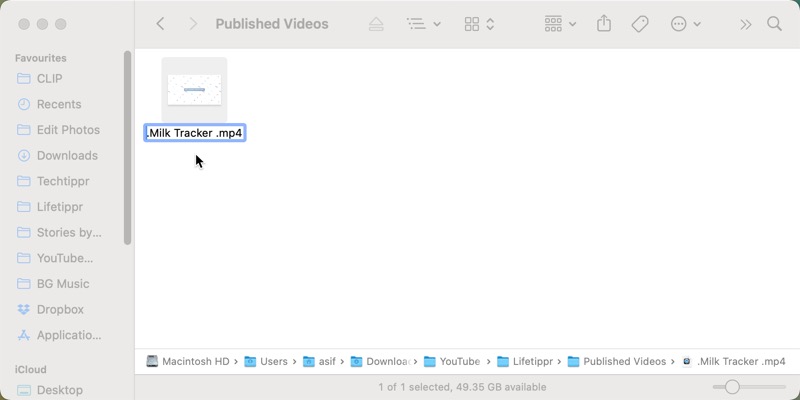
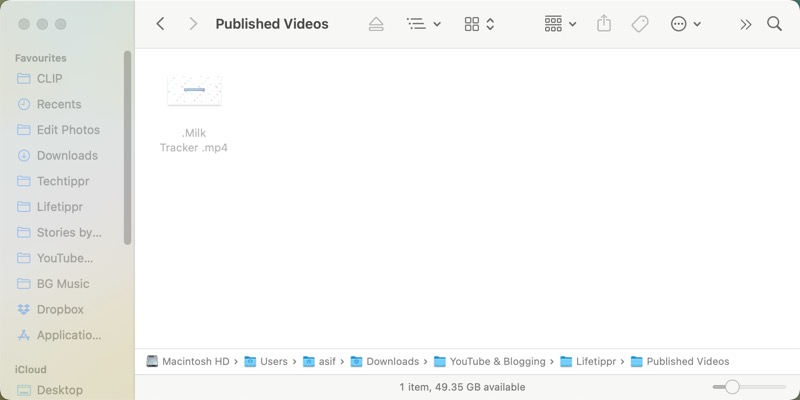
You just have to rename the file by adding a dot (.) at the beginning of the file name. Here are the steps involved.
Select the file you want to hide.
Right click and select ‘Rename’ from the options
Add a dot (.) at the beginning of the name and press Enter.
This will hide the file, to view and unview the hidden files you can follow any of the three methods mentioned above.
Once the file is hidden using the method above, and the option to view hidden files is enabled, you will be able to view the hidden file but it will be little faded. Its actually a clever way to hide your files from other people who have access to the computer.
Keep in mind hiding files like this does not guarantee other people will not be able to access it because the methods mentioned will reveal all the hell finds on the computer.
Reasons to Avoid Tampering with Hidden Files
Since hidden files are integral to system functions, it’s best to avoid modifying them unless absolutely necessary. Dangers include:
Deleting important system files that render macOS unstable
Altering configurations that break apps or workflows
Exposing sensitive information to security risks
Causing general performance slowdowns or crashes
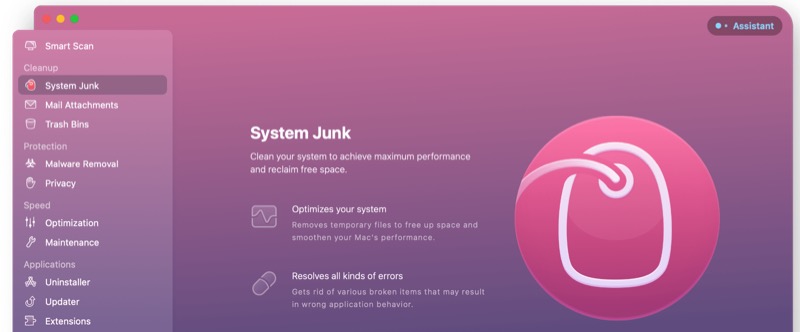
So these were the methods you can try to view hidden files on a mac computer. You can also try Clean My Mac which is an excellent application format computer to keep things organised and keep your mac fast.
Apple’s new feature of the Mac Operating System will make your iPhone more usable as it allows you to use it as a webcam. Learn how to use the continuity camera feature on my face 13 Ventura.
Apple is known for copying features made by third-party apps from other manufacturers. But it’s true that when it brings those features to their devices, it is near perfect, without many technicalities for the end-user.
Check the Continuity Camera in action in this video
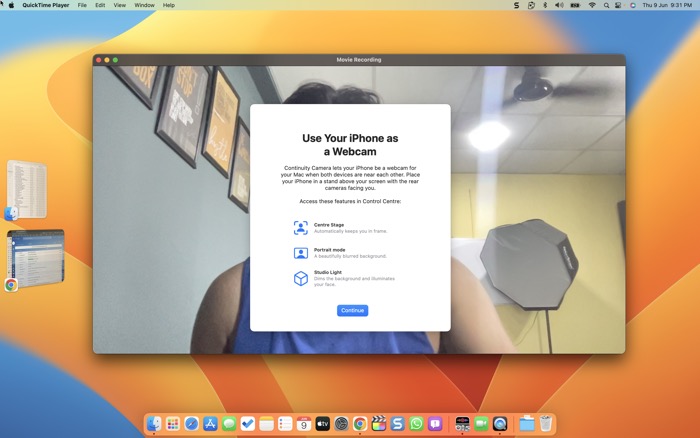
And this is true for a new feature for the new Continuity Camera where users can use their iPhone camera as a webcam on their Mac.
The recently launched Mac releases from Apple have got decent cameras built-in, but it is nowhere near the quality of iPhone cameras. So, you can use your best cameras for video conferencing is a great move.
How to use the continuity camera feature?
Here are a few things required to use Continuity Camera on Mac.
Your Mac must be running macOS Monterey or later.
Your iPhone must be running iOS 15 or later.
Both devices must be signed in to the same Apple ID using two-factor authentication.
Continuity Camera must be turned on in Settings > General > AirPlay & Handoff on both devices.
Your iPhone and Mac must be near each other and have Bluetooth and Wi-Fi turned on.
Your iPhone must not be sharing its cellular connection and your Mac must not be sharing its internet connection.
To use Continuity Camera over USB, your iPhone must be set to trust your Mac.
Here are some additional things to keep in mind
Continuity Camera is not supported on all Mac models. For a list of supported models, see the Apple Support article Continuity Camera system requirements.
Continuity Camera may not work if your iPhone or Mac is in Low Power Mode.
If you are having trouble using Continuity Camera, try restarting your devices.
Start using Continuity Camera
It’s all done wirelessly, and no cable is required. Although you can do it using a cable also. It would also charge your iPhone, which is recommended if you are planning to have longer video sessions.
I tried it with Google Meet, Zoom, WhatsApp, and Quick Time Player, and it was flawlessly. I did not notice any latency in the video, even though it was a wireless connection. The wireless connection also means you have the flexibility of keeping the camera at a much better angle without just a laptop.
Key Features of Continuity Camera
Center Stage: This feature automatically keeps you in the frame as you move around during a video call.
Portrait mode: This feature blurs the background behind you to create a more professional look.
Studio Light: This feature uses the TrueDepth camera on your iPhone to light your face more evenly and reduce shadows.
Desk View: This feature lets you share a top-down view of your workspace during a video call.
High-quality video: Continuity Camera can output video at up to 1920 x 1440 resolution and 60 frames per second.
Wireless or wired: You can use Continuity Camera wirelessly or wired.
While showcasing the Continuity Camera features, Apple also showed that it would support Center Stage. It is a feature available in newer iPads and MacBooks, which keeps the subjects in the center even if they are using them.
Portrait mode is useful in scenarios where you have to attend at meeting and the background is messy. You can enable the portrait mode which will blur the background making it free.
The desk view is kind of mind-blowing, is that users will also be able to use the wide-angle camera on iPhone to show a top-down view of their desk.
This one was unavailable for me to test as I am using the beta version of macOS 13. It will be coming to the stable version when it releases.


 for Shooting Smooth Videos")