5 Cool Features of Snagit App by Techsmith to Become More Productive

Productivity does not only mean making more time to do a specific task. It also means doing a task with such focus that it can be completed faster.

Thankfully, the people who work around websites, apps, images, and screenshots, have great tools to speed their process of performing a task. And Snagit by Techsmith is one such tool.

The Snagit App is available for both Windows and Mac, and we have already written many articles about it. You can learn more about its core capabilities by reading this article.

In short, it is the best tool to create and Annanote screenshots faster on your computer. If you want to create professional tutorials and Guides, Snagit is a great tool.

The amazing feature of the Snagit app

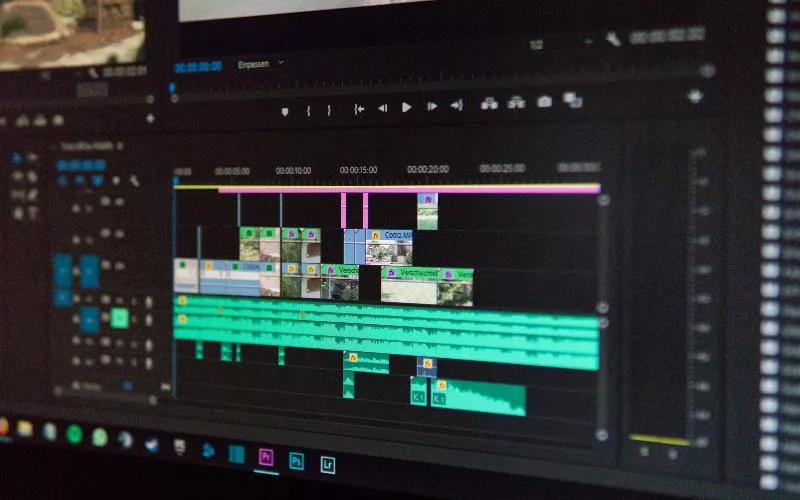
Captured screenshot opens directly in the image editor.

For a lot of people, it is not only about taking a screenshot but making changes by adding text, marks, and arrows to it. So, natively you would take a screenshot and then open it in an image editor to do the edits.

Snagit has an inbuilt image editor, and the screenshots are directly opened in the image editor after taking the screenshot. Apart from that, you can also precisely take a screenshot of a particular window or an area of the screen.

1. The Inbuilt Image Editor has multiple uses

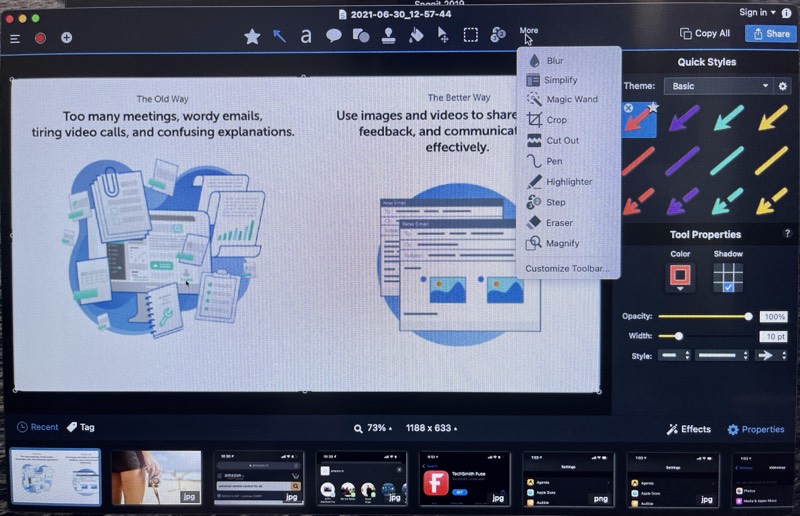
The inbuilt image editor is so good that I don’t use any other image editor for various image manipulations. I even used the image editor to make changes to an image that is not a screenshot.

You can open any image in the inbuilt image editor of Snagit. Then you can use all the tools provided in the image editor, such as blurring out a path on the image, using arrows, circles, rectangles, or a highlighter to focus on a particular area. There are many more tools provided in the image editor.

And a lot of times, I use it to resize an image or convert a PNG into JPG.

2 .Create Tutorials and Guides Faster with Templates

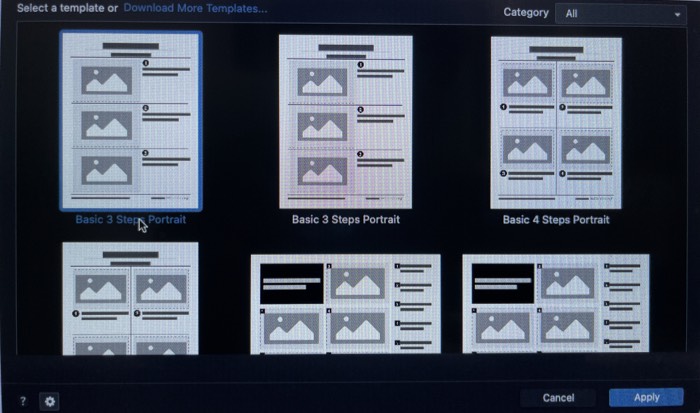
The new version of Snagit has broad templates beautifully designed, so all you have to do is, add your screenshots and write the instructions.

You can then either save it in PNG or PDF format and share it with the Customer/Client/Employee.

It makes it super easy to create instructions for newly hired employees and instructions for your customers about using your product.

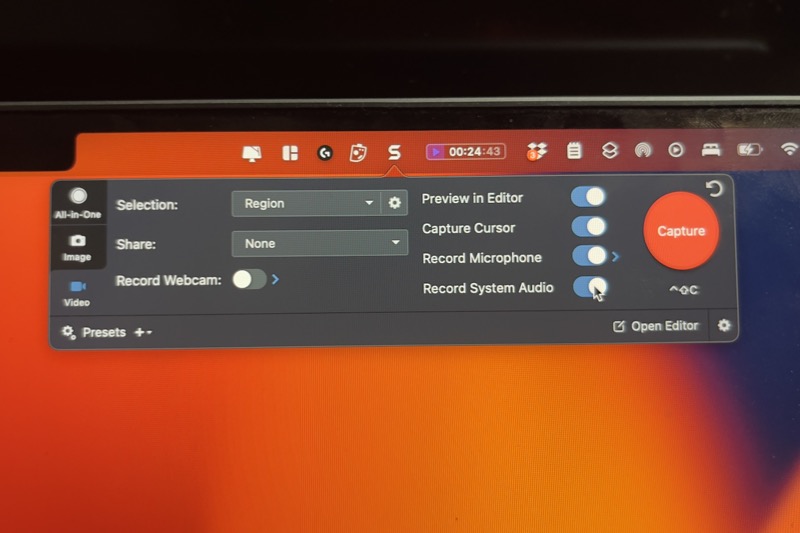
3. Capture Screencasts and Convert into GIFs

Another great feature of Snagit I found super helpful is that you can record your screen while doing something.

The video also opens in the image editor, where you can stop the video and only save the desired part you intend to use.

You can also convert the video into GIF, which again has many other uses as well, creating MEMEs from a video. However, you will have to keep in mind, the longer the video, the longer larger the size of the GIF will be.

But you can use additional tools to optimize the GIF if you want to use it on the web. Here’s a great guide for creating optimized GIF Animations. 

4. Send Images from Mobile to PC

TechSmith, the maker of the Snagit App, has also developed mobile apps (for iOS and Android), which let you send images from mobile to computer.

The images you send are also sent directly to the Snagit App so that you can quickly make edits to them before sharing. The app name is Fuse by Techsmith and can be installed from App Store and Play Store for iPhone and Android.

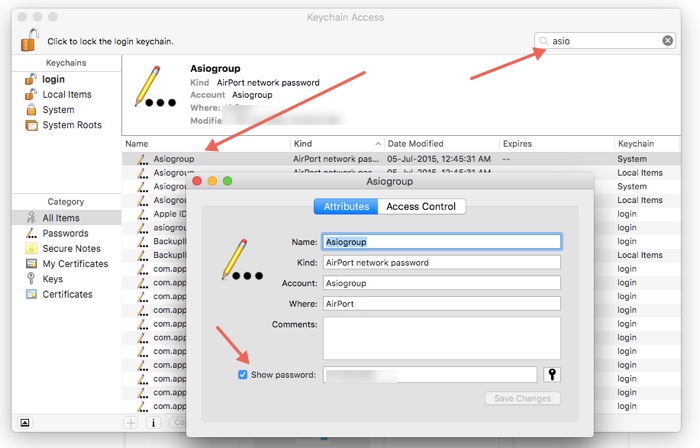
5. You can grab text from images

If you find an image on the web that has a lot of text and cannot be copied using the native method of right-clicking and selecting copy, or ctrl/cmd+C, you can use Snagit.

Snagit lets you precisely select the portion you want to take the screenshot, and then click on

Many other small features

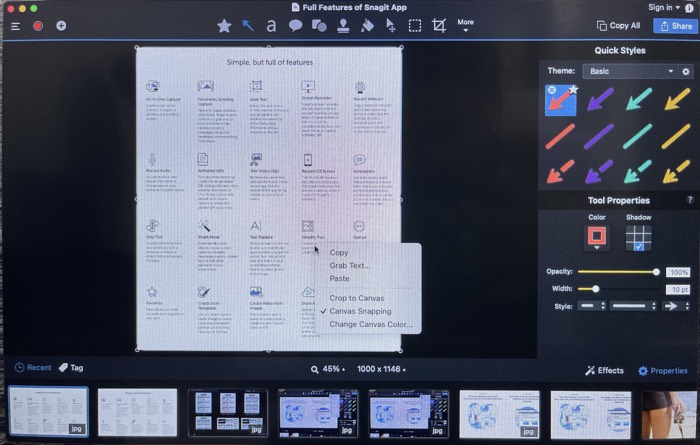
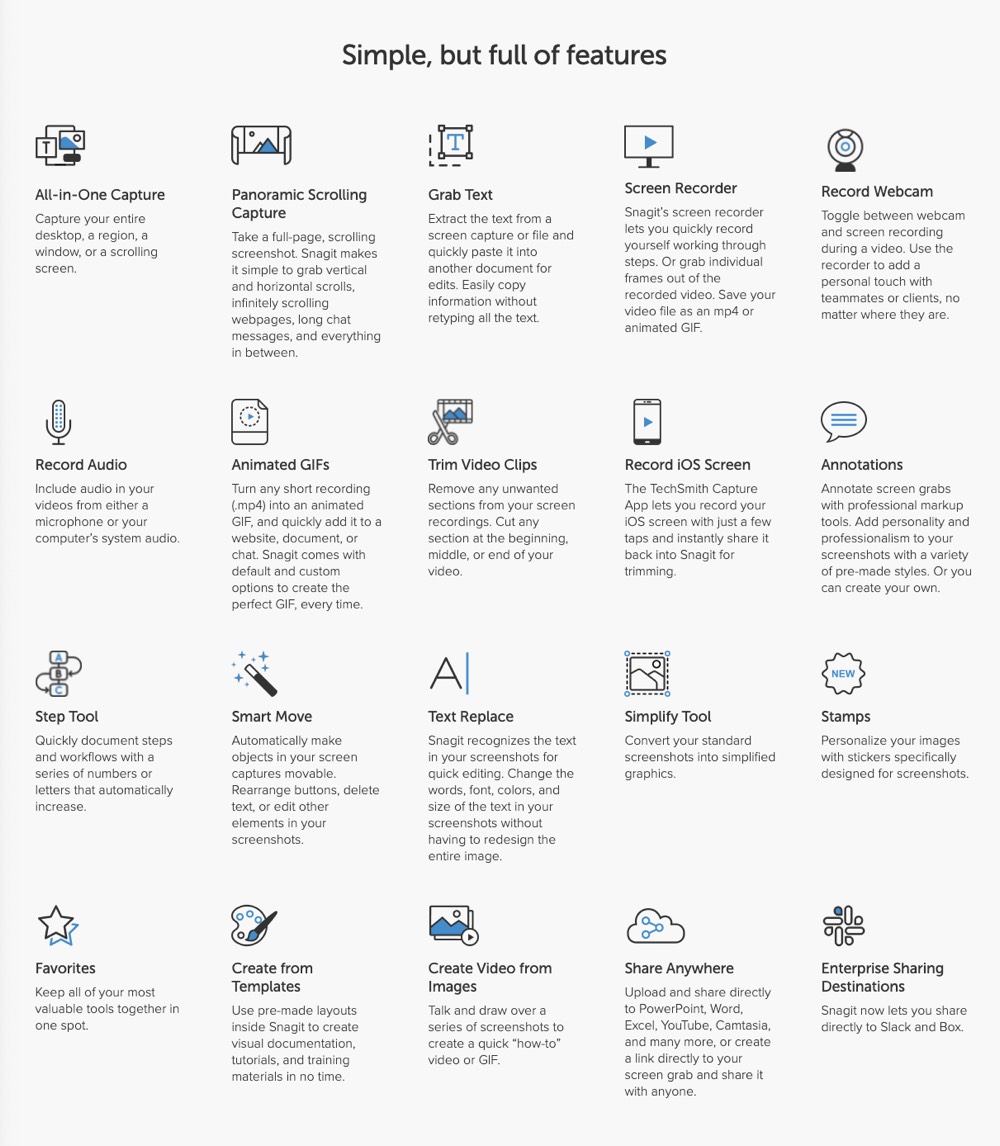
Apart from all these features I mentioned above, many small parts are helpful in different use cases. It will make this article long and tedious if I mention all those minor updates; however, here is a screenshot of all the features of Snagit mentioned on their website. The screenshot has been taken and editing using Snagit.

Click the image to enlarge

You can get Snagit for just $49, which is a pretty reasonable price for a tool like this. Also, it offers a 30-day free trial.

Check out Snagit App

How to Enable System Audio in Snagit for Mac Users

Snagit is a useful application that allows you easily capture screenshots on your computer and also record screen casting. And the inbuilt editor makes it easy to make adjustments to images.

It also allows users to record system audio, which brings up many use cases for this single application.

For instance, you can capture a segment of a YouTube video without downloading it by simply taking a screencast and enabling the system audio recording feature. 

This capability is also helpful when creating tutorials involving websites or web apps where you also happy record the internal audio.

Enable ‘Record System Audio’ in Snagit on Mac

When you click on capture, to start recording your screen, you can make the selection of the area you want to record, a long with many other options such as enable the webcam or enable audio recording.

Another feature you can enable is, ‘Record Internal Audio’. This easily gets enabled for pc users. But make users are facing an issue where it ask to authorise a plugin.

Mac users (especially M1 powered and other Apple Silicon Chipset powered Macs) may encounter an issue when enabling the system audio feature in Snagit. 

Upon installation on your Mac computer, Snagit requires certain permissions for smooth operation, such as access to your microphone and folders. 

When attempting to grant access to system audio, conflicts within the Mac system may cause Snagit to perceive this as a security threat and deny plugin access. 

This tutorial will guide you on how to enable the system audio feature on your Mac computer effectively.

Shut down your computer by clicking the Apple logo at the top left and selecting “shut down.” After it’s off, press and hold the power button until you see startup options loading.

Once recovery options appear, select “options” and click “continue.”

Wait for MacOS recovery mode to load. Then choose “Startup security utility” from the ‘Utilities’ Dropdown menu in the top left corner.

In this window, select your system drive and click “Security Policy.”

Switch from full to reduced security and enable the first checkbox. Enter your password when prompted to apply these changes.

Afterward, restart your Mac by clicking on Apple logo > restart.

When you log in again, a message stating that a system extension is blocked should pop up; if not go manually to System Preferences > Security & Privacy settings.

Unlock settings using padlock icon (bottom left) with your password.

Allow Rogue Amoeba Software LLC as prompted at bottom of window. Then, restart once more.

Now you’ve successfully set up! Now when you enable record system audio, you will be able to record internal audio and use it for many other use cases other than taking screenshots and recording screencast.

How to login to Facebook using your mobile number

0

Majority of the web portals are following the age-old system of sign up using an email address.

And the fact that it is easier to hack an email address, web companies started searching for alternatives that could provide users with a secure account.

And since a mobile phone number is uniquely available to individuals, it makes more sense to use mobile phone numbers to create accounts.

Fortunately, big companies like Facebook allow users to create an account on their photos using their mobile phone numbers.

Even if you have got an existing Facebook account using an email address you can still link your mobile number so that you can log in using your mobile number.

Login with your phone number would still require you to input password. The mobile number will replace the email address not the password. 

How to link your mobile number with the Facebook account from Desktop

If you are opening the Facebook on the desktop, go to the Settings area of Facebook, and then click on Mobile from the left panel.

There you will be able to add your mobile number and verify it by typing the confirmation code that is sent on your mobile number.

Once your mobile number is verified with Facebook you will be able to login to your Facebook account using your mobile number.

To do that, you need to type in your mobile number instead of your email account and your usual password.

How to link your mobile number with the Facebook account from Mobile

If you do not have access to desktop and you want to link your mobile number with your Facebook account on mobile, here is what you need to do.

Is the native app of Facebook does not have an option of linking a mobile number to the account, you need to open the Facebook website on your mobile browser.

I would recommend you use Google Chrome, and once you have opened the website, request a ‘desktop website’, that will open the full version of Facebook on your mobile.

Then you can follow the same steps mentioned in the desktop section of this post.

Once you have linked and verify your mobile number, you will be able to use your mobile number to login to Facebook.

Why mobile phone numbers provide more security than email addresses?

Mobile phone numbers can indeed offer a higher level of security compared to email addresses for various reasons. While both communication methods have their own vulnerabilities, mobile phone numbers have certain features that make them more secure in many contexts:

  1. Two-Factor Authentication (2FA): Mobile phone numbers are commonly used for two-factor authentication, which adds an extra layer of security to online accounts. When you log into a service or platform, you receive a verification code via SMS or a phone call, which you must enter along with your password. This makes it much harder for unauthorized individuals to gain access to your accounts, as they would need physical possession of your phone to receive the verification code.
  2. Physical Possession: Unlike email addresses, which can be accessed from anywhere with an internet connection, mobile phones require physical possession. If someone wants to access your SMS messages or verify a 2FA code, they need to have your actual phone. This physical barrier reduces the chances of remote hacking or unauthorized access.
  3. SIM Card Security: Mobile phone numbers are tied to SIM cards, which are small chips inserted into your phone. While it’s not impossible to clone or spoof a SIM card, it is generally more difficult and sophisticated than typical email-based attacks. SIM card cloning requires physical access to the SIM card and the knowledge of specific techniques, making it a less common form of attack.
  4. Carrier Verification: When you set up a new mobile phone number or make changes to your account, mobile carriers often require verification through your SIM card or other methods. This adds an additional layer of security to prevent unauthorized changes to your number. In contrast, email addresses are relatively easier to create and manipulate, which can facilitate phishing attacks.
  5. Phone Recovery Services: Many mobile operating systems offer device recovery services that can help you locate, lock, or wipe your device remotely in case it’s lost or stolen. This adds an extra level of protection to your data and accounts associated with that device.
  6. Less Targeted by Spammers: While both phone numbers and email addresses can be targeted by spammers, mobile phone numbers tend to be less accessible to spammers due to the costs and infrastructure required to send SMS messages or make calls at scale.

How to change linked mobile number on Facebook?

Here is the process of changing your mobile number on your Facebook. Keep in mind you will require access to the mobile number which is currently linked to the Facebook as you will have to authenticate it using a temporary pin which will be sent on the phone number. 

  1. Log In: Go to the Facebook website or open the Facebook app and log in to your account if you’re not already logged in.
  2. Open Settings: On the Facebook website, click on the downward-facing arrow in the top-right corner of the page, then click on “Settings & Privacy” and select “Settings.” On the Facebook app, tap the three horizontal lines (menu) in the bottom-right corner, scroll down, and tap on “Settings & Privacy,” then tap on “Settings.”
  3. Security and Login: In the settings, look for “Security and Login.” Click or tap on it to access your security settings.
  4. Edit Phone Number: Look for the “Login” section, and you’ll see your current linked mobile number. Click or tap on the “Edit” button next to your phone number.
  5. Change Number: You’ll be prompted to enter your password for security purposes. Once you’ve entered your password, you can now add a new phone number by clicking or tapping “Add another mobile phone number.” Follow the prompts to enter the new number and verify it through a code sent to that number.
  6. Remove Old Number: After adding the new number and verifying it, you’ll likely have the option to choose which number you want as your primary contact method. Once you’ve set the new number as your primary, you can choose to remove the old linked number if desired.
  7. Save Changes: Make sure to save your changes, and your new linked mobile number will be updated on your Facebook account.

There is a list of app and services other than Facebook that allow users to use phone numbers instead of email address

  1. Twitter: Twitter allows users to link their mobile phone numbers for login and account recovery purposes. Users can receive verification codes via SMS to log in securely.
  2. WhatsApp: WhatsApp, a popular messaging app, uses phone numbers as the primary method of identification. When setting up WhatsApp, users verify their phone numbers through a verification code sent via SMS or phone call.
  3. Signal: Signal, a privacy-focused messaging app, also uses phone numbers for registration and verification. Users receive a confirmation code via SMS to link their numbers to their Signal accounts.
  4. Instagram: Instagram, a photo and video sharing platform owned by Facebook, allows users to log in using their mobile phone numbers for an additional layer of security.
  5. LinkedIn: LinkedIn, a professional networking platform, offers phone number-based authentication as an alternative to email-based logins.
  6. Snapchat: Snapchat, a multimedia messaging app, allows users to link their phone numbers for account security and recovery purposes.
  7. Telegram: Telegram, a messaging app known for its security features, offers phone number-based logins. Users receive a verification code via SMS during the account setup process.
  8. Google: While Google primarily uses email addresses for account identification, it also offers the option to link a phone number to enhance account security and recovery.
  9. Microsoft Account (Microsoft Outlook, OneDrive, etc.): Microsoft allows users to add and verify a mobile phone number to their Microsoft accounts for authentication and account recovery.
  10. Apple ID: Apple provides the option to use a phone number as a trusted device for two-factor authentication and account recovery for Apple ID, which is used across various Apple services.
  11. Amazon: Amazon allows users to add a mobile phone number to their accounts for two-step verification and account recovery.
  12. PayPal: PayPal, a popular online payment platform, offers the option to link a mobile phone number for two-factor authentication and account security.

Listen to Articles with this iPhone Shortcut

Want an easy way to have your iPhone read aloud articles and webpages? You can create a custom shortcut to enable text-to-speech for any website content.

Let me quickly show you how you can create an iPhone shortcut that will let you read any content from any webpage. It is helpful in reading articles at a certain speed. For example, 1.5x or 1.25x. This will help you read articles faster.

And the other use case is you can listen to the articles while you are commuting or you are doing other stuff. You can use earphones and listen to the articles or maybe you are tired. You just don’t want to look at screen at night.

Then also this shortcut can be helpful.

Watch the video tutorial

The Speak Screen Feature

There is a feature called Speak screen (you can find it in accessibility settings from settings of your iPhone) which can be activated by swiping two fingers on from the above of your screen whenever you are on a webpage.

For example I have got this article opened you can enable speak screen feature by swiping two fingers from the top of your screen.

So this will easily let you listen to the article and here you can also select the speech rate like 1x, 1.5x, 2x things like that but here is an even better solution you can achieve the same thing using an iPhone shortcut.

How the Shortcut Works

So I’ve already created an iPhone shortcut and it works something like this. Suppose you’re on this page, you can tap on the share icon, scroll down to find speak text because this is the name of my iPhone shortcut. You can rename it anything.

The shortcut grabs the text from a webpage and feeds it to your iPhone’s built-in text-to-speech feature. You can control the voice, speed, pitch, and more.

To use it, simply open a webpage, tap the share button, and run the shortcut. It starts reading immediately.

Creating the Shortcut

Here’s how to make the “Listen to Articles” shortcut:

  1. Open the Shortcuts app and tap the plus button.
  2. Search for and add the “Get Contents of Webpage” action.
  3. Add the “Get Text from Input” action from suggestions.
  4. Add the “Speak Text” action and customize voice, speed, etc.
  5. Connect the Get Contents and Get Text actions.
  6. Name the shortcut “Listen to Articles”
  7. Enable Share Sheet access so it shows when sharing webpages.

Using the Shortcut

Once you’ve built the shortcut, using it is simple:

  1. Open an article or webpage in Safari or Chrome.
  2. Tap the share button.
  3. Tap the “Listen to Articles” shortcut.
  4. Allow access permission initially.
  5. The page’s text will start being read aloud immediately.

Now you can listen to any webpage or article! Use this to speed up reading, multitask while listening, or rest your eyes.

Found this useful? Check out more iPhone shortcuts

If you are not an iPhone user here are more ways you can listen to the articles using text to speech {TTS} technology.

How to Add Multiple Photos to One Instagram Story

Want to share a collection of photos in a single Instagram Story? You have a few good options to create multi-picture Stories natively or with third-party apps.

Method 1: Posting Multiple Photos Using Layout Feature

guy doing something on his phone

When you are on the stories page, you will find the option on either on the left. On the right hand side of your screen. One of the feature would be Layout. This creates a great where you are able to add photos to each grid.

This lets you click photos for each grid or you can also select the photo from your photo gallery like to normally do. It has as much as six options for the Grid where you calculate the number of photos you want to post such as two or three or four photos or even six photos.

Once you are done, selecting the photos for you three, you will be able to post to your story. 

This is great option but does not give you a lot of flexibility, as the photos grid has a predefined space. 

Method 2: Posting Multiple Photos Nativel

First, open the Instagram app and tap the Your Story circle. Take or select your main photo and add it to your Story as usual.

Once it’s posted, pinch and zoom on the photo to resize it smaller. This leaves room for additional photos.

Next, swipe up from the bottom of the screen and select the sticker icon. Choose the Add Photo sticker.

Browse and select another photo to add. Resize and position it with pinch/zoom gestures.

Repeat this process to keep adding more photos from your camera roll. Place them strategically to create a layout.

The last photo added will be on top. Be careful when resizing to not block other photos underneath.

While possible natively, it can be tricky making complex collage-style Stories this way. The layered photos also cannot be individually edited.

Method 3: Creating Layouts with Canva

For greater creative freedom, use the Canva app. Canva makes assembling multi-picture Stories easy.

Open Canva and browse their Story templates. Or start a blank document sized for Instagram Stories (1080×1920 pixels).

Drag and drop your photos onto the canvas. Resize, layer, and arrange them as desired into a collage-style layout.

Customize further by adding colored backgrounds, stickers, text, and any other elements. Canva has tons of options.

When finished, tap Download and save your Story design as a JPG or video file.

Now simply upload this file to Instagram as your Story. The layout and edits will be preserved.

Flexible Editing for Multiple Uses

A benefit of designing Stories in Canva is being able to reuse them.

Maintain a Canva library of Story templates tailored to your brand. Swap out the photos to give them new life.

Easily resize for any social platform like Facebook, Twitter, Pinterest, and more. Get maximum mileage from your creative designs.

Other Tips for Multi-Photo Stories

A few other tips for eye-catching Stories:

  • Use 5-7 photos at most. Too many can overwhelm viewers.
  • Pick a color theme or visual style to unify the photos.
  • Add text captions to provide context or tell a narrative.
  • Use stickers, animations, and drawings to embellish.
  • Check that key subjects aren’t hidden behind other layers.

With the right tools and strategy, you can create Instagram Stories chock full of photos that captivate your audience. Give them an intriguing photo journey!

Check out more about how to make the best of Instagram

How to Easily Create Highly Shareable Instagram Reels with Premiere Pro

0

Instagram Reels present a massive opportunity to create viral content that spreads across the platform.

As an Adobe Premiere Pro user, you can utilize powerful editing tools to recreate and customize popular Reels tailored for your brand and audience.

How to do it?

The idea is simple. Find a trending Instagram Reels video that is doing well. Download it if you need help – check my article on downloading Reels.

Save the Reel on your computer. Bring it into Adobe Premiere Pro to edit.

Use the Adobe Premiere Pro’s scene edit detection feature. It detects where frames change, like cuts in the video. It adds markers at each cut or frame change

.

Bring your clip in and adjust your edit to the markers. They show where to place your cuts.

Once it’s setup, enhance your video by color grading or adding transitions.

Export your edited video when complete. Then post it on Instagram Reels to ride the trend.

Read on for more details on each step. I’ve discussed this process more in-depth below.

Finding Trending Reels to Analyze

The first step is identifying what types of Reels perform well in your niche. Spend time browsing hashtags and creators relevant to your content focus.

Make note of Reels with high view counts and engagement. Watch for common trends and formats that grab attention.

Analyze the pacing, transitions, effects, text and graphics, music choices, and other elements of viral Reels.

Breaking down these details will help you recreate what works. Some current popular formulas include meme/joke videos, challenge/trend videos, green screen/duet videos, and more.

Downloading and Importing into Premiere

Once you spot viral Reels with high potential, download them to your computer. Instagram doesn’t allow video downloads with music, so you should check how you can download it.

Import the video file into your Premiere Pro project. Ideally, place it on a track above your working clips so you can easily refer to it.

Using Scene Edit Detection

Here’s where Premiere Pro’s editing intelligence comes in handy. The Scene Edit Detection feature automatically scans a clip and adds cuts precisely where transitions and edits occur.

To use it, simply right click your imported viral Reel file in the timeline. Select “Scene Edit Detection” and let Premiere analyze the clip. Within seconds, it will add a multitude of cuts, matching the original edit points. for a two 90 second video, it took about 15 seconds, but it depends on how many cuts there are in the video and also the length of the video.

Replacing Footage for a Customized Recreation

Now comes the creative part. With the viral Reel’s edit points in place, you can easily swap in your own footage.

Delete or disable the viral clip, then drag your clips into the timeline. The pace and order of the edits will be mapped out, making recreating the flow effortless.

Trim and arrange your clips to perfectly fit the edit points. Reuse any graphics or visual elements from the original for consistency. Maintain the same intro and outro length.

Adding Custom Stylization

To make your version truly unique, take the time to stylize it further. Add transitions between clips and play with speed adjustments. Layer in animated text, graphics, and stickers using Essential Graphics.

Apply color correction adjustments for a specific tone or look. Use keyframes to animate movement and scale. Add stylish video effects like glitch or VHS effects using Premiere’s built-in presets. Want to capture great videos from your mobile? Check out Mobile Filmmaking.

Exporting for Upload to Instagram

After finalizing your recreate, export it out of Premiere Pro. For Instagram Reels, h.264 video codec at 1080×1920 resolution is recommended. For maximum video quality, export at a high bitrate around 8,000-10,000 Kbps.

The finished file can now be uploaded directly into Instagram as a new Reel, ready to be shared across the platform. Check how to upload videos on Instagram in the highest quality.

Also, if you use WhatsApp, here’s how you can post high quality WhatsApp Status.

What to Do When Your Memory Card is ‘Write Protected’

Have you ever inserted a memory card into your computer only to see an error that the card is “protected” and cannot be modified?

This is frustrating, but thankfully easy to fix once you know why it happens.

The Lock Switch

Image credit: Canon

Memory cards have a small physical switch on the card itself, usually labeled “Lock.” This switch can be slid to the Lock position to prevent files on the card from being deleted or overwritten.

It’s an easy switch to toggle accidentally. If your card seems mysteriously read-only, check that the Lock switch is slid to the unlocked position.

Note that the position of the lock switch can vary by memory card brand and type. Include a photo showing lock switch examples

Unlocking/ Locking the Card

Image credit: bwillcreative.com

To unlock the memory card, gently slide the small switch on the card from the Lock position to the unlocked position. It should slide smoothly and take little force.

Once unlocked, the card can once again be written to, modified, and formatted as normal. All the old data will still be there.

If the card remains locked after flipping the switch, try these

  • Try reformatting the card
  • Use the official SD card formatting tool
  • Test the card in another device
  • Contact the manufacturer for a defective card

Important: Backup data before making changes if the card is readable but stubbornly locked.

Recommendation:

If you work with important data, it is advisable you get an SSD. these are portable enough to carry with you everywhere and can also be connected with android devices. make a habit of regularly, moving your data from SD card to SSD as soon as you finish your project. 

I personally use Samsung SSD last few years and I’m satisfied with that. Check out my review of the Samsung T5 SSD

Difference between physical lock switches and software write protection

Physical lock switches and software write protection are two ways to prevent data modification.

Physical lock switches, found on storage devices like USB flash drives, physically prevent changes by toggling a switch.

Software write protection, implemented in the operating system or applications, restricts write access to specific files or areas.

Preventing Accidental Locking

Now that you know about the lock switch, you can prevent this issue in the future.

Be careful when inserting and removing cards to not bump the switch accidentally. Some card cases even have a hole that exposes the switch, so take extra care with those.

It’s also good to be familiar with your card’s supported formats. An incompatible format can make the card appear locked. ExFAT and FAT32 are the most widely supported. Check out this article to learn more about different Formatting options.

With this knowledge, that mysterious “protected” error doesn’t have to ruin your day again! Just locate the lock switch and slide it back to unlock the card.

Check out more articles on the blog to make your tech life easy.

How to Find Out What Font a Website is Using

0

Have you ever visited a website and liked the font they were using? Want to know the secret to figuring out what font any website uses? Here’s a simple trick to find out.

Use a Font Finder Bookmarklet

The easiest way is with a font finder bookmarklet. A bookmarklet is a special bookmark that runs JavaScript on any web page you’re on.

Go to This Website and drag their font finder bookmarklet to your browser’s bookmark bar. It will be labeled “FontFinder”.

Activate the Bookmarklet on a Web Page

When on a webpage with a font you want to identify, click the FontFinder bookmarklet. This activates the script.

Your cursor will turn into a plus sign, indicating it is ready. Hover and click on any text or element on the page.

A popup will appear, identifying the font name, size, weight, and style of the text you clicked.

Check Different Elements on the Page

Test out different sections, like headlines, body text, captions, etc. The font finder will work on any text or element.

You can disable the bookmarklet by clicking the “FontFinder” label in the popup. This deactivates the script so your cursor returns to normal.

Use It on Your Own Website

Try it out on your own website to double check it identifies fonts correctly. Since you set the fonts, you can verify the bookmarklet’s accuracy.

This font finder bookmarklet is an easy way to satisfy your font curiosity on any web page. No more wondering “what font is that?” while browsing. Just click and discover!

Watch the Video Tutorial

Identify Exact Fonts Used in the images

If you are looking for the font used in images, there is a different tool that will easily let you do that. Check out this block post.

How to Access Netflix Account Setting on Mobile?

0

If you are struggling to access Netflix settings on your mobile phone’s app, here is what you need to know.

There is no option to access settings or manage your account on Netflix apps for iPhone, Android or even TV.

The only way to manage your Netflix account by accessing the Netflix settings is from the website.

But, if you open the Netflix app on your mobile phone, you are redirected to the app on your mobile.

If you want to cancel your Netflix Plan, check out this article.

Watching El-Camino on Netflix

So how do you access that on your mobile phone?

Open the desktop version of Netflix website on your mobile phone.

It is possible on both iPhone as well as on Android and works on any browser app.

Here are the steps to open Netflix website to manage Netflix settings on iPhone.

  • Open Netflix website on Safari browser or Chrome browser (Whichever you prefer).
  • Once the website is open, you can find the option to request desktop site in Safari.(Similar option is also available in Chrome)
  • You have to tap it and the Netflix will open the website desktop version of the website.
  • Then you can go to your account.
  • And you can click on the top right or top left, depending on the UI of Netflix.
  • You can click on the account icon, which will reveal more options.
  • One of them would be to access the settings.
  • Once you are on the settings page, you can check many other sections of your Netflix account to manage it.

You can cancel your plans, upgrade or downgrade the plans as well.

The Role of Microsoft Exchange Server in Data Protection Strategies

Data protection has risen to the top of organizations’ priority lists in the current digital world. Effective data protection methods have become more important as a result of the volume of sensitive information being communicated and the growing reliance on electronic communication. In this sector, Microsoft Exchange Server is a significant player. We’ll define Microsoft Exchange Server today and talk about how important it is to have a data security plan.

What is Microsoft Exchange Server?

First of all, you might be curious what is Microsoft Exchange Server actually?

Microsoft Exchange Server is a communications and collaboration software that it created. Its primary function is that of an email server, enabling the sending, receiving, and administration of emails inside an organization. Exchange Server, however, offers a wide range of capabilities that are intended to improve data management, communication, and collaboration in a corporate context. It goes beyond simple email management.

Key Features of Microsoft Exchange Server

1. Email Management: 

With features like shared mailboxes, rules, filters, and inbox organization, Microsoft Exchange Server is a potent email platform. POP3, IMAP, and SMTP are just a few of the email protocols it supports, assuring interoperability with a variety of email clients.

2. Calendar and Scheduling:

Users can easily book meetings, appointments, and activities thanks to Exchange Server. To simplify collaboration and communication, it provides shared calendars, resource booking, and automatic scheduling.

3. Contacts and Address Book: 

A centralized location for organizing and storing contact information is provided by Exchange Server. Users are able to share contacts inside the company and keep their address books up to date thanks to this.

4. Mobile Device Management:

Exchange Server provides mobile device management tools to provide safe access to emails and data from smartphones and tablets in light of the growth of mobile devices.

5. Data Protection and Security:

Strong security features like data encryption, spam filtering, and antivirus integration are included in Exchange Server to safeguard sensitive data from outsiders and online dangers.

The Role of Microsoft Exchange Server in Data Protection Strategies

Implementing an extensive data protection plan is essential as firms manage a growing amount of sensitive data.

Microsoft Exchange Server is essential to these tactics because it offers a safe and effective platform for controlling and safeguarding important communication and data.

1. Secure Communication: 

Emails and data in transit are protected by encryption techniques used by Exchange Server. This makes sure that private data is shielded from eavesdropping and unwanted access while being sent.

2. Data Retention and Archiving:

Exchange Server provides features for data archiving and retention, enabling businesses to keep track of emails and other forms of communication for regulatory compliance. By archiving, you can make sure that important data is safely kept and accessible when you need it.

3. Backup and Recovery:

Exchange Server makes it possible to perform routine data backups, giving companies the ability to restore lost or damaged data in the case of hardware malfunctions, human mistake, or other unanticipated events. The preservation of business continuity and the reduction of data loss depend on these backups.

4. Legal and Compliance Requirements:

Legal and compliance requirements that apply to many companies require the safe keeping of electronic communication. These needs are assisted by Exchange Server capabilities like eDiscovery and data preservation rules.

5. Protection Against Malware and Phishing: 

The built-in security tools in Exchange Server, including as spam filtering and antivirus integration, aid in protecting against malware, phishing scams, and other email-based risks. Users are protected from harmful material by this security, which also lowers the possibility of data breaches.

6. Remote Access Security:

Exchange Server offers secure remote access to emails and data in response to the increase of remote and hybrid work practices. This guarantees that workers may access their communications and information connected to their jobs from any location without jeopardizing security.

Organizations must prioritize effective data protection methods to preserve their sensitive information in a world where data breaches and cyberattacks are common dangers.

A key component of such tactics is Microsoft Exchange Server, which provides a feature-rich and secure platform for managing email communication and collaboration. Data integrity, availability, and compliance are crucially supported by its encryption, archiving, backup, and security capabilities.

The significance of Microsoft Exchange Server in data protection policies grows as organizations continue to develop and embrace digital transformation. Organizations may strengthen their data security procedures, promote secure communication, and confidently handle the difficulties of the contemporary digital ecosystem by utilizing Exchange Server’s features.

How to Use WhatsApp Without A Phone?

Are you looking for how to use WhatsApp without using a phone? Perhaps you want to use it on a tablet, PC or an iPad maybe? Here is how you can do it.

Well, it’s not possible natively because WhatsApp doesn’t have an app for iPad. Neither does it allow Android tab users to install WhatsApp on their devices, if it doesn’t have a slot for Sim, or it doesn’t have a calling feature.

But again, here is a workaround for using WhatsApp on devices like Android tablet, or an iPad.

If your question is about whether you can use WhatsApp without a phone, maybe you want to use WhatsApp on a tablet or a computer, even when you don’t have a phone with you. This is also possible. But you will require your mobile device to register your number with WhatsApp, check this section of the article for details.

If you want to use WhatsApp on a tablet PC or a device that comes under a computer device, here is how you can do it.

Watch the Video

How to use WhatsApp on Android Tab

To use WhatsApp on your Android tablet, you need to download the APK file of WhatsApp and then install it by doing sideload. (check out this article know how to sideload apps on android device)

whatsapp_compatibility

Android being an amazing open source operating system by Google, it gives choices that are not available on the iPhone or iPad OS.

Download the latest version of WhatsApp APK from this website. This is the website that I trust, so don’t use any other website except this one. 

Download WhatsApp APK and Sideload It

If you are not able to install this, it would mean that the option to ‘install from unknown sources’ is disabled, which can easily be enabled from the settings or maybe your tablet will pop up this option when you try to install the WhatsApp APK. You can quickly enable it or enable it from the settings.

Once you have enabled ‘install from unknown sources’, you will be able to install the APK and open WhatsApp.

Log in using your phone number and the OTP process. And you are done.

Here’s the detailed tutorial to install Whatsapp on Android Tab

Use WhatsApp Linked Feature

If you want to use WhatsApp on both your mobile device, and a Tab,you can do it too.

Go to the link devices section from settings on your Mobile and then tap on Link a Device’ and Scan the QR code on WhatsApp on your Tab.

So you will be able to use your WhatsApp on both the devices on your mobile phone as well as on your tablet PC. This will also allow you to use WhatsApp without the phone because the linked devices are independent of the primary device and can be used even when there is no connection on primary device. 

How to use WhatsApp on iPad.

On iPad, it’s a little tricky because like Android, iOS, and iPadOS do not give the choice of side loading apps.

So the only option we have is, install a third party app that will give us the functionality of WhatsApp Web.

You can find an app on the App Store. You can search for WhatsApp for Web. There is however, one minor inconvenience using these apps on iPad. Too many ads that ruin the experience.

Suhail is what you can do instead. Open web.WhatsApp on Safari browser on iPad. Tap on the share button, look for ‘Add to Home screen’. Once it is added, it acts like a native app having its own window in full screen.

Note: It is not a native experience like you will get on your Android tablet PC because it’s a third party app which has a browser inside the app. And the browser needs to be loaded once you launch the app.

And it takes a few seconds to load WhatsApp messages.

So, it is not as intuitive as it is on an android tablet or a mobile phone. But it is what it is.

How to use WhatsApp on Computer

If you want to use WhatsApp on your computer, you can either login into the WhatsApp web in your browser. O

You can also download the desktop apps available for windows and Mac.

These apps for Desktop will let you link your WhatsApp on your mobile phone and you will be able to use it independently meaning even if Internet connection is not available on your mobile phone. You will still be able to use WhatsApp on your computer.

Now you know how you can use WhatsApp without a phone. Perhaps this was what you wanted to know. By the way, check out this huge WhatsApp tips and tricks article to make the best use of WhatsApp.

How to Find the Password of Your Wi-Fi Through a Connected PC or Mac

I was talking to a friend the other day over Skype, she was using it on her Laptop and I was using it on my Phone. Don’t get me wrong, we just friends :-)

She was seeing me moving around my house while talking to her, she asked me how cool it is to be able to use Skype on Mobile. I said yes, you too can use it.

To which she said, “I do not have wifi access in my phone”. She didn’t know the password of her Wi-Fi, the same Wi-Fi to which she was connected from her Laptop.

“You can get the password of your Wi-Fi from your Laptop itself”. She jumped in excitement when she heard me telling this to her.

And this is what I told her.

Finding the Wifi Password on Windows Computer 

Click on the Wi-Fi Icon in the notification area in the bottom right, click on the option that says something like Open Network and Sharing Center or View Connections.

wifi0

Then a Window will open that will show you the network your Computer is connected to. You can then click on the Connections (as shown in the screenshot below).

wifi1

This will open another Window like the one below, which will be your Wi-Fi status. Where you can click on the Wireless Properties.

wifi2

The Wireless Properties will be shown to you in another Window.

wifi31

You can check the box that says Show characters and the asterisks (*) will turn into the password of the Wi-Fi which can be used in any of your posts.

Finding the Wifi Password on Mac Computer

I wish finding the password of connected Wi-Fi network on a Mac Computer was as easy as it is on a Windows PC, but it’s not, there is a bit of tricky part which we will address below.

You have to open the Keychain Access to get the password of the Wi-Fi you are connected to. To do that, you need to go to Utilities from Applications in the Finder, then click on Keychain Access (shown in the screenshot below).

wifipasswordofmac

When the Keychain Access is open, you can click on Kind to get all the entries of saved password on the top. You can use the Search box to find your Wi-Fi network name among the entries. One you get that, right click and then click on ‘Get Info’.

wifipasswordonmac

At this point of time, your Mac computer will ask for your Computer Username and Password.

And then you will be shown another Window, and the next step is very similar to that of Windows.

findwifipassonmac

Just check the ‘Show password’ and you get the password for your Wi-Fi network.

I hope this helps, and if fear forgetting your Wi-Fi password again and you do not want to go through all this again, simply open Google Keep and paste your password in a note. Google Keep is a pretty neat app that opens both on PC and your Smartphone.

Check out more Awesome Stuff Google Keep can do 

Get Multi Tab Split Screen Mode on Your Computer in a Single Click

0

If your workflow requires you to work in Google Chrome and you have to switch between multiple tabs, then working with split screen setup might actually boost your productivity.

It is a fact that we tend to get more work done when we have more screen real estate.

By setting up your application Windows in a way that you don’t have to switch between them and all can be viewed at once, you can save time leaks that happen when you switch between the tabs.

Watch the Video

I mostly find myself working on my 13 inch MacBook Air and I split my screen up in 2 windows.

One is where I am writing or taking notes, and the other one is where I am taking references from or doing my research.

I have found working this way to be extremely productive as I don’t have to switch between tabs for taking notes.

Now, the Mac natively offers this functionality of a split screen but I don’t find myself using it very often since all my work is inside Google Chrome. I usually setup my multi-window screen manually.

But, I recently found a Chrome extension that let’s me do it all in just a single click.

About the Tab Resize Chrome extension, which makes creating split-screen layouts a piece of cake.

It lets you create some presets of how you want the browser to behave when you click on the Tab resize button.

You can stack the Chrome Windows vertically as well as horizontally, the number of rows would mean how many windows can be stacked one on another, and the number of columns mean how many windows can be stacked together horizontally.

My work requires 2 windows, which means two columns and one row, the columns have to be in 7:3 ratio, with an narrow window being on the left-hand side, this all can be easily selected in the options of Tab resize.

Once you have created your desired Preset, you can click on the Tab resize icon that resides beside the address bar of Google Chrome, and Boom the Chrome Windows magically take their place.

So for my workflow, I have to be on the second last tab to click on the Tab resize button so that the last tab can be shifted to the left-hand side to be the narrower window, while all the other tabs stay in the same window and move to the right-hand side.

I used to stack the Chrome Windows manually whenever I have to write articles for my blogs and that happens multiple times a day.

So every time I do it manually it might take a minute or two, and with Tab resize it take less than 10 seconds.

This Chrome extension is only letting me save a couple of minutes per day but it can be huge if we multiply it by 30 days of the month, or maybe the difference can be even Larter if we multiply 365 days of a year.

So, if the Chrome extension is letting me save only 5 minutes every day, it would save me around 1800 minutes for the next 1 years, which is roughly 30 hours just for stacking windows for getting the work started.

You can install the Chrome Extension from Chrome web store and try it yourself

So this is one of its kind Chrome extension that I’ve used, there may be better ones out there and I will try them and will report on techtippr.com

So make sure you bookmark our website or like us on Facebook or Twitter, you can also turn on the notifications by tapping the red button on the bottom right-hand side of your device screen.

Incoming searches

chrome split screen mac

chrome tile tabs

chrome split screen android

chrome multi window

chrome split tabs in one window

chrome extensions

tab scissors

chrome extension for multiple tabs

How to Upgrade Your Mac to MacOS Sonoma

MacOS Sonoma, also known as MacOS 14, is Apple’s upcoming operating system release. While the official version is still a few months away, Apple has released a public beta that allows users to test out Sonoma before its full launch. Here’s how to upgrade to the MacOS Sonoma public beta:

Watch the Video

Sign Up for the Beta Program

First, you’ll need to enroll in Apple’s beta program. Go to beta.apple.com and register with your Apple ID. Once signed in, you’ll need to agree to Apple’s beta terms and conditions.

Enroll Your Mac

After logging into the beta site, you can enroll your eligible Mac to access the betas. On your Mac, go to System Preferences > Software Update. Here you’ll see the option to upgrade to the “MacOS Sonoma Public Beta.”

Back Up Your Mac

Before installing any beta software, it’s crucial to back up your Mac. The best way is to use Time Machine to create a full system backup. You can also manually backup important files by copying them to an external hard drive or cloud storage.

Download and Install the Sonoma Public Beta

Once enrolled and backed up, click “Upgrade Now” on the Software Update screen. This will download the Sonoma beta installer. When the download is complete, your Mac will walk you through the installation process. Follow the onscreen prompts until installation is finished.

Explore New Features

Once your Mac reboots into MacOS Sonoma, you can start exploring all the new features. These include:

  • Widgets on the desktop: Widgets can now be placed on the desktop, giving quick access to app information.
  • New video conferencing features: Like Presenter Overlay and new reactions for fun video calls.
  • Safari updates: New tab bar, improved privacy protection, and browsing profiles.
  • Game Mode: Gives games priority access to CPU and GPU for better performance.
  • Enhanced accessibility features: Such as phonetic suggestions for dictation and the ability to pause animated images.
  • New screen savers: Including one inspired by the Apple TV.
  • Password and passkey sharing: Makes it easier to share passwords and passkeys.
  • Private browsing enhancements: To better protect user privacy.
  • Improved autocorrect and predictive text: For more accurate and helpful suggestions.

Keep in mind there will likely be bugs and performance issues since Sonoma is still in beta. Avoid installing the beta on your main work Mac in case of critical bugs.

The public beta gives normal users an early hands-on with Apple’s next big software release before it’s finalized in the next few months.

How to Enable/Disable Android Updates on Your Android?

Have you got an android app? Obviously you do. This article in the first place. Android updates are essential for keeping your device secure, enjoying new features, and maintaining optimal performance.

In this guide, we will explore how to enable or disable Android updates, understand Google’s update cycle for Android, and learn how to update both system software and individual apps on your Android device.

How to Enable Android Auto Updates

Maybe the auto update feature on your android Smartphone has been disabled for some reason. Although it is recommended to enable it. At least have the option to download updates when connected to Wi-Fi, if you want to say mobile data.

Enabling Android Updates

By default, Android devices are set to automatically download and install updates when they become available. This ensures that your device stays up-to-date with the latest security patches, bug fixes, and feature enhancements.

But, like I said, there could be any reason, the android auto updates have been disabled.

To enable automatic updates:

1. Open the “Settings” app on your Android device.
2. Scroll down and tap on “System” or “Software Update,” depending on your device model.
3. Look for an option like “Automatic system updates” or “Auto-update system,” and ensure it is turned on.

Disabling Android Updates

While it is generally recommended to keep your device updated, some users may prefer to disable automatic updates due to personal preferences or specific reasons. Disabling updates may lead to potential security risks and lack of access to the latest features. To disable automatic updates:

1. Open the “Settings” app on your Android device.
2. Scroll down and tap on “System” or “Software Update.”
3. Look for “Automatic system updates” or “Auto-update system” and turn it off.

Android platform is used by thousands of smartphone manufacturers who put their own skin on top of it. So the settings to find Software Update might differ from each other, there is no standard path to find the settings. but it’s still easy to find this option.

Does your smartphone manufacturer offers updates to your mobile model?

Before moving onto the next point, make sure the smart phone you own supports Software Update from its manufacturer. Since android is an operating system used by thousands of mobile manufacturers who put their own skin on top of it, and they also have to sell their new devices, so they usually offer android updates for two years.

After that, you are only eligible for monthly security patches. Let’s understand how Google update for android works.

This is why it’s crucial to research before buying a smartphone to ensure that you keep getting regular updates for as long as possible. OEMs like Samsung offer three years of software updates for the devices.

What’s Google’s Update Cycle for Android

Google releases major Android updates on an annual basis. The update cycle usually follows this pattern:

1. Developer Previews: Several months before the official release, Google provides developer previews of the upcoming Android version. These previews allow developers to test their apps on the new platform and provide feedback to Google.

2. Beta Releases: After the developer previews, Google launches public beta programs. These beta releases are available for select devices, and users can opt-in to test the upcoming Android version. Beta testing helps Google gather user feedback and identify potential issues before the final release.

3. Official Release: Typically, the final version of the new Android update is launched in the third quarter of the year. Google announces the official release, and it is first made available for Google Pixel devices. Other Android device manufacturers receive the update shortly after, although the timing can vary.

4. Security Updates: Throughout the year, Google also releases monthly security updates to address any vulnerabilities and keep Android devices secure.

Related Article: How to get paid apps in Android for free 

Updating Individual Apps

Updating apps is essential for accessing new features and improvements while ensuring app stability and security. To update apps on your Android device:

1. Open the “Google Play Store” app.
2. Tap the three horizontal lines in the top-left corner to open the menu.
3. Select “My apps & games.”
4. You will see a list of apps with available updates. To update all apps, tap “Update all.” Alternatively, you can individually select apps to update by tapping “Update” next to each app.

Staying up-to-date with Android updates is crucial for maintaining the security and performance of your device. While enabling automatic updates is recommended, you have the option to disable them if necessary.

Additionally, regularly updating individual apps through the Google Play Store ensures you can enjoy the latest features and benefits of each application on your Android device.

Check out these cool Android tips and tricks that I have shared on my blog.

How to get the latest Android OS for your old Android Mobile?

If your Android smartphone is several years old, the chances are the OEM has stopped giving software updates to your smartphone model. But even after that, the OEM pledges to offer monthly security patches.

So make sure you keep getting them as it’s very crucial to have updated security on your device, because it can be prone to hacker attacks.

Also, some third-party app developers have also stopped the support for old versions of Android mobiles to avoid security issues. So if your old smartphone fits the bill, there is still a solution. You can get the latest updates by installing custom ROMs.

Now, I know it’s getting a little technical, but if you’re curious, you can check out more information about custom ROMs and how they can be installed on any Android mobile phone.

There are custom ROMs available for different smartphones from OEMs and the version also depends on the model of the smartphone. If you don’t want to go to this route, the best option would be to get another smartphone.

Check out Smartphones on Amazon

Automate iPhone Screen Orientation with this iPhone Shortcut

Here is a solution for a minor inconvenience iPhone users face when browsing Twitter, Facebook, YouTube, etc. Most video content has switched from landscape to portrait for vertical videos, reels, and more.

However, there is still a good amount of landscape content available. When you want to watch these full screen, you have to either open the video full screen or turn off screen orientation. While it doesn’t take long to do this, it’s still a slight hassle.

Here’s How to Automate Screen Orientation on iPhone

The good news is you can automate this process using iPhone shortcuts. Watch the Video Tutorial below or the Instructions mentioned below the video.

Watch the Video

Create an automation that triggers a shortcut to change screen orientation based on your usage.

For example, you may want Screen orientation lock off when in Facebook or YouTube, but on otherwise.

To turn Screen orientation lock off when closing these apps:

1. Create a new automation and select “App Open” as the trigger. Choose YouTube, Facebook, or any apps where you want orientation off.

2. Set the automation to run immediately and turn off notifications.

3. In the “Do” section, select a blank shortcut. This is where you’ll add actions.

4. Search for “Set Orientation Lock” and tap it to turn orientation off, then tap again to turn on/off as needed.

5. Add a “Stop Shortcut” action to end the shortcut.

This automation will now trigger when you open YouTube, Facebook, etc., running the shortcut to turn orientation off.

You can simply rotate your phone to watch landscape videos full screen. It works like magic.

To turn Screen orientation lock back on when closing these apps:

1. Create another automation for “App Closed” and select your trigger apps.

2. In the “Do” section, add a blank shortcut.

3. Add “Set Orientation Lock” to turn on, and “Stop Shortcut.”

Now when you exit YouTube, orientation will turn on again.

I’ve shared many other cool iPhone shortcuts on the blog, so check them out! Let me know if you have any other questions.